If you are looking for the help article on the Library, click here to read it.
If you are looking for the help article on Branch Folders, Tags, & Notifications, click here to read it.
If you are looking for the help article on Project Documents, click here to read it.
If you are looking for the help article on Document Permissions, click here to read it.
If you are looking for the help article on Document Notifications, click here to read it.
From the profile dropdown, select Branch Settings, then click Branch Folders.
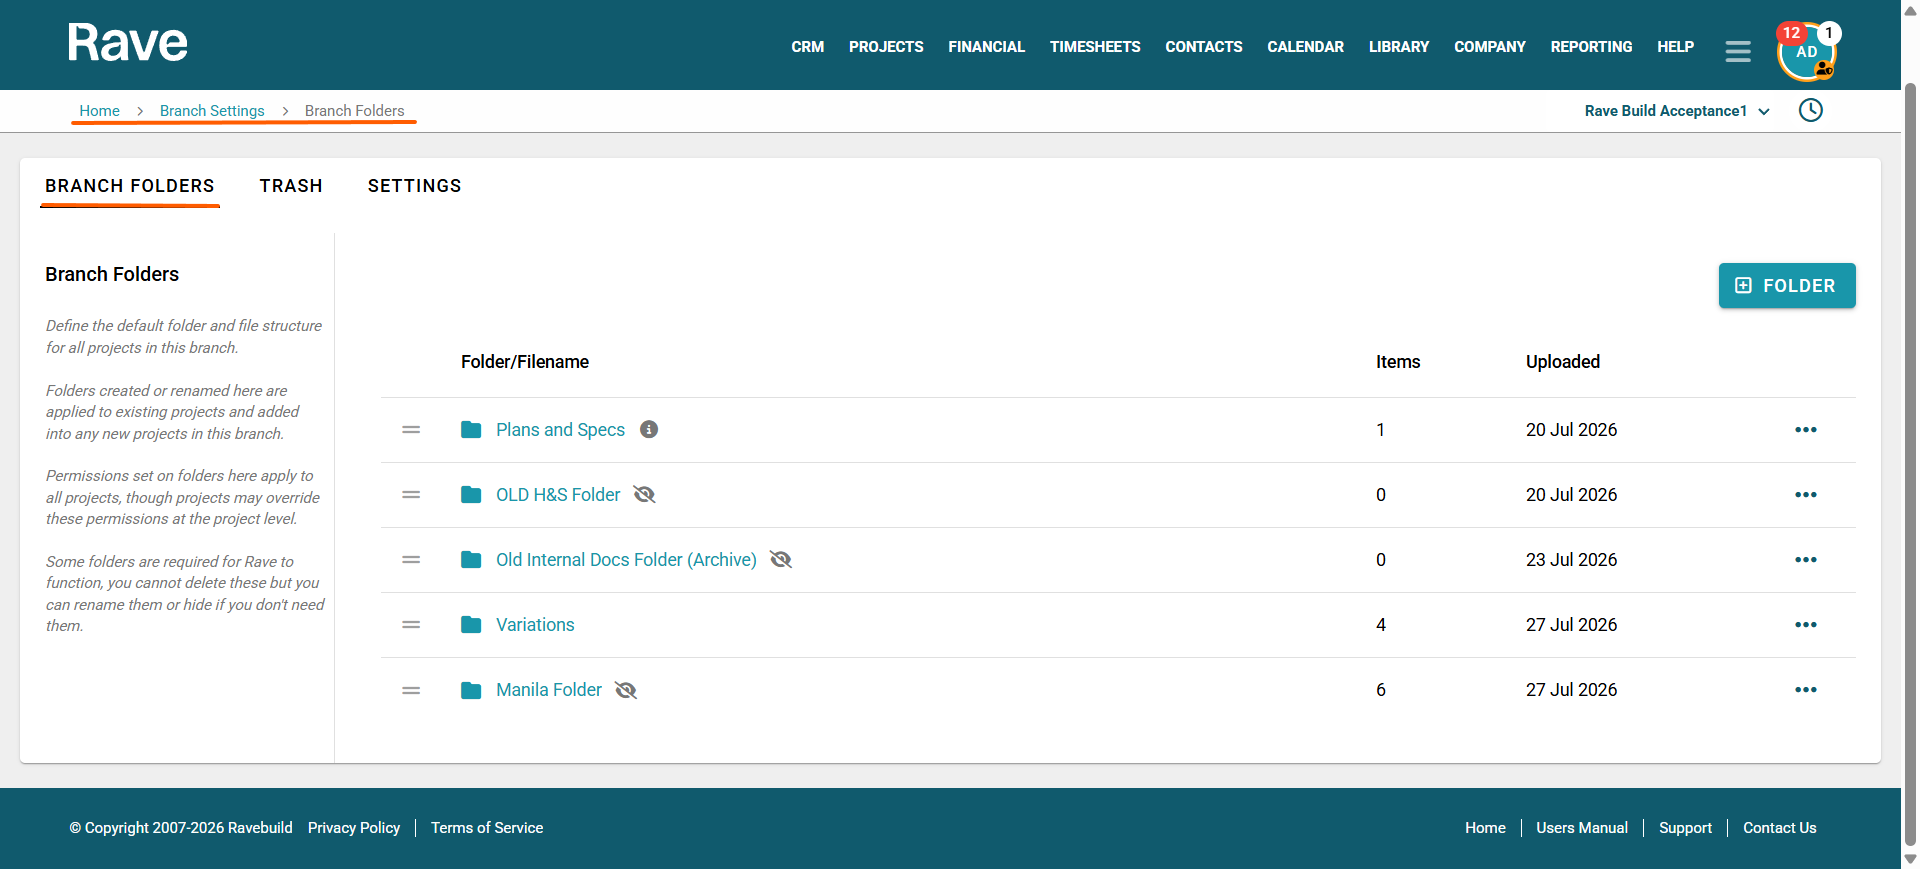
Here you will find:
- Recurring Folder Setup and Default Folder Setup options that apply to all projects.
- A second tab for Trash
From the Branch Folders screen, you will see all folders that have been created.
For each folder, you can:
Reorder the folder list - Using the = icon, you can drag to reorder folders
View the Folder Name
Item Count – Displays the number of documents stored within the folder.
Last Upload Date – Shows when the folder was created.
Options Menu (Three-Dot Ellipsis) – Provides additional folder management options.
Add a new Folder - Click the + Folder button to add a new folder
Mandatory Folders
If a folder is mandatory, it will display an ℹ️ information icon explaining what its purpose is and that it cannot be deleted.
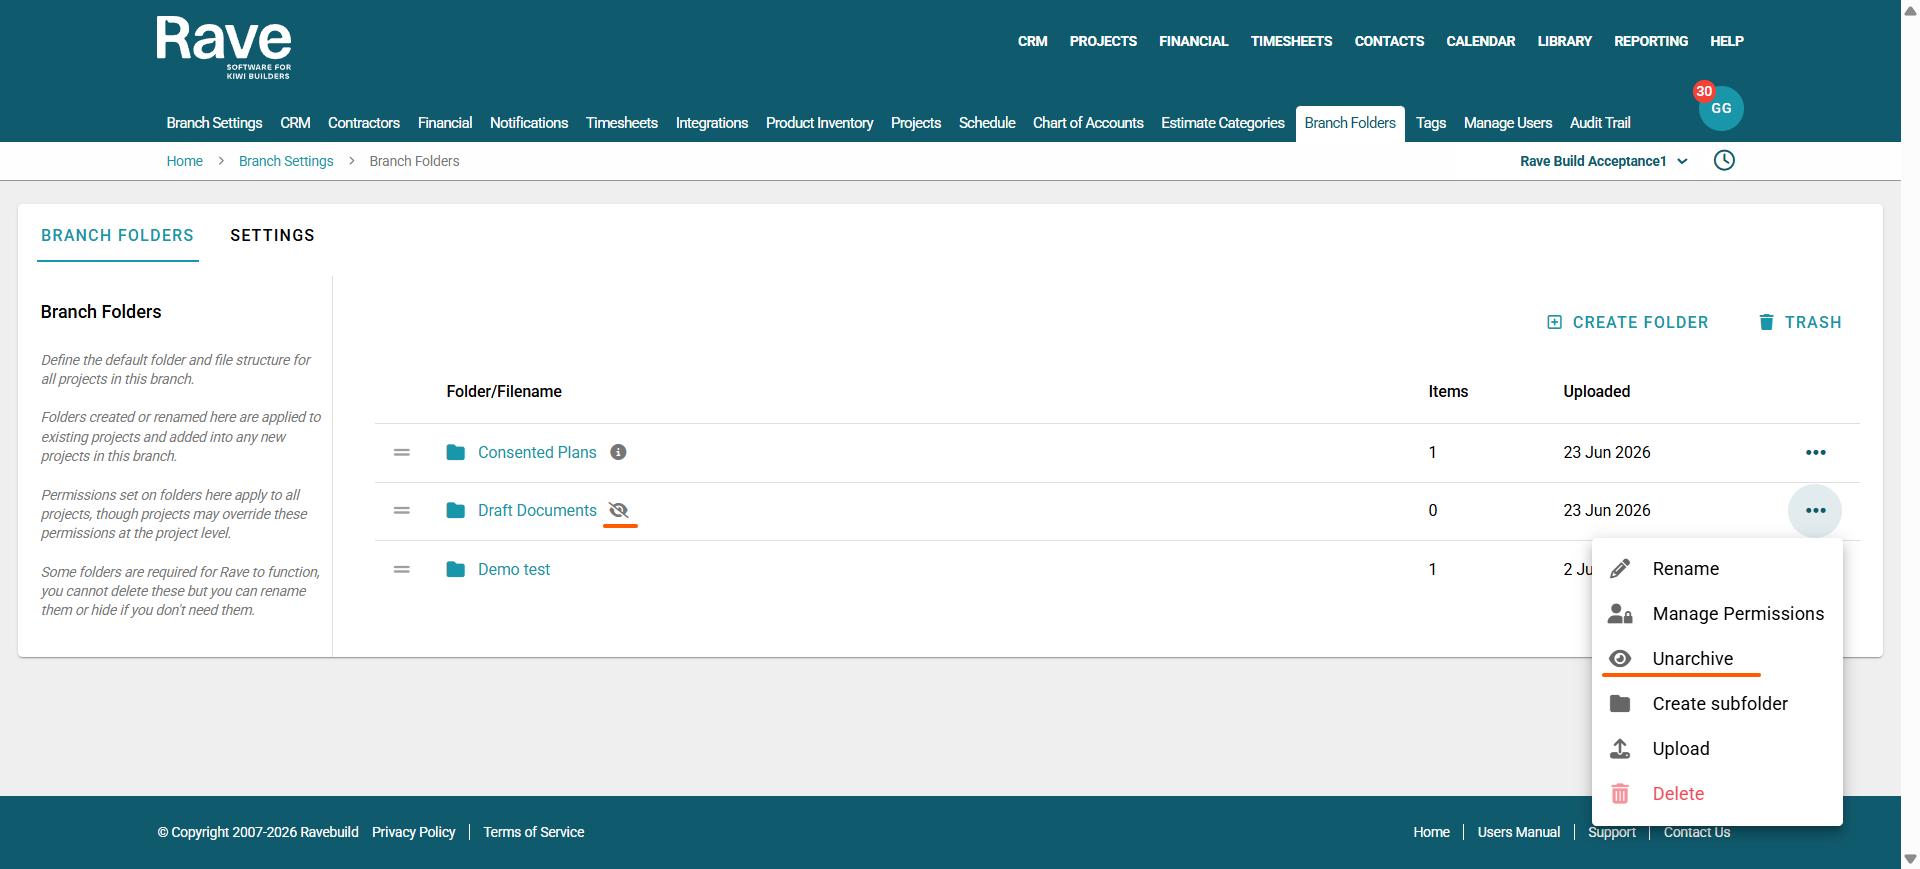
Archived folders will be displayed with an Eyeball icon with a strike through it.
Custom Folders/Carried Over Folders
All other folders have been carried over from the previous Rave folder structure and can now be fully customised. Click the three-dot ellipsis (⋯) beside a folder to access the following options:
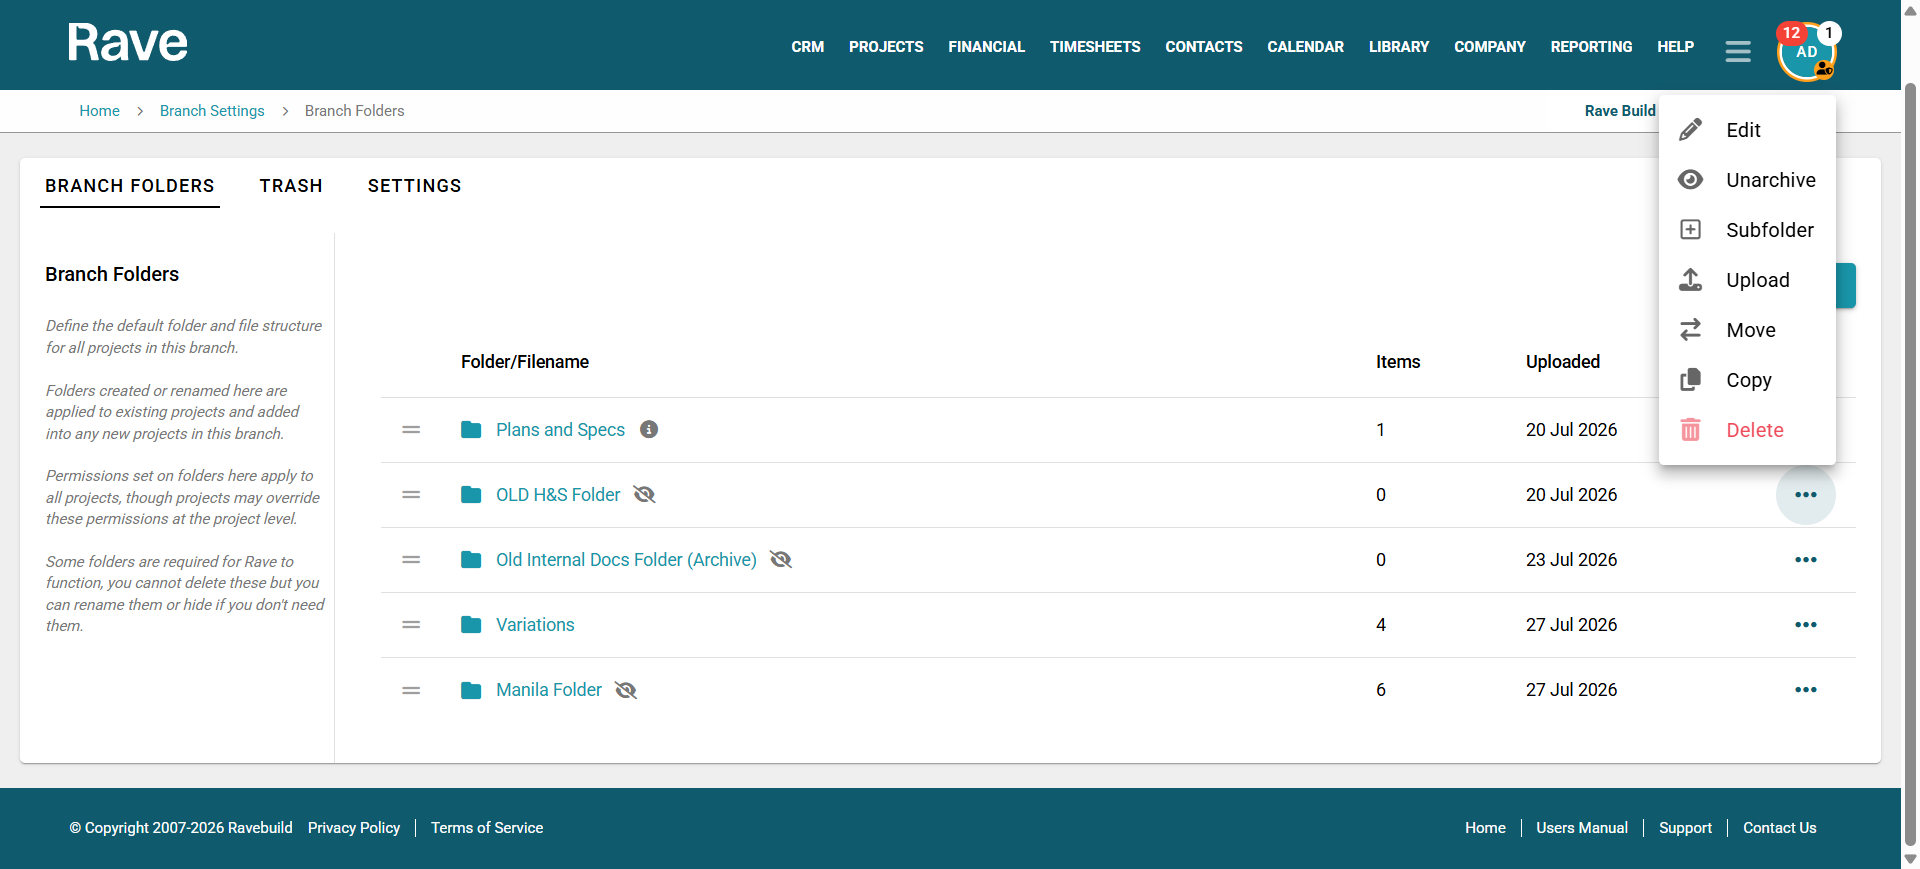
Edit – Change the folder name.
Archive/Unarchive - To either Archive or Unarchive a folder
+Subfolder – Create a new folder within the selected folder.
Upload – Add new documents to the folder.
Move - Move the folder to another folder or subfolder
Copy - Copy the entire folder and place in another Folder or Subfolder
Delete – Remove the folder and its contents. (Not available for the mandatory Rave folder)
Manage Folder Permissions
Clicking Edit will open the Manage Permissions modal where you can set the default permissions for each folder.
You can choose to:
Save, which only changes the permissions for all new projects going forward, or
Save and update all projects, which will change permissions for all existing projects and new ones in the future.
Available permission levels are:
- No Access – users cannot view or access the folder.
- View Only – users can view folder contents but cannot upload, edit, or make changes.
- Full Access – users can add, edit, and upload files within the folder.
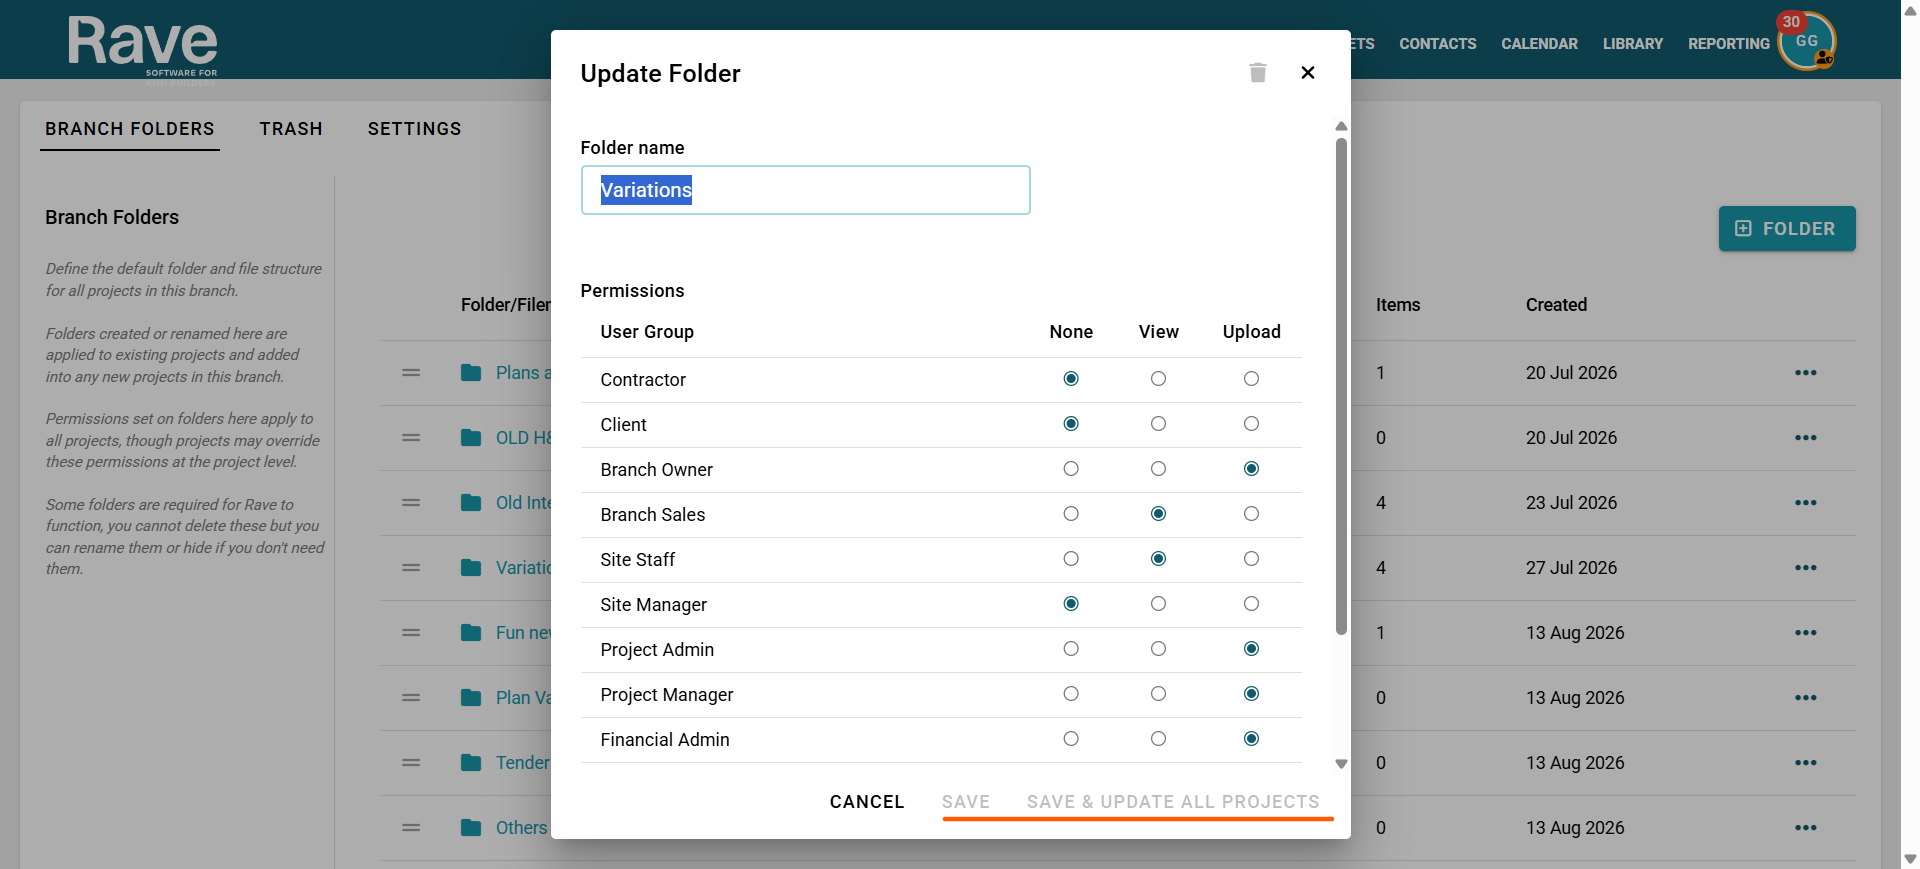
At the individual Project level, permissions can be adjusted as required. This allows administrators to increase or decrease access for specific user groups based on the needs of that particular project while maintaining the branch settings as the default starting point.
Creating Recurring Subfolders
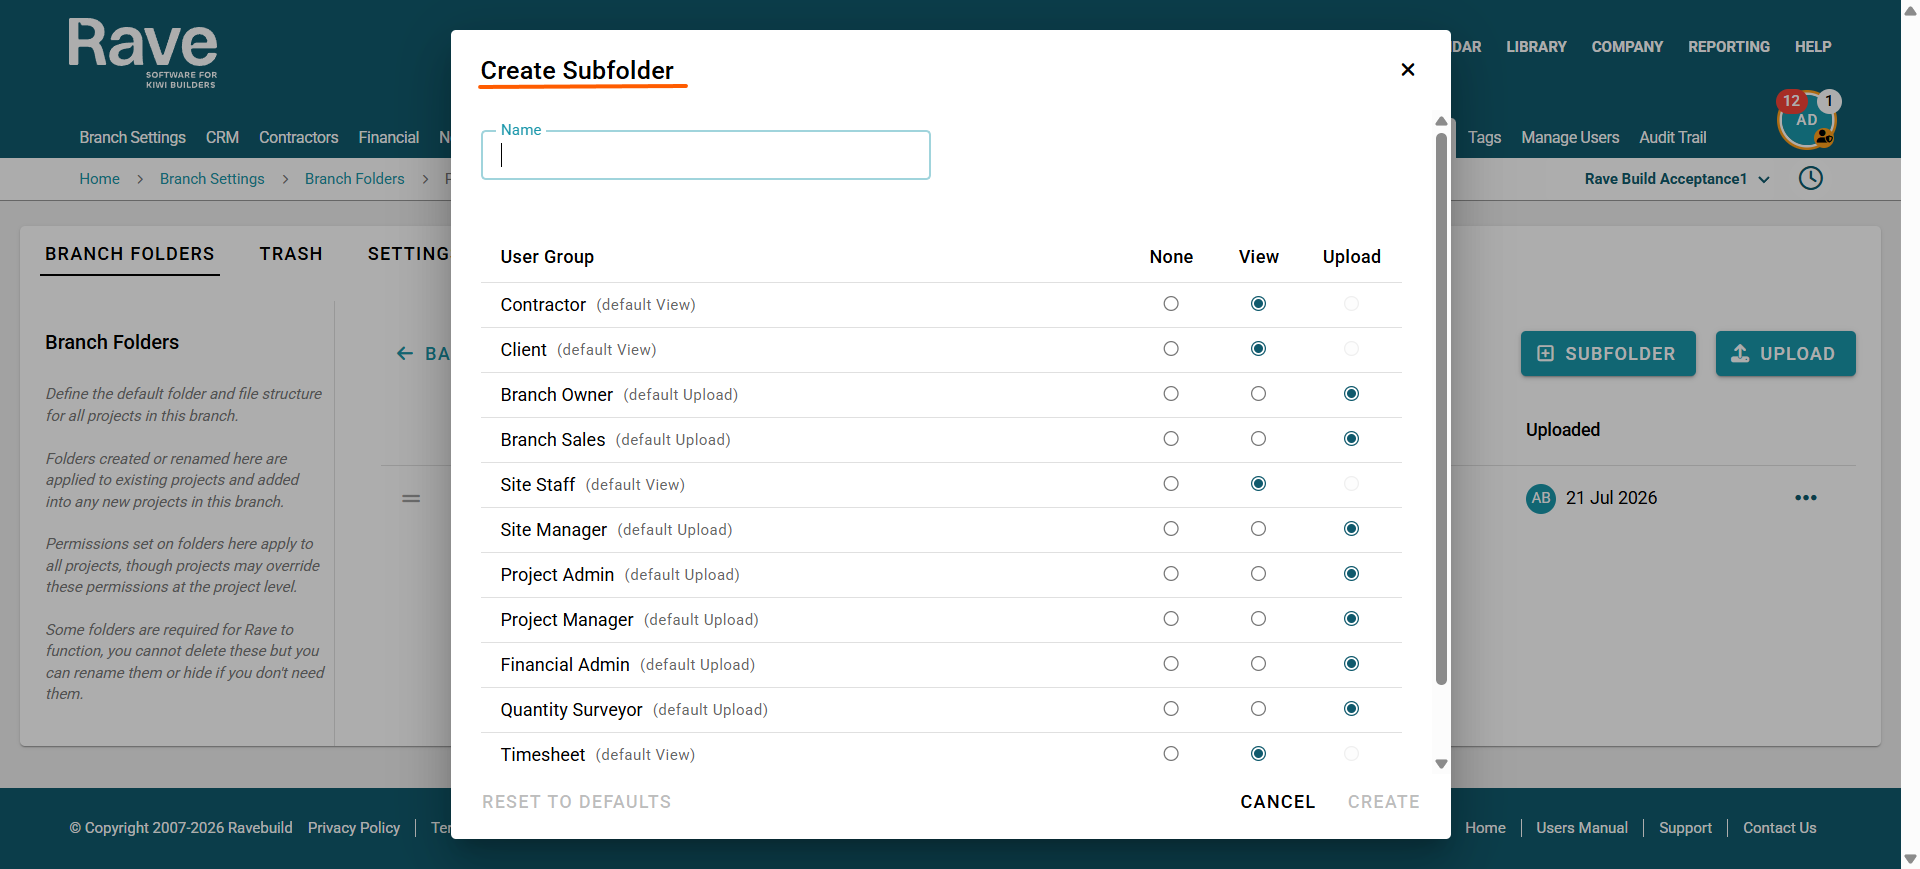
To create recurring subfolders within a main folder, click the three-dot ellipsis (⋯) beside the folder and select Create Subfolder, or from within the folder click the +Subfolder button.
Enter a name for the subfolder and set the default permissions you wish this subfolder to have, and click Create. The subfolder will be nested inside the selected main folder and will automatically be created within each new project, allowing users to store related files and information in a structured way.
You can create as many subfolders as required to suit your business processes and project documentation needs.
Best Practice: While subfolders can help keep information organised, having too many folders and subfolders can make it more difficult for users to determine where documents should be stored. Consider keeping your folder structure as simple and intuitive as possible to encourage consistent use across projects.
Deleting Branch Folders
Deleting a Branch Folder is only possible if the folder isn't used in the current project(s). If it is, you need to use the Archive feature below.
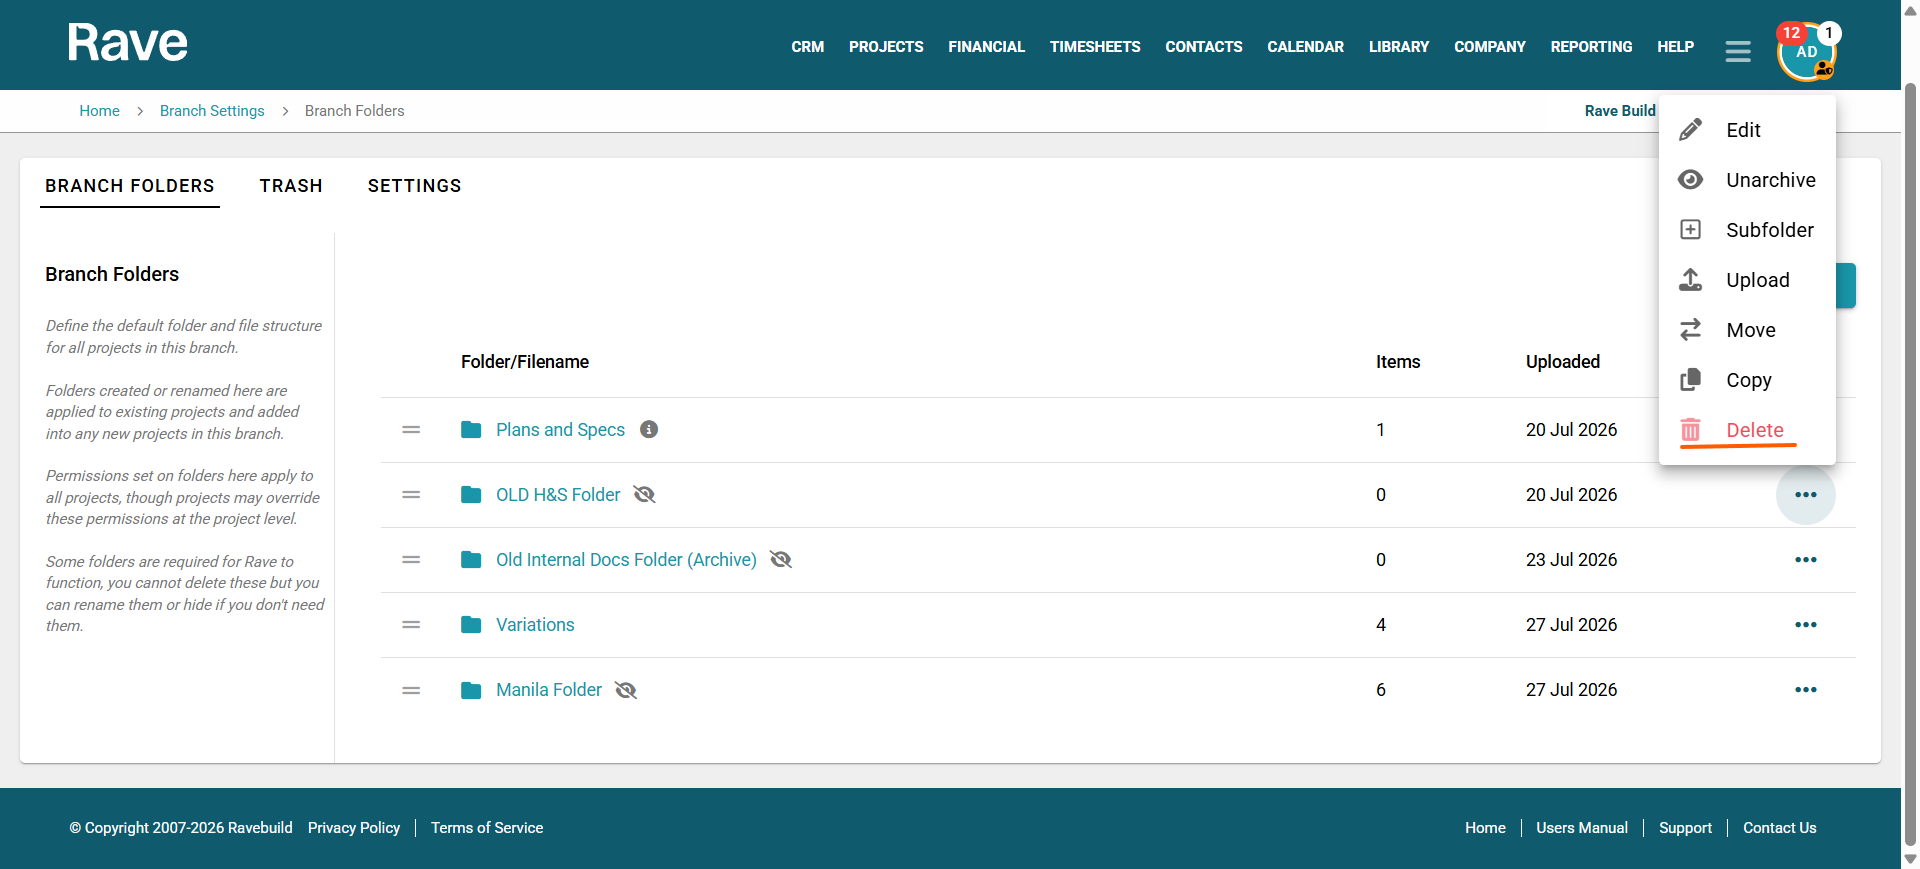
Deleting a branch folder will:
- Remove the folder from the recurring folder structure so it will no longer be created in new projects.
- Remove any existing folders from current projects (as the projects will have no data in them)
Archiving Branch Folders
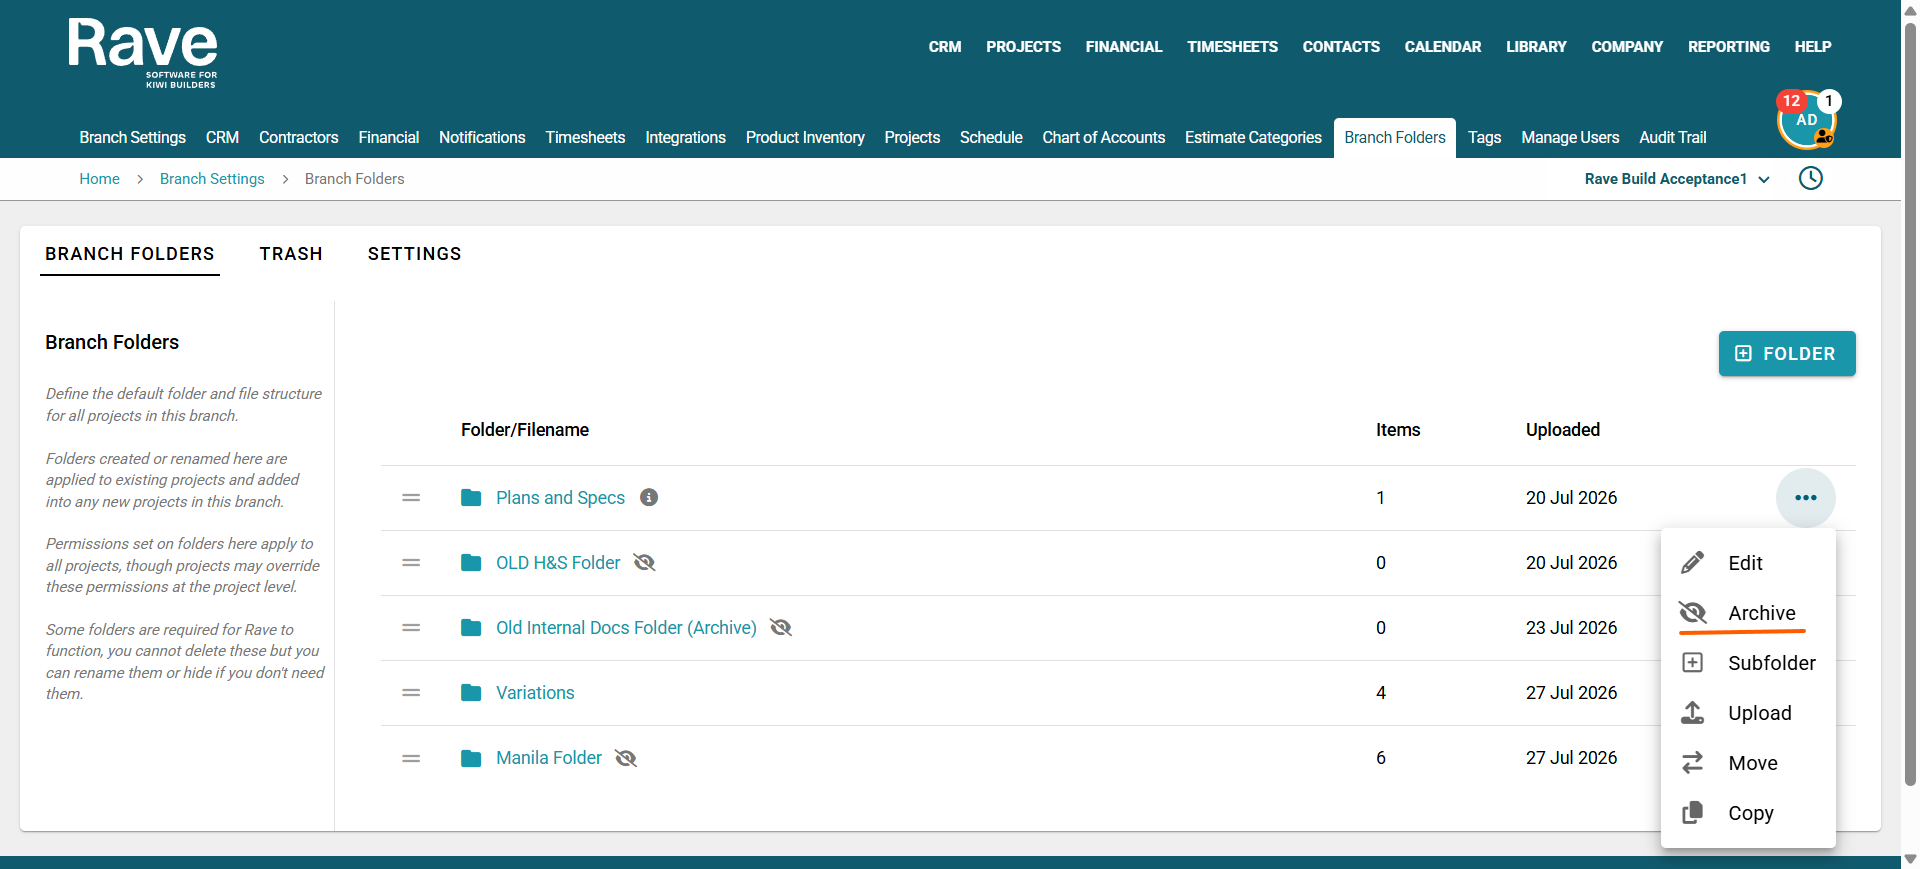
Archiving a Branch Folder will not archive any folders already created in existing projects that contain documents, but it will prevent them from being shown in new projects going forward.
Archiving a branch folder will:
- Add an eyeball icon with a strike through it to the folder on the list page
- Hide the folder from the recurring folder structure while preserving the configuration for future reference.
- Any folders previously created with documents already added to them within projects will remain unchanged and need to be managed separately within those projects if required.
Unarchiving a branch Folder is as simple as clicking the 3-dot ellipsis again and pressing Unarchive.
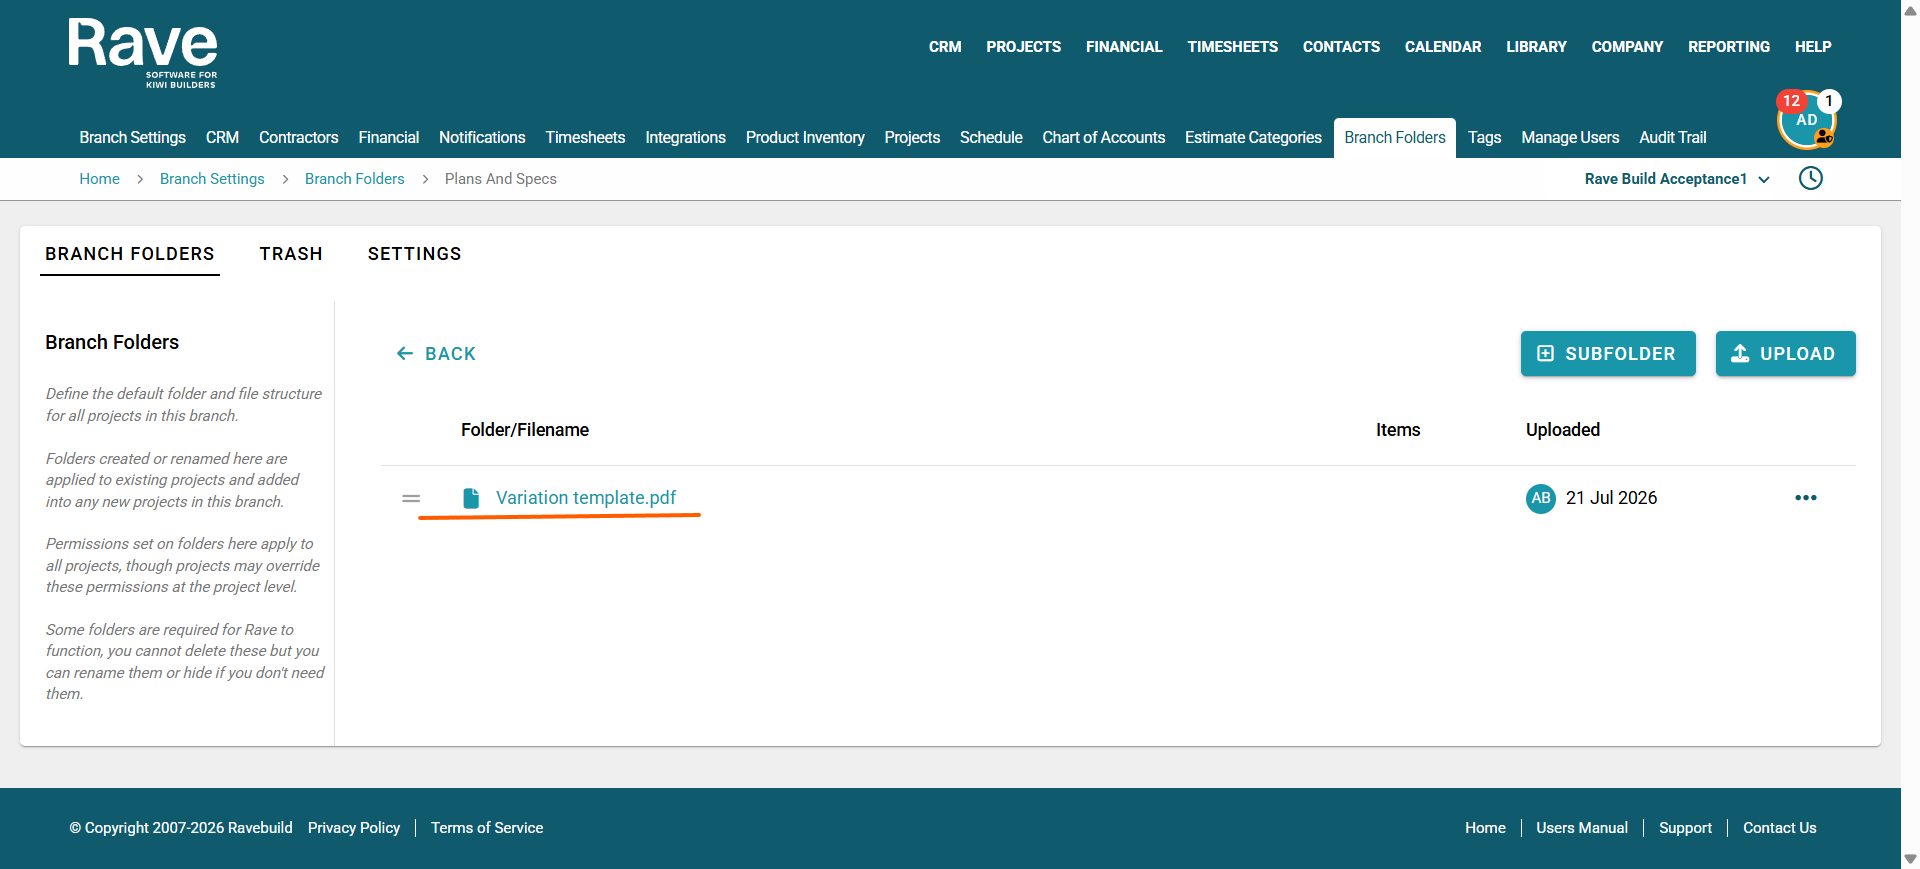
Uploading items to Folders or Subfolders
Uploading documents to a Branch Folder or any of its subfolders will automatically make those documents available in the same folder across every project. For this reason, only upload generic documents (such as templates, policies, or standard forms) to Branch Folders. Do not upload project-specific documents, as they will be visible in all projects.
Trash Tab
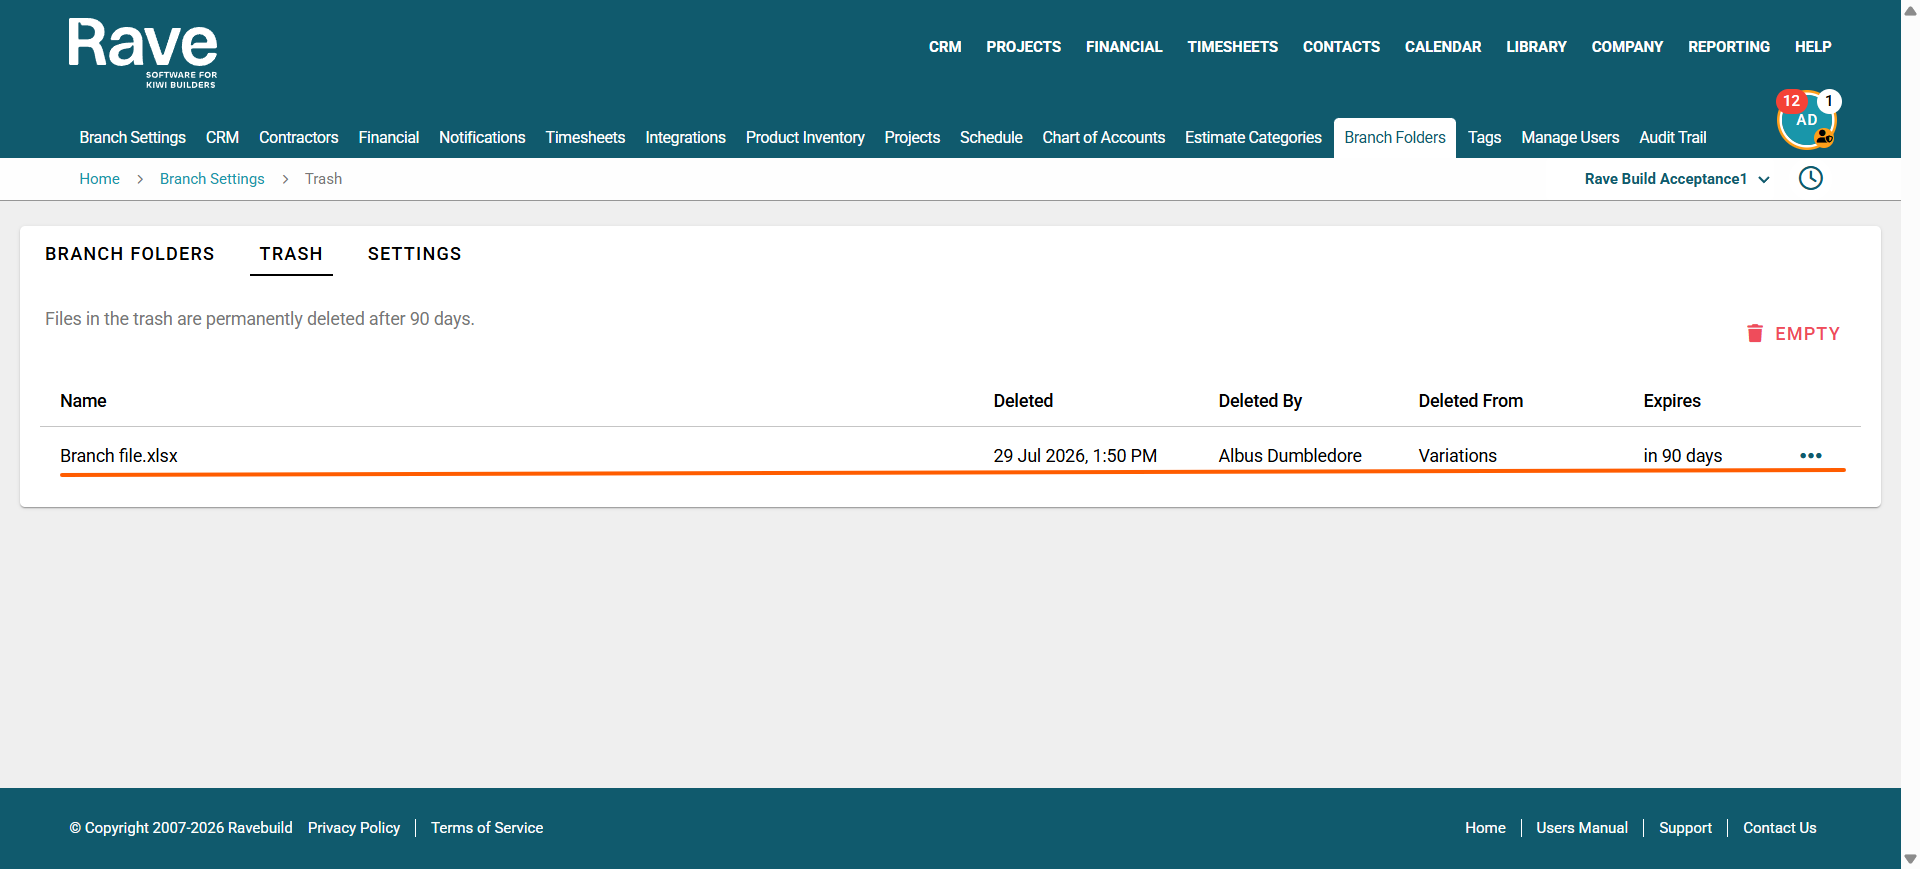
The Trash tab contains all documents that have been deleted from your Branch folder structure.
For each deleted document, you'll see:
Document Name
Date and Time Deleted
Deleted By
Original Folder/Subfolder
Days Remaining until the document is permanently deleted by the system
Click the three-dot (⋮) menu next to a document to access the available actions. Depending on your permissions, you can:
Restore the document to its original folder or subfolder.
Permanently delete the document immediately. This action cannot be undone.
To permanently remove all documents in the Trash, click Empty in the top-right corner of the screen.
Was this article helpful?
That’s Great!
Thank you for your feedback
Sorry! We couldn't be helpful
Thank you for your feedback
Feedback sent
We appreciate your effort and will try to fix the article