The CRM settings screen includes several sections where you can customise different aspects of your CRM configuration.
To access your branch CRM settings (with the appropriate permissions):
Click on your profile icon – the teal circle with your initials located at the top right of the page.
From the dropdown menu, scroll down and select Branch Settings | CRM.
This will open the CRM Settings screen, which defaults to the Branding tab.
Branding Tab Overview
1. Custom Client Login Link
At the top of the Branding tab, you’ll find your customised client login link.
Copying and pasting this URL into your web browser will take you to your personalised Rave login screen.
2. Branding Options
You have the ability to customise several elements of your login and navigation interface, including:
Branch Logo – Upload your company or branch logo to appear on your login screen and used for documents/emails from Rave.
Login Screen Background – Set a custom background image to reflect your brand.
Menu Button Colour – Customise the colour of menu buttons.
Active Menu Button Colour – Define a specific colour for the active menu selection, helping users easily identify their location within the system.

3. Enquiry (Lead) Close Date Settings
You can also configure a default expected close date for all new enquiries (leads). This is the timeframe you expect a contract to be signed after receiving an initial lead.
Options available are:
1, 3, 6, 9, or 12 months
Setting this default helps streamline your sales process and provides consistent expectations across your team.
4. Email Marketing
You can choose to disable the "Opt into Marketing" checkbox from appearing on CRM pages.
If "Enable Opt into Marketing" is unchecked, the feature will not be displayed.
If enabled, you can configure whether the checkbox is:
Selected by default, or
Optional for the user to choose.

Forecast Settings
This page controls the data that the salesperson's target and forecast reports display. We have a complete CRM - Setting Your Salesperson Forecast for the Financial Year FAQ on how to create and manage this feature.

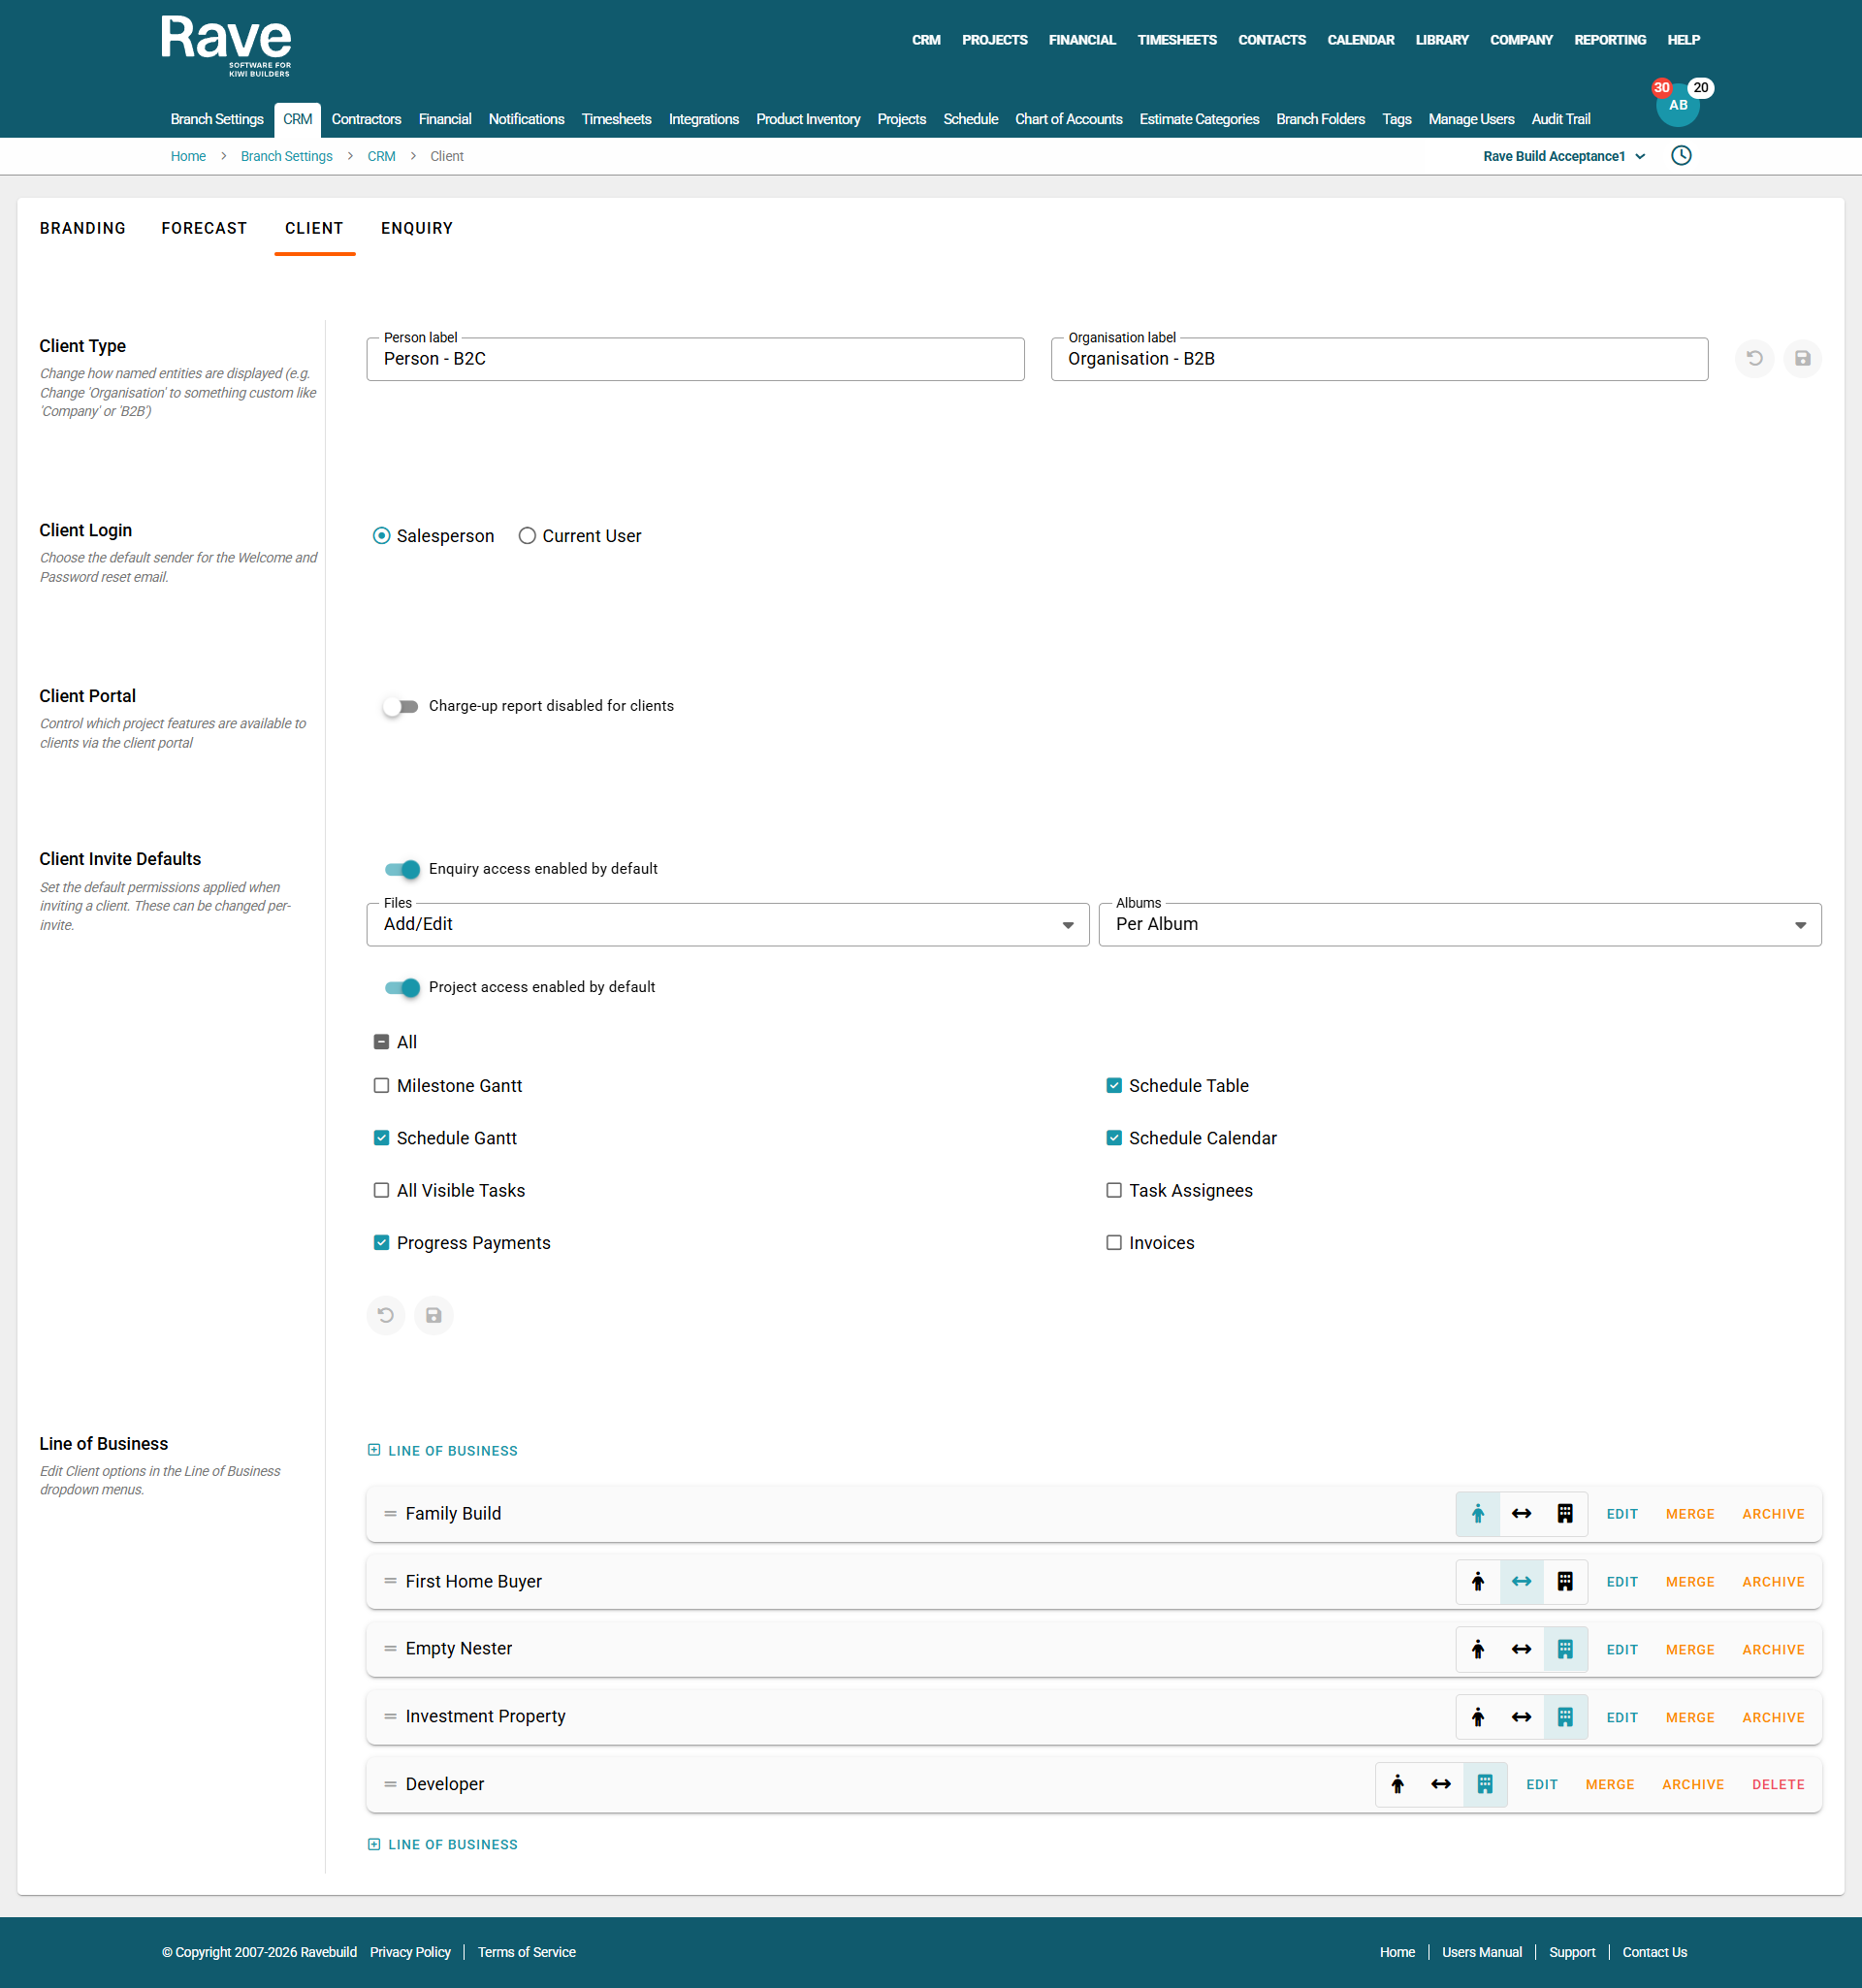
Client Settings
Note: If your Rave account is part of a Franchise Business that has a head office/support office that controls these settings, this tab will not be available for you to view/edit. If you are at a head office level, you will see the orange warning box below indicating that you are changing settings for ALL your franchises.
Client Types
You can update the labels for 'Person' and 'Organisation' to be names that represent your client base i.e. you could change these to 'People' and 'Business' etc.
Client Login
Choose the default person you want your client log in welcome email and password reset emails to come from. Either their salesperson or the person intitiating the emails. You can also override this per client when sending the emails out.
Client Portal
For non-charge-up clients, you can disable the Charge-Up report from showing as an option when inviting clients to Rave and setting their permissions.
Client Invite Defaults
Inviting clients to Rave gives you plenty of flexibility, but sometimes consistency is just as important as choice.
That's why we've introduced Branch Default Client Invite Settings.
This new feature allows your branch to set a default list of client invite options for both Enquiries and Projects. These selections will be automatically preselected whenever a client is invited to Rave. Your team can still customise individual invitations by switching specific settings on or off as needed, but the default configuration ensures everyone starts from the same place.
Line of Business
You can create and manage your Lead & Clients 'Line of Business' options for a person only, organisation only or both. Simply click on the '+ Line of Business' button to add a new line, and select the person, both or building buttons to set. Existing lines can be edited, archived, or deleted i.e. as your business evolves/grows, you can;
- Edit any existing options
- Archive old options that are in use - they don't delete old data, they just can't be used for new enquiries
- Delete any options that have never been used
Enquiry Settings:
General - Direct Project Creation (Skip enquiry step). When enabled, this will allow projects to be created directly for a client without creating an enquiry first. This simplifies the project creation workflow.

Enquiry Defaults - Select the enquiry defaults when creating a new lead.
All new enquiries will use the selected values and cannot be changed until the enquiry has been saved. These defaults will also apply to the Show Home Portal.
Source of Lead - Slide on the Make source of lead mandatory when creating an Enquiry slider to enforce the source of lead option to be picked everytime.
You can also choose to enforce a Source of Lead type (sub source) as well by slidin gon the Make source of lead type mandatory when the selected source of lead has types.

Interested in
You can create and manage your Lead & Clients 'Interested In' selections. Simply click on the '+ Interested In' button to add a new line. Existing lines can be edited, merged, archived, or deleted i.e. as your business evolves/grows, you can:
- Edit any existing options
- Archive old options that are in use (they don't delete old data, they just can't be used for new enquiries)
- Merge an existing option into another one, which will transfer all the enquiries from the old option to the new one, and retire the old option
- Delete any options that have never been used

Pipeline and Sub-Pipeline Stage
You can create and manage your Lead & Clients Pipeline and Sub Pipeline Stage options.
- Simply click the + Pipeline Stage, or + Sub Pipeline Stage to add a new line
- Click the Edit button on the pipeline stage or Sub Stage to edit the colour of the stage, the % amount and the name.
- Click Archive to archive old options that are in use (they don't delete old data, they just can't be used for new enquiries). Click unarchive to bring them back.
- Merge an existing option into another one, which will transfer all the enquiries from the old option to the new one, and retire the old option
- Delete any options that have never been used
Note: You cannot edit 0%, Won or Lost as these are mandatory fields. You can set a max of 12 pipelines per Client Type. If your business doesn't distinguish between client type (Person and Business) set your Pipeline choices in the middle which shows for ALL clients.
The sales process is important for ensuring that both salespeople and clients stay aligned on the process. For this reason, we have introduced the ability to lock the sales pipeline at specific stages so important steps cannot be skipped.
Cclick the padlock icon on a pipeline stage to make it mandatory. This prevents that stage from being skipped. The sales team will see the locked pipeline stage greyed out until the required step has been completed. As soon as the mandatory step is completed the rest of the pipeline will open up for the sales process to continue.
This setting works hand in hand with the Mandatory Pipeline Start setting, which requires all new leads to enter the sales process at the first pipeline stage. By ensuring every lead follows the same journey from the beginning, reporting remains accurate and provides a true reflection of sales activity, conversion rates, and pipeline performance. Together, these settings help maintain process consistency and improve the quality of CRM reporting.

Priorities
If Priorities isnt something you intend to use you can slide off the Priorities switch and it will remove this option in the CRM system. By default Prioirities are enabled and are a mandatory field.
You can create and manage your Priority options.
- Simply click the + Priorities Button to add a new option
As your business evolves/grows you can:
- Edit any existing options
- Archive old options that are in use (they don't delete old data, they just can't be used for new enquiries)
- Merge an existing option into another one, which will transfer all the enquiries from the old option to the new one, and retire the old option
- Delete any options that have never been used

Source of Lead and Sub-Source of Lead
You can create/manage your Source of Lead and Sub Source of Lead options
- Simply click the + Source of Lead, or + Source of Lead Type to add a new option
As your business evolves/grows you can:
- Edit any existing options
- Archive old options that are in use (they don't delete old data, they just can't be used for new enquiries)
- Merge an existing option into another one, which will transfer all the enquiries from the old option to the new one, and retire the old option
- Delete any options that have never been used

Regions
While your Clients & Leads regions are hard-coded into the system for New Zealand, you can create/manage your sub-region options and Local areas here.
You can choose to show or Hide certain regions from showing in your system.
If you want to remove areas you don't cover simply choose Hide. This will remove them from showing for you and your team.
- Simply click the + Sub Region button to add a new option and then the + Local Area to add another layer under the sub region. Your local area could be a subdivision name, town, city or other. We don't report on the local area as this is an individual choice per Client.
As your business evolves/grows you can:
- Edit any existing options
- Archive old options that are in use (they don't delete old data, they just can't be used for new enquiries)
- Merge an existing option into another one, which will transfer all the enquiries from the old option to the new one, and retire the old option
- Delete any options that have never been used
Note: If you have company Level CRM settings you can ask the Rave Support team to turn on Regions to be branch specific. This way you still control your business options but its branch by branch.
With two branches in the same region like Auckland you can give each branch a different set of Sub Regions and Local Ares in their Auckland Region choices.

Lost Reasons
You can create/manage the Lost Reason fields here
- Simply click the + Lost Reason button to add a new option
As your business evolves/grows you can:
- Edit any existing options
- Archive old options that are in use (they don't delete old data, they just can't be used for new enquiries)
- Merge an existing option into another one, which will transfer all the enquiries from the old option to the new one, and retire the old option
- Delete any options that have never been used

Was this article helpful?
That’s Great!
Thank you for your feedback
Sorry! We couldn't be helpful
Thank you for your feedback
Feedback sent
We appreciate your effort and will try to fix the article