The Branch Project Settings screen contains multiple sub-tabs where you can customise certain parts of your Project's sections.
You can access your branch Project settings, with permission, via your profile drop-down icon - the teal coloured circle with your initials to the top right of your page.
Clicking on this icon, scroll down to Branch Settings | Project Settings option.
Clicking on this page opens your Project Settings screen.
Project Settings
Branch owners have the permission-based ability to customise various parts of their Projects pages. If your Rave account is part of a Franchise Business that has a head office/support office that controls these settings, the tabs will not be available for you to view/edit. If you are at a head office level, you will see the orange warning box below indicating that you are changing settings for ALL your franchises.

Project

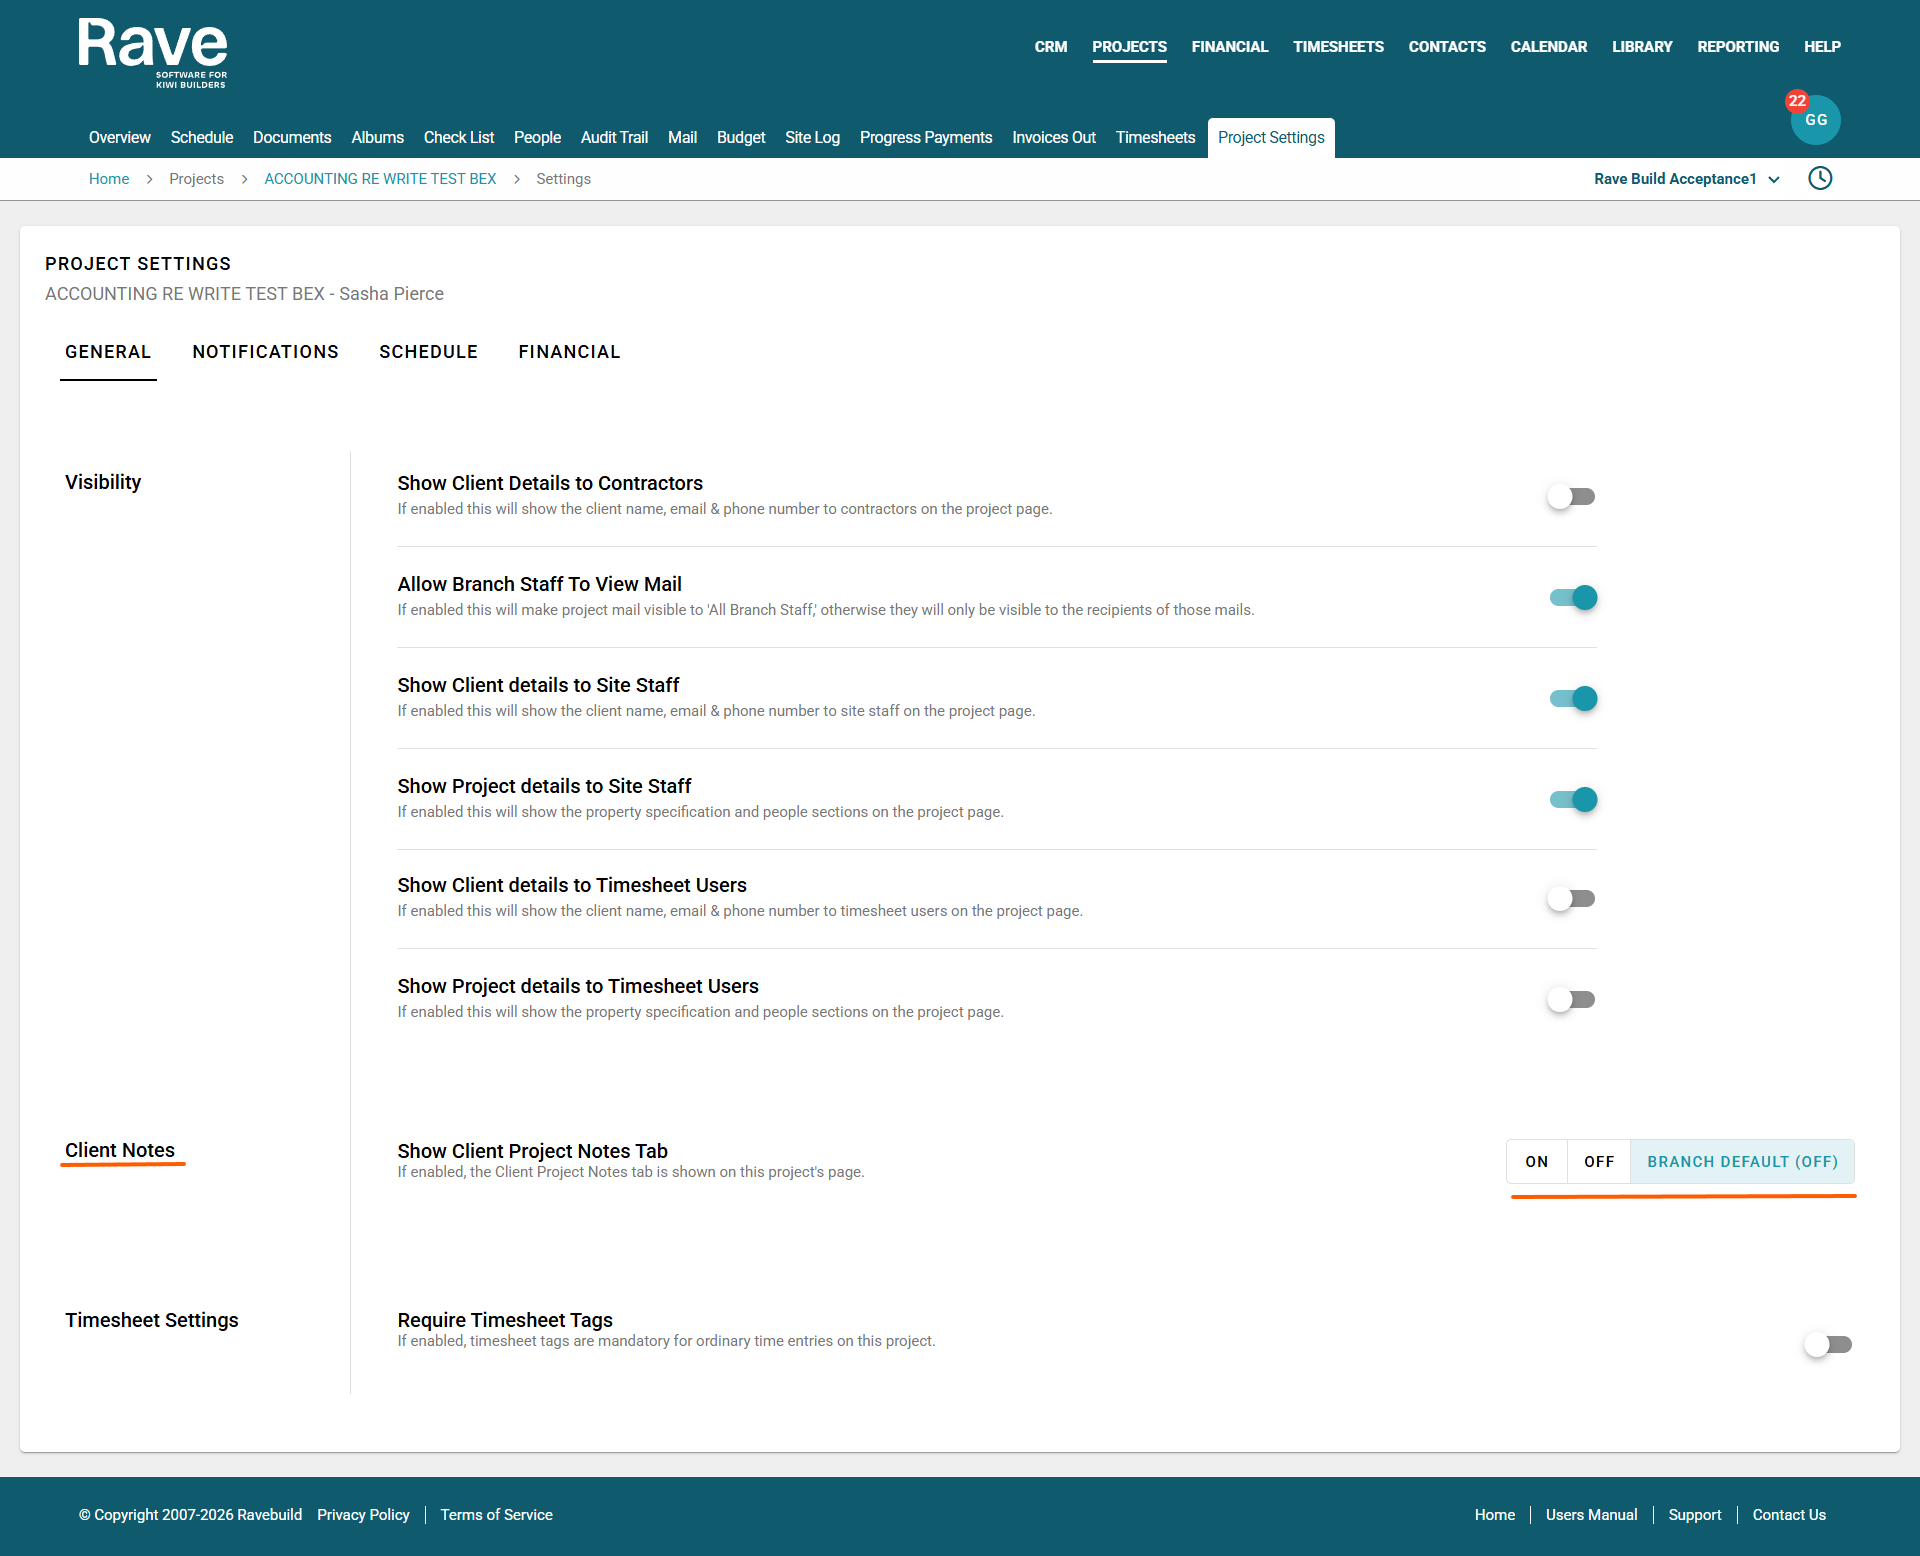
You can now hide client details and certain project information from Site Staff and Timesheet Users, just as you can with Contractors. This ensures privacy is maintained while your team continues to collaborate and perform their roles.
Simply choose which user group you want to show/hide Client Details and Project Details.
To see these settings for Contractors, click here for the Article.
Show Client Details will enable the user to view the client's name, email, and phone number on the project page. Disabled, they will see Redacted on the project list page, and then no client information box on the project overview page.
Show Project Details will enable the user to see the project people page information, the signed contract value, if applicable, and the project type. With the slide turned off, the information is hidden from the users.
Show Client Project Notes - When slid on the client project Notes box, it will be shown to all staff members with permission to view or add notes.
Note: When disabled, the box will disappear for everyone. This is also able to override at a per-project level.
You can choose to override the Branch setting in Project Settings as per below.
Project Stages
You can create and manage your project Stages options.
- Simply click the + Stage Button to add a new option
You can also:
- Edit any existing options
- Archive old options that are NOT in use
- Merge any existing Stages into a new one
- Delete any unused/unwanted stages
- You cannot delete stage with active projects assigned and you cannot merged into an archived stage you must first unarchive it.
Note: Closed Projects are not affected by this change, only Open Projects.
Once amended, you can return to the Projects list page and bulk-assign or single-assign any of the project Stages using your new custom list. See the article here.


Key Tasks
You can add and manage your Key Task list here.
The order of your Key Tasks down the page is the order these will display across your Key Tasks build overview report.
The Key Task Name and Description are generally the same, but it is the ‘Name’ field that dictates what is displayed on the report.
- Simply click the + Key Task Button to add a new option
You can also:
- Edit any existing options
- Delete any options that are no longer required
- If you wish to customise the colouring of your key tasks you can click Edit and select a colour by clicking on the coloured square intside the Colour box. Customising the colouring will override the default options Rave hard codes in the background.

Project Types
You can add and manage your Project Types here.
- Simply click the + Project Type to add a new option
- Once a Project Type has been added, you click the + Project Sub-Type button to add a sub-type
You can also:
- Edit any existing options
- Merge an existing option into another one, which will transfer all the enquiries from the old option to the new one, and retire the old option
- Archive old options - these will still show on existing reports, but won't be available for future projects.
- Delete any options that are no longer required

Garage Types
You can add and manage your Garage Types here.
- Simply click the + Project Type to add a new option
You can also:
- Edit any existing options
- Merge an existing option into another one, which will transfer all the enquiries from the old option to the new one, and retire the old option
- Archive old options - these will still show on existing reports, but won't be available for future projects.
- Delete any options that are no longer required

Collections
You can add and manage your Collections, or House Style, and Plans here
- Simply click the + House Style to add a new House Style option
- Once a House Style has been added, you can click the + House Plan button to add a House Plan option
You can also:
- Edit any existing options
- Merge an existing option into another one, which will transfer all the enquiries from the old option to the new one, and retire the old option
- Archive old options - these will still show on existing reports, but won't be available for future projects
- Delete any options that are no longer required

Consent Authority
Here you can hide or unhide the specific build consent authority groups you want visible in your branch. Hiding the number that shows makes it faster for project managers or admins to select the right one.

Was this article helpful?
That’s Great!
Thank you for your feedback
Sorry! We couldn't be helpful
Thank you for your feedback
Feedback sent
We appreciate your effort and will try to fix the article