This article will focus on Contractor Files, both at the Branch Level and the Contractor Level
The First Help Article was on adding a new Contractor. You can read it here.
The Article following is on Editing/Viewing/Removing Contractors. You can read it here.
The Previous Help Article is on adding a New Contractor Via CSV. You can read it here.
Clicking the Contact Tab takes you to the Contacts page, where you can manage contacts based on your permissions.

With your permission, you will see Contractors, Contractor Files, and Supplier/Tenants.
You may have all of these tabs, none or only 1 or 2.
In the Manage Users section, users with permission can choose to assign these tabs.
To give a user No Access, unselect the Enable Contact Access, which will hide the tabs for them.
If you choose to grant access to either Contractors, Contractor Filers, or Suppliers/Tenants, you can then select which options you want them to have.
Some options are View-only, Add/Edit/Manage and Remove.
Once you have selected Contractor Files, you will see the table format below.
This view lists all Branch-specific and Global Contractor files, along with their owners.
You can keyword search by a specific Contractor First/Last Name, Company Name, LBP number, or Category name.
You can also filter by Category, Expiry date, and Uploaded date
The Export button lets you export the filtered results or all information on the screen.
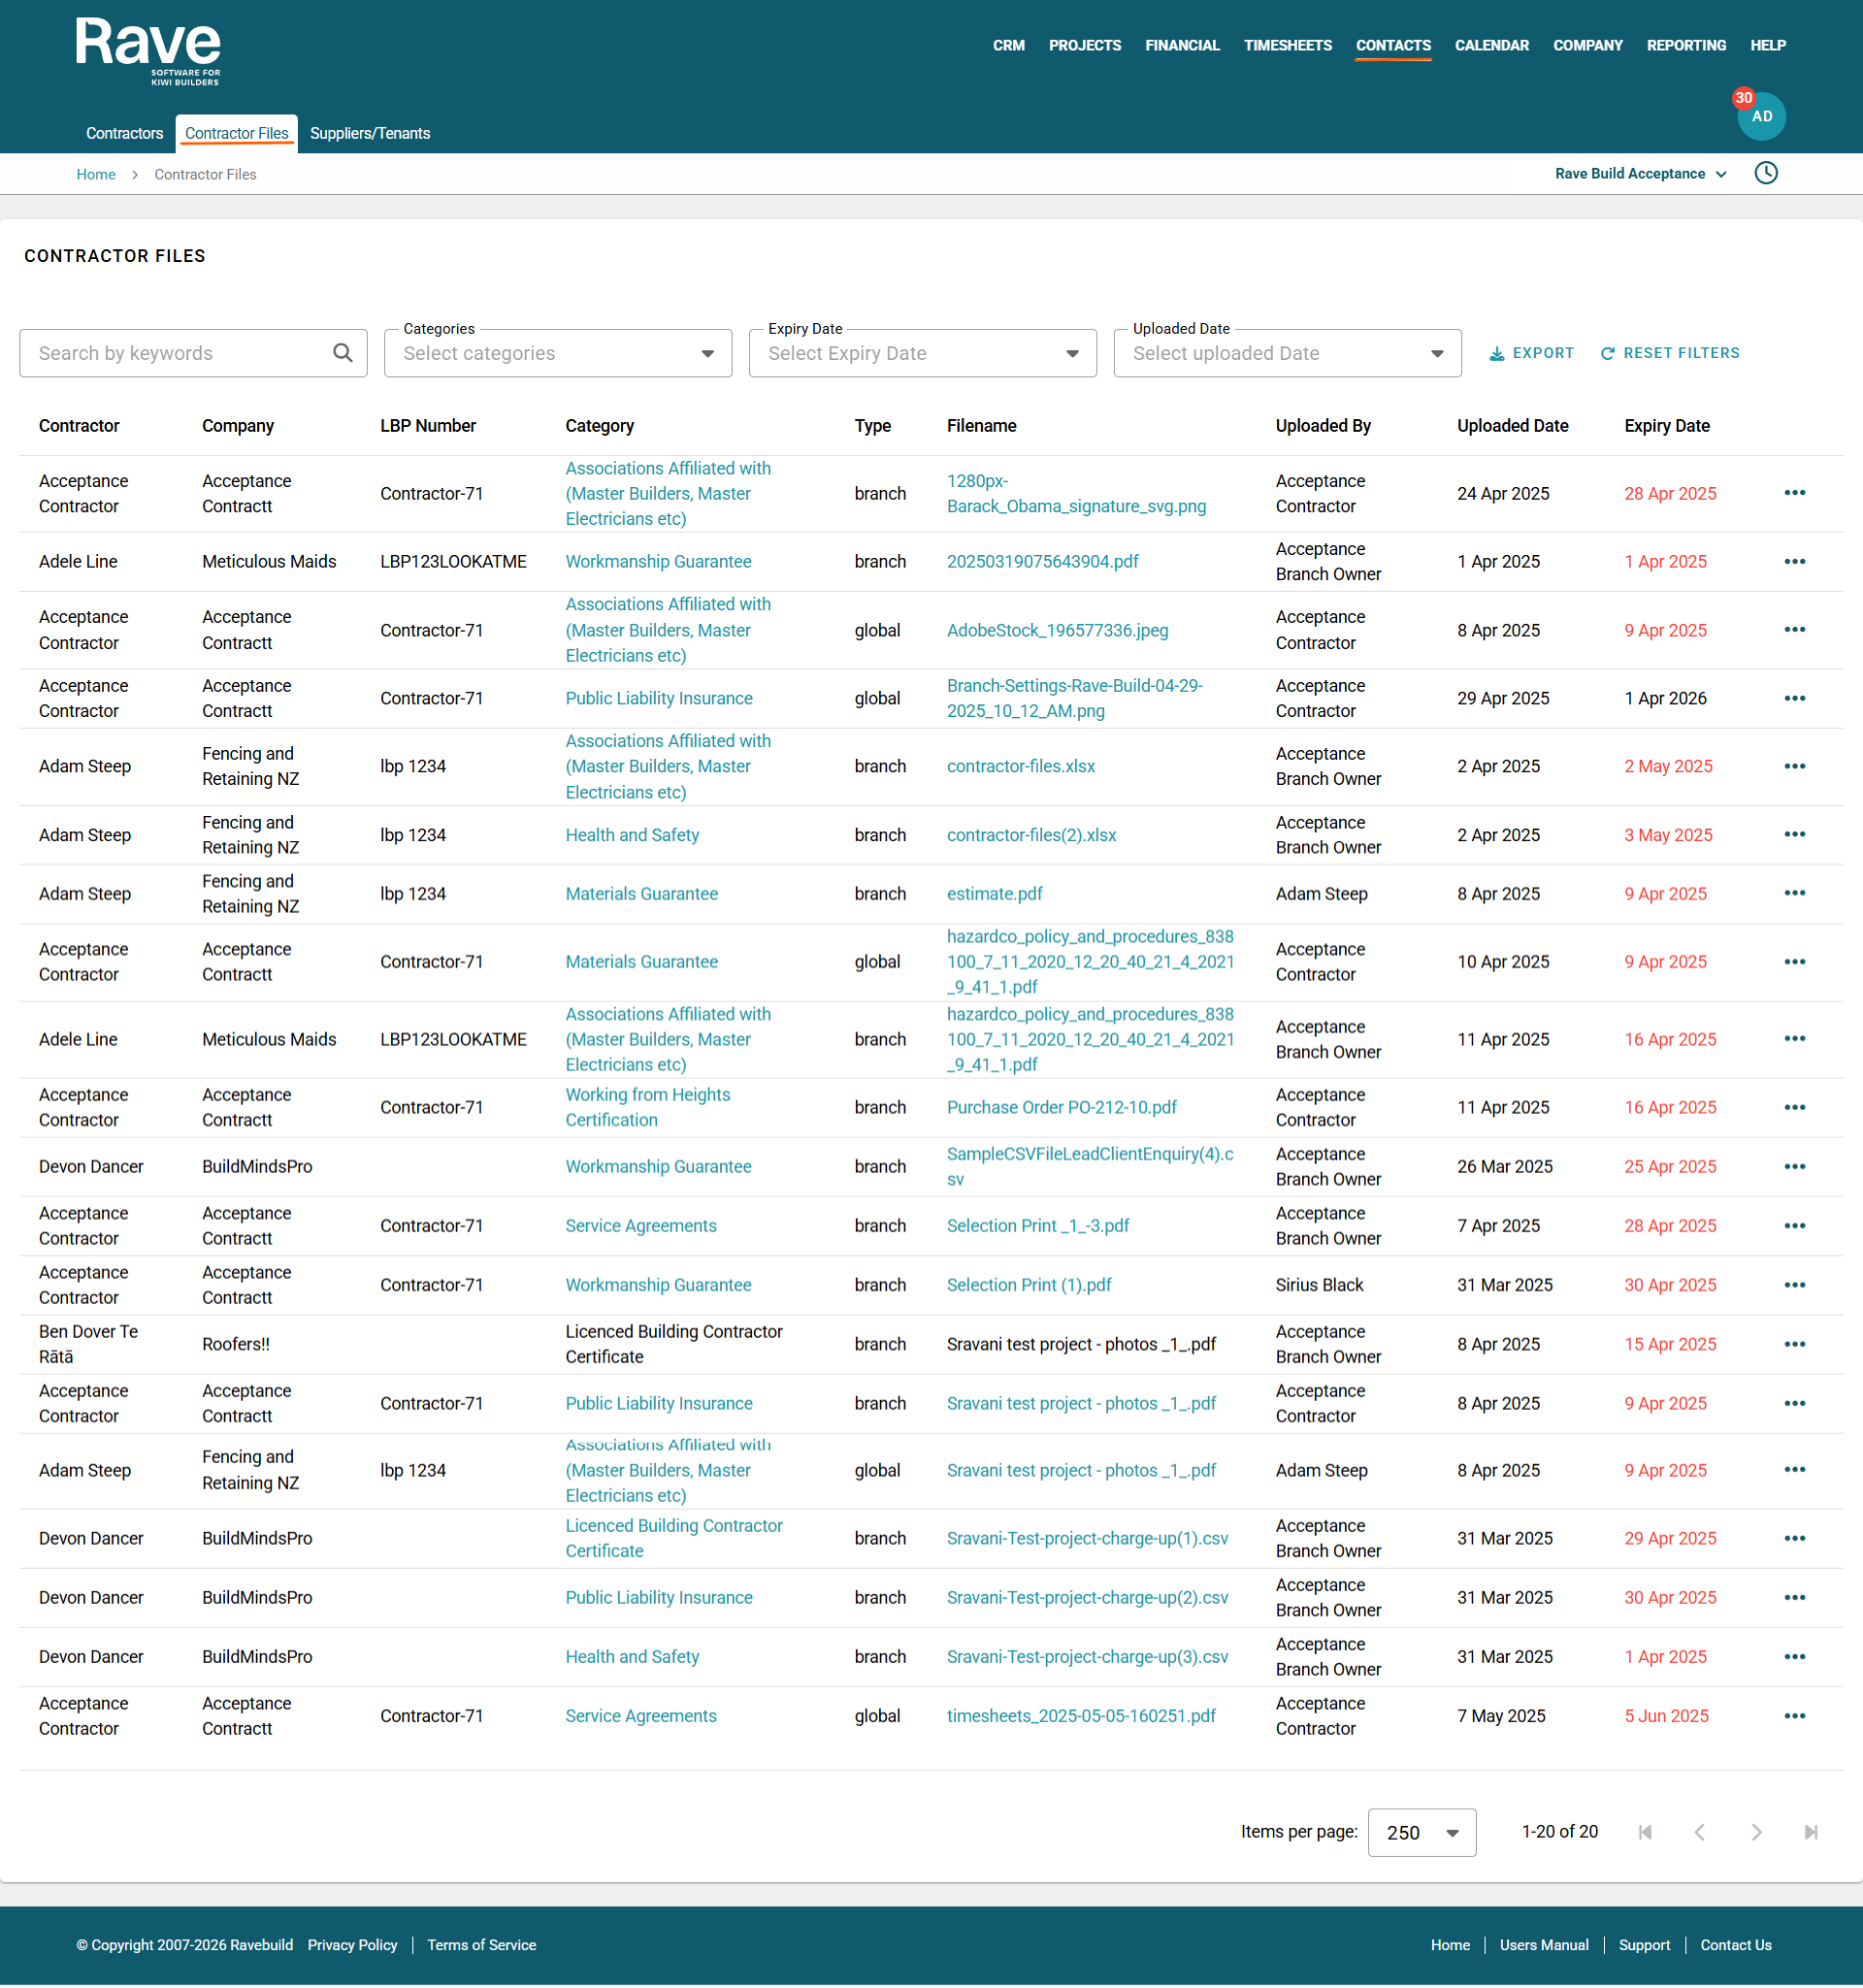
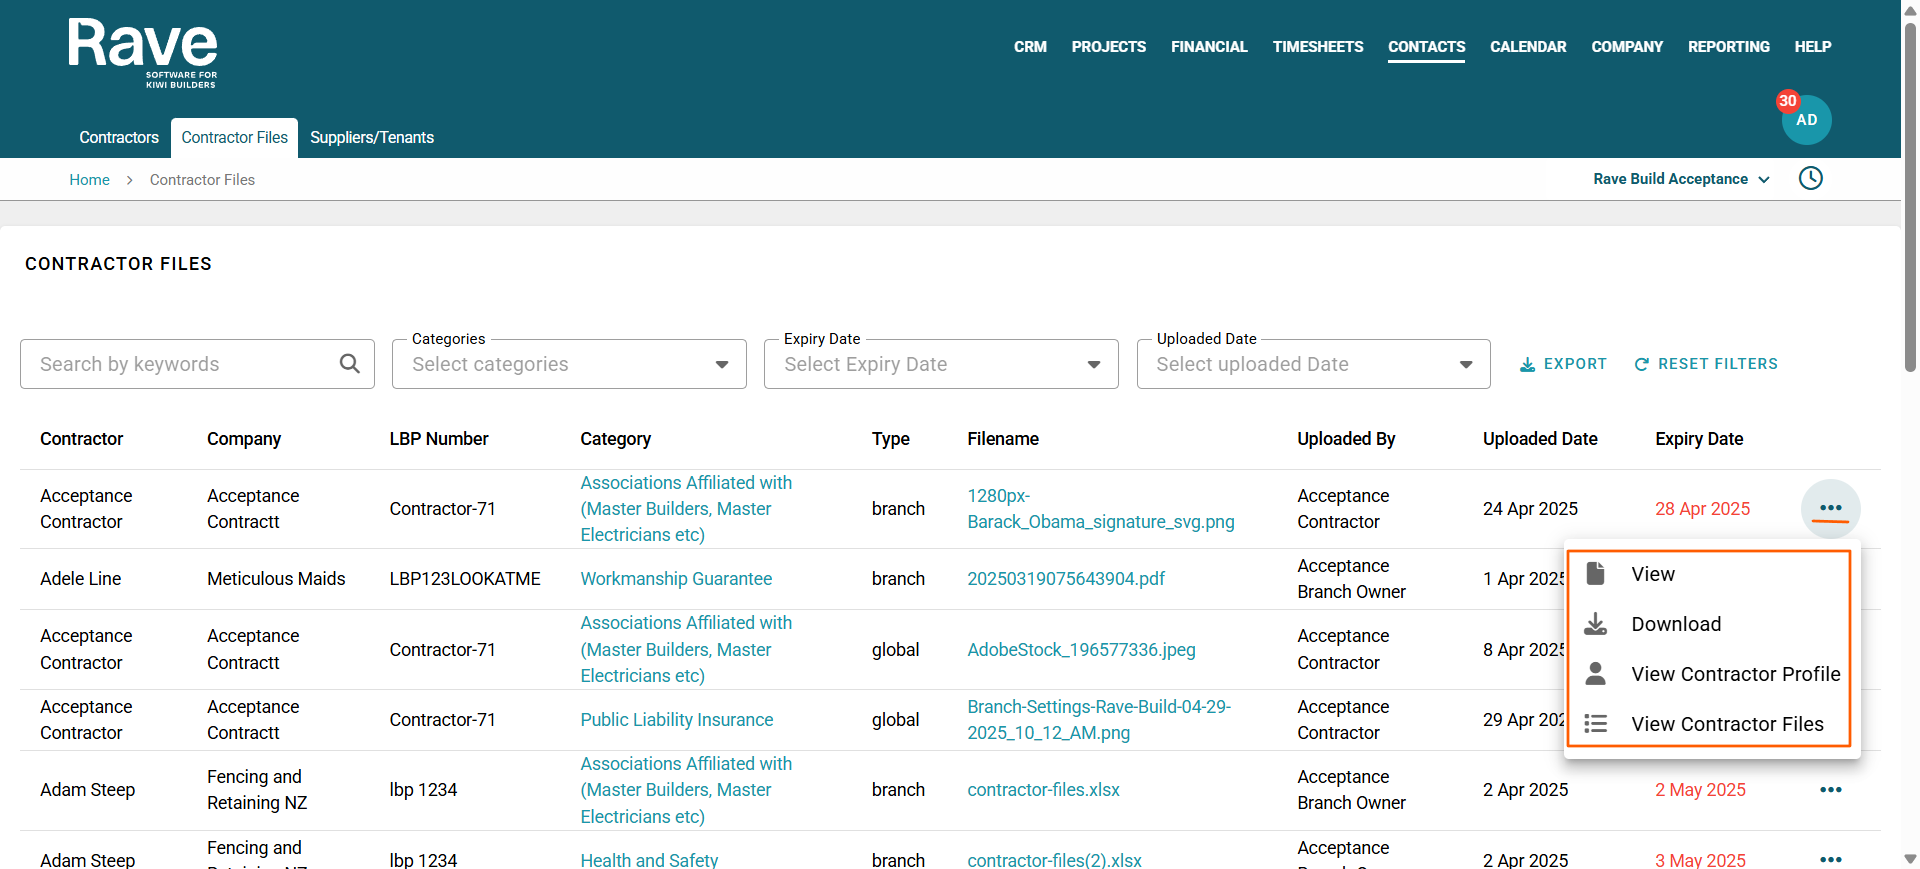
The 3-dot ellipses allow you to:
View the attachment
Download the attachment
View the Contractor Profile
View the Contractor files
To manage this information, click View Contractor Files. This will take you to the Contractor Files for this specific Contractor, where we create/manage and store information for each Contractor.
Managing/Uploading Contractor Files from the Contractor Profile.
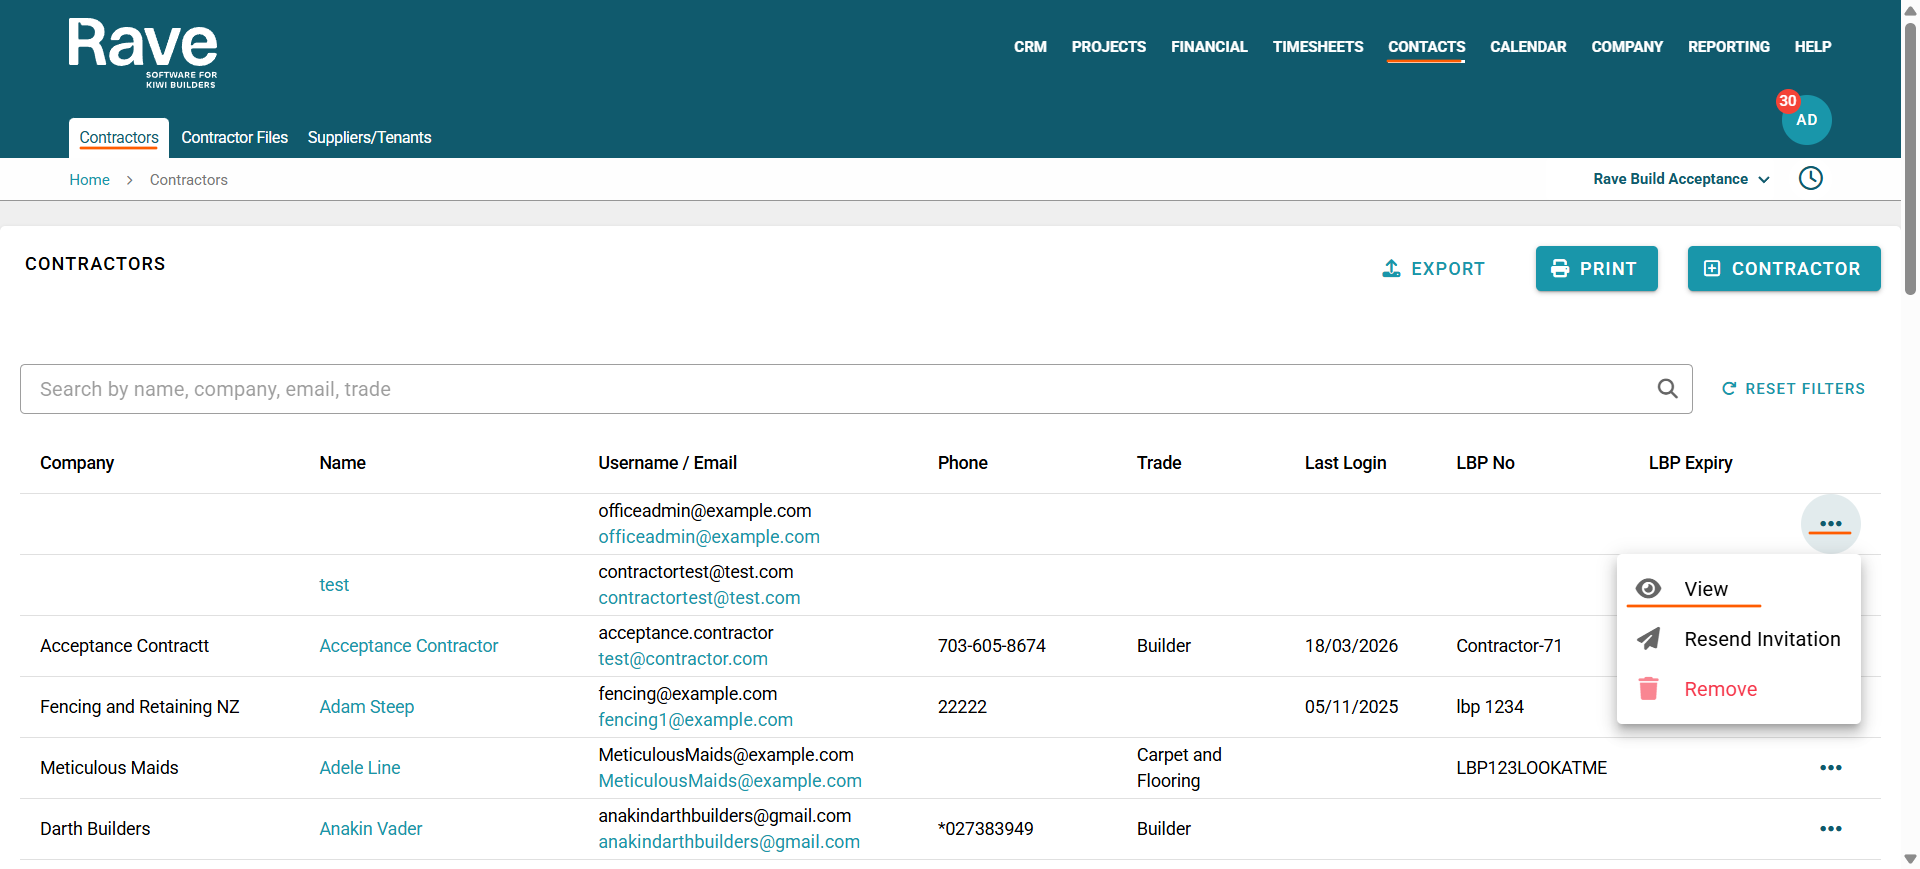
From the Contacts Button, click Contractors, find the contractor for whom you want to add/edit a file, and click the 3-dot ellipses and press View.
Then select Contractor Files from the sub- tab.
The ‘Contractor Files’ page is broken into two sections:
The first is the ‘Shared Uploaded Files’ section. This is where Contractors can load documents for all branches they work with. You are unable to delete or edit these files as they are owned by the Contractor.

The second section is the ‘Branch Only’ folder, which is accessible by the contractor and your business only. Any Files you or your contractor upload here are visible only to the two of you.
You can see if the documents are owned by your Branch or the Contractor.
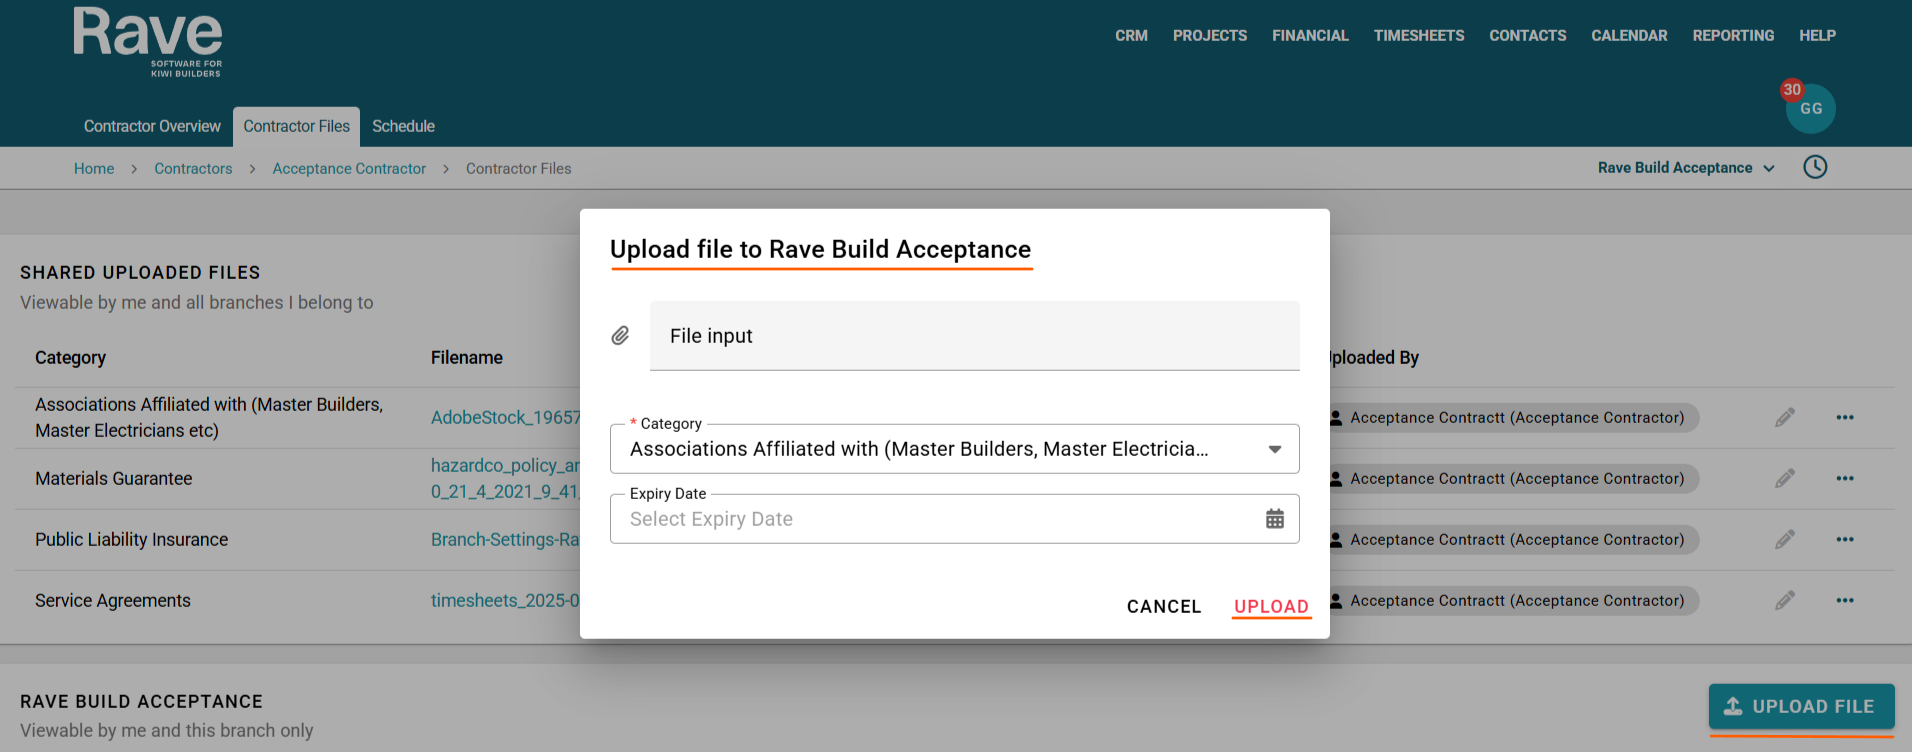
To add a document on behalf of the Contractor
Click the upload file button
You can drag and drop into the File Input Box or click it and select the document.
You can choose the Category, and if applicable, an Expiry Date, then select Upload.
We have added the ability to create customised Category Names under the Branch Contractor Settings for certain documents. This permission-based feature allows you to create and edit Category Names specifically for use in your Branch with your Contractor Files. To view the help article, click here.
Contractor File Expiry Notifications
You can choose to opt into or out of Email or Internal Notifications when a contractor file is due to expire.
By default, these notifications are turned off for all Branch Users.
You can change these settings via the Manage Users permission.
To read more about this, click here for the help article.
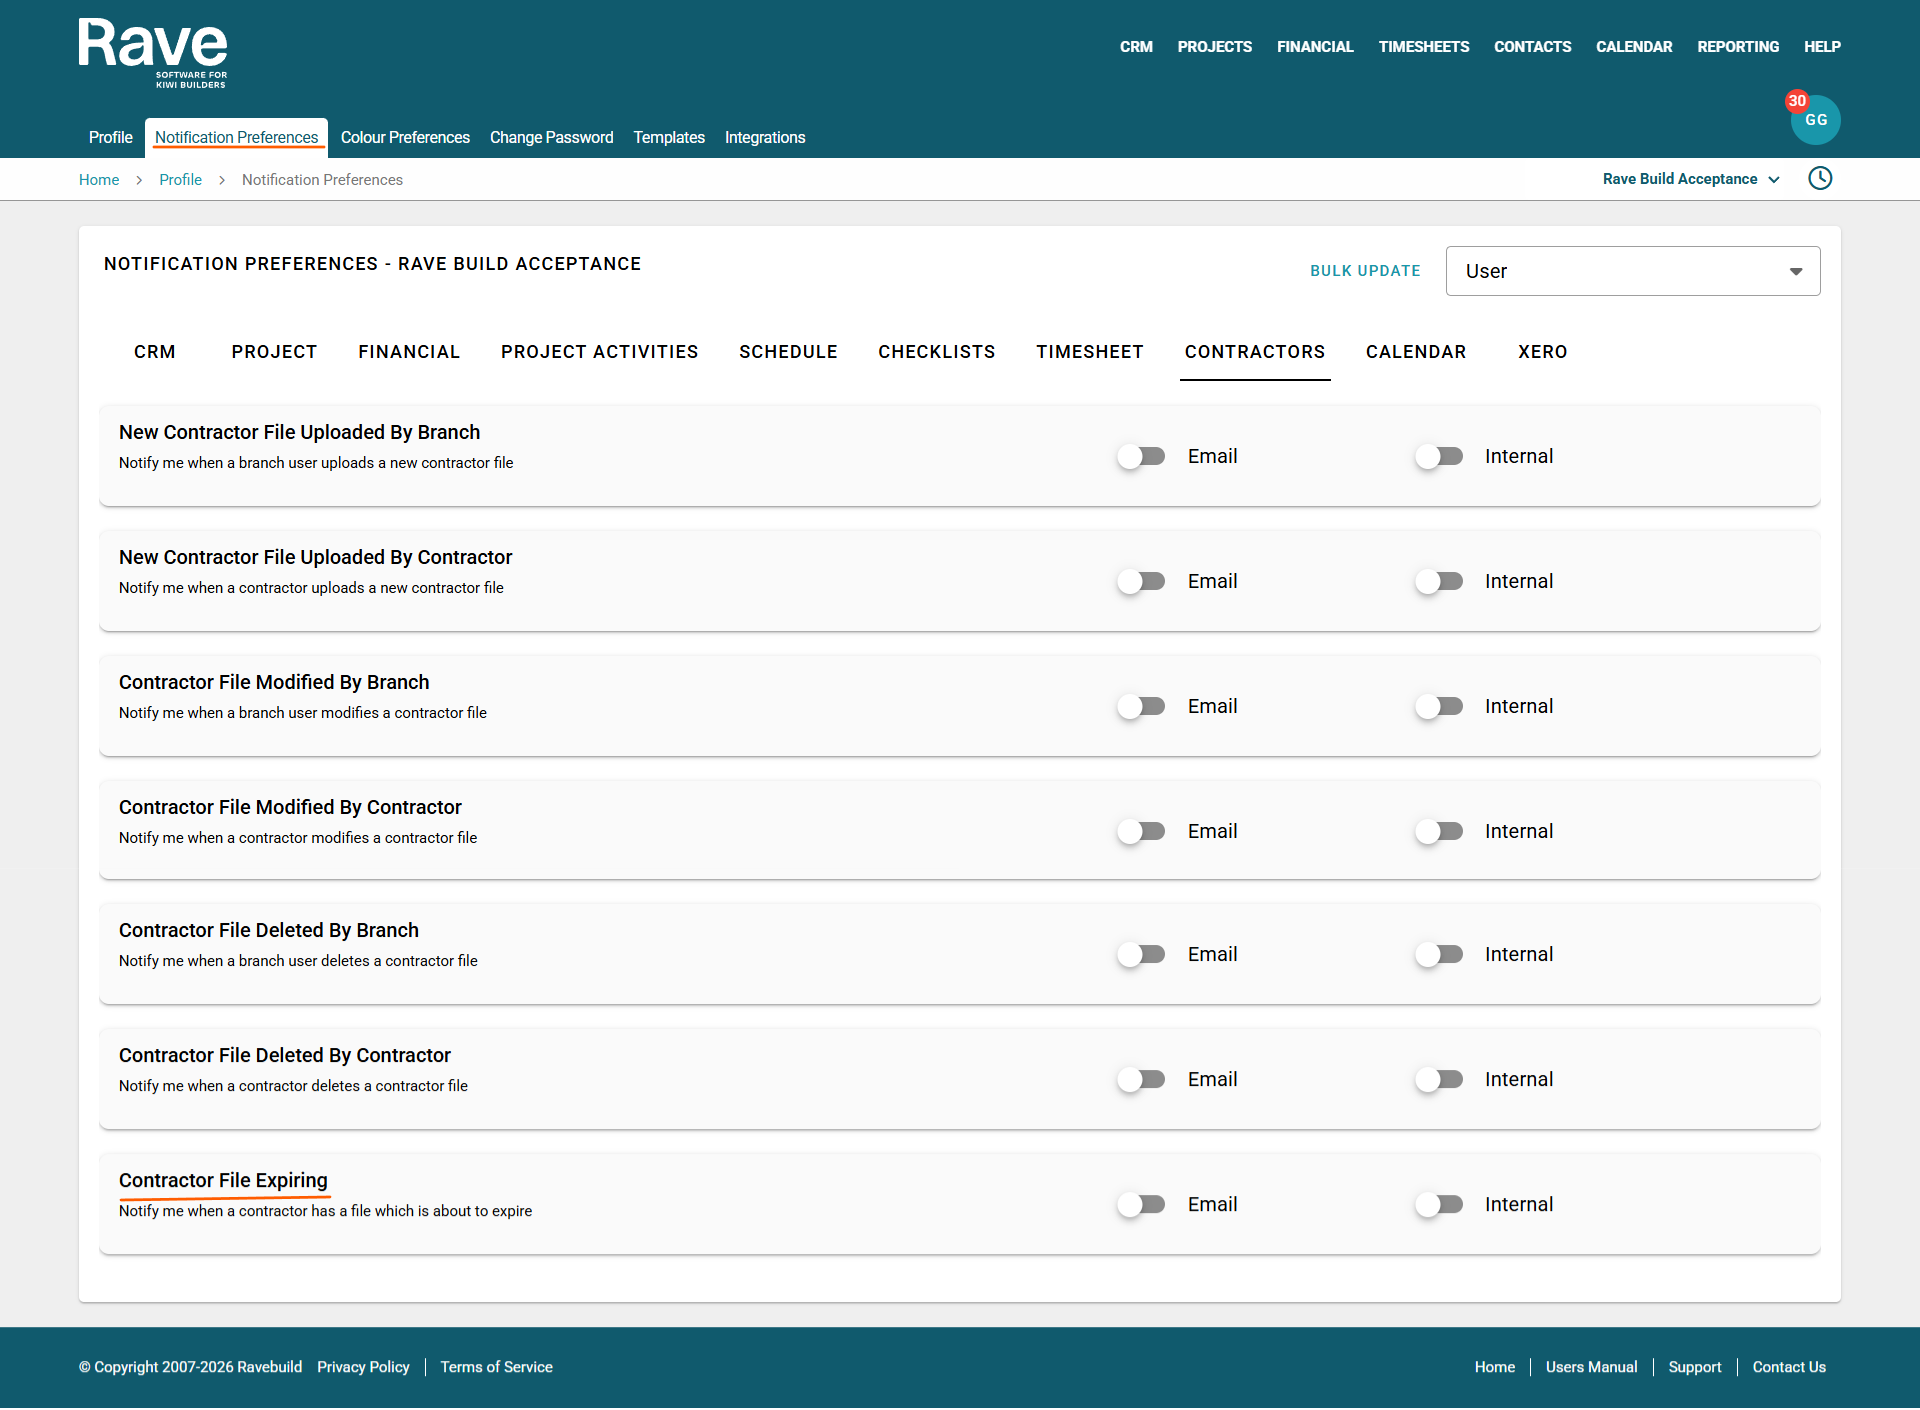
Notifications will be sent out 1 month before the expiry date and then 1 day before the expiry date.
A sample email is below.

Was this article helpful?
That’s Great!
Thank you for your feedback
Sorry! We couldn't be helpful
Thank you for your feedback
Feedback sent
We appreciate your effort and will try to fix the article