This article will focus on Adding Contractors in Bulk via CSV upload/import.
The Previous Help Article was on adding a new Contractor. You can read it here.
The Next Help Article is on Editing/Viewing/Removing Contractors. You can read it here.
The Final Article is on The Contractor Files Tab. You can read it here.
Clicking the Contact Tab takes you to the Contacts page, where tabs let you manage contacts based on your permissions.

With permission, you will see Contractors, Contractor Files and Supplier/Tennants.
You may have all of these tabs, none or only 1 or 2.
In the Manage Users section, users with permission can choose to assign these tabs.
To give a user No Access, unselect the Enable Contact Access, which will hide the tabs for them.
If you choose to give access to either Contractors, Contractor Filers or Suppliers/Tennants, you can then select which options you want them to have.
Some options are View-only, Add/Edit/Manage, and Remove.
Note: Suppliers vs Contractors
The term ‘Supplier’ in RAVE is used to describe those suppliers and sub-trades who do not need a RAVE login to access your projects, schedules, and documents in RAVE, i.e. 'Suppliers' provide quote information only or receive Purchase Orders via email only. They do not need to log in to RAVE to access the project details, and therefore do not need a RAVE login. Suppliers can be emailed a quote request and purchase order, but they cannot log in to view them all in one place.
As opposed to 'Contractors' who do need a RAVE login to access your projects, schedules, and documents in RAVE, they can also view quote requests in RAVE, submit a quote, and view Purchase Orders. As a result, we send a welcome email with login details to 'Contractors', but we don't for 'Suppliers'
Adding a Contractor Via CSV
You can add multiple contractor profiles to your database via a CSV upload.
Click + CVS import button to the top right

You can download the sample Contractor File Import Template using the hyperlink provided at the top of this screen.
Once downloaded, you may either enter the information manually or copy and paste your data into the template before submitting it for import.
Note: Rave only accepts imports in CSV format. If you attempt to upload a file in a different format, the import will fail during the preview stage.

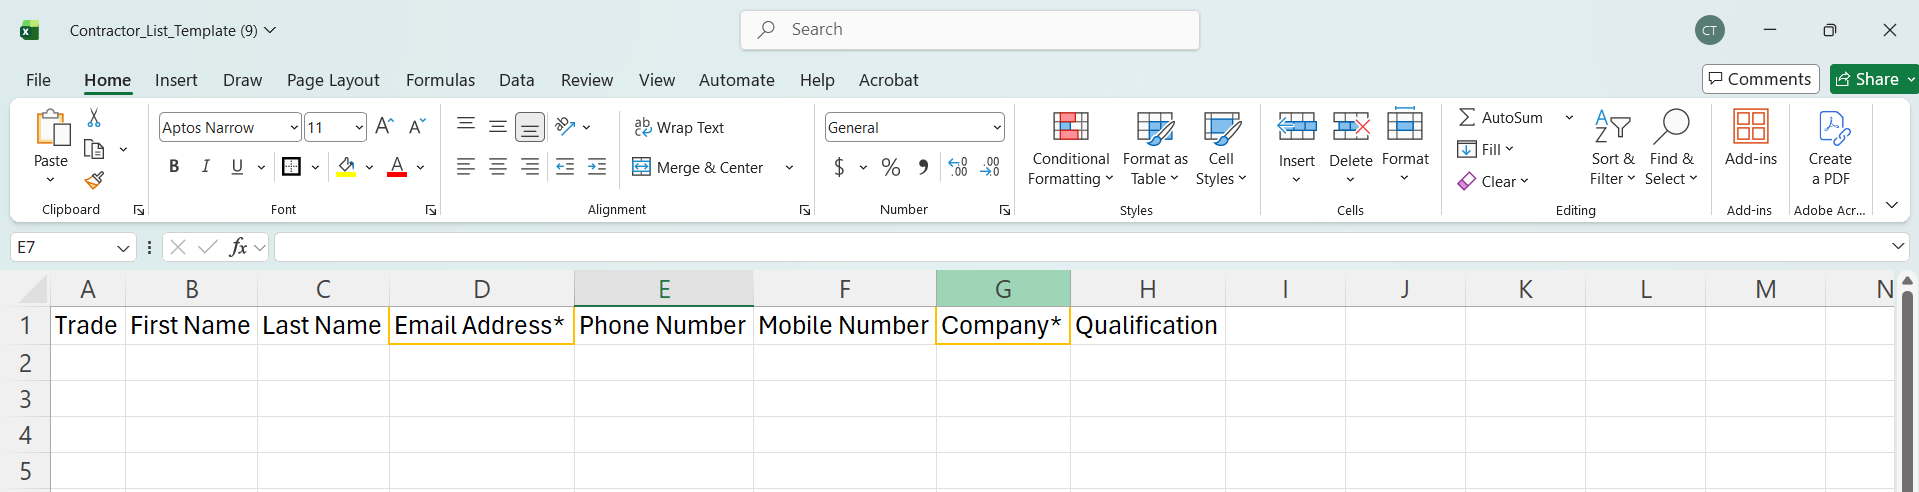
The required fields on this CSV template are the contractor's email address and their business name, both highlighted with an asterix, but we encourage you to fill in as many fields as you can to make it easier for your trades to check that their details have been loaded correctly, also making it easier for you to find and attach contractors to your projects and schedules. The CSV columns to fill in are the contractor's:
- Trade
- First and Last names - or the name of your primary contact for that business
- *Email address - this is a required field, and needs to follow a valid email address structure
- Business or contact phone number
- Mobile number
- *Business or company name - this is a required field
- Qualification(s) if any
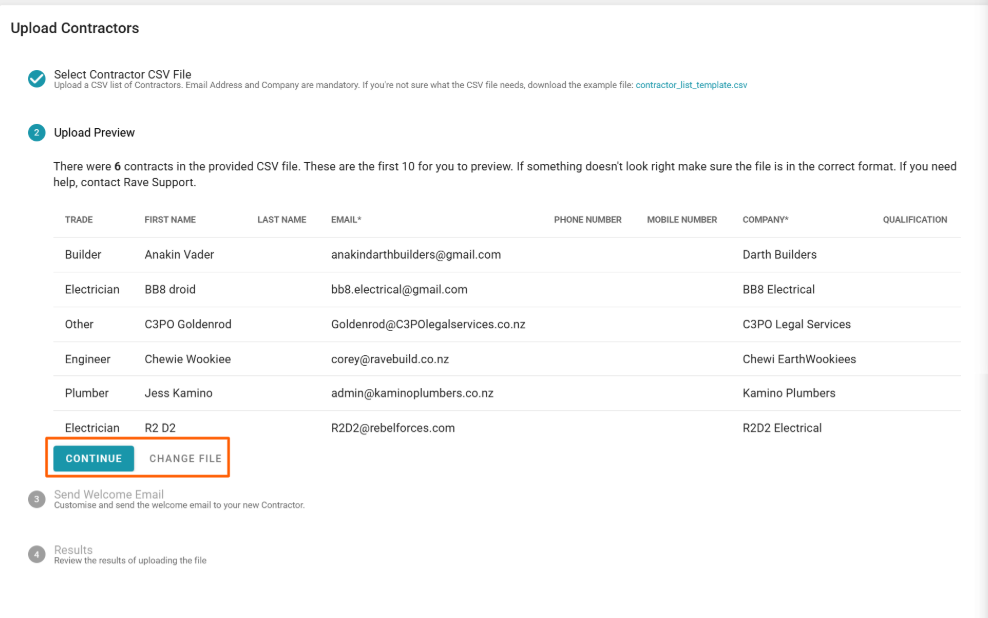
Once you have formatted your CSV file, click the Select a File button, add the document, and press Continue.
Rave will now check that all of the data is correct. If there are no issues, you will see the Continue button to move on to the next part of adding the contractors.
If there is an error in the file, a red warning will appear, and you cannot continue. You must fix the errors by editing the file, re-saving and then pressing Change File and re-uploading it.

The two reasons this error will occur are if the Company name or the Email address has been left blank, as these are mandatory fields. Fix these fields in your CSV, then re-upload. Once it's correct, you will see the Continue button
From this point onwards, the process is the same as the 'Adding a Contractor using their Email Only' process.
The Send Welcome email pop-up will then allow you to choose to alter the default welcome email and send it, alter the default welcome email and save it as a new template, then send, or just Send and Save as is.
Note: For managing existing templates, see our help article here.
The insert Merge Fields, which are Branch Name, Branch Email and Branch Phone, sit along the bottom of the pop-up for you to select when you want to insert these default fields into the email.

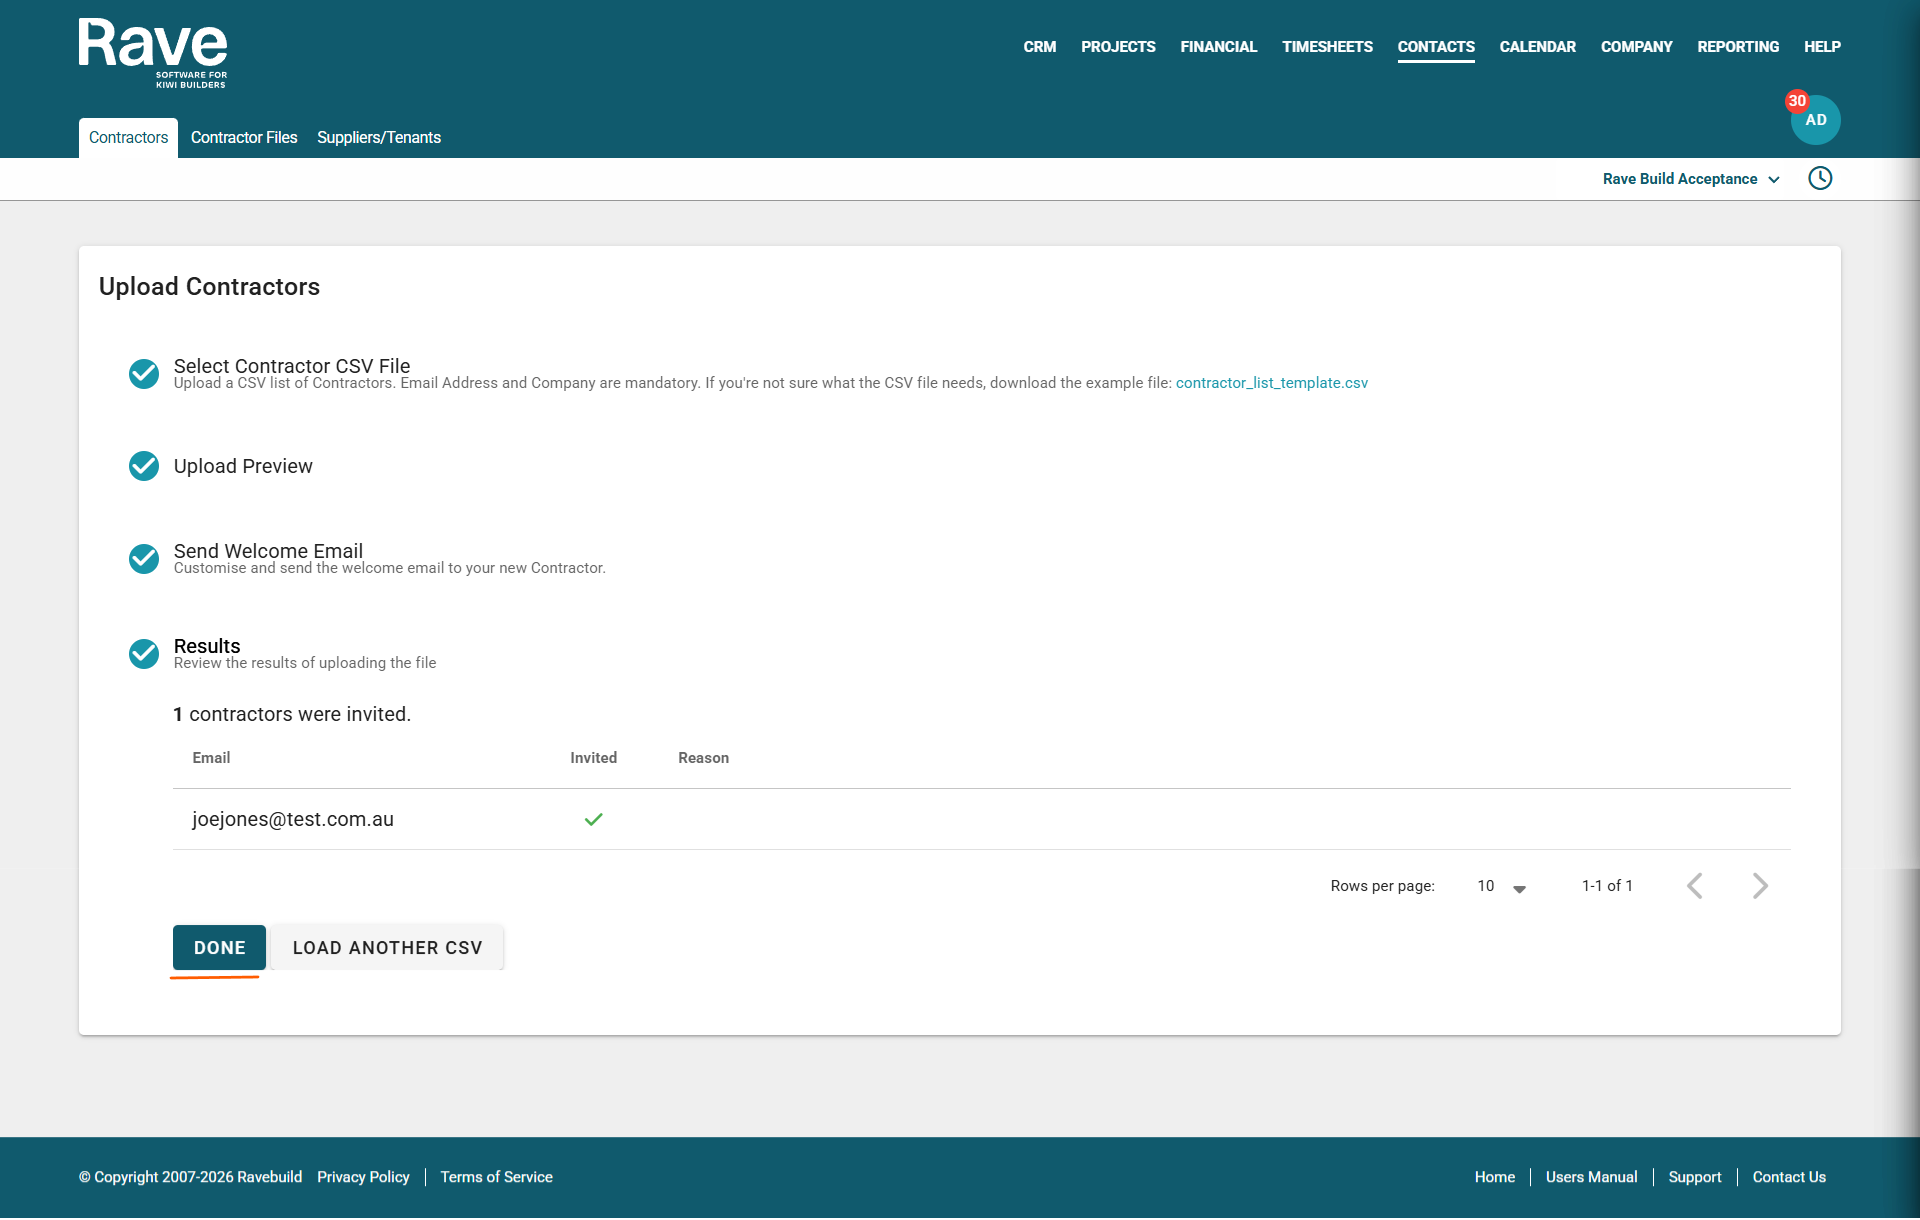
You'll then move to the Results section, which shows all the contractors who have been successfully invited. Press Done and you are finished, or you can Load another CSV file and start again with a different batch of Contractors
Was this article helpful?
That’s Great!
Thank you for your feedback
Sorry! We couldn't be helpful
Thank you for your feedback
Feedback sent
We appreciate your effort and will try to fix the article