The following is a full training video for Rave Checklists - for step-by-step written instructions, please refer to the help article links and guide added below.
To Access the article on Checklist Permissions, click here.
To Access the article on Checklist Notifications, click here.
To Access the article on Branch Settings Checklist Status Groups, click here.
To Access the article on saving to a template and loading from a template, click here.
To Access the article on the Checklist Template menu, including CSV import, click here.
Note: Use Schedule tasks for time-sensitive activities with set start and finish dates or times.
Project Checklists suit process-driven tasks where steps must be completed, but timing may be more flexible.
Checklists are ideal for:
Pre-construction checks
Construction QA checks
Vehicle Checks
Health & Safety Checks
Tasks that require multiple people to have visibility but one person is responsible for completing.
A staff member needs to follow a set process
A number of steps need to be completed as part of a standard workflow
A task needs to be completed, but does not require a specific scheduled date or time
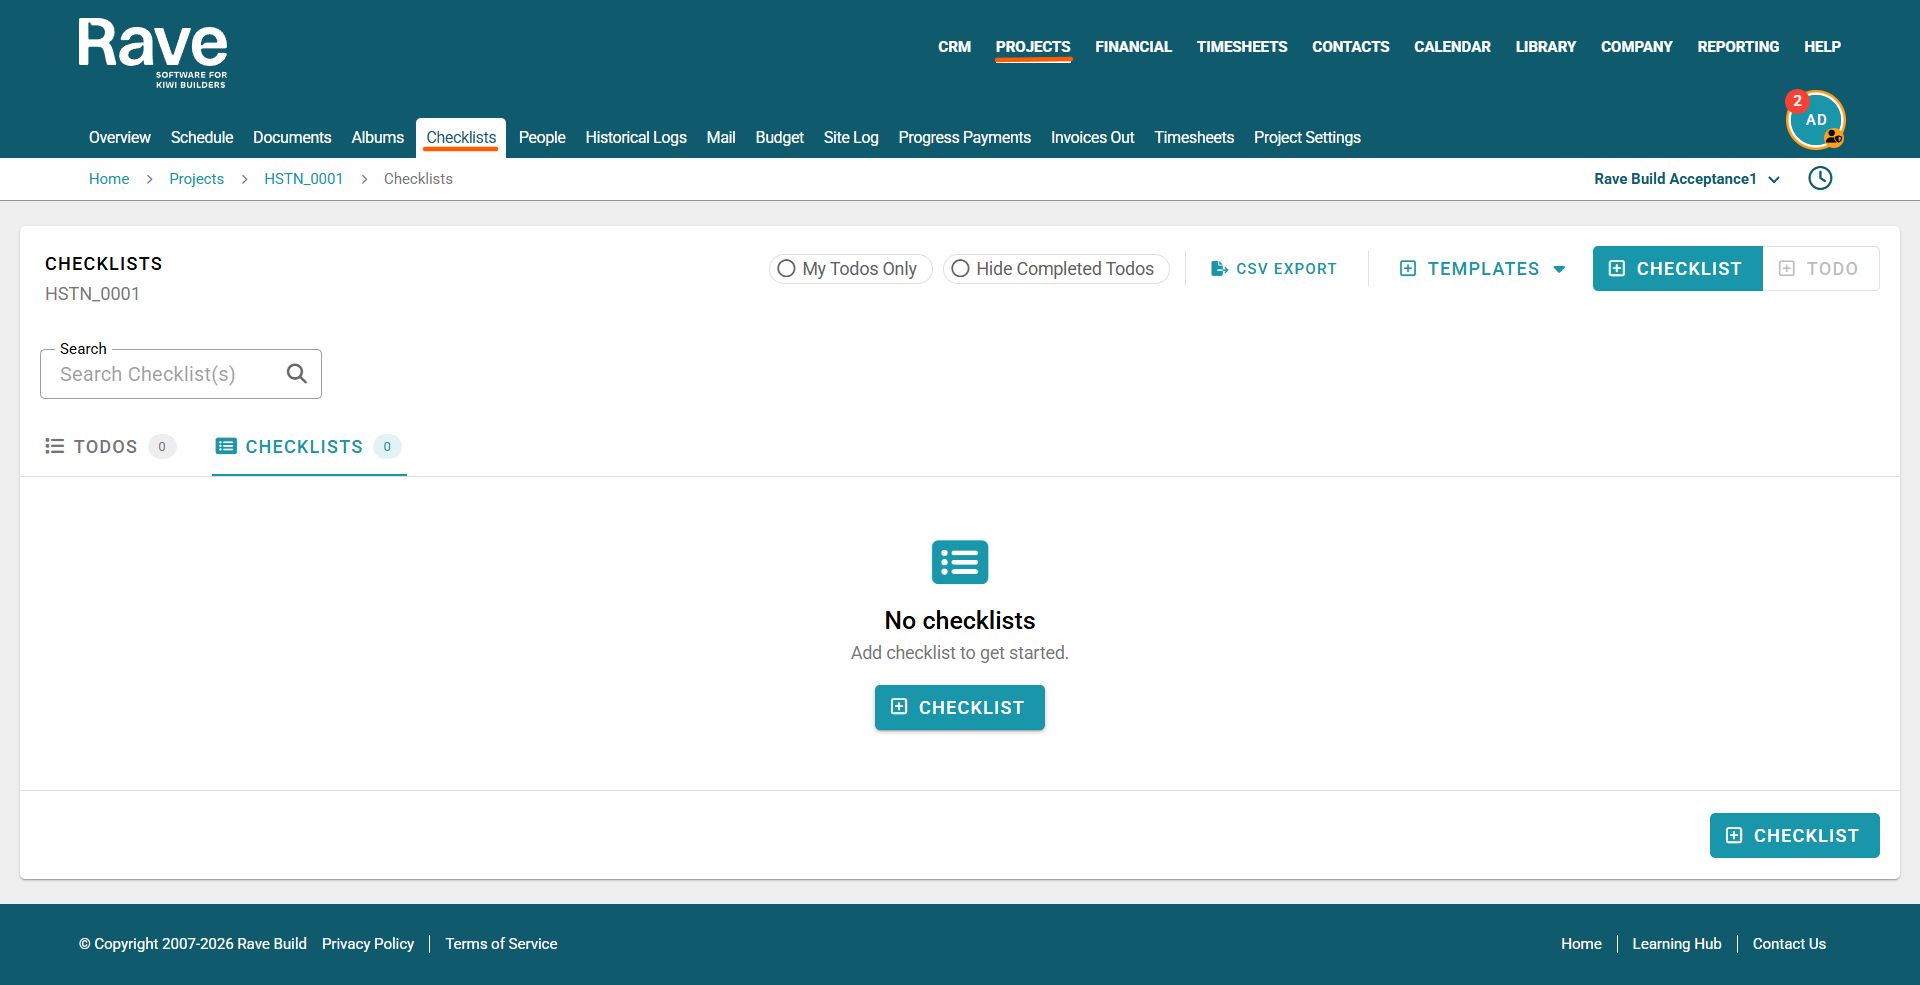
To access checklists, first open the project you wish to add a checklist to, then from the main tab click Checklists.
Adding Checklists to a Project
After you open the project, go to the Checklists sub-tab.
There are two ways to add a new Checklist to a project:
Create a new Checklist manually
Load an existing Checklist Template
Create a New Checklist Manually
Click + Checklist
Enter a name for the Checklist.
Choose which status group you wish to use.*
The default options set by Rave as Complete, Incomplete, Not Applicable. But you have the ability to create your own status groups via your branch settings.Click Add.
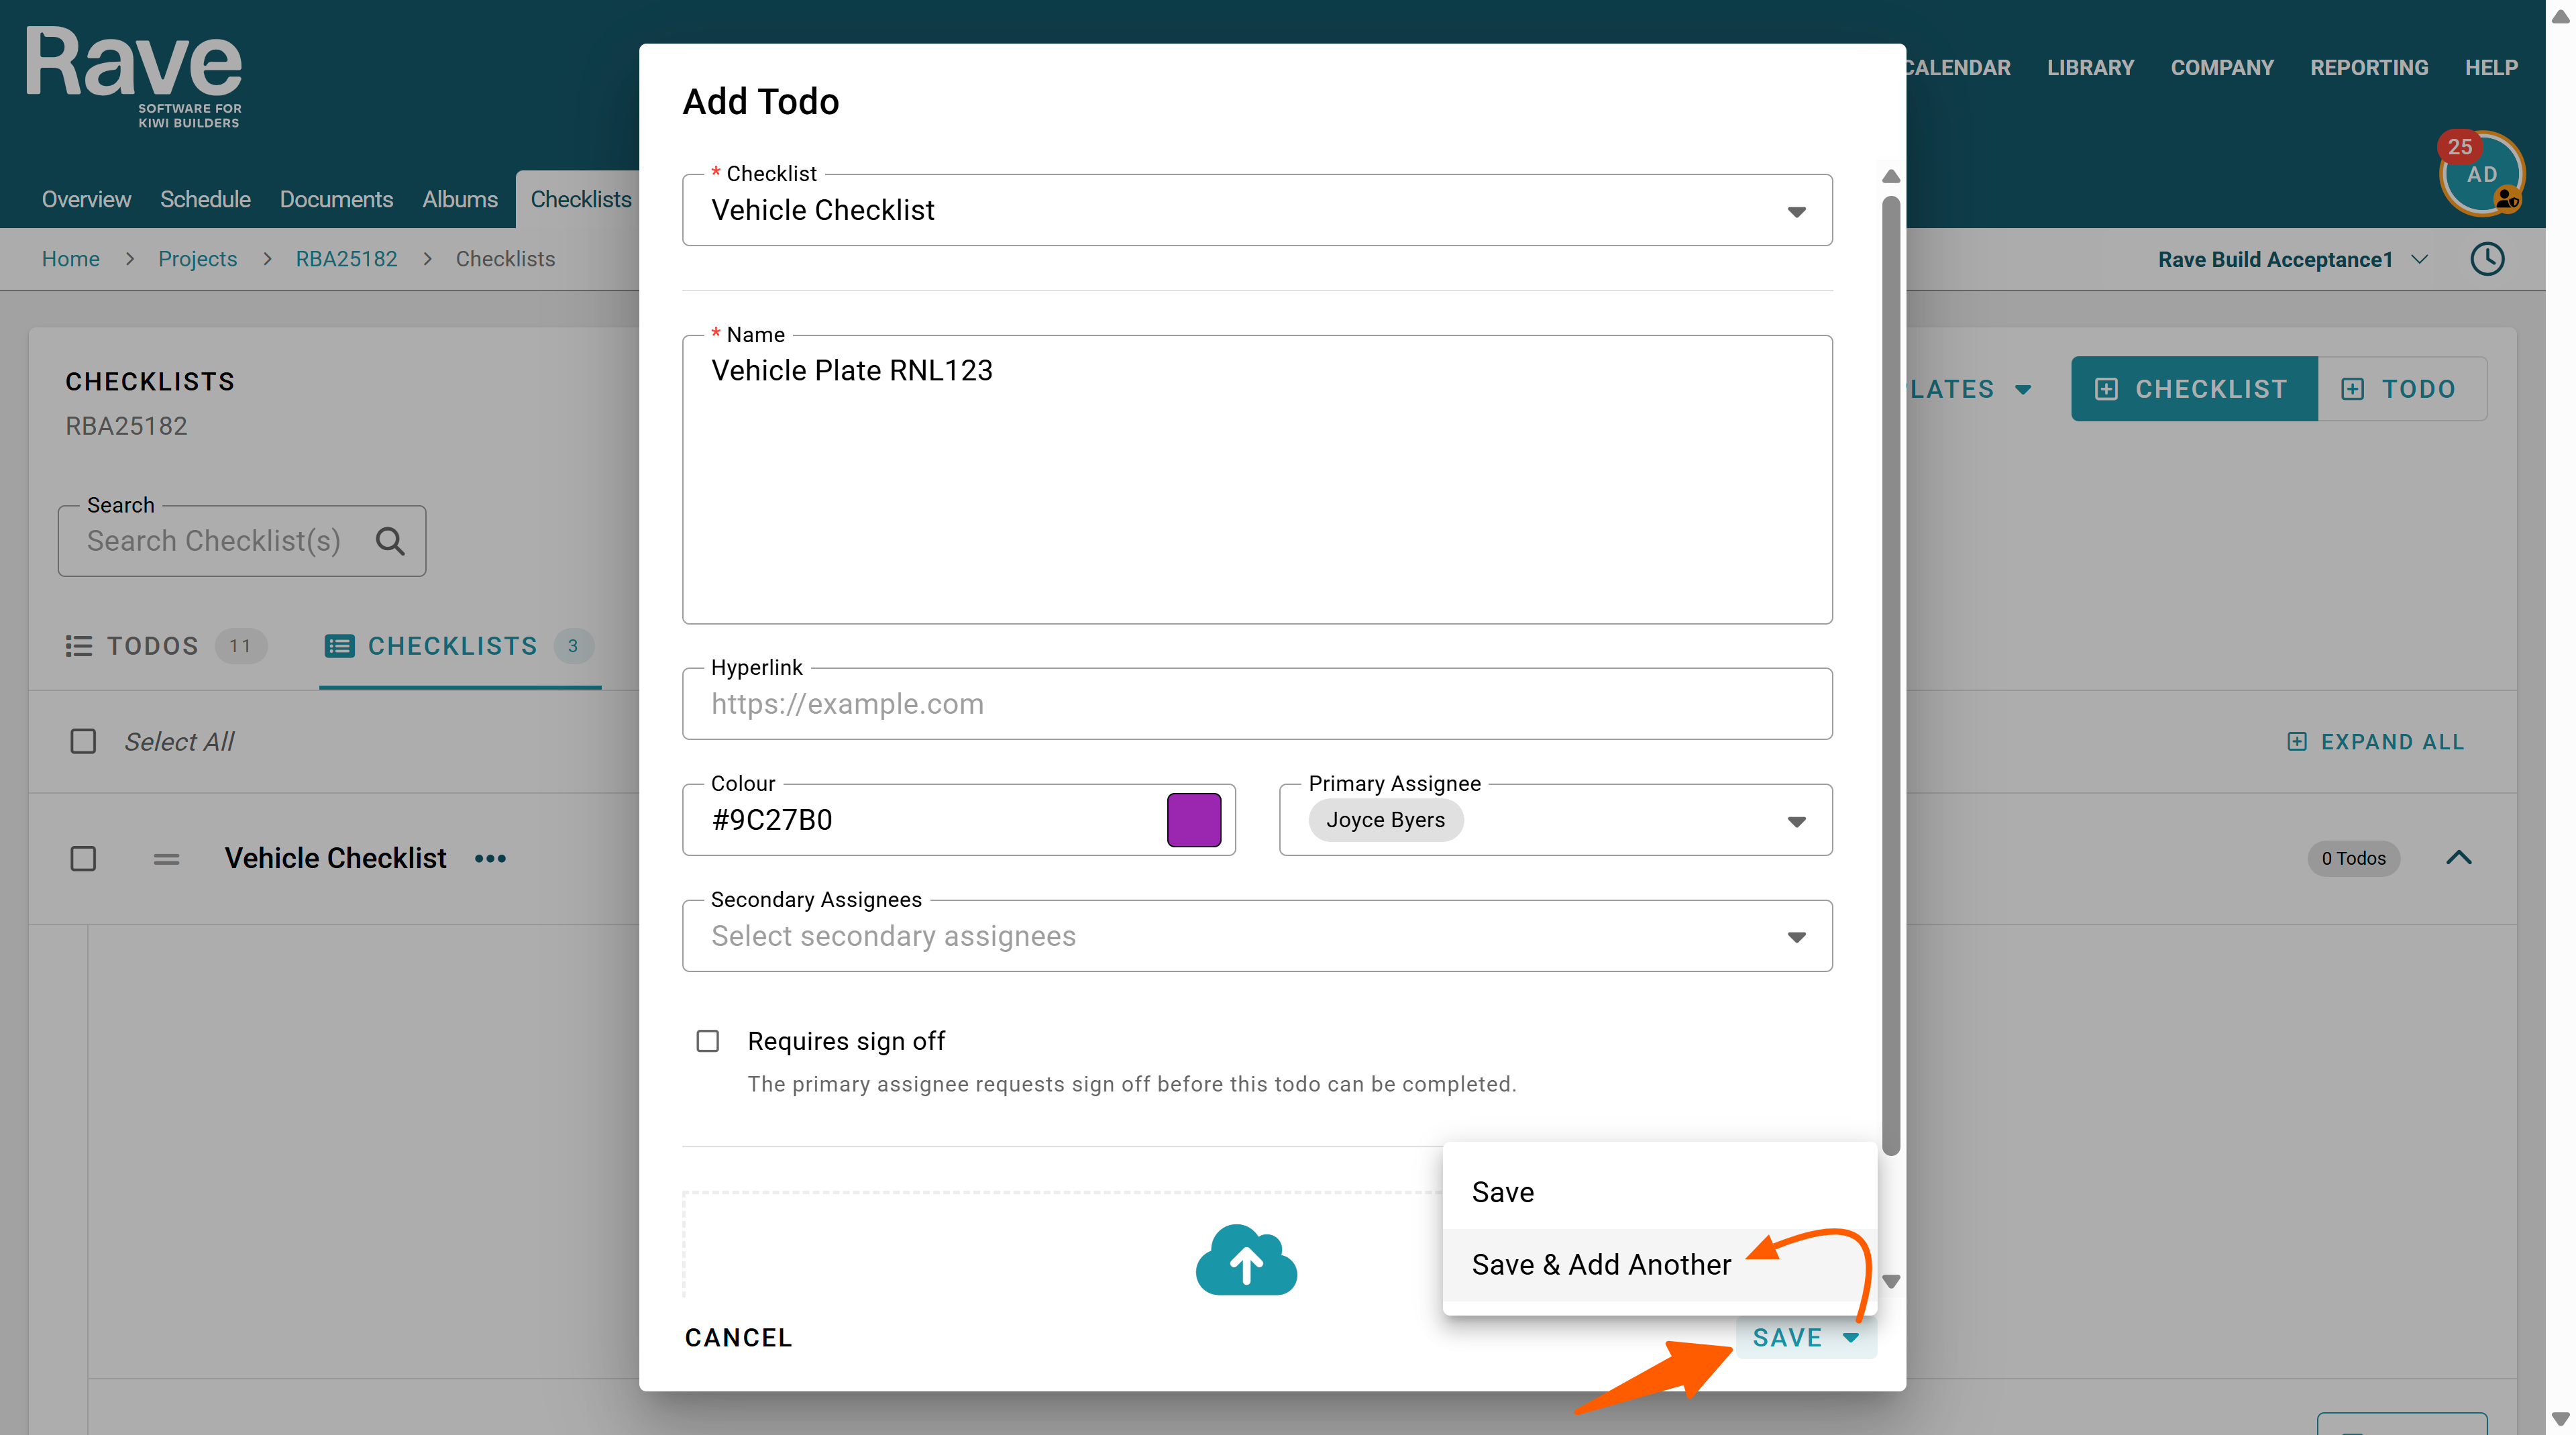
Once the Checklist is created, the modal will pop up; you can begin adding individual Todos.
- Enter a name/title for the todo
- If applicable, paste in your hyperlink to external images/instructions/documents
- Select the colour for the todo
- Assign a primary person to this todo
- Assign any secondary assignees
- Add any attachments
- Then click Save - to save this todo only. Or clicking on the Save dropdown arrow, you have the option of Save & Add Another (todo)
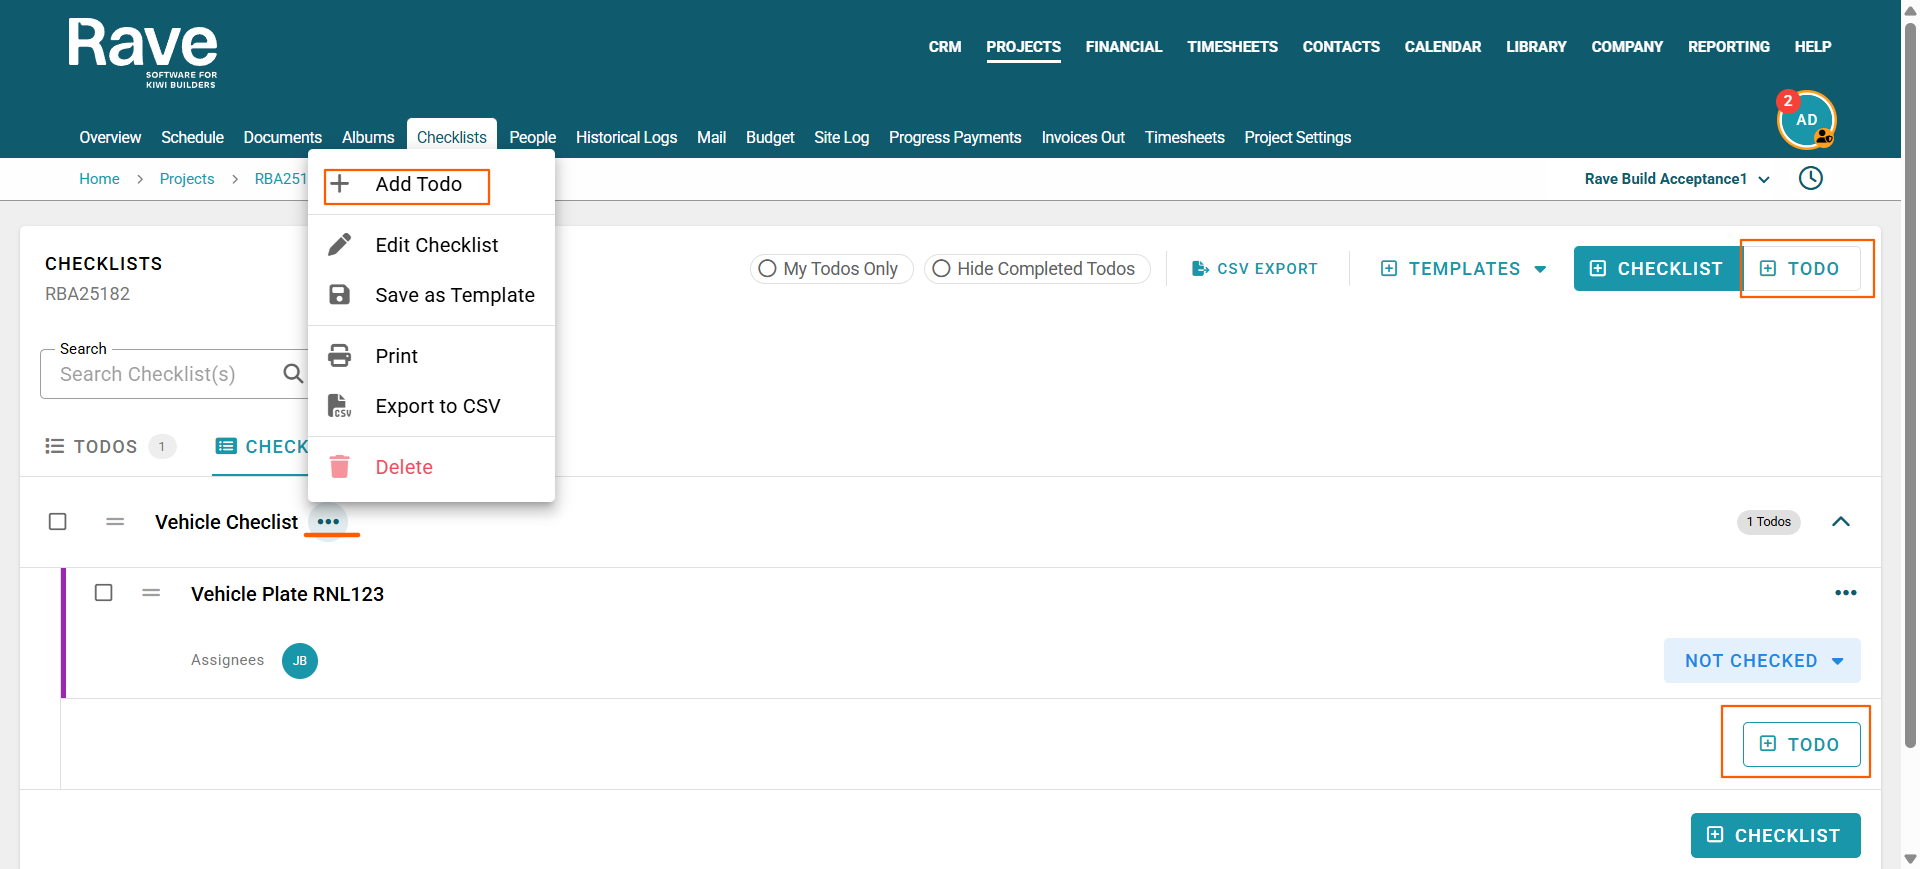
You can then keep adding todos via the save modal, or by clicking the three-dot ellipsis beside the checklist name, or by selecting the +Todo to the bottom right of the checklist, or the +Todo button to the top-right corner of the checklist cscreen. If you choose the top right button, you'll need to choose which checklist to assign this to-do to if you have more than one checklist available.
Repeat these steps as needed to create individual checklists or add more todos to an existing checklist.
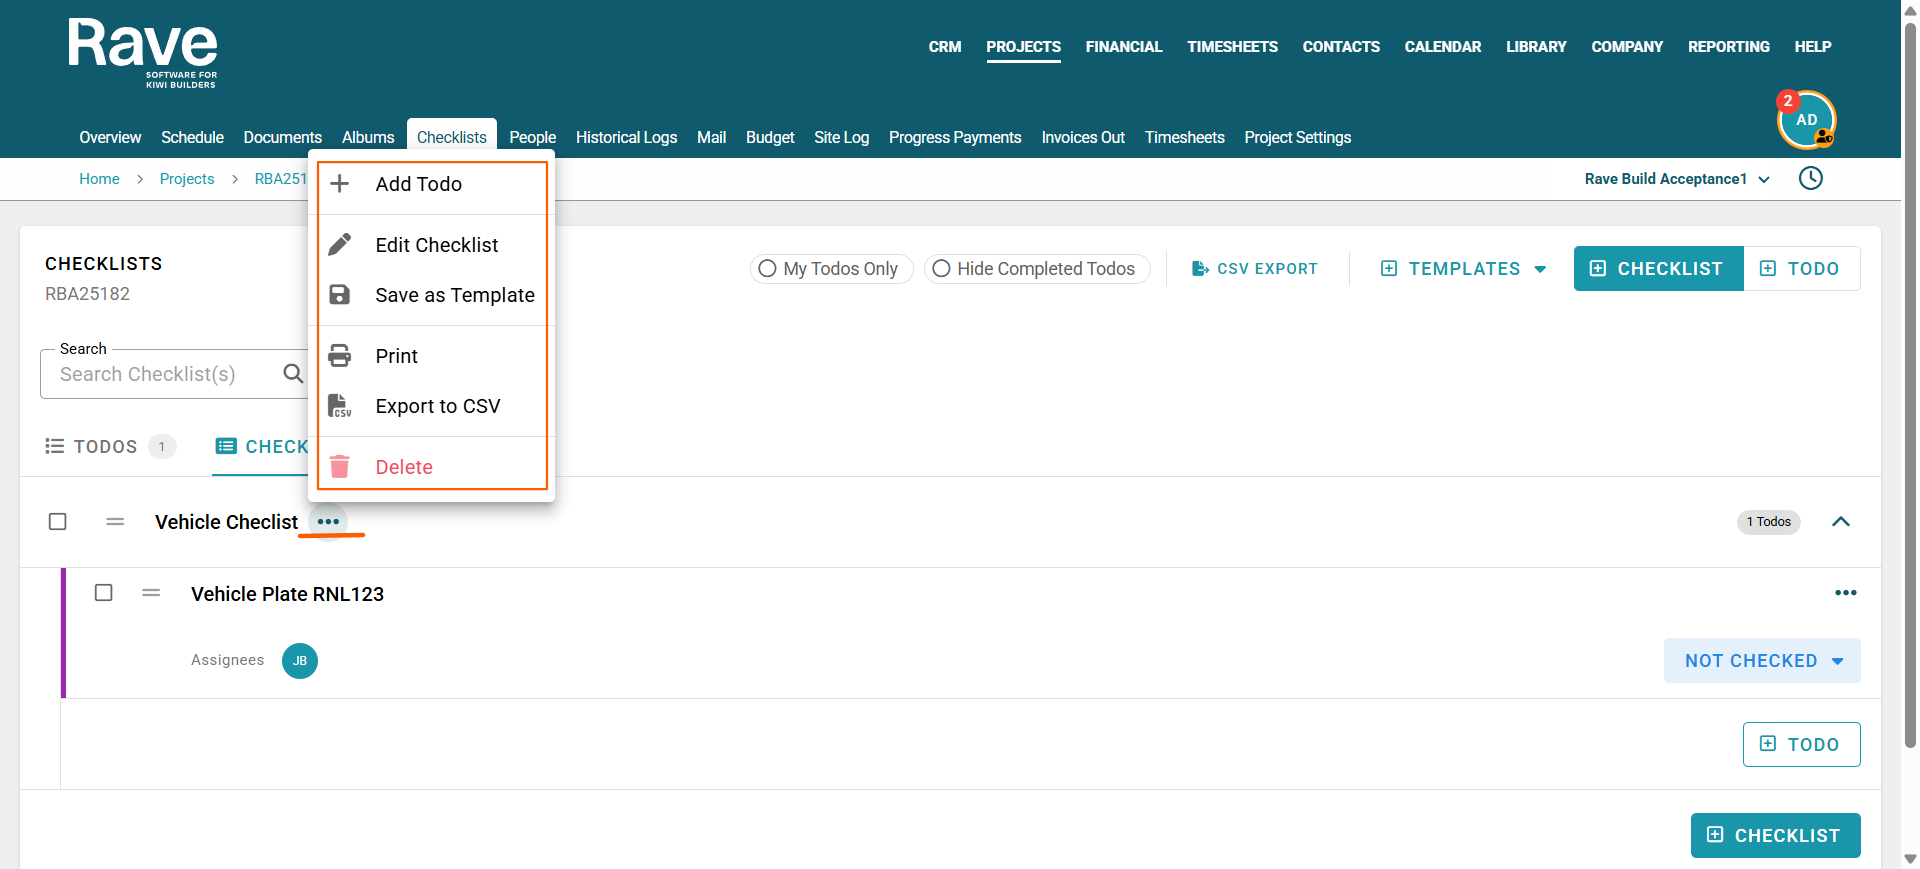
Once a Checklist has been added with Todos you have the option under the checklist to click the 3 dot elipisis and:
+ Add Todo - add a new todo to this checklist
Edit checklist - edit the name of the checklist
Save as Template - save this checklist as a new template or add to an existing template
Print - print your checklist
Export to CSV - export your checklist to CSV
Delete - with permission, delete the entire checklist and todos.
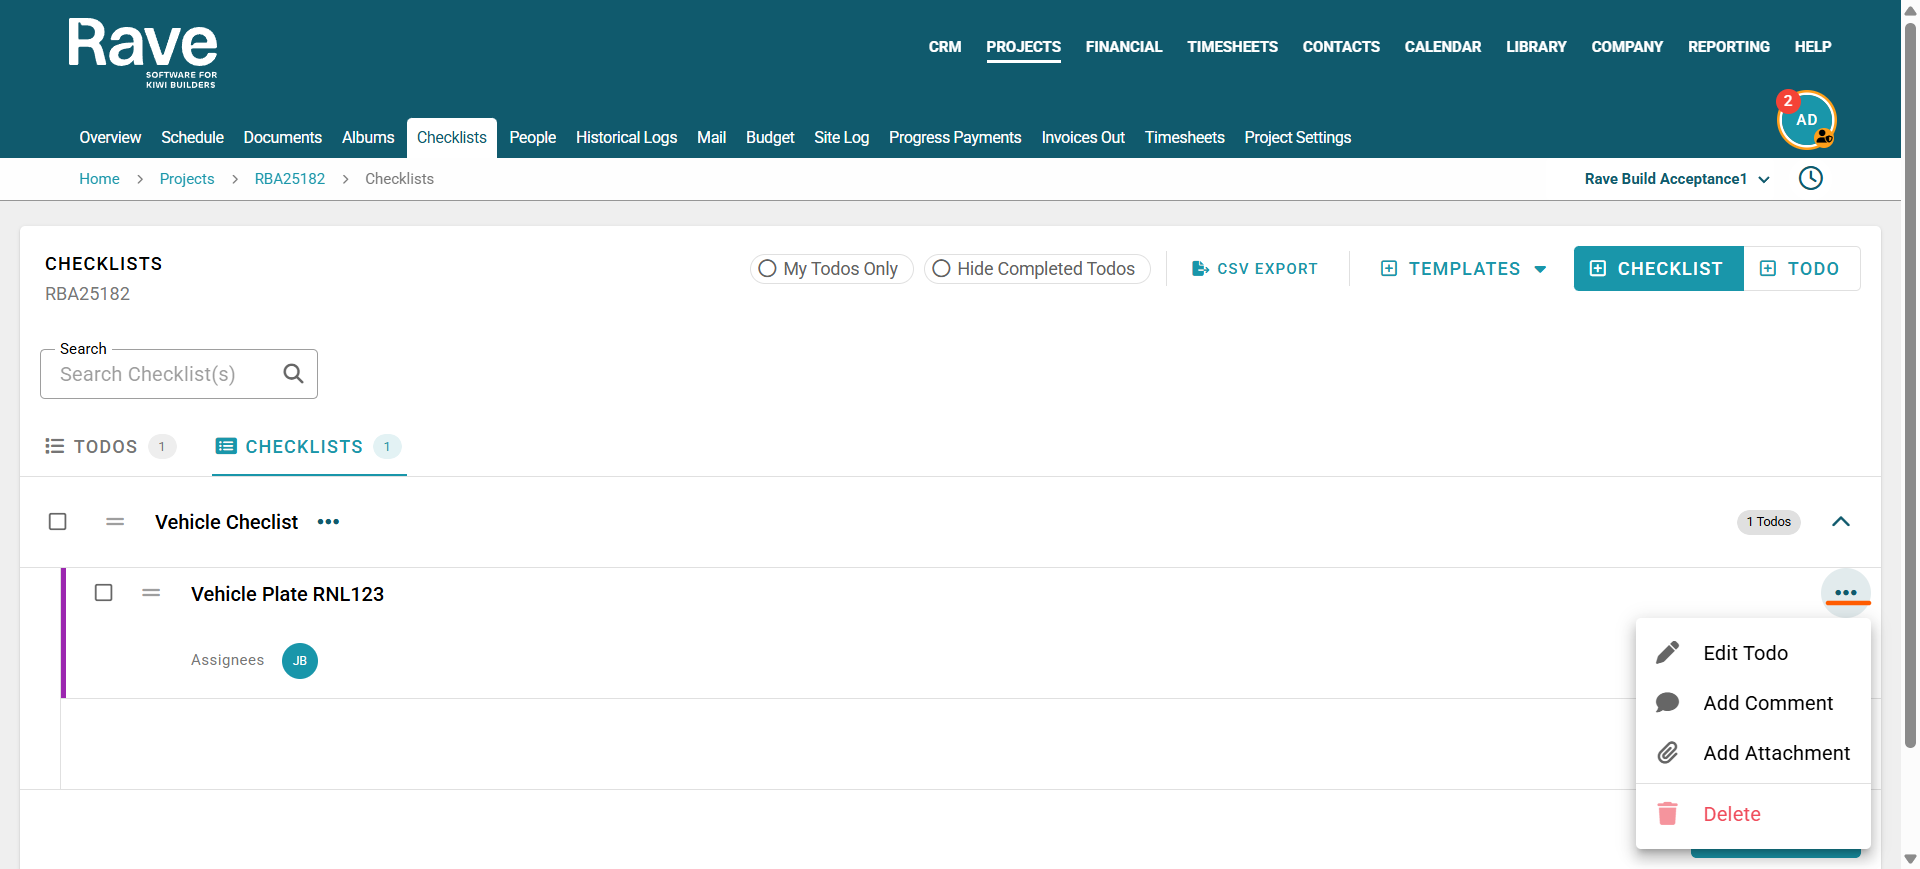
Once a Todo has been added, you have the option under the todo to click the 3-dot ellipsis and:
Edit ToDo - with permission, edit the todo information
Add Comment - with permission, or if you are the primary or secondary assignee, add a comment to the todo, including images/attachments
Add Attachments - with permission, or if you are the primary assignee, add images/attachments to the todo, including comments.
Delete - With permission, delete the todo
Marking a Todo as Completed/Done etc...
To the right of your todo line, will is the status drop-down. This is where you can change the todo's status. As you mark off items as completed/done, a green progress to complete bar will appear with the number of todo's completed vs the total number of todo's. Once all of the todo's have been completed, the progress to complete bar will be replaced by a green completed icon.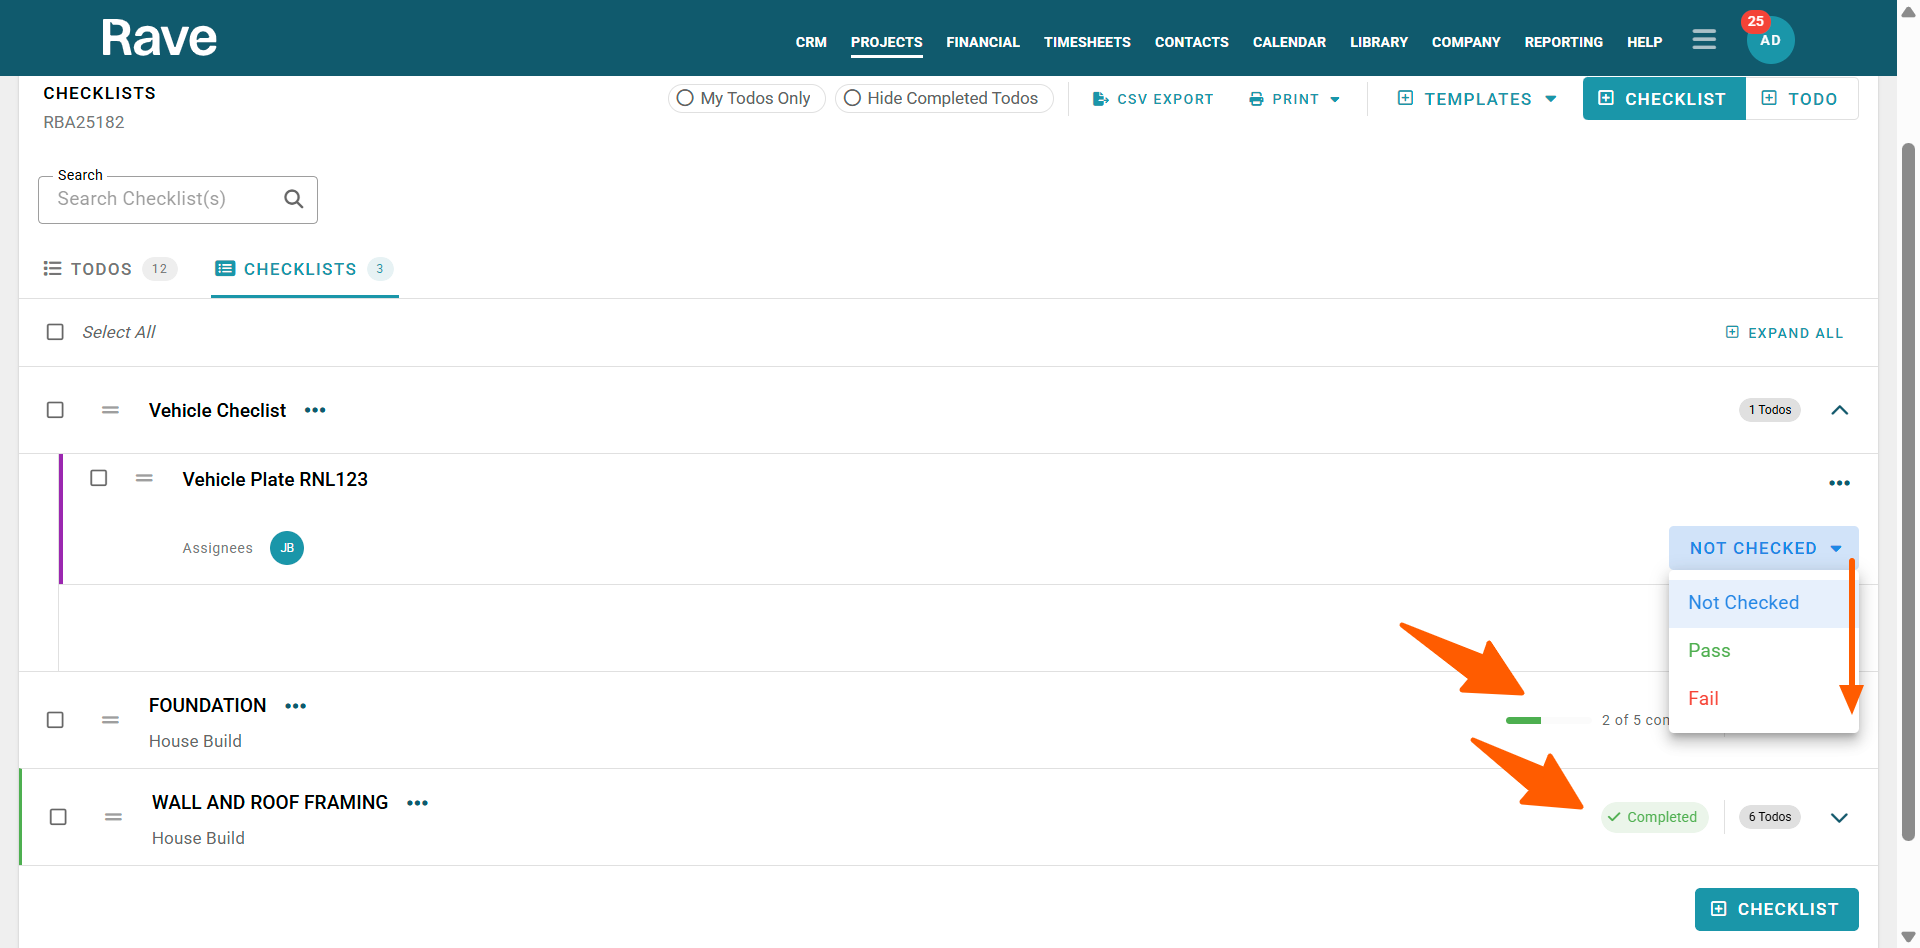
Comments and Attachments
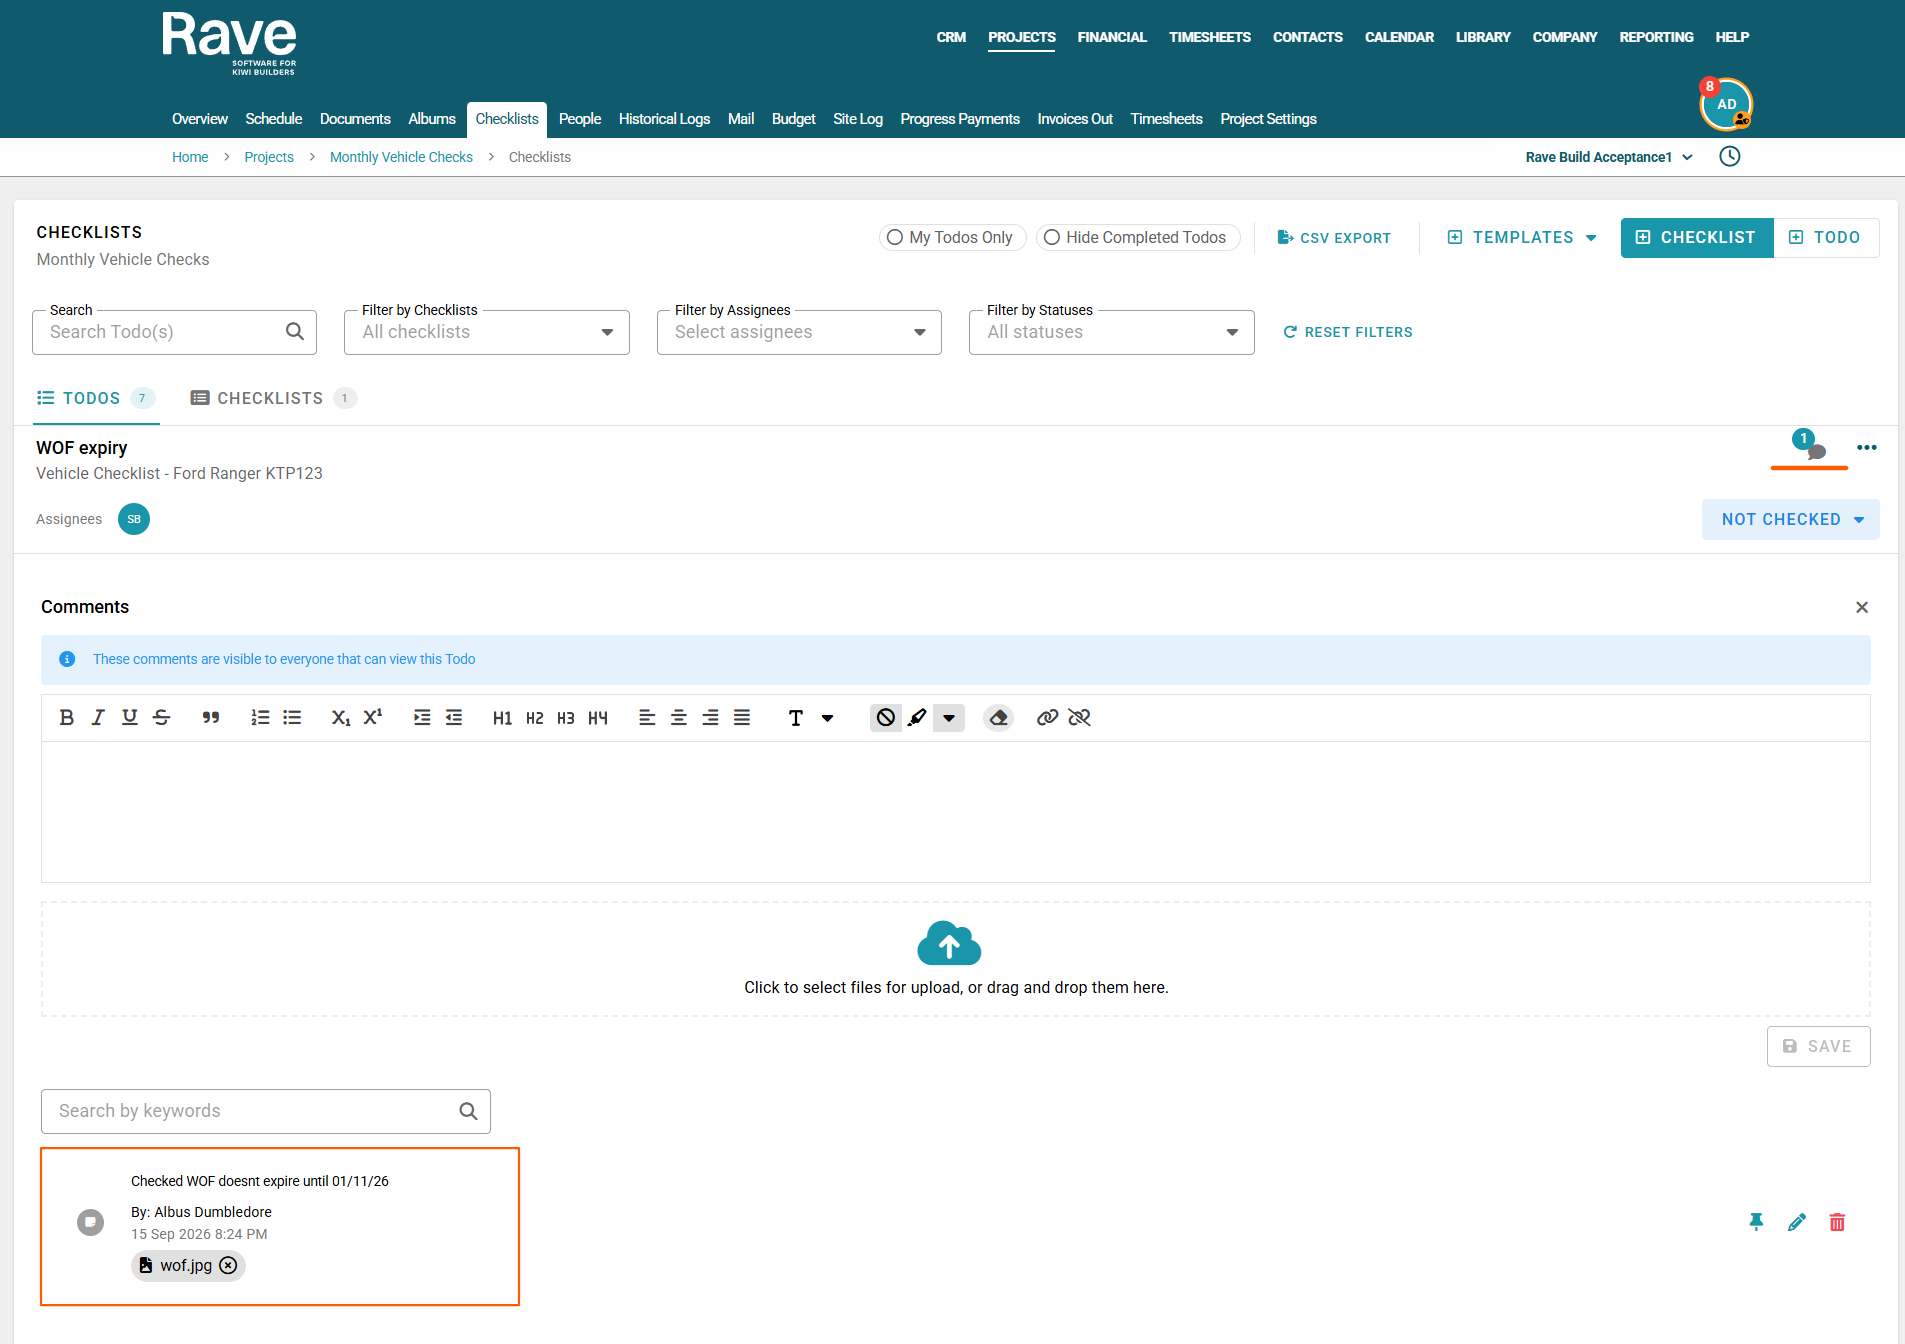
Once you have added comments and/or attachments to your todos, you can click on the speech bubble beside the three-dot ellipsis to view past comments.
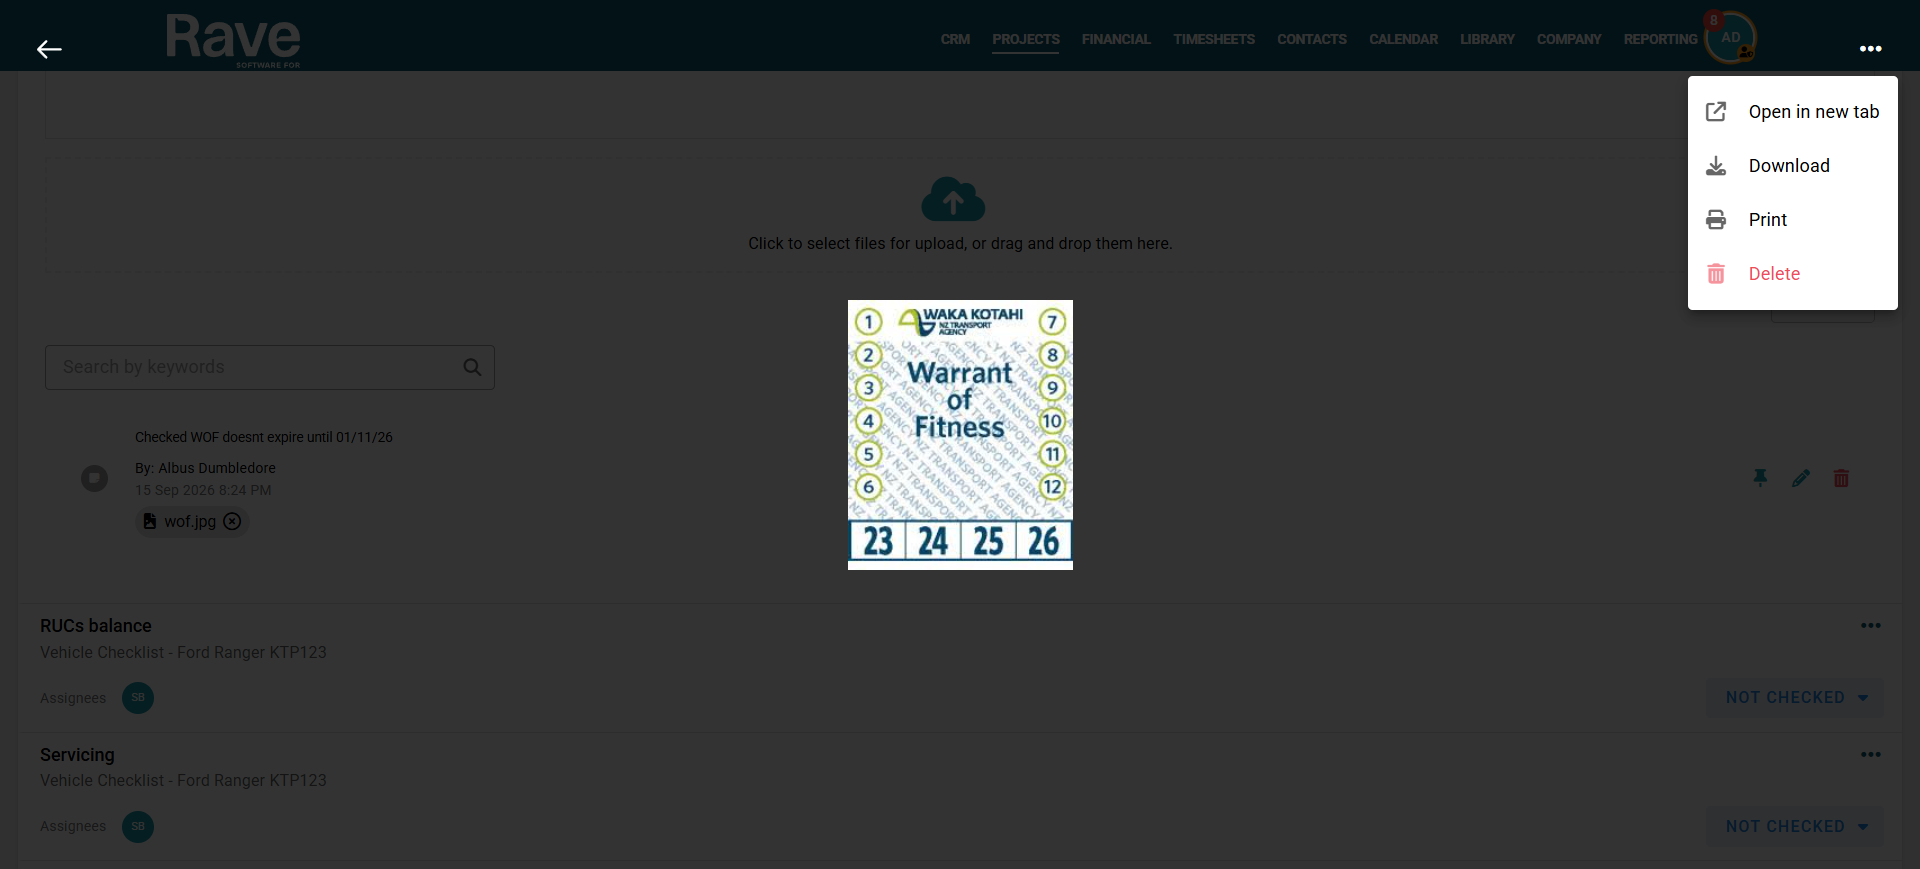
Clicking an attachment lets you preview it. You can then open it in a new tab, download it to your device, print it, or, with permission, delete it.
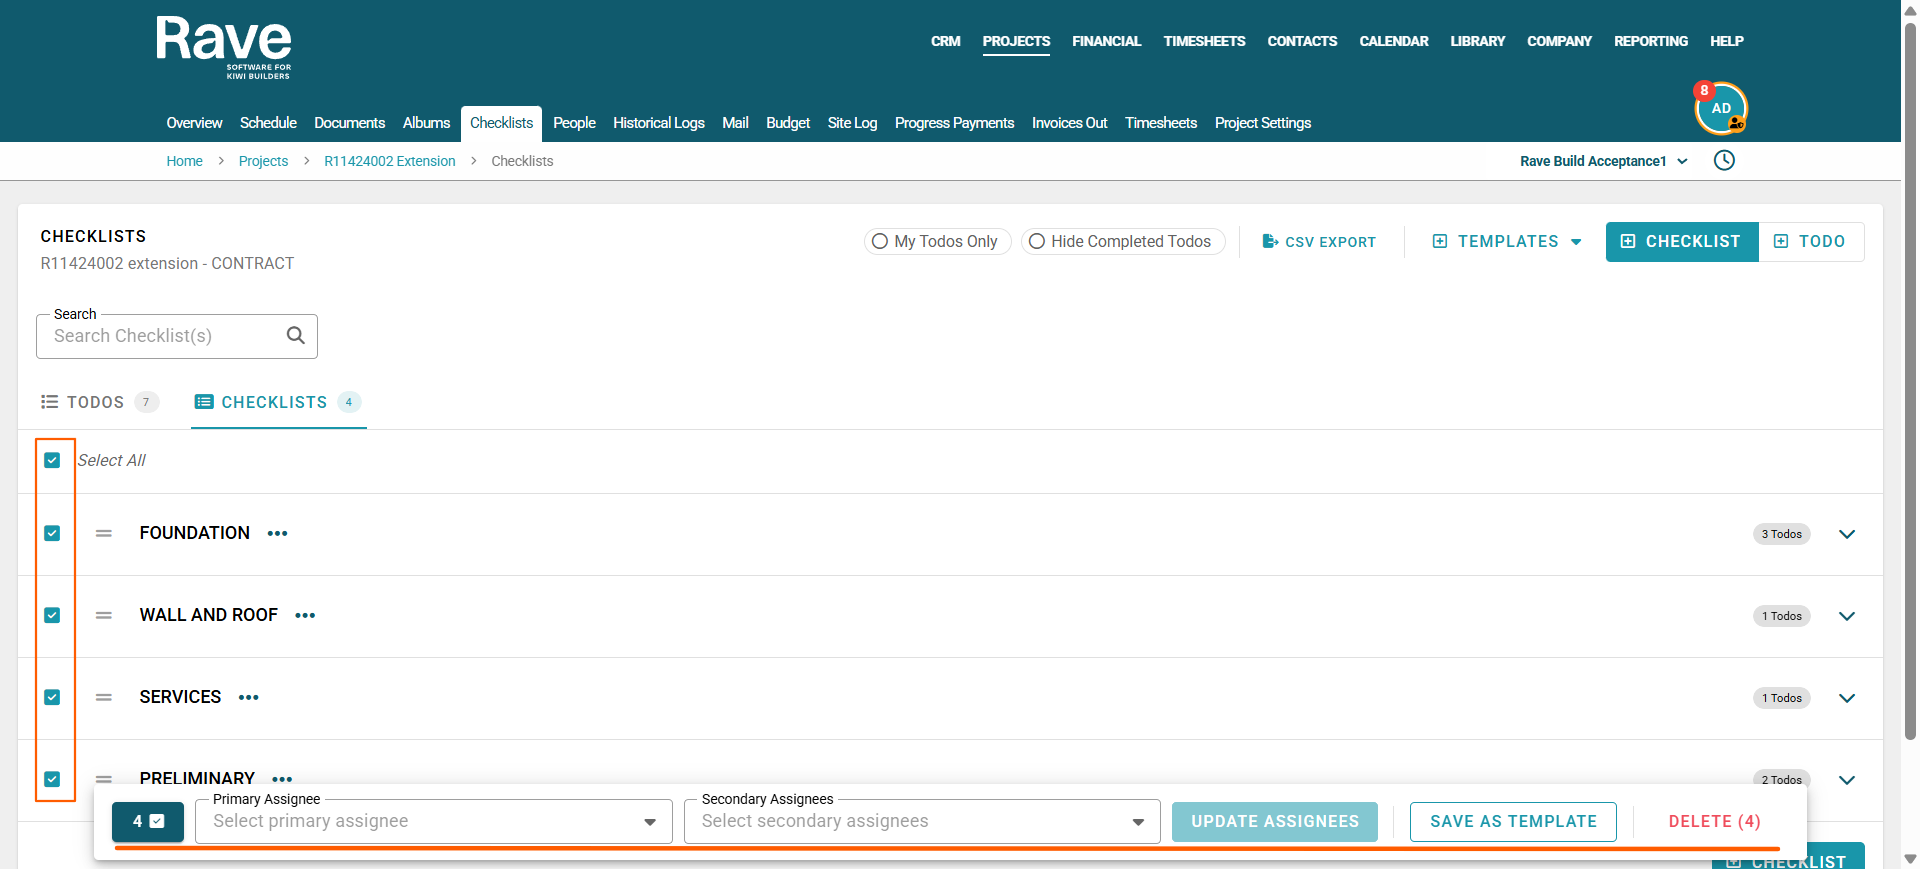
Bulk Action Bar
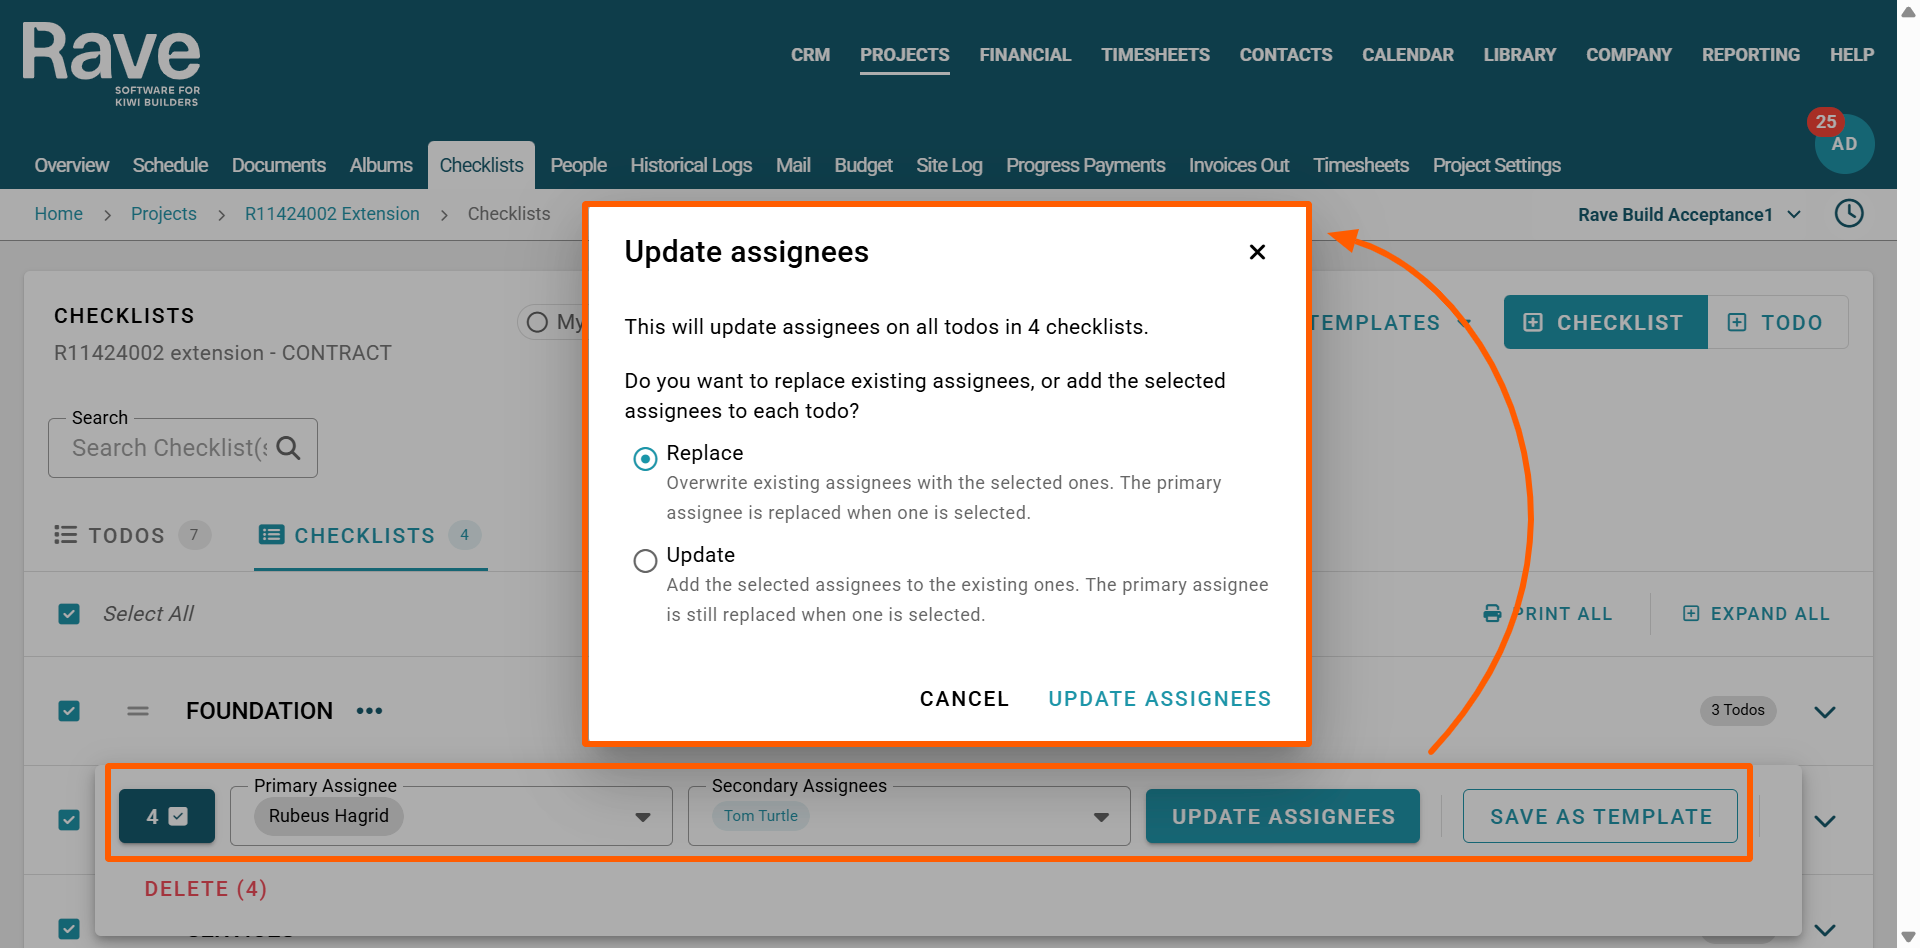
The bulk action bar allows you to multi-select checklists to update primary and secondary assignees on all todos within those checklists, save as a template, as well as bulk delete.
Note: When bulk updating a primary and/or secondary checklist assignees via the bulk action bar, you have the ability to replace (overwrite existing assignees ) or update (add these new assignees) in both project checklists and checklist templates.
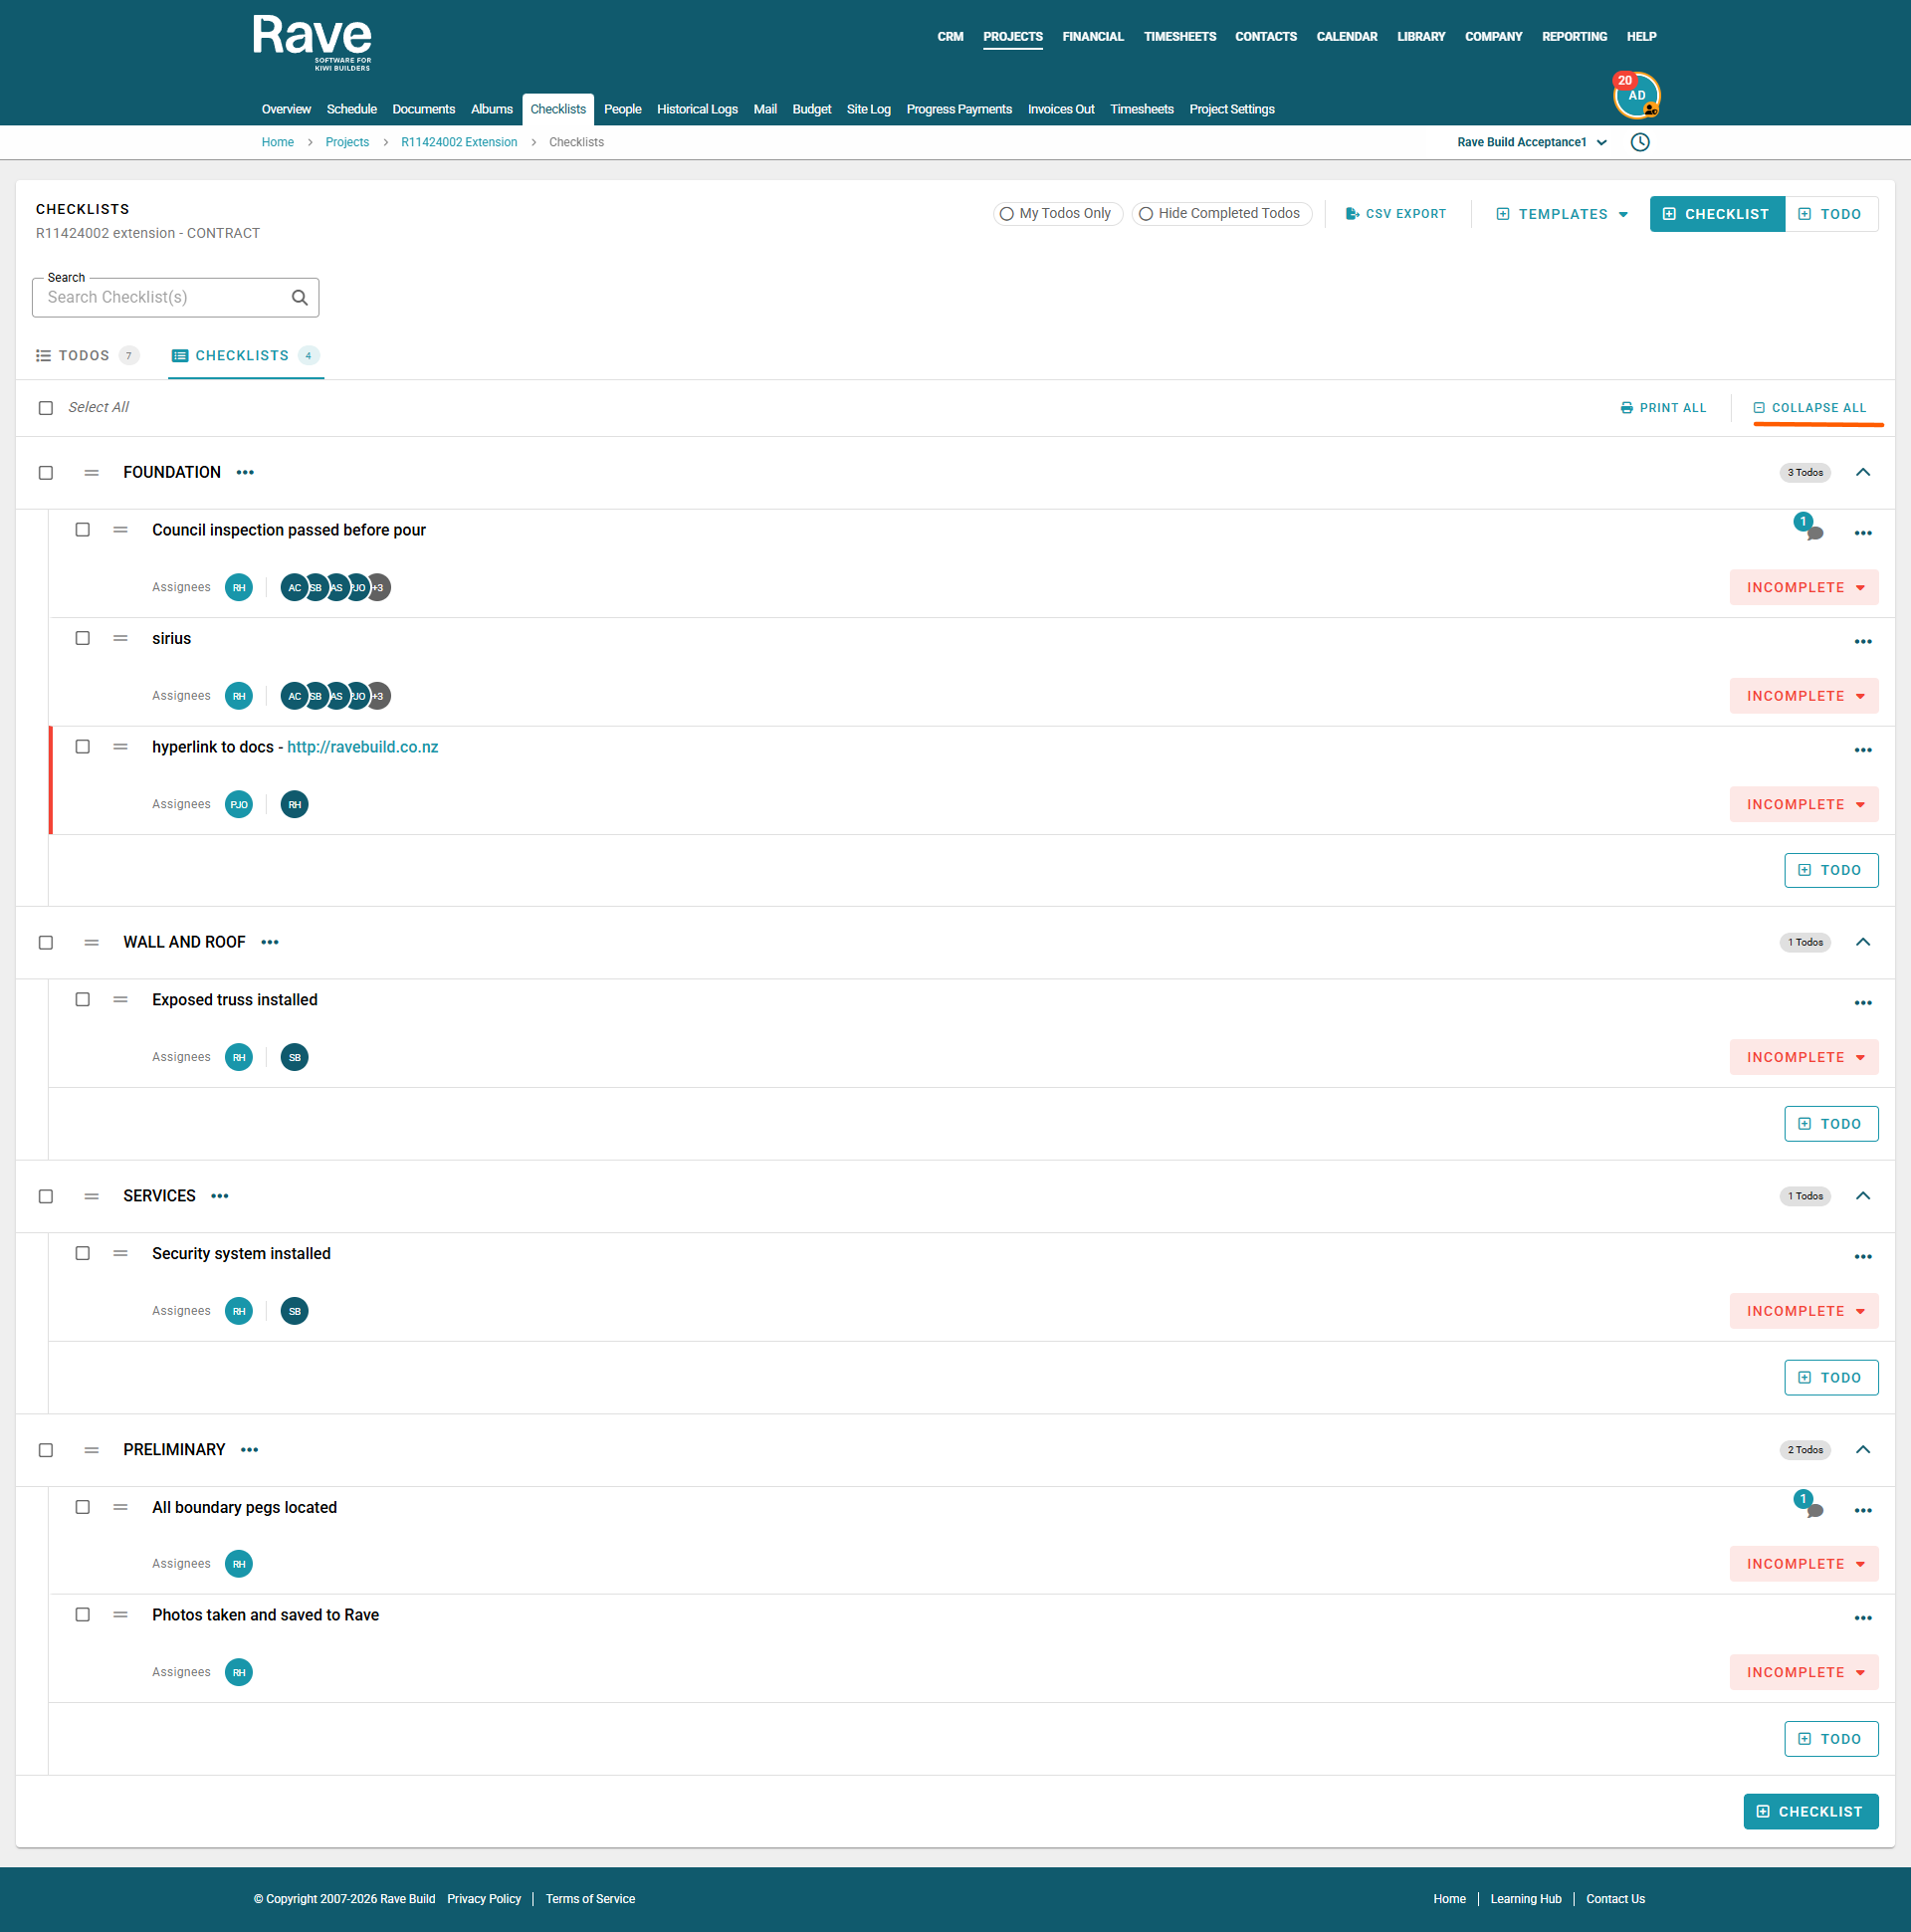
Expand/Collapse All
Click the expand all/collapse all button to expand or collapse all your checklists to view the todos as one large list.
Print Entire Checklist
To print all checklists in the project, as one document, from todo's page click the Print button drop-down, and select either the Print all checklists, or Print filtered results option. Print all will print all todo's in all checklists, while the print filtered option, only available from the Todos view, will only print the filtered todo's and checklists.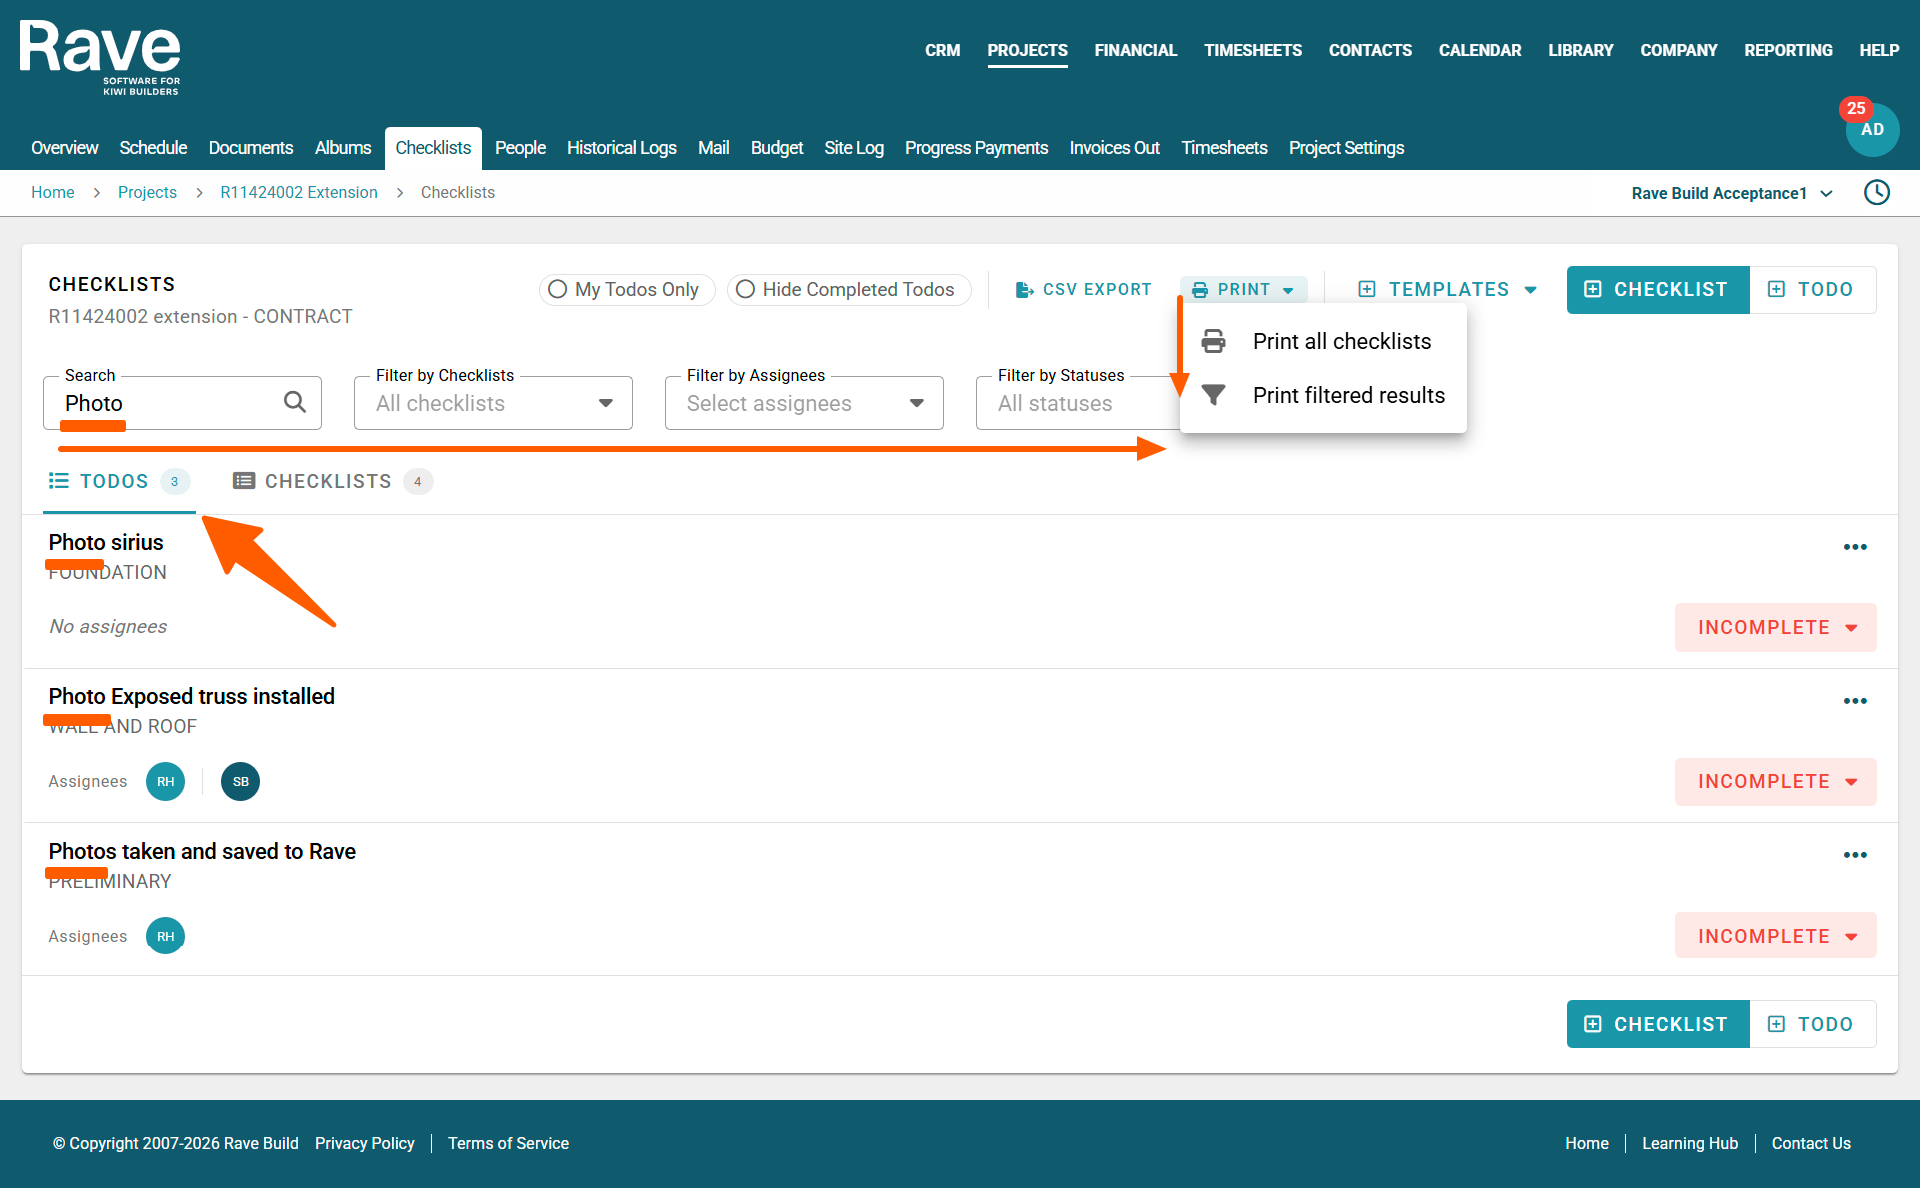
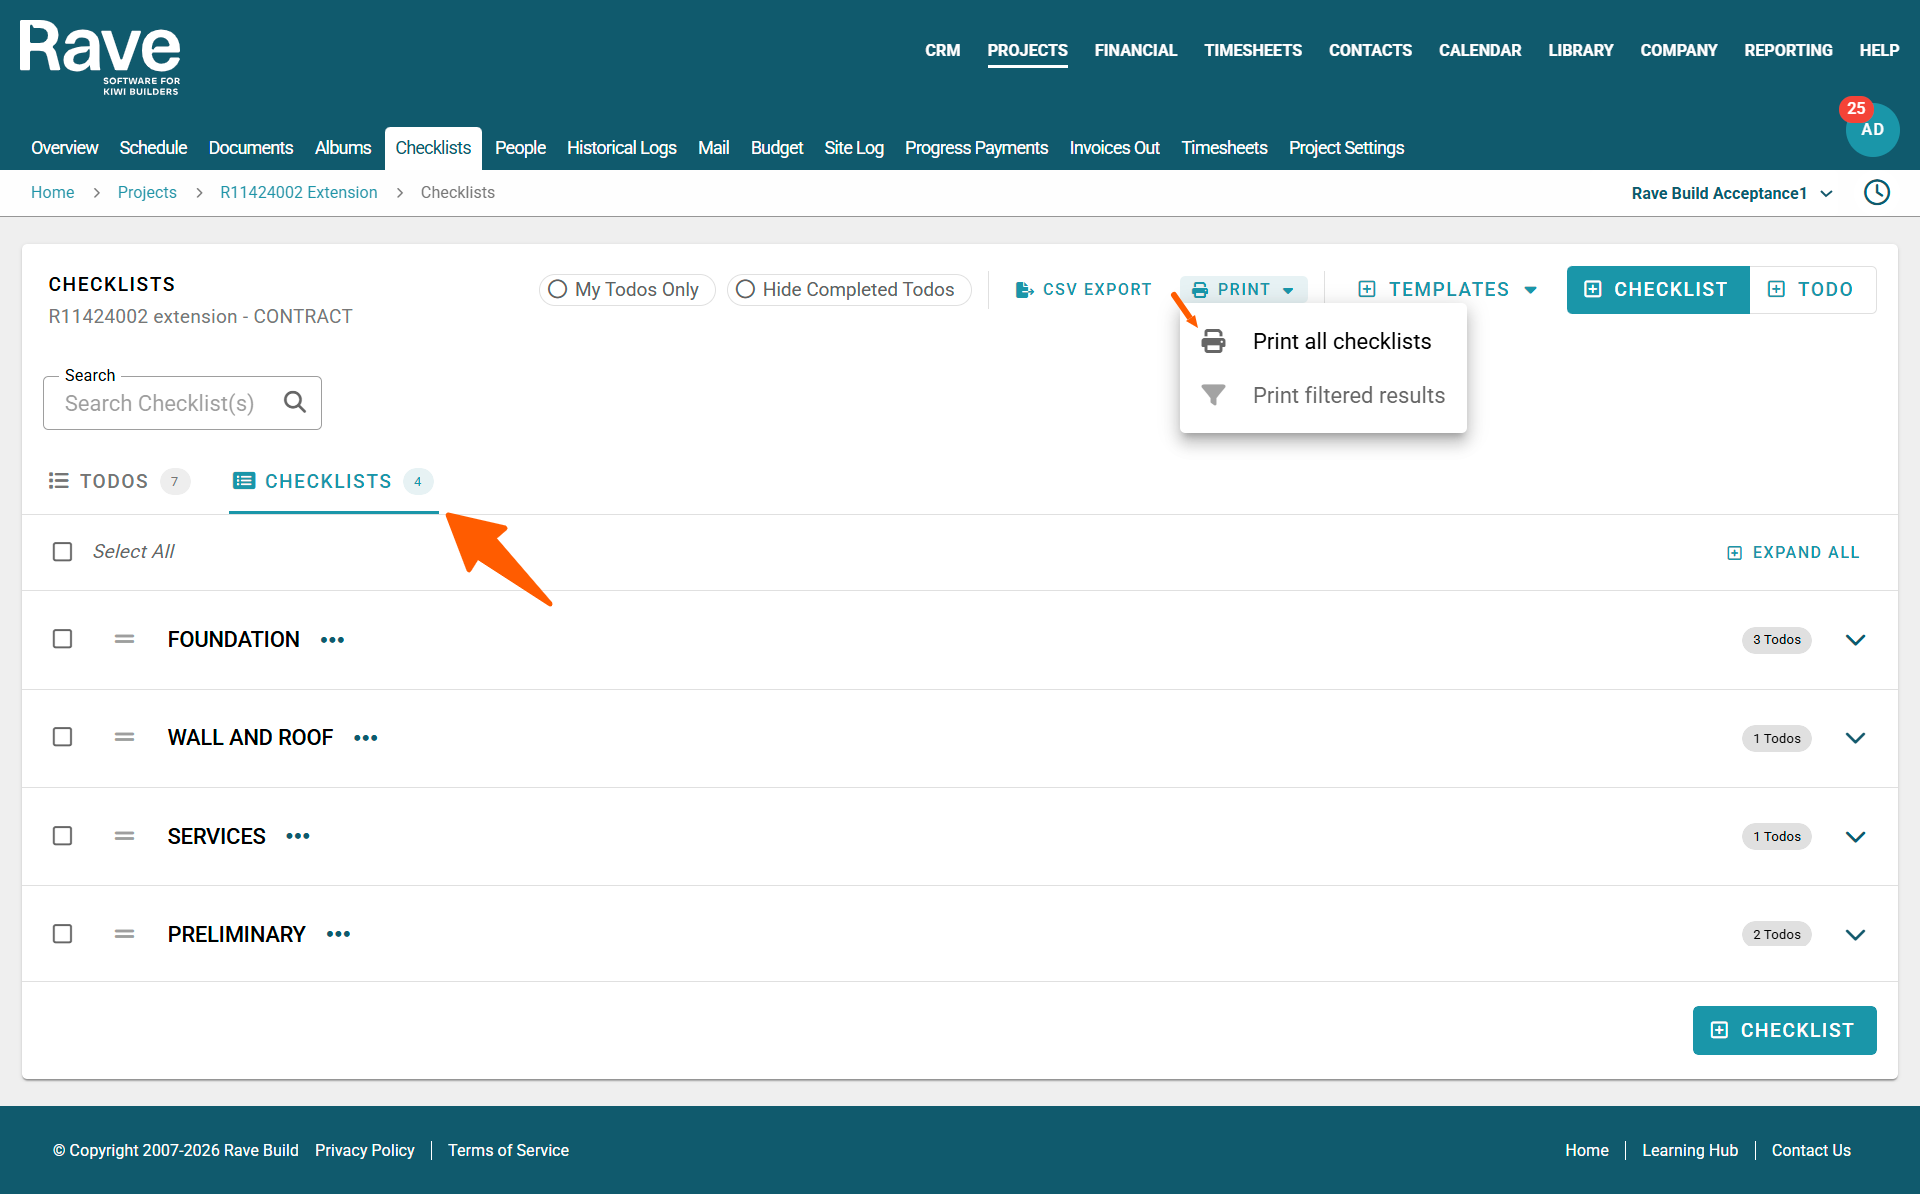
Print a single Checklist
Click the three dots beside the Checklist title.
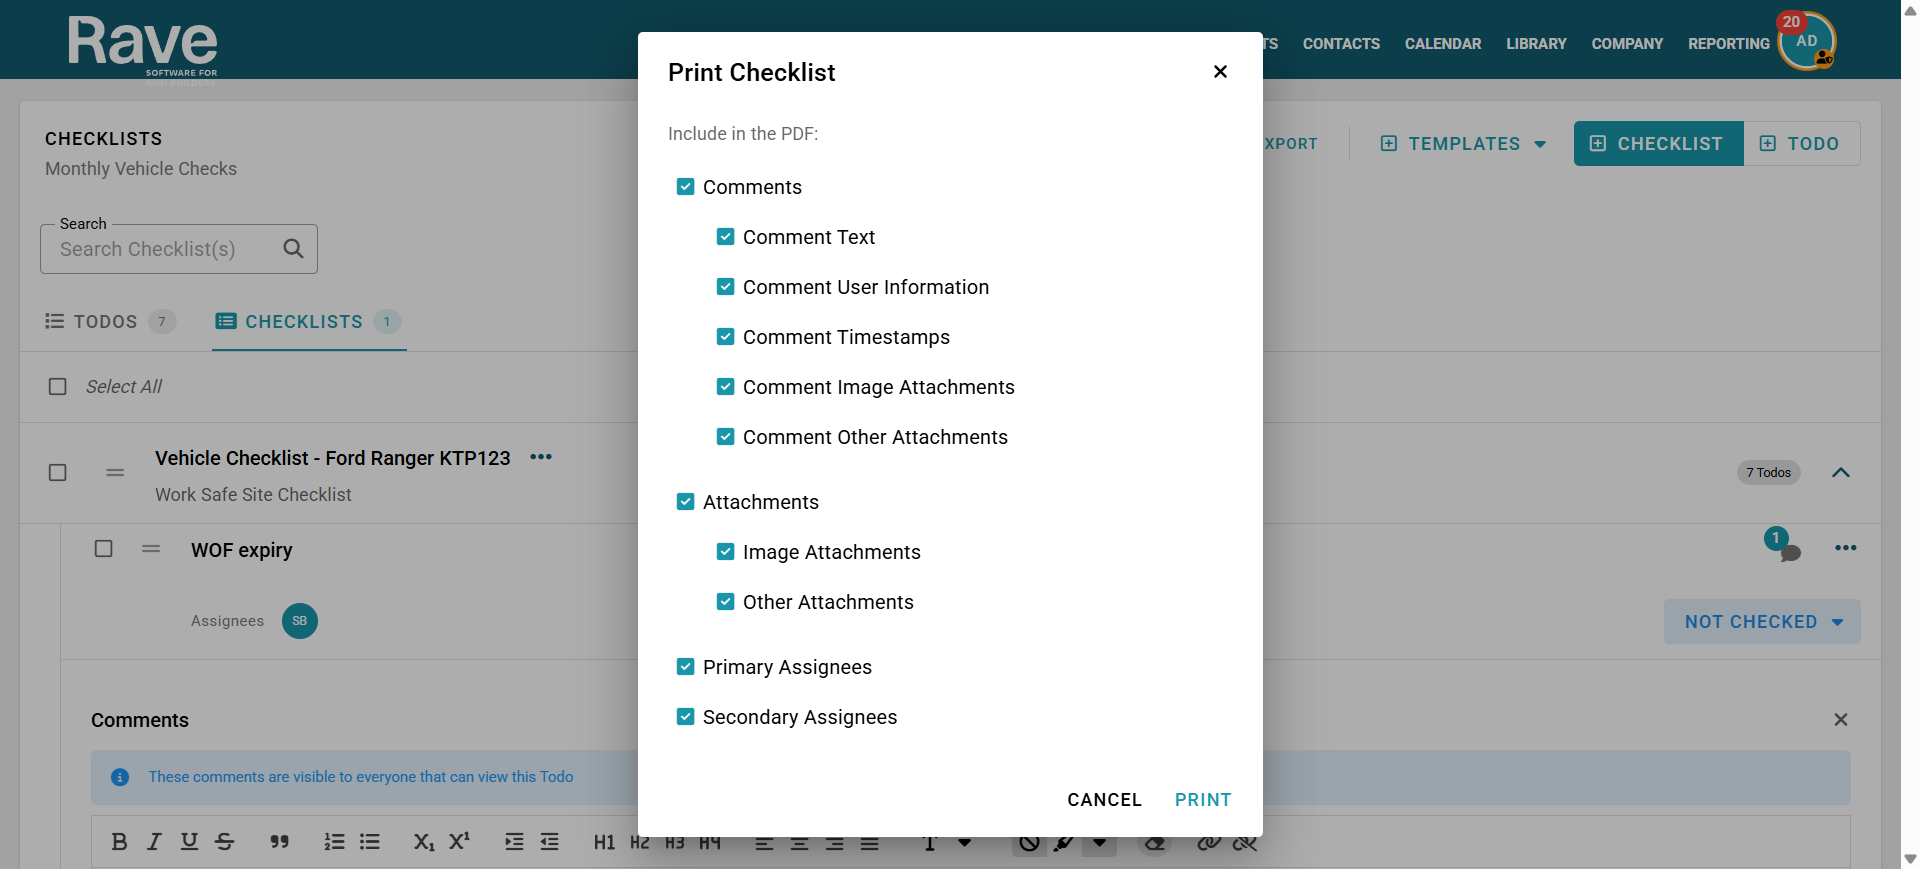
Select your print options.
Click Print.
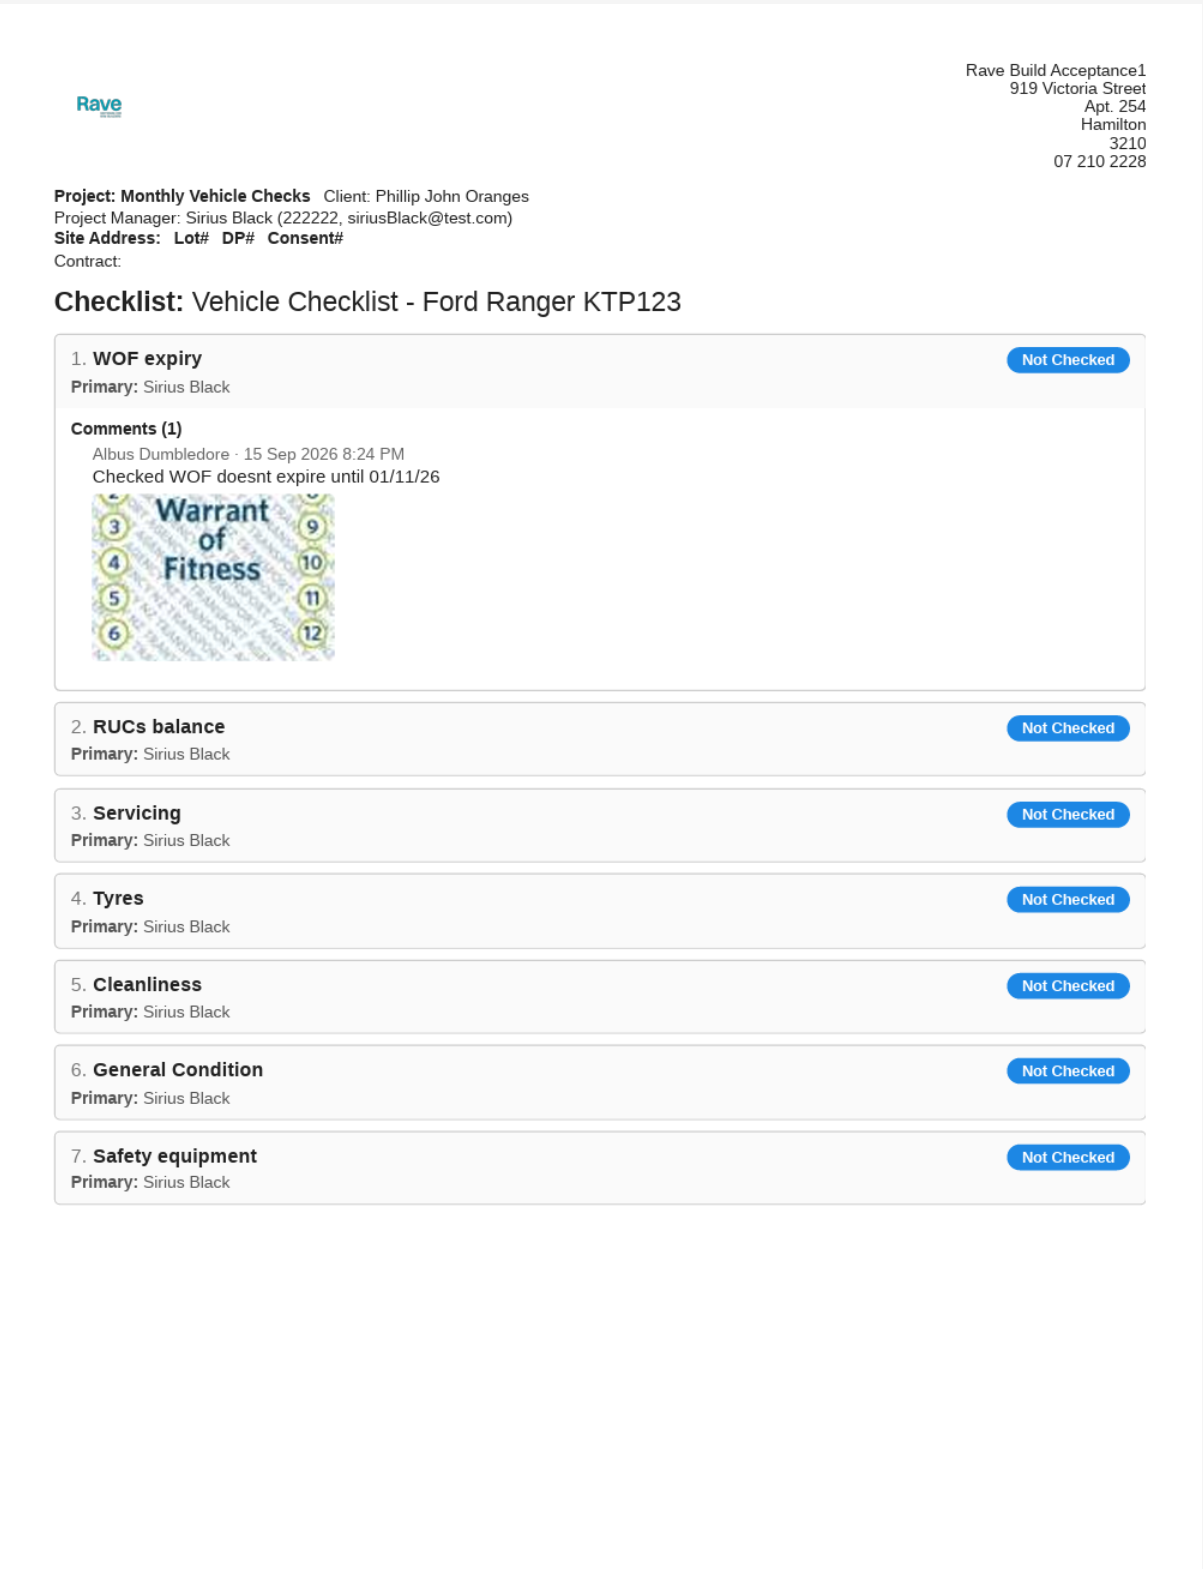
This will convert the Checklist to a PDF for you to then print or download and save.
NOTE: Colour-coded Todos will print in colour by default. If required, change your printer settings to greyscale or black and white before printing.
Was this article helpful?
That’s Great!
Thank you for your feedback
Sorry! We couldn't be helpful
Thank you for your feedback
Feedback sent
We appreciate your effort and will try to fix the article