The following is a full training video for Rave Checklists - for step-by-step written instructions, please refer to the help article links and guide added below.
To Access the article on Adding/Editing Checklists and Todo's, click here.
To Access the article on Checklist Permissions, click here.
To Access the article on Checklist Notifications, click here.
To Access the article on Branch Settings Checklist Status Groups, click here.
To Access the article on Saving to a template and loading from a template, click here.
To manage and edit Checklist Templates, go to Projects, then Custom Templates, then Checklists.
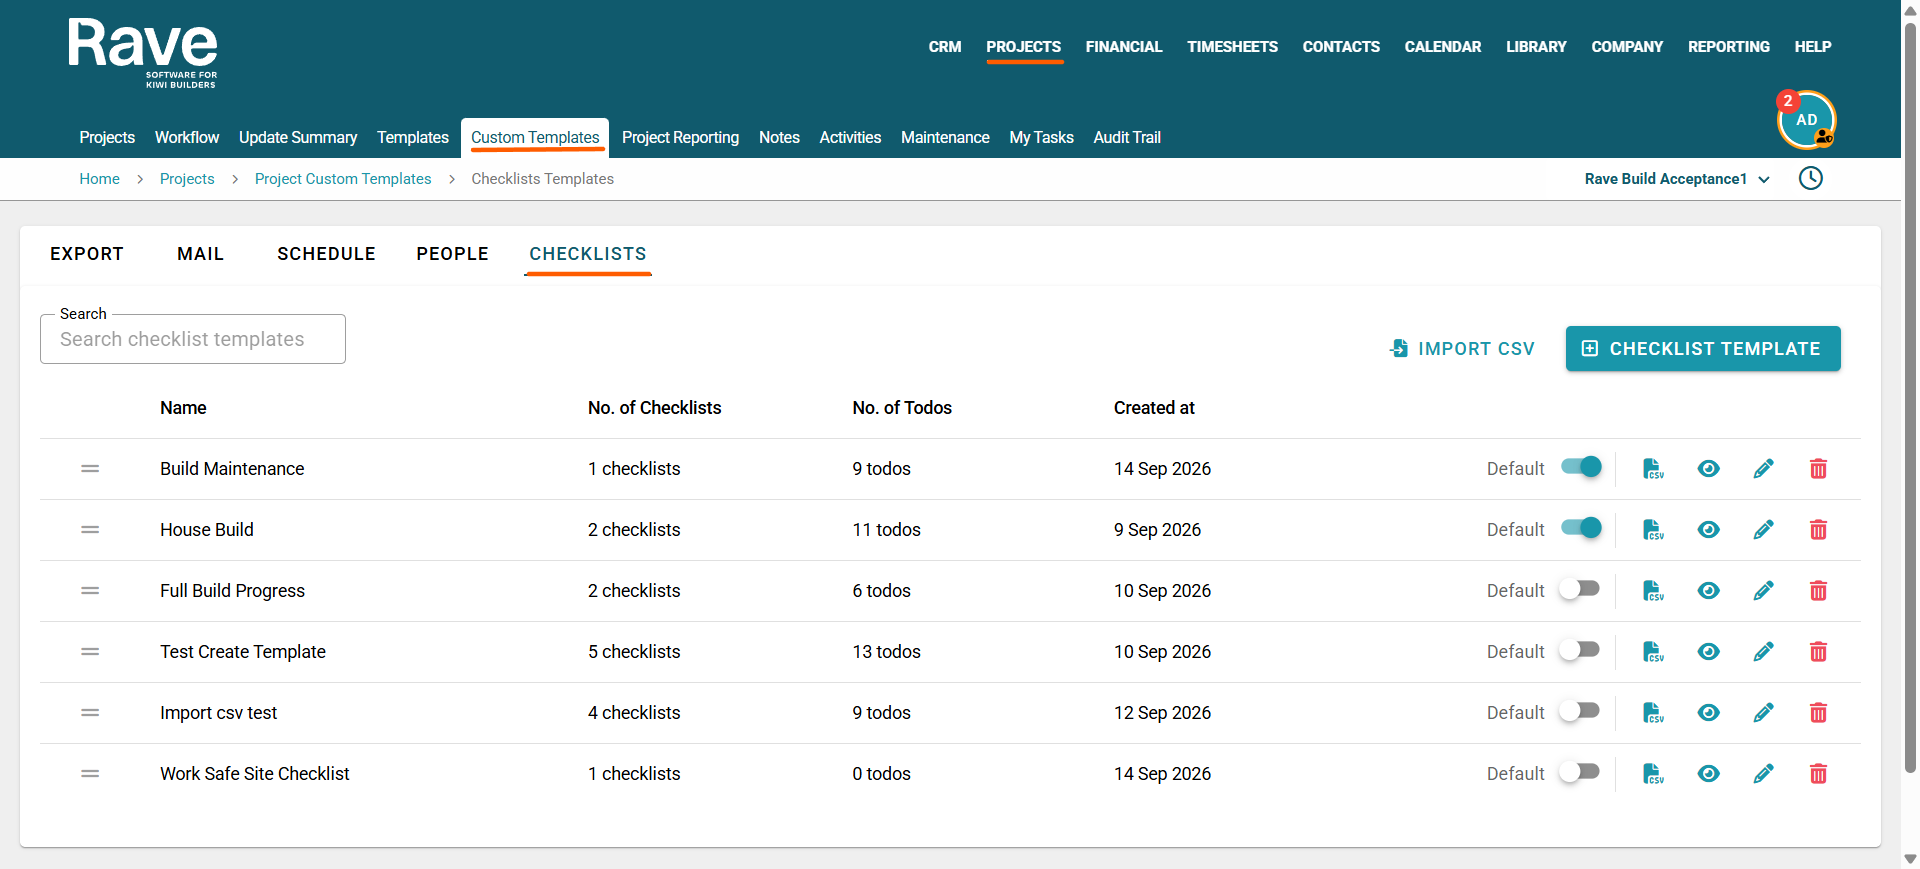
Your existing checklist templates will display the following information:
Template Name
Number of Checklists included in the template
Number of Todos
Created Date
- You will also see a Default slider. When you turn on the Default slider, that template will automatically load on all new projects when they are created. There is no limit to the number of default templates you can have set.
Depending on your permissions, you may also see the following actions:
CSV icon – Export the template to CSV
Eye icon – View the template
Pencil icon – Edit the template
Trash can icon – Delete the template
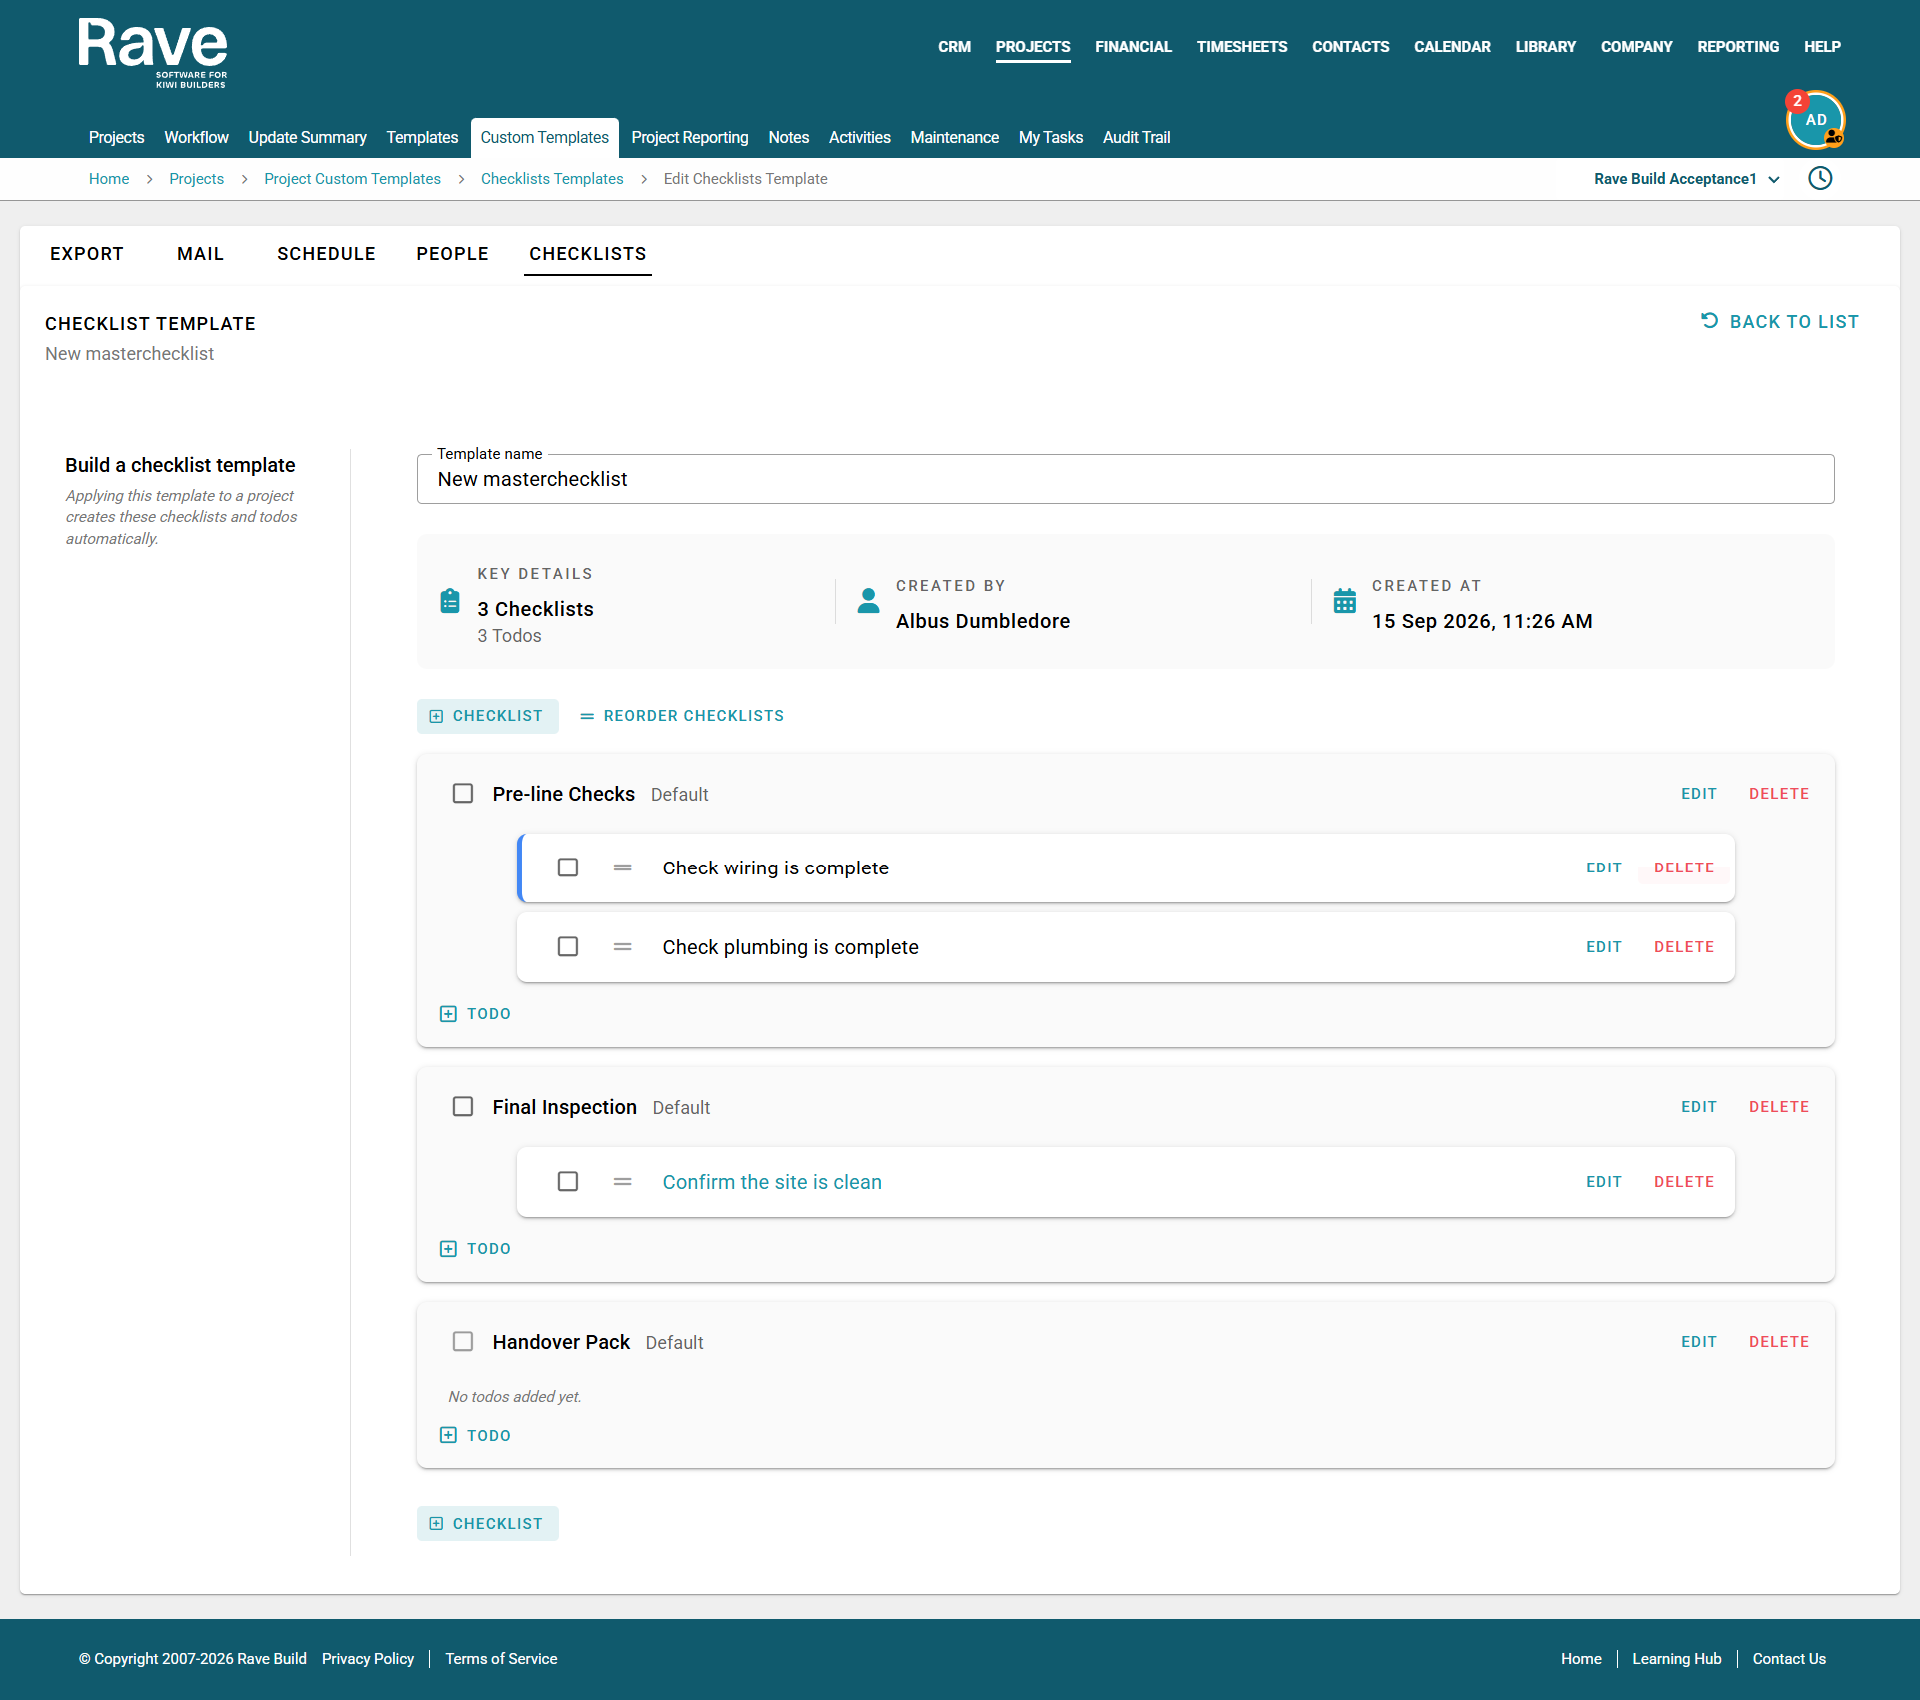
Editing a Checklist Template
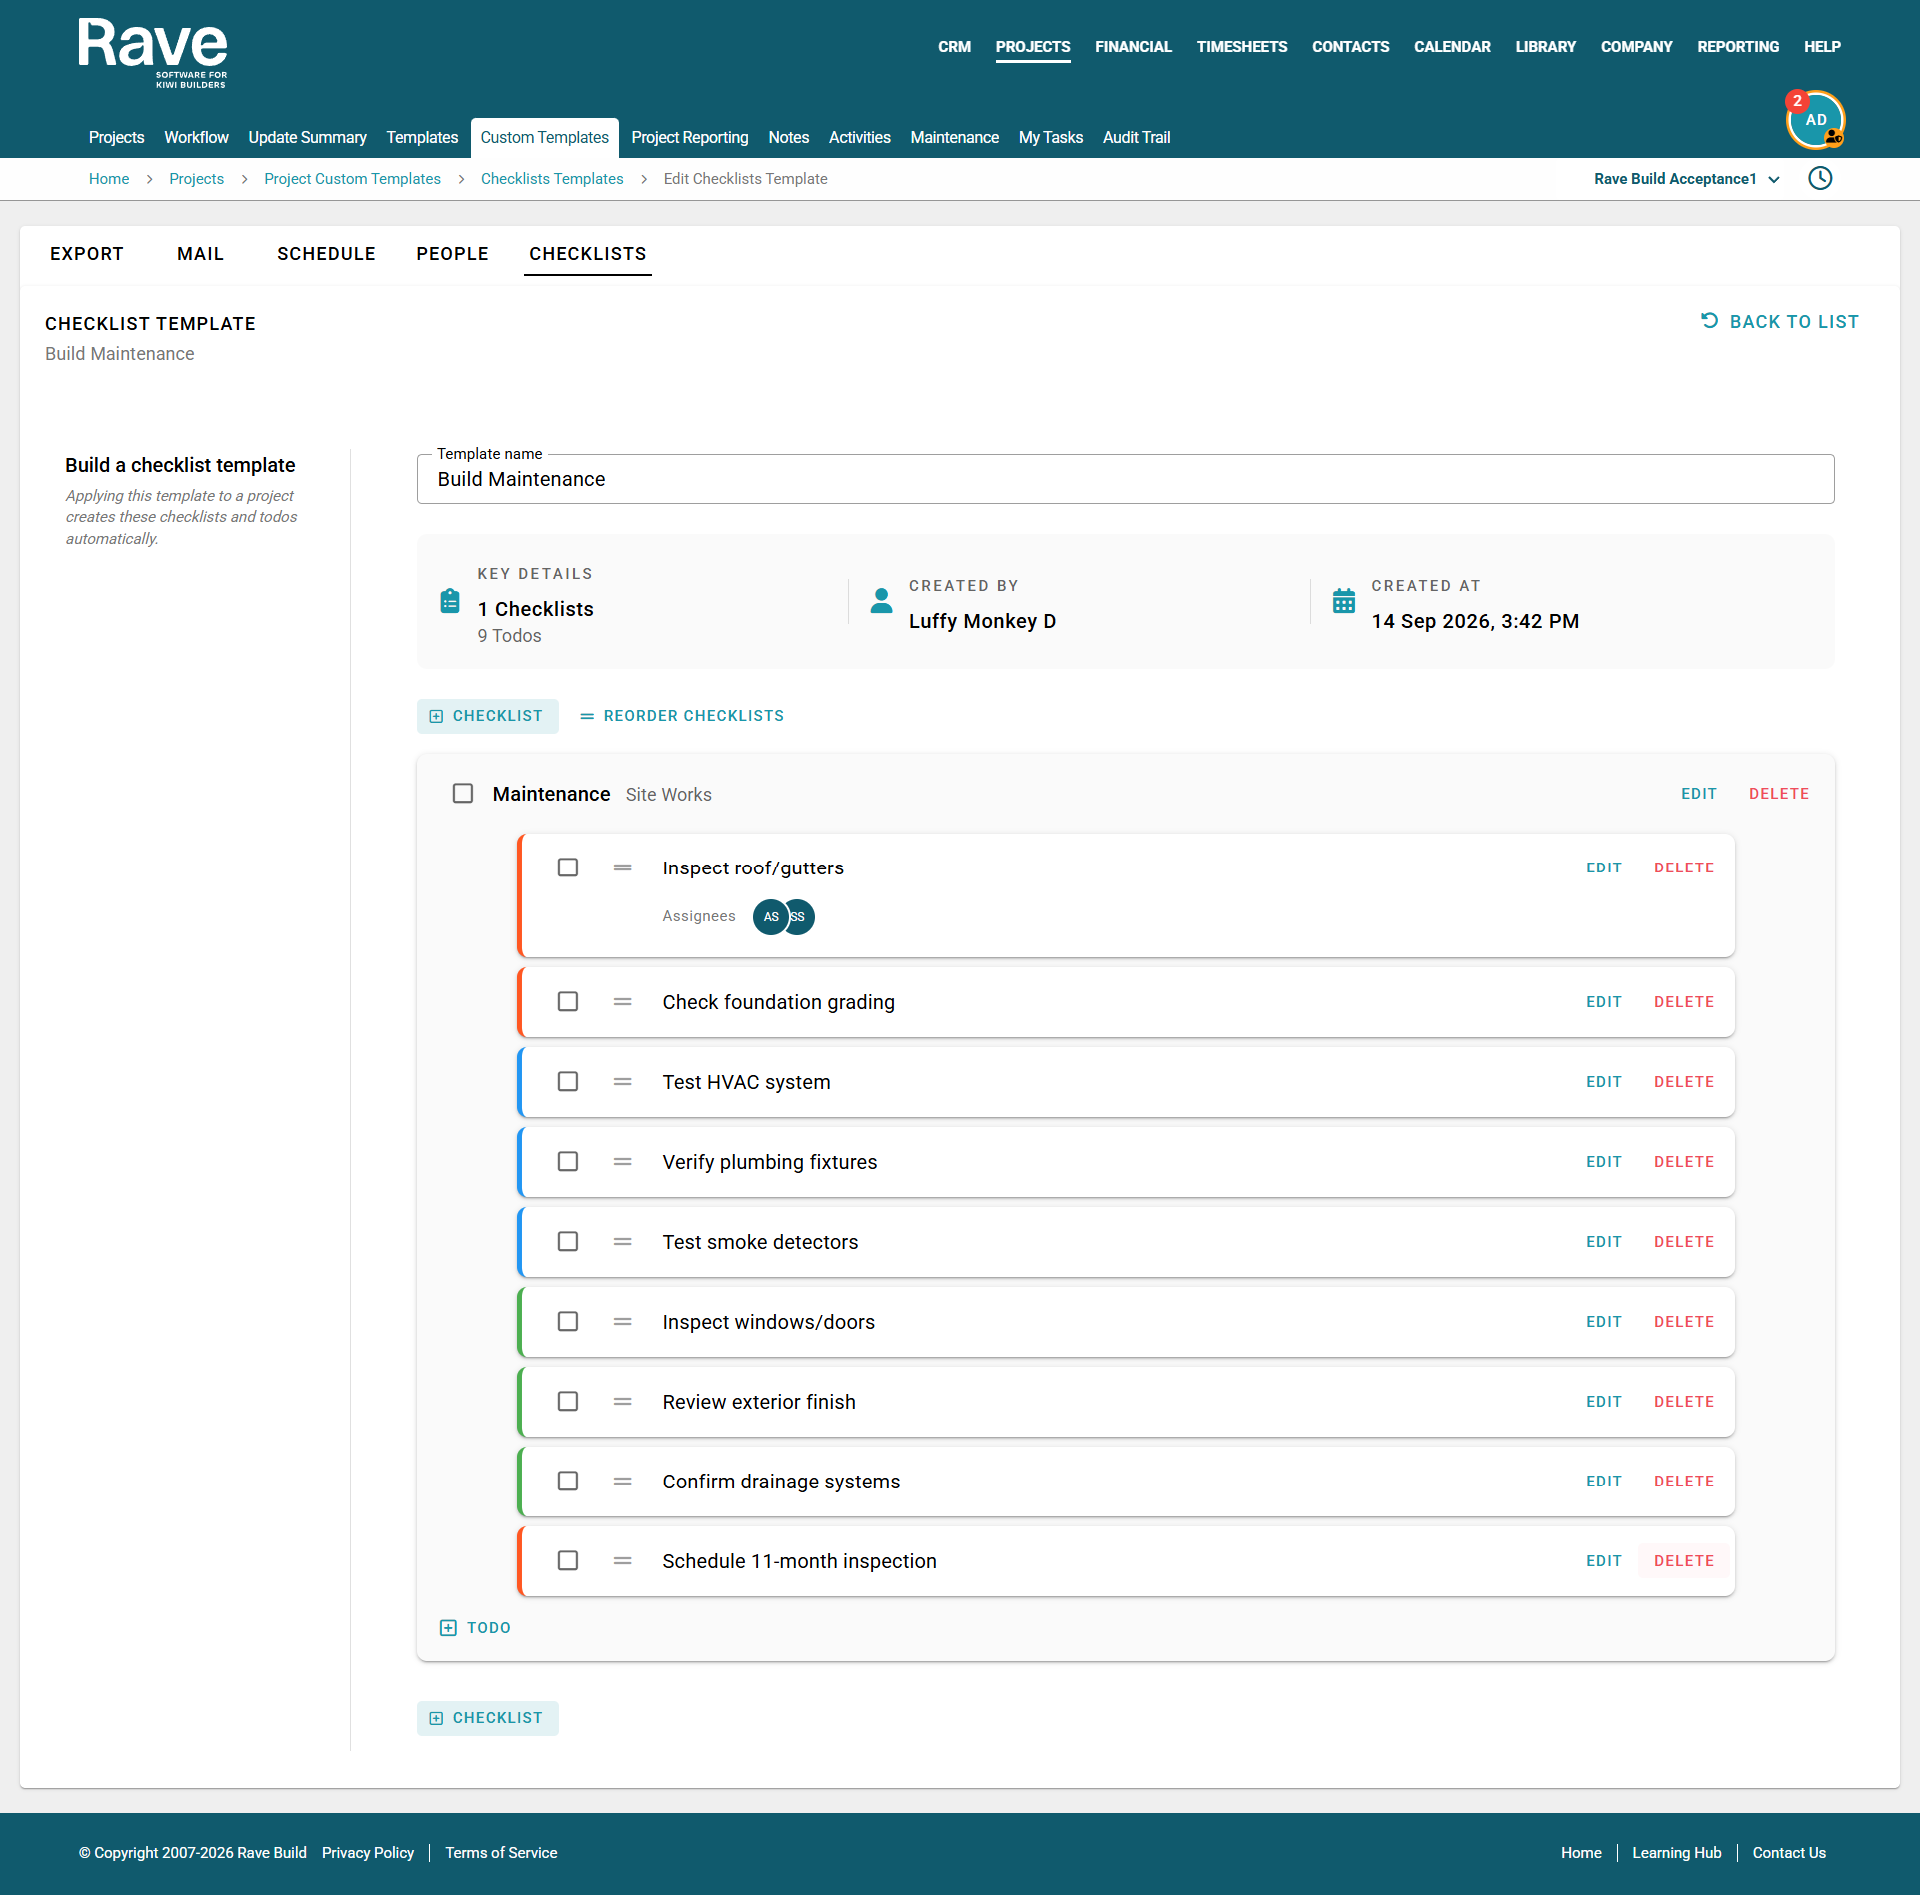
Click the pencil icon to open the template in Edit Mode.
From here you can:
Change the template name
Reorder checklists
Add or remove To-Dos
Edit the colour of individual To-Dos
Change the To-Do name or description
Add or change assignees
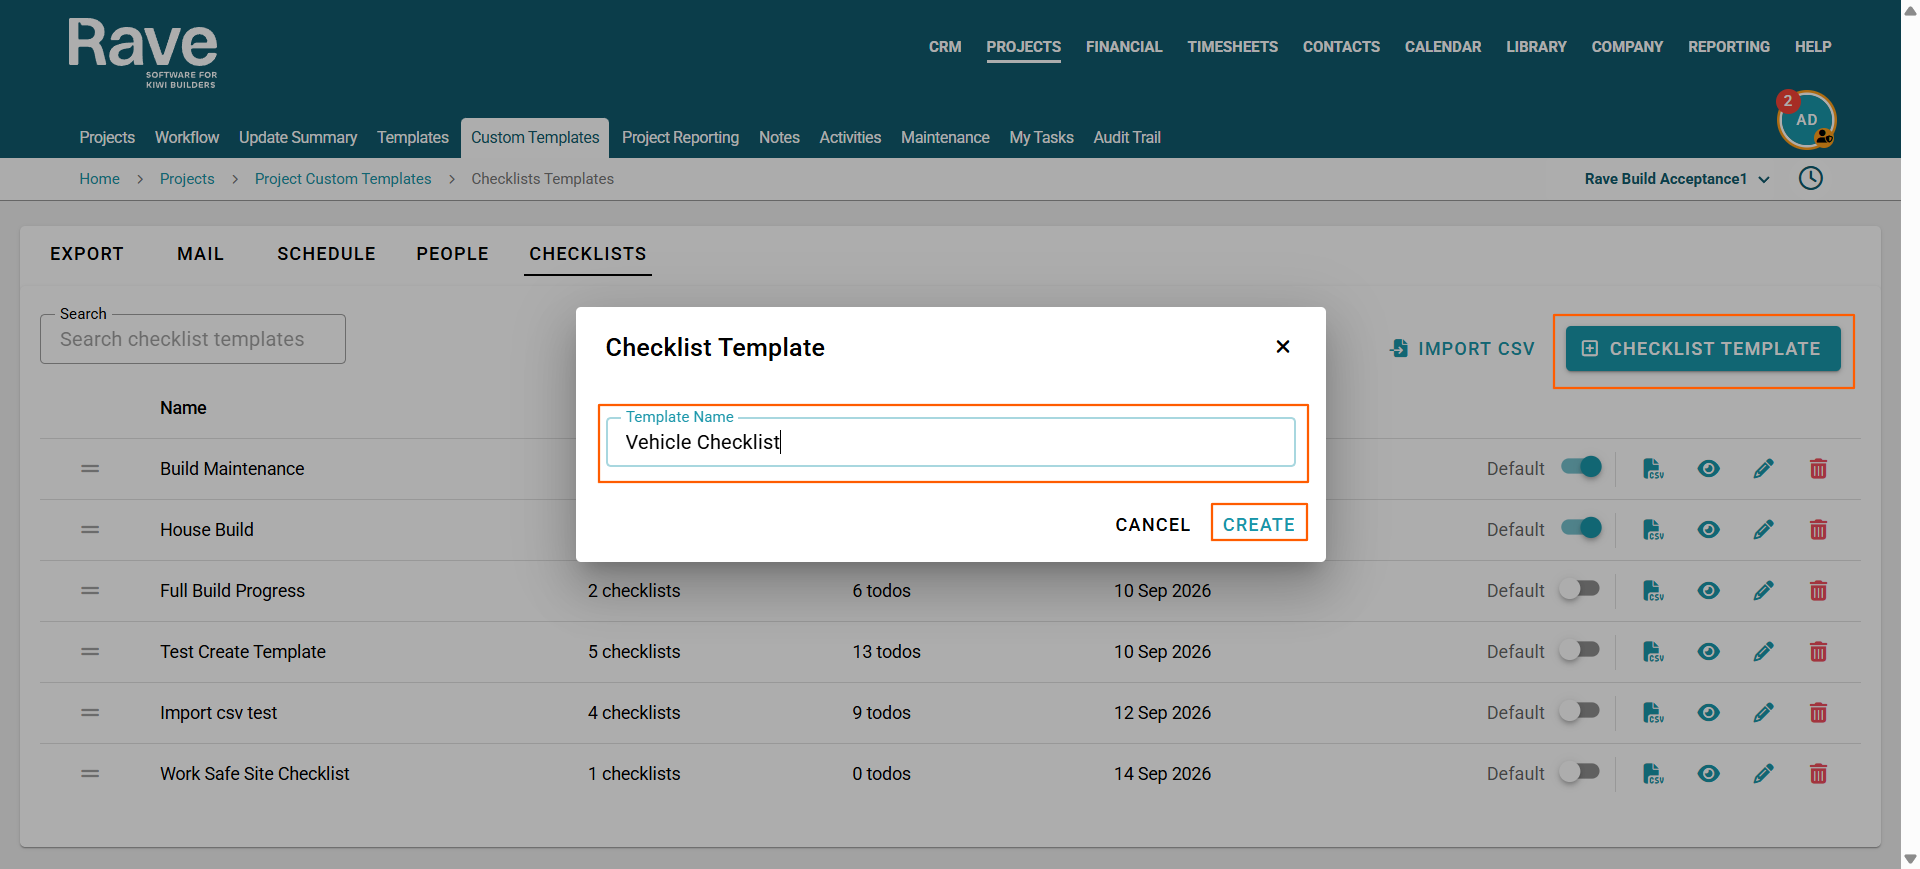
Bulk Action Bar
The bulk action bar allows you to multi-select checklists to update primary and secondary assignees on all todos within those checklists, as well as bulk delete.
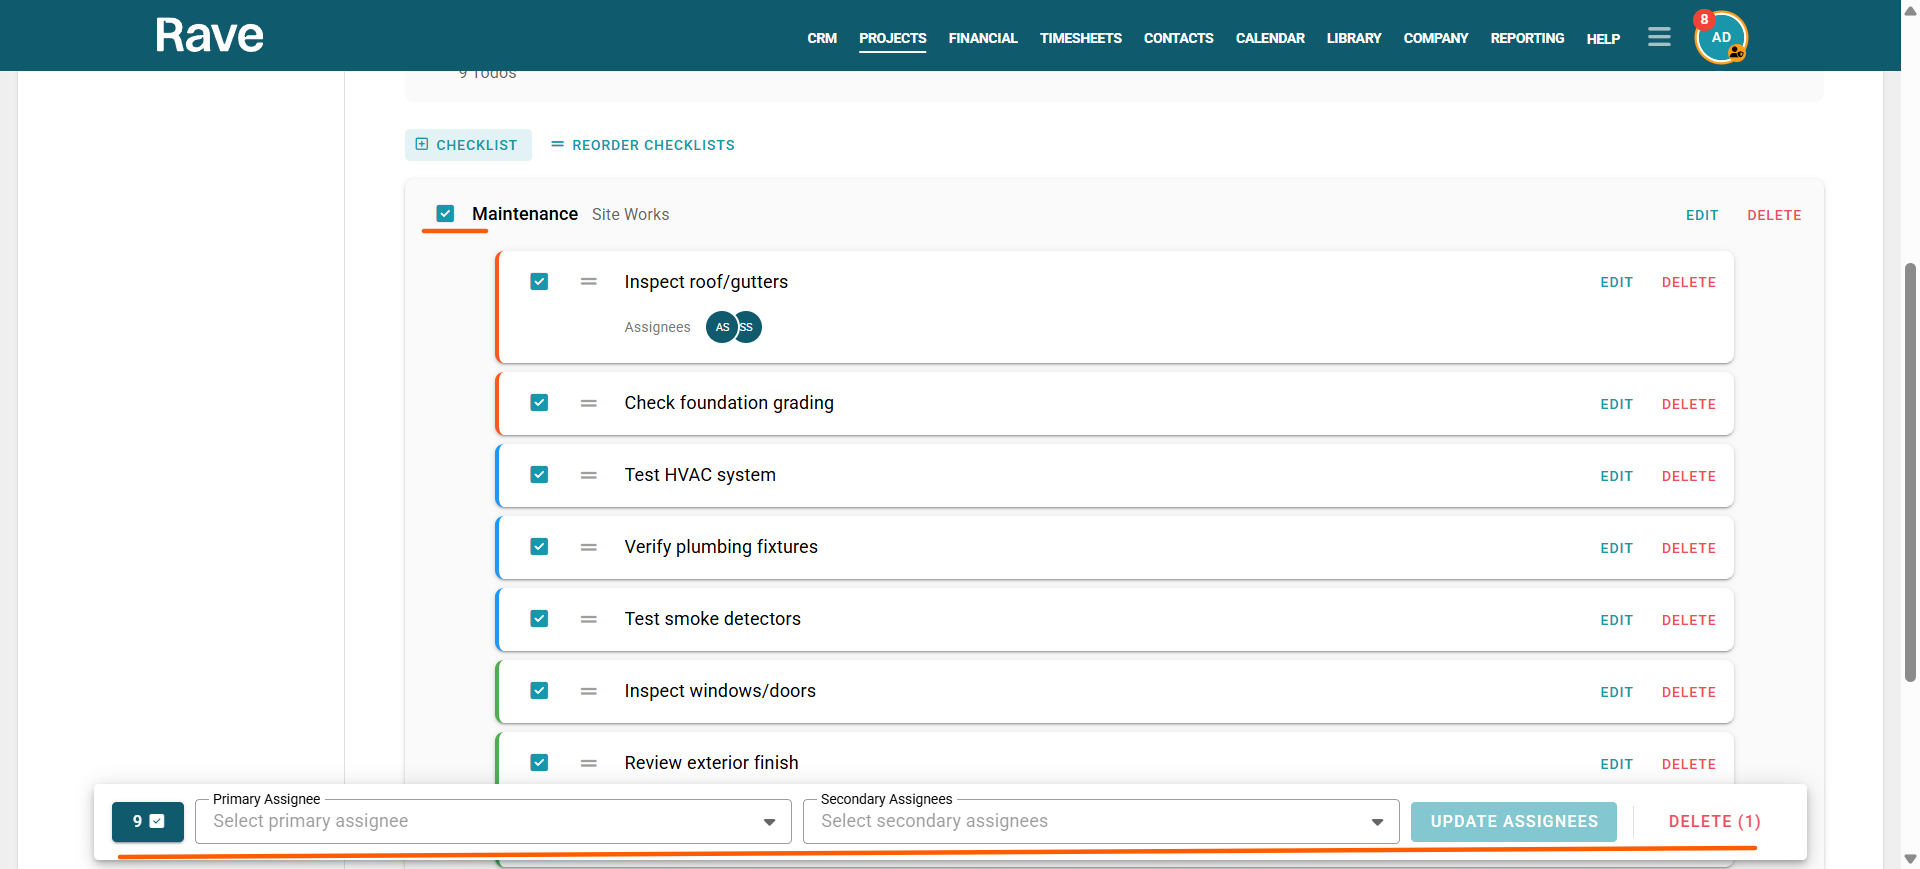
Create a New Checklist Template
You can also create a new Checklist Template directly from the Templates area.
Click + Checklist Template.
Enter the Template name.
Press Create.
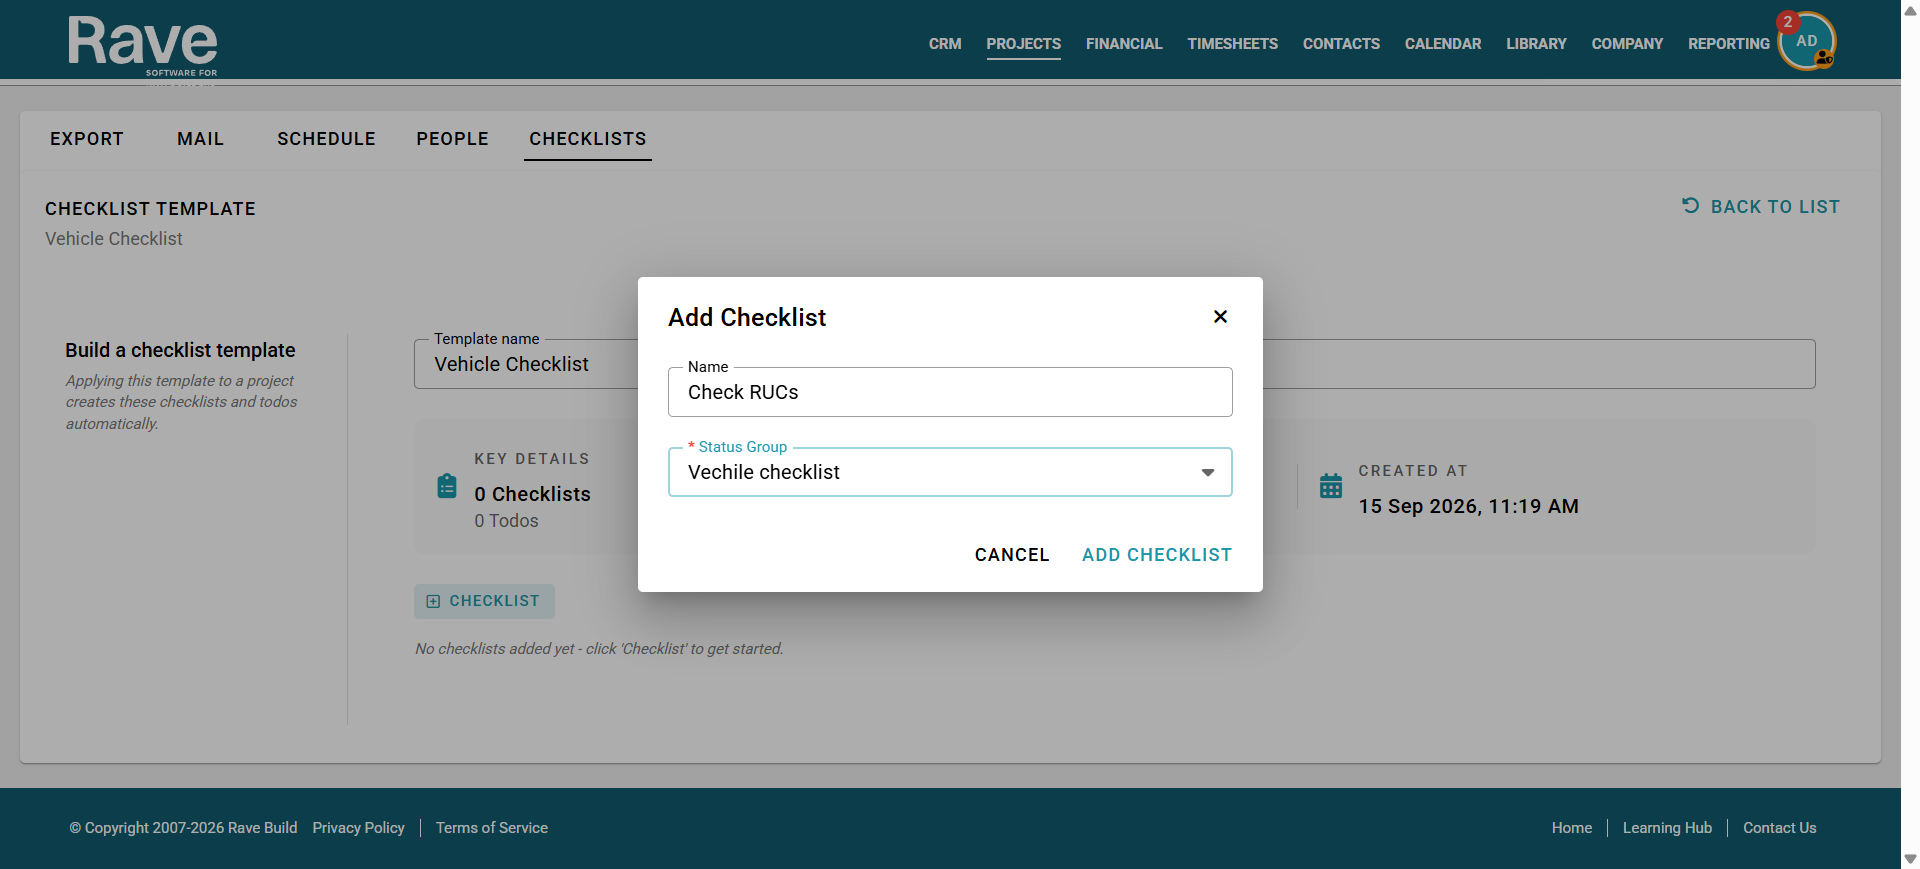
You can now create your Checklist Name and select which status group you want to use from your custom list, then click Add Checklist.
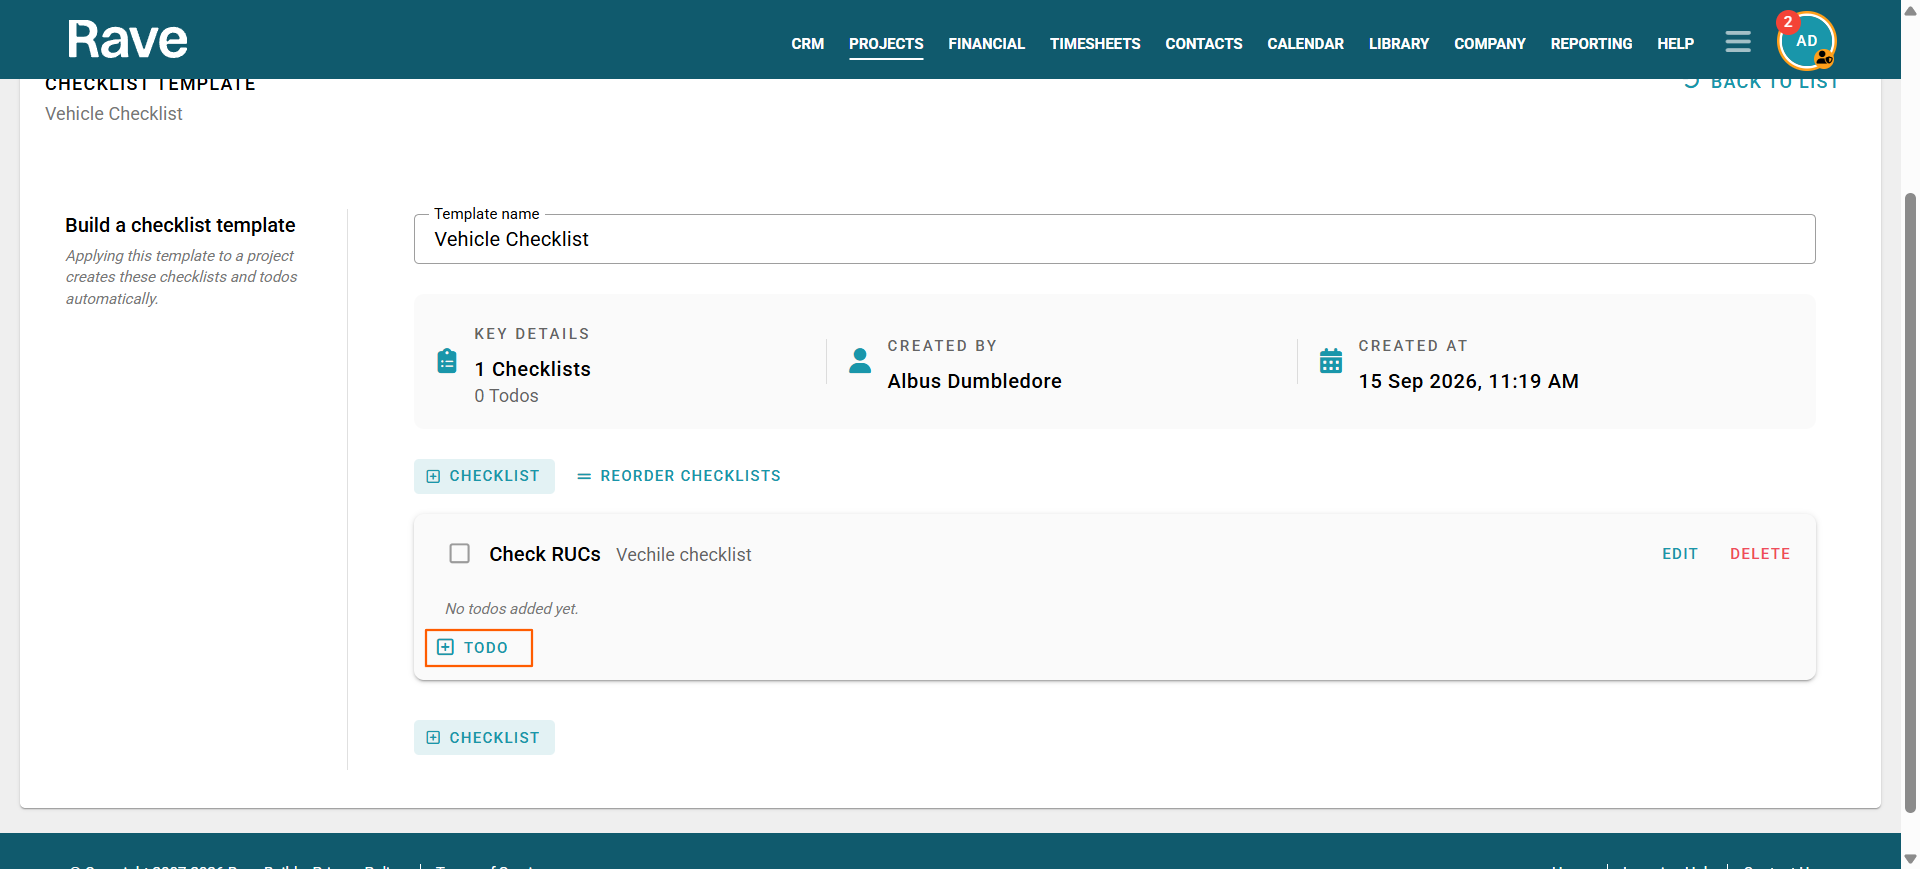
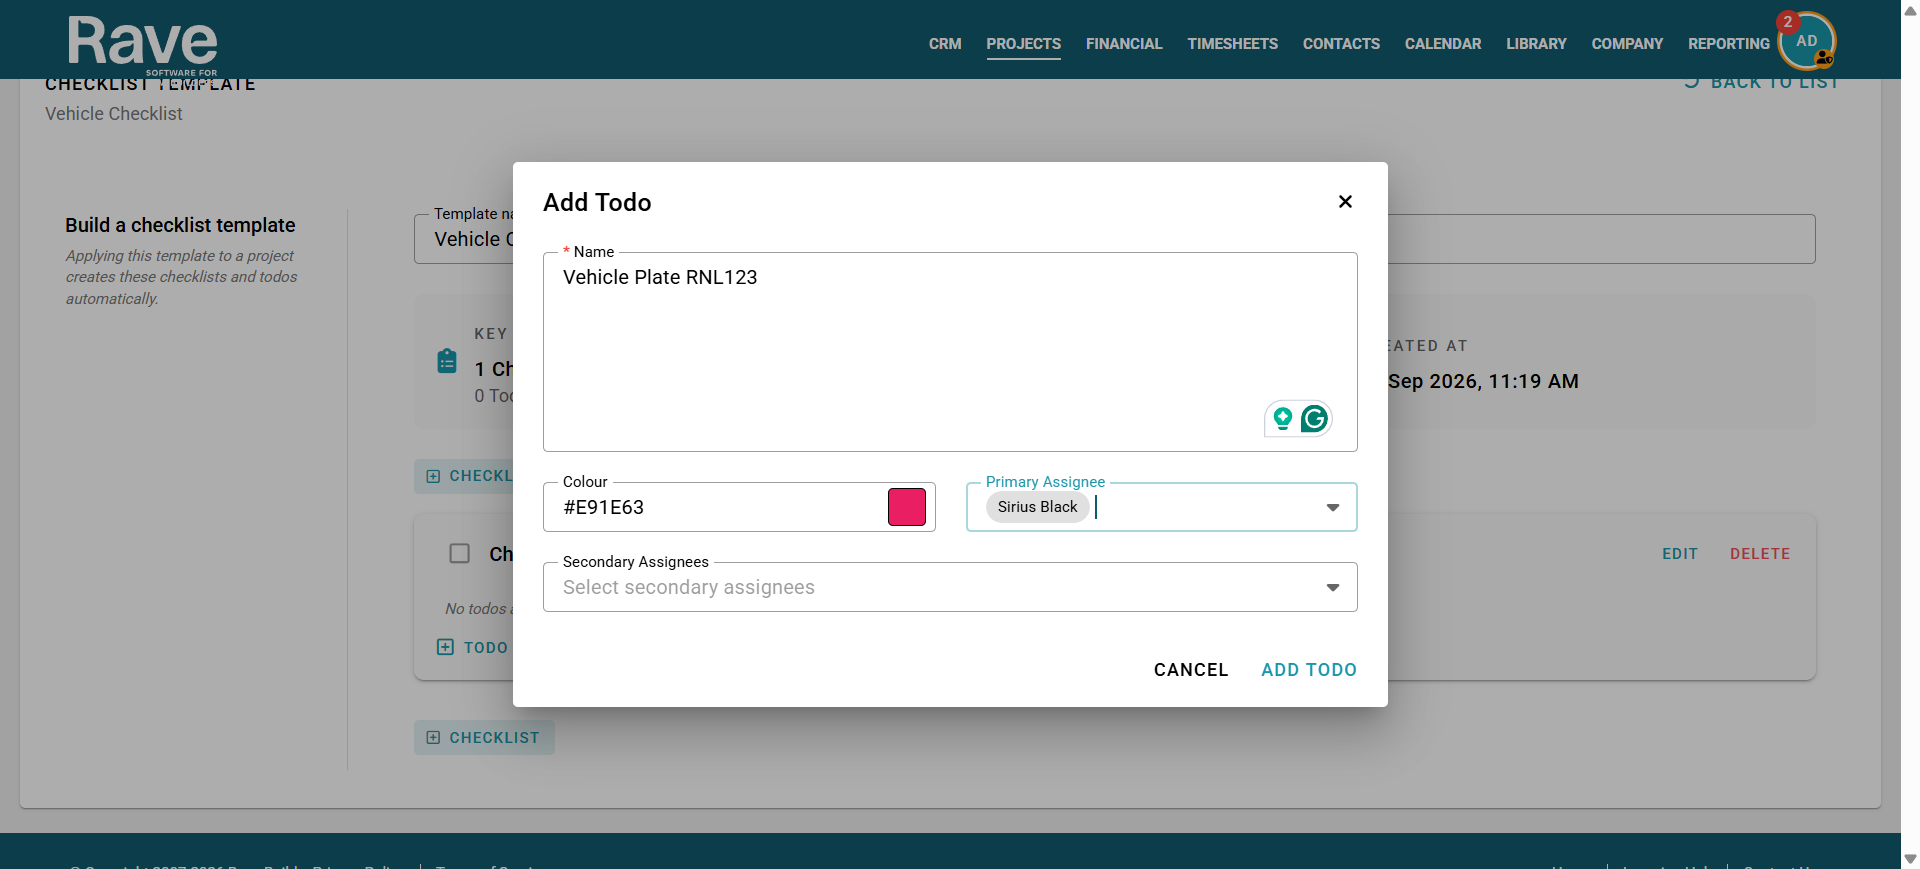
Now select +todo to start adding your todos including the name, colour, hyperlinks, and assignees.
Then press Add todo once finished.
Upload Checklists Template to RAVE Using CSV
If your business already has established processes or Checklists, you can upload them to RAVE using our Checklist CSV Template.
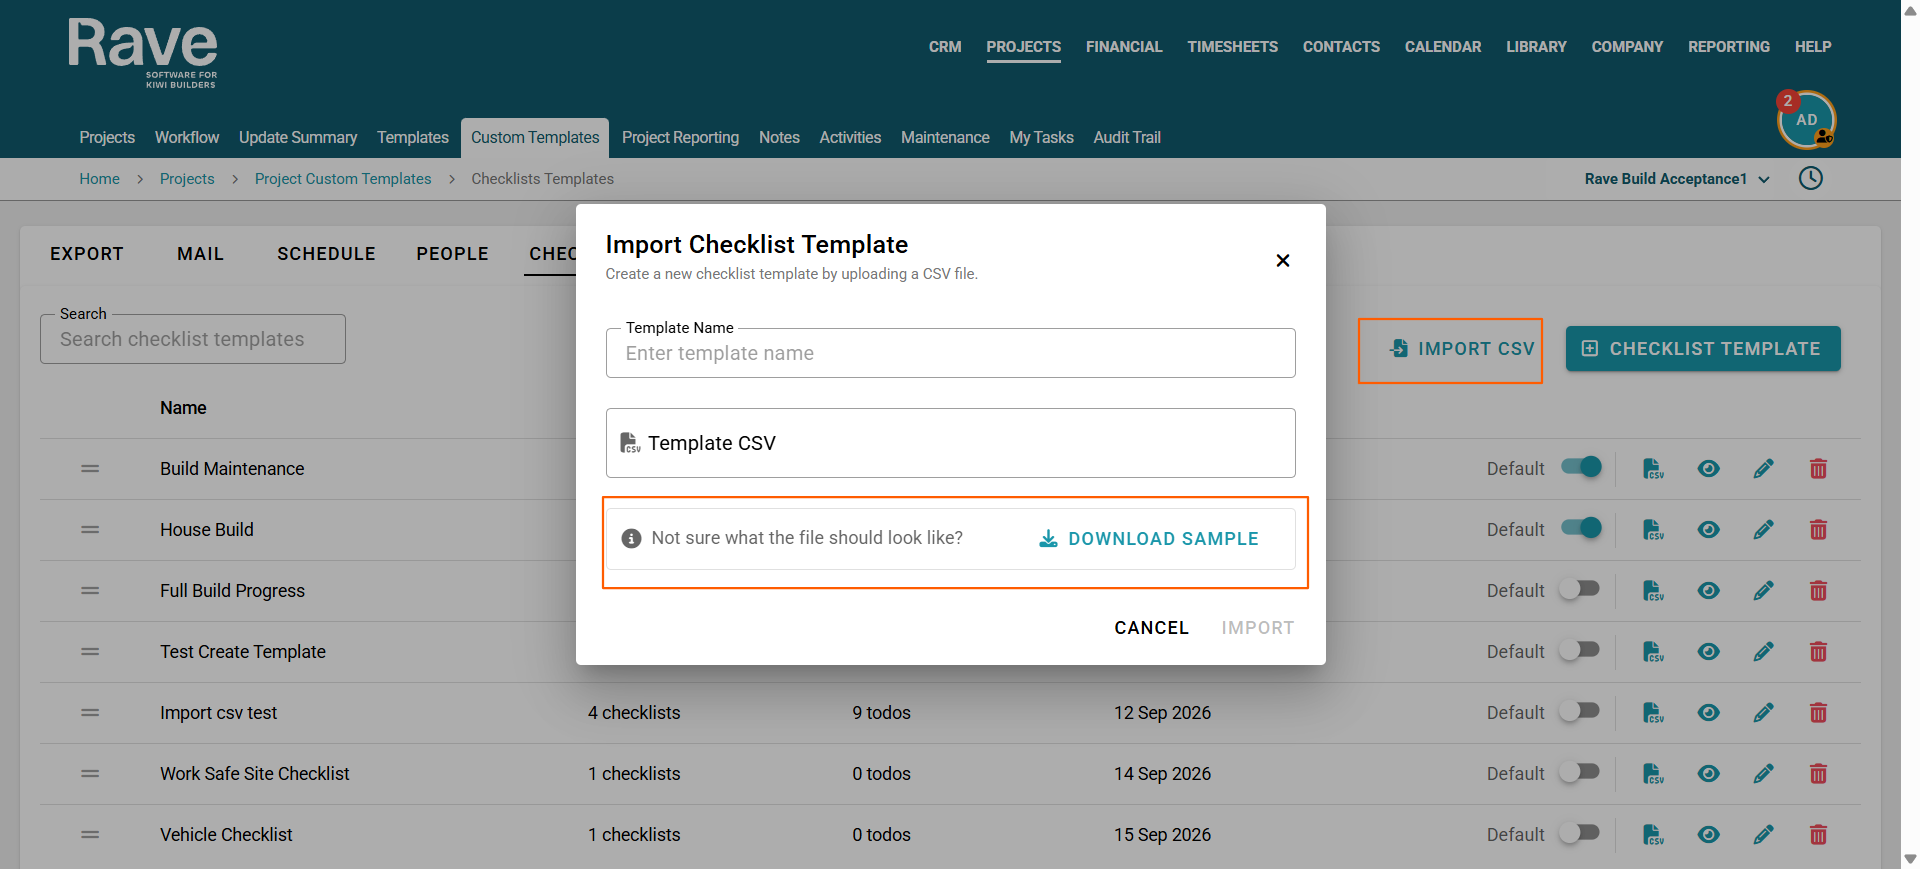
- Select Import CSV. If you don't have our sample file, you can download it to ensure your checklist CSV includes the right information.
- Name your template
- Click the Template CSV box to open and load the sample, or drag the CSV into that box
- Select Import (The Import button will remain grey until you name the template.)
- Your CSV file will load into the template menu in edit mode for you to review
- Once you are happy, you can click back to list or navigate away from the page, as it will be saved
Was this article helpful?
That’s Great!
Thank you for your feedback
Sorry! We couldn't be helpful
Thank you for your feedback
Feedback sent
We appreciate your effort and will try to fix the article