In this guide, we'll cover how to navigate and log in to Rave for the first time, as well as how to set up Single Sign-On if you are already logged in to Rave.
The first step to accessing your login is to find the Welcome email you received from your building company. It will have a link: Click Accept this invitation.
This will direct you to the login page where you can follow the steps to create your login for the first time.
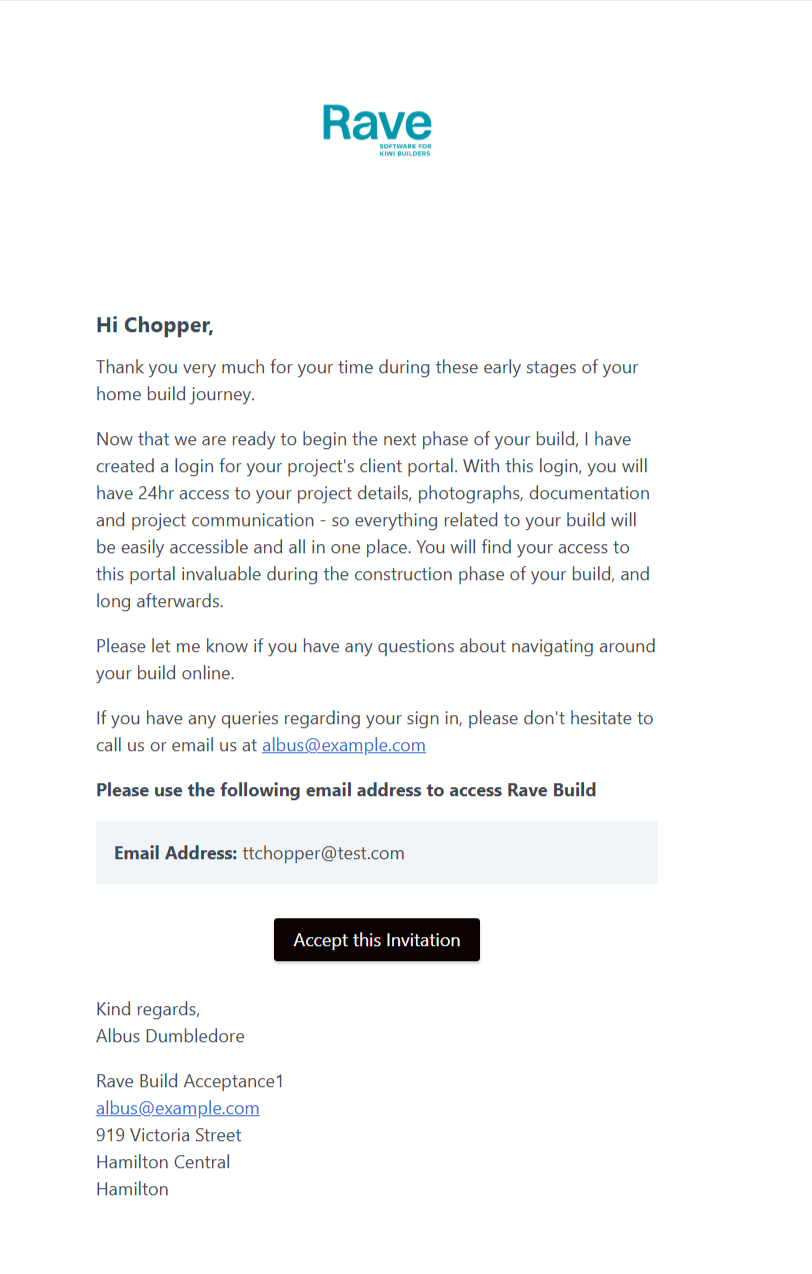
If you don't have your welcome email or you have already got a Rave login, you can head directly to our login page https://pro.ravebuild.com/s/login
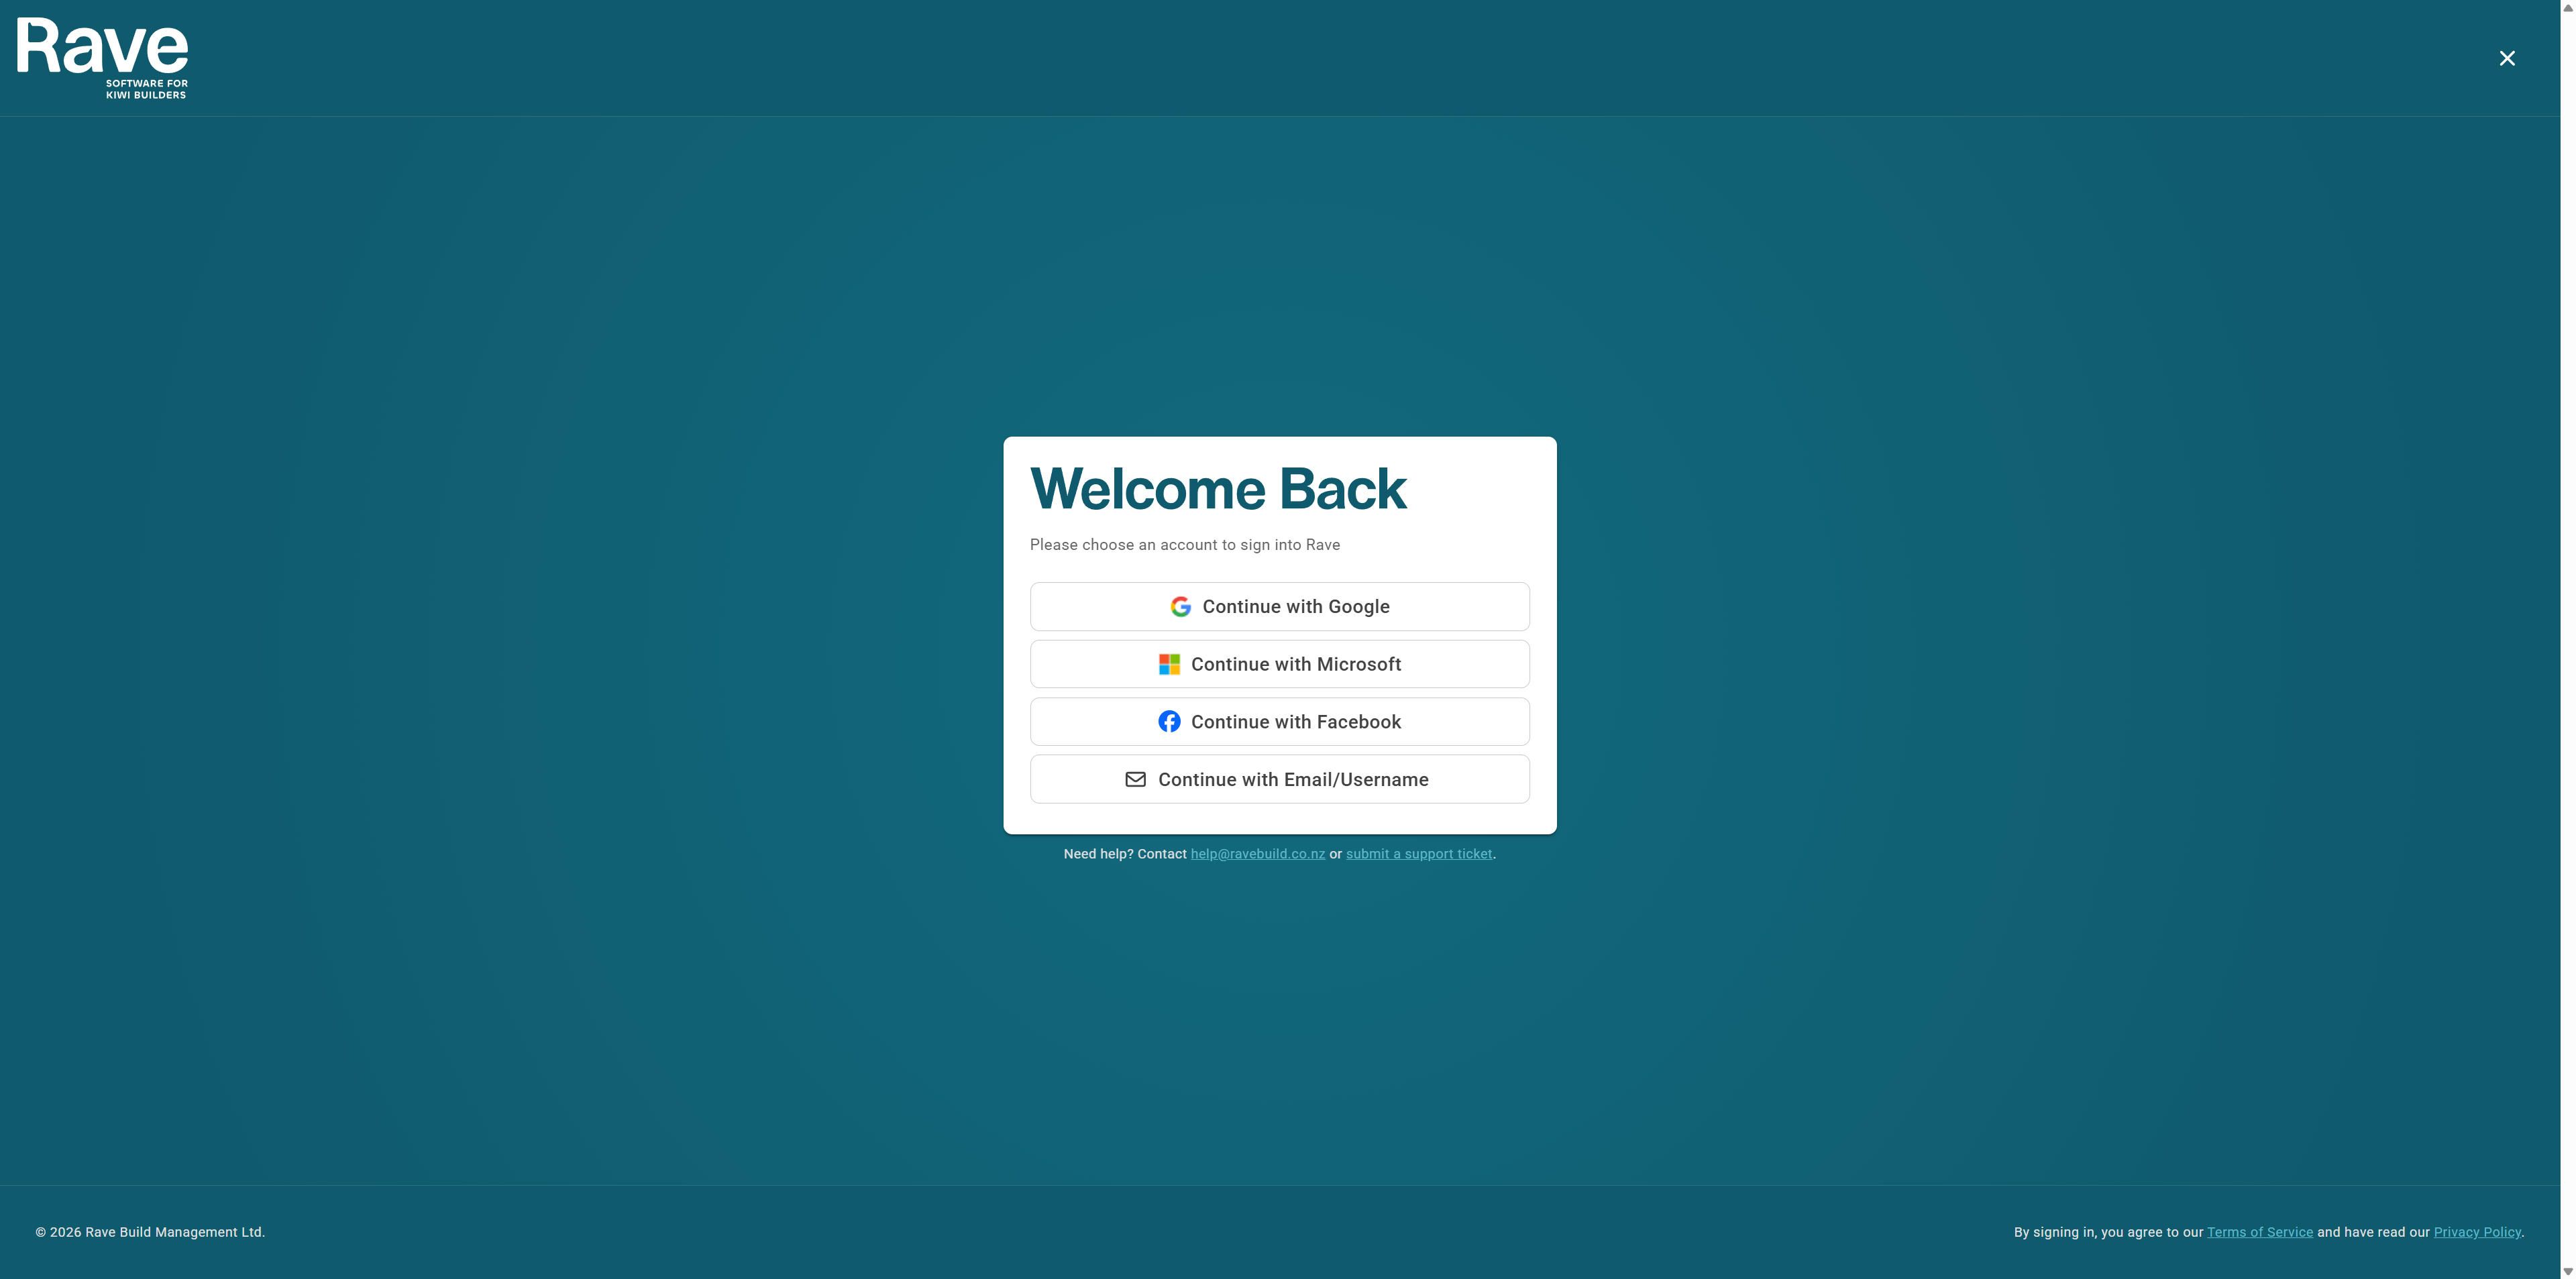
The new login page looks like the image below. There are options to choose how you log into Rave. The steps below explain each one and how to log in, choose to stay logged in and also set up 2 factor authentication (2FA).
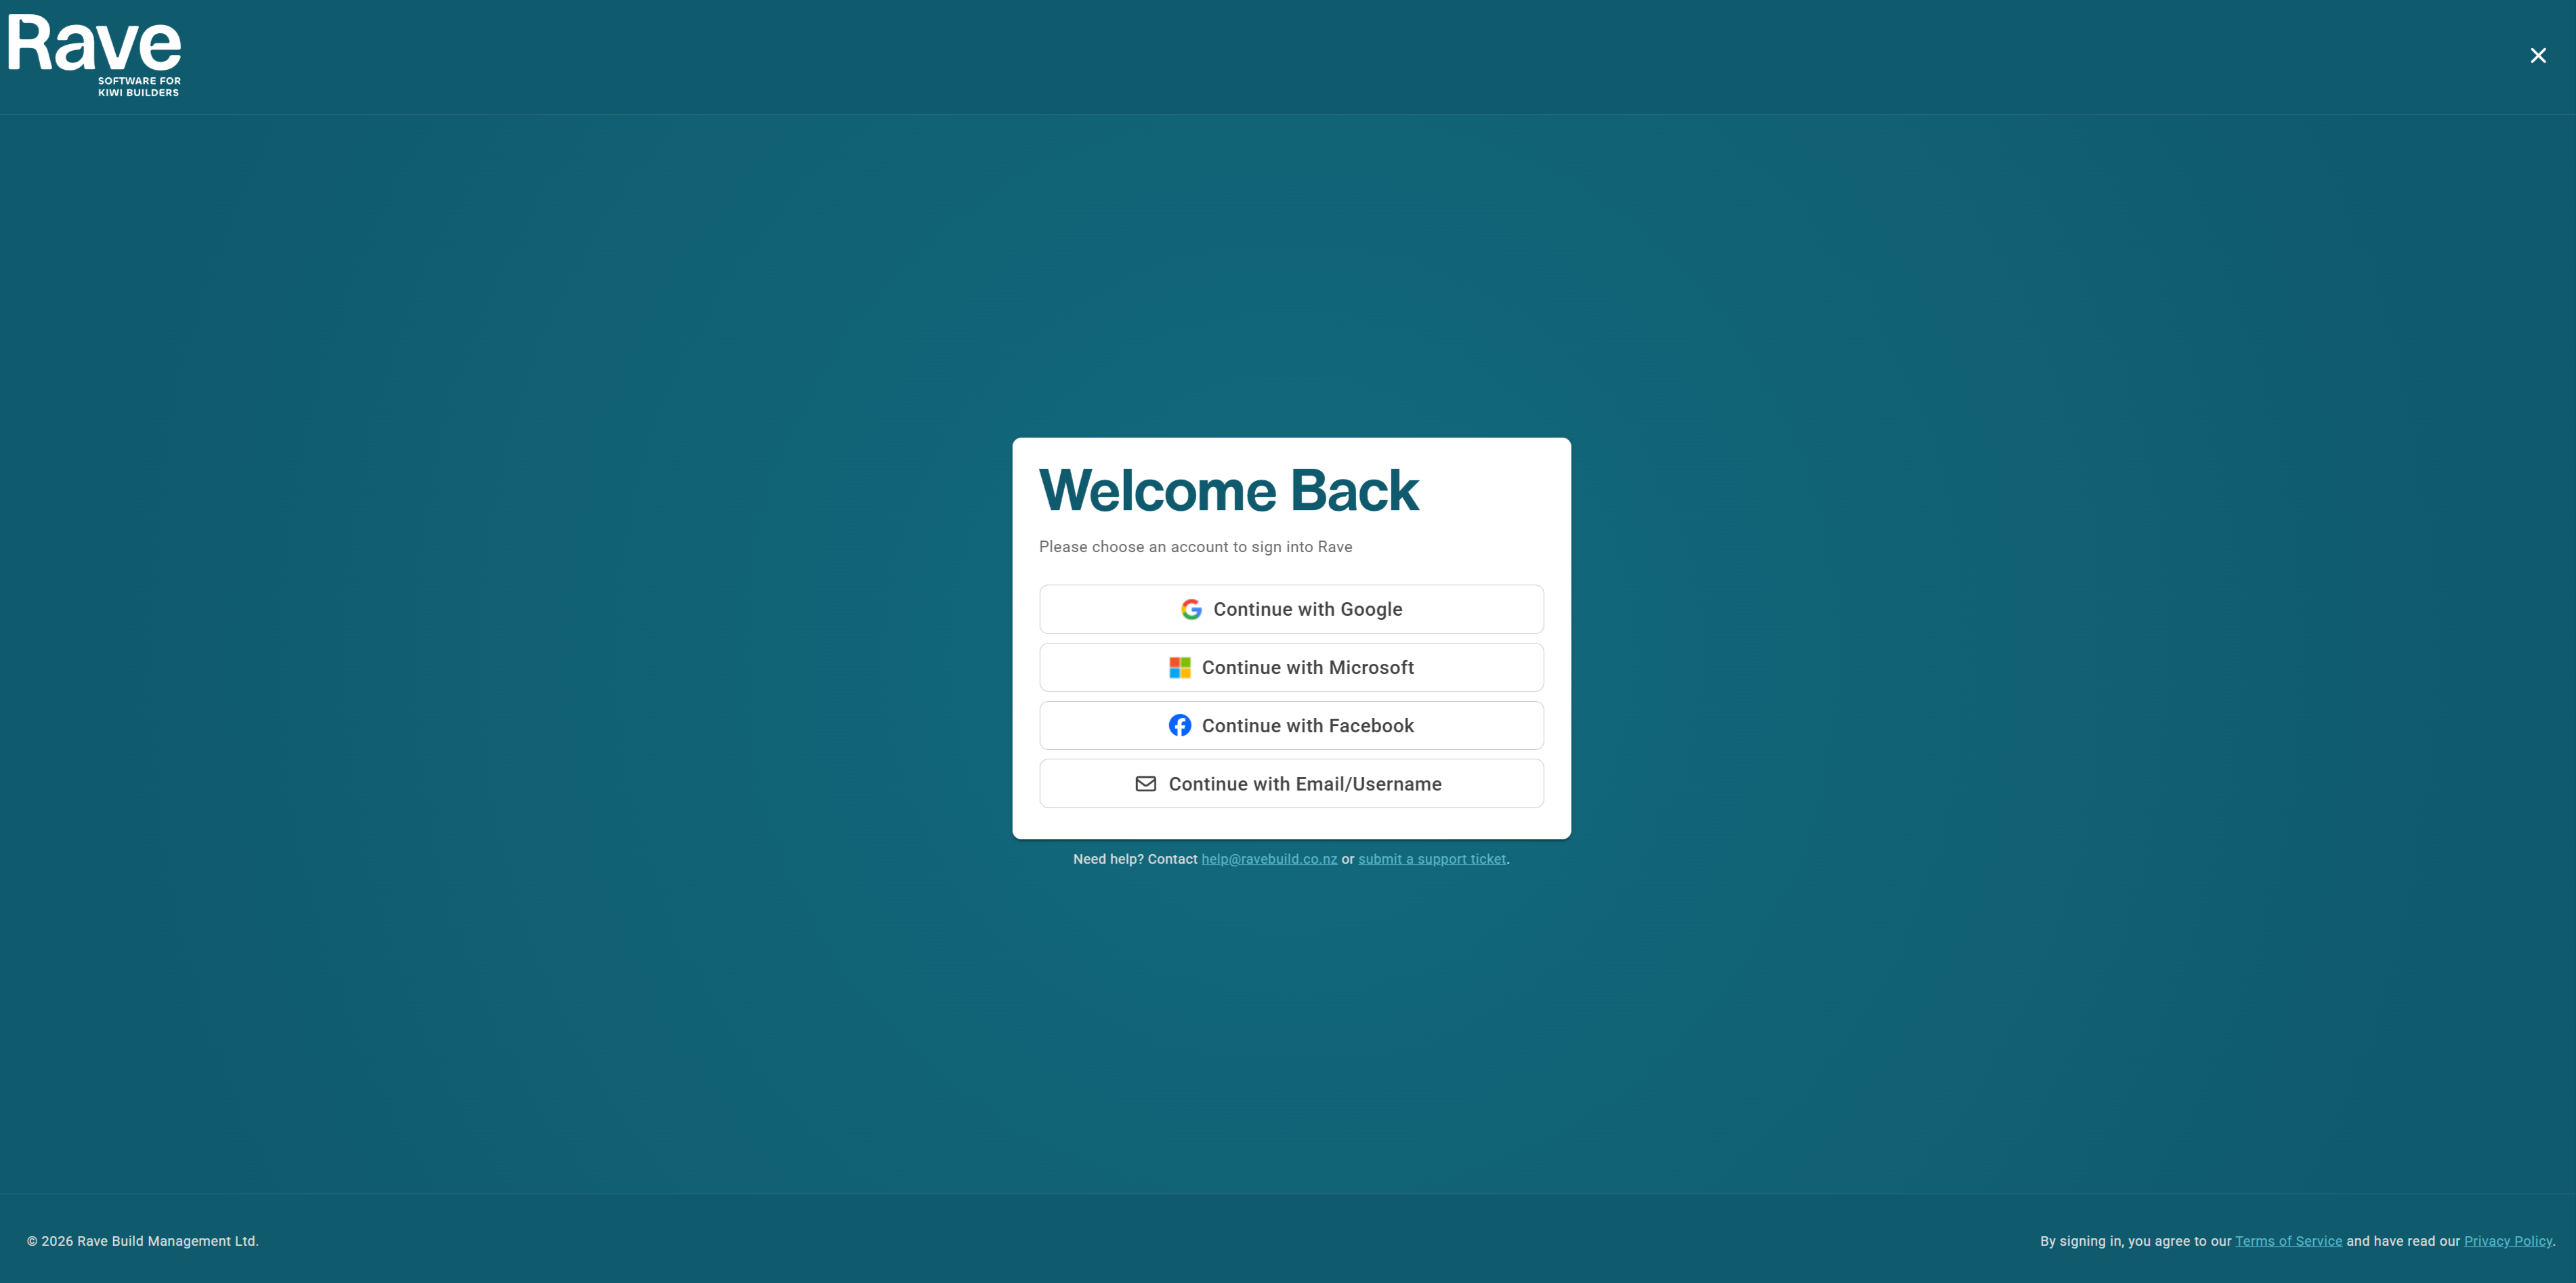
Before You Begin
Please ensure:
- You have been invited to Rave.
- Your Rave account has been created using the correct email address.
- You have access to the email inbox associated with your Rave account.
- If you're using Google, Microsoft, or Facebook, that account uses the same email address as your Rave account.
- Note: If you are both a client and a contractor in Rave, you can now use a single email address to access all of your Rave accounts with one login.
- The sign-in option you use should match the email address connected to your Rave account.
Sign In With Google
Use this option when your Rave email address is connected to a Google or Google Workspace account.
Go to the Rave login page.
Select Continue with Google.
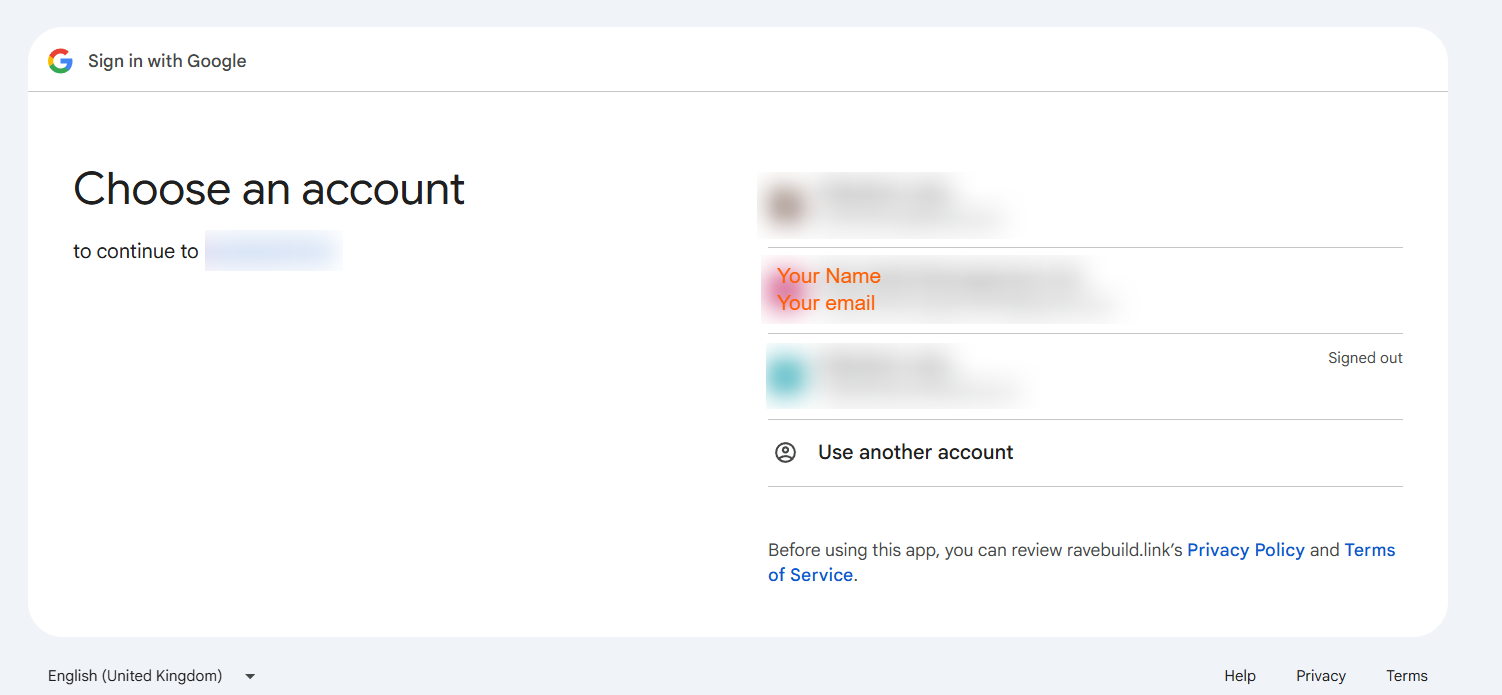
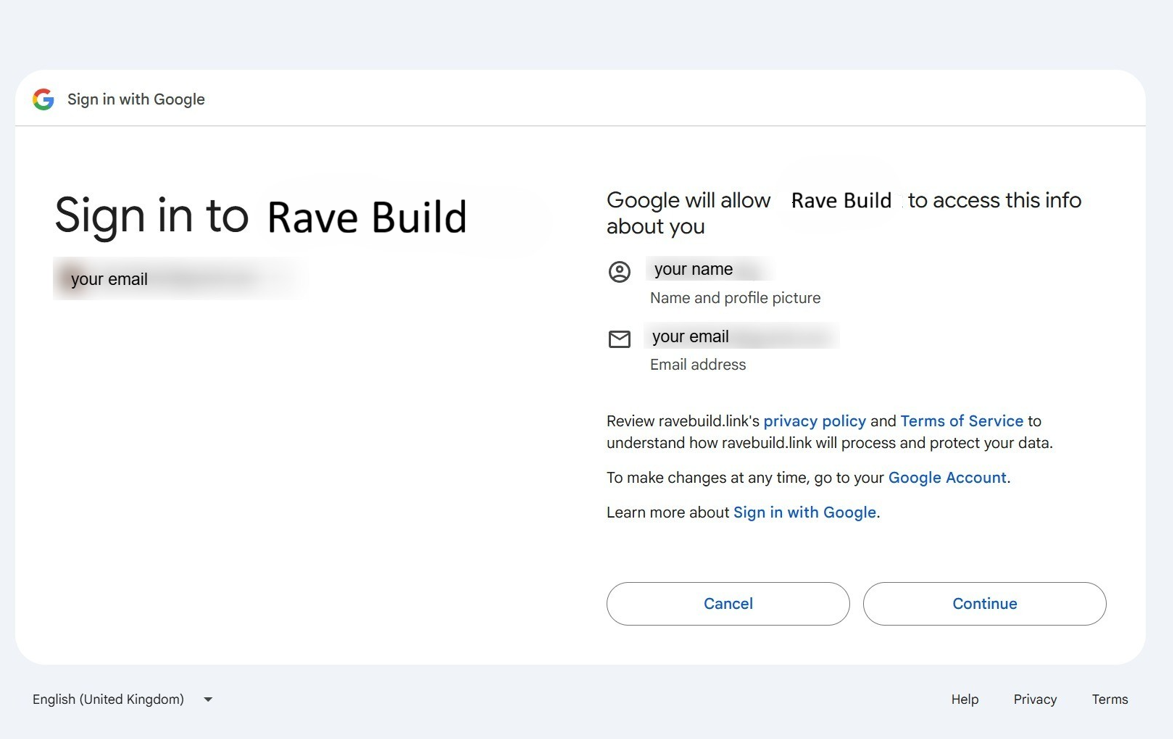
Choose the Google account connected to your Rave email address.
Enter your Google password if prompted.
Complete any multi-factor authentication required by your organisation.
You will be securely redirected to Rave.
Having Trouble?
Check that the Google account you selected uses the same email address as your Rave account.
If you are already signed in to multiple Google accounts, you may need to select Use another account and enter the correct email address.
Sign In With Microsoft
Use this option when your Rave email address is connected to a Microsoft 365, Outlook or Microsoft account.
Go to the Rave login page.
Select Continue with Microsoft.
Enter or select the Microsoft account connected to your Rave email address.
Enter your Microsoft password if prompted.
Complete any multi-factor authentication required by your organisation.
You will be securely redirected into Rave.
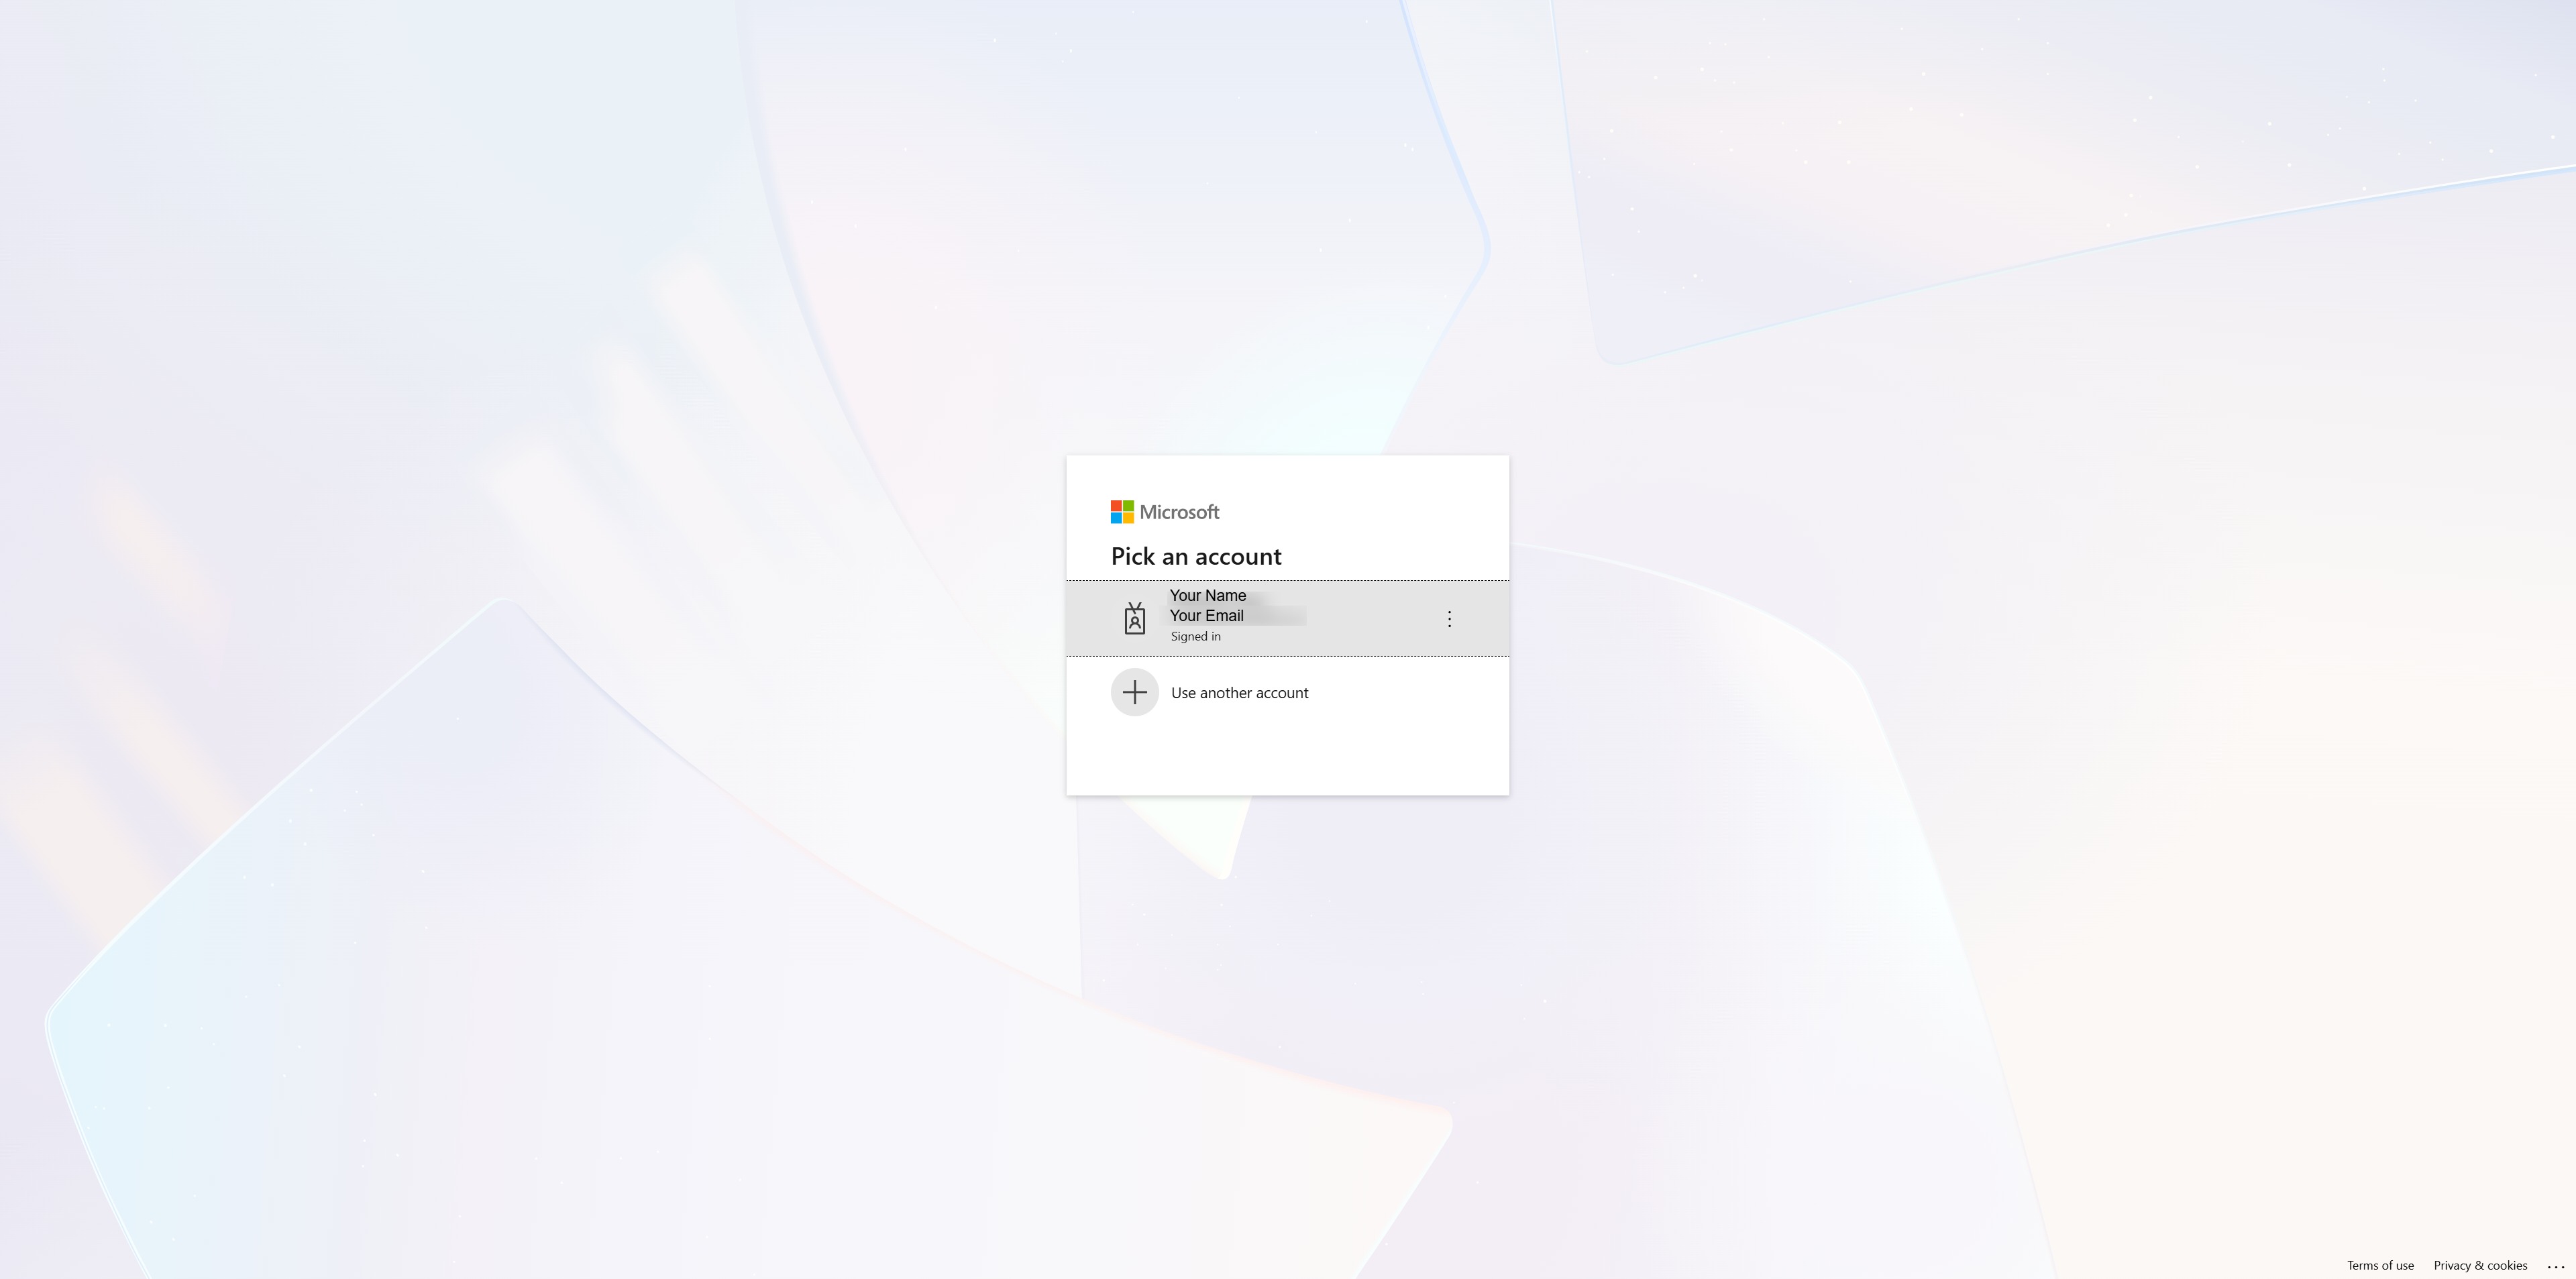
Having Trouble?
Check that your Microsoft account uses the same email address as your Rave account.
Your organisation may also require approval from its Microsoft administrator before third-party applications can be used.
Sign in with Facebook
Use this option to connect your Rave account to your Facebook Profile
Go to the Rave login page.
Select Continue With Facebook.
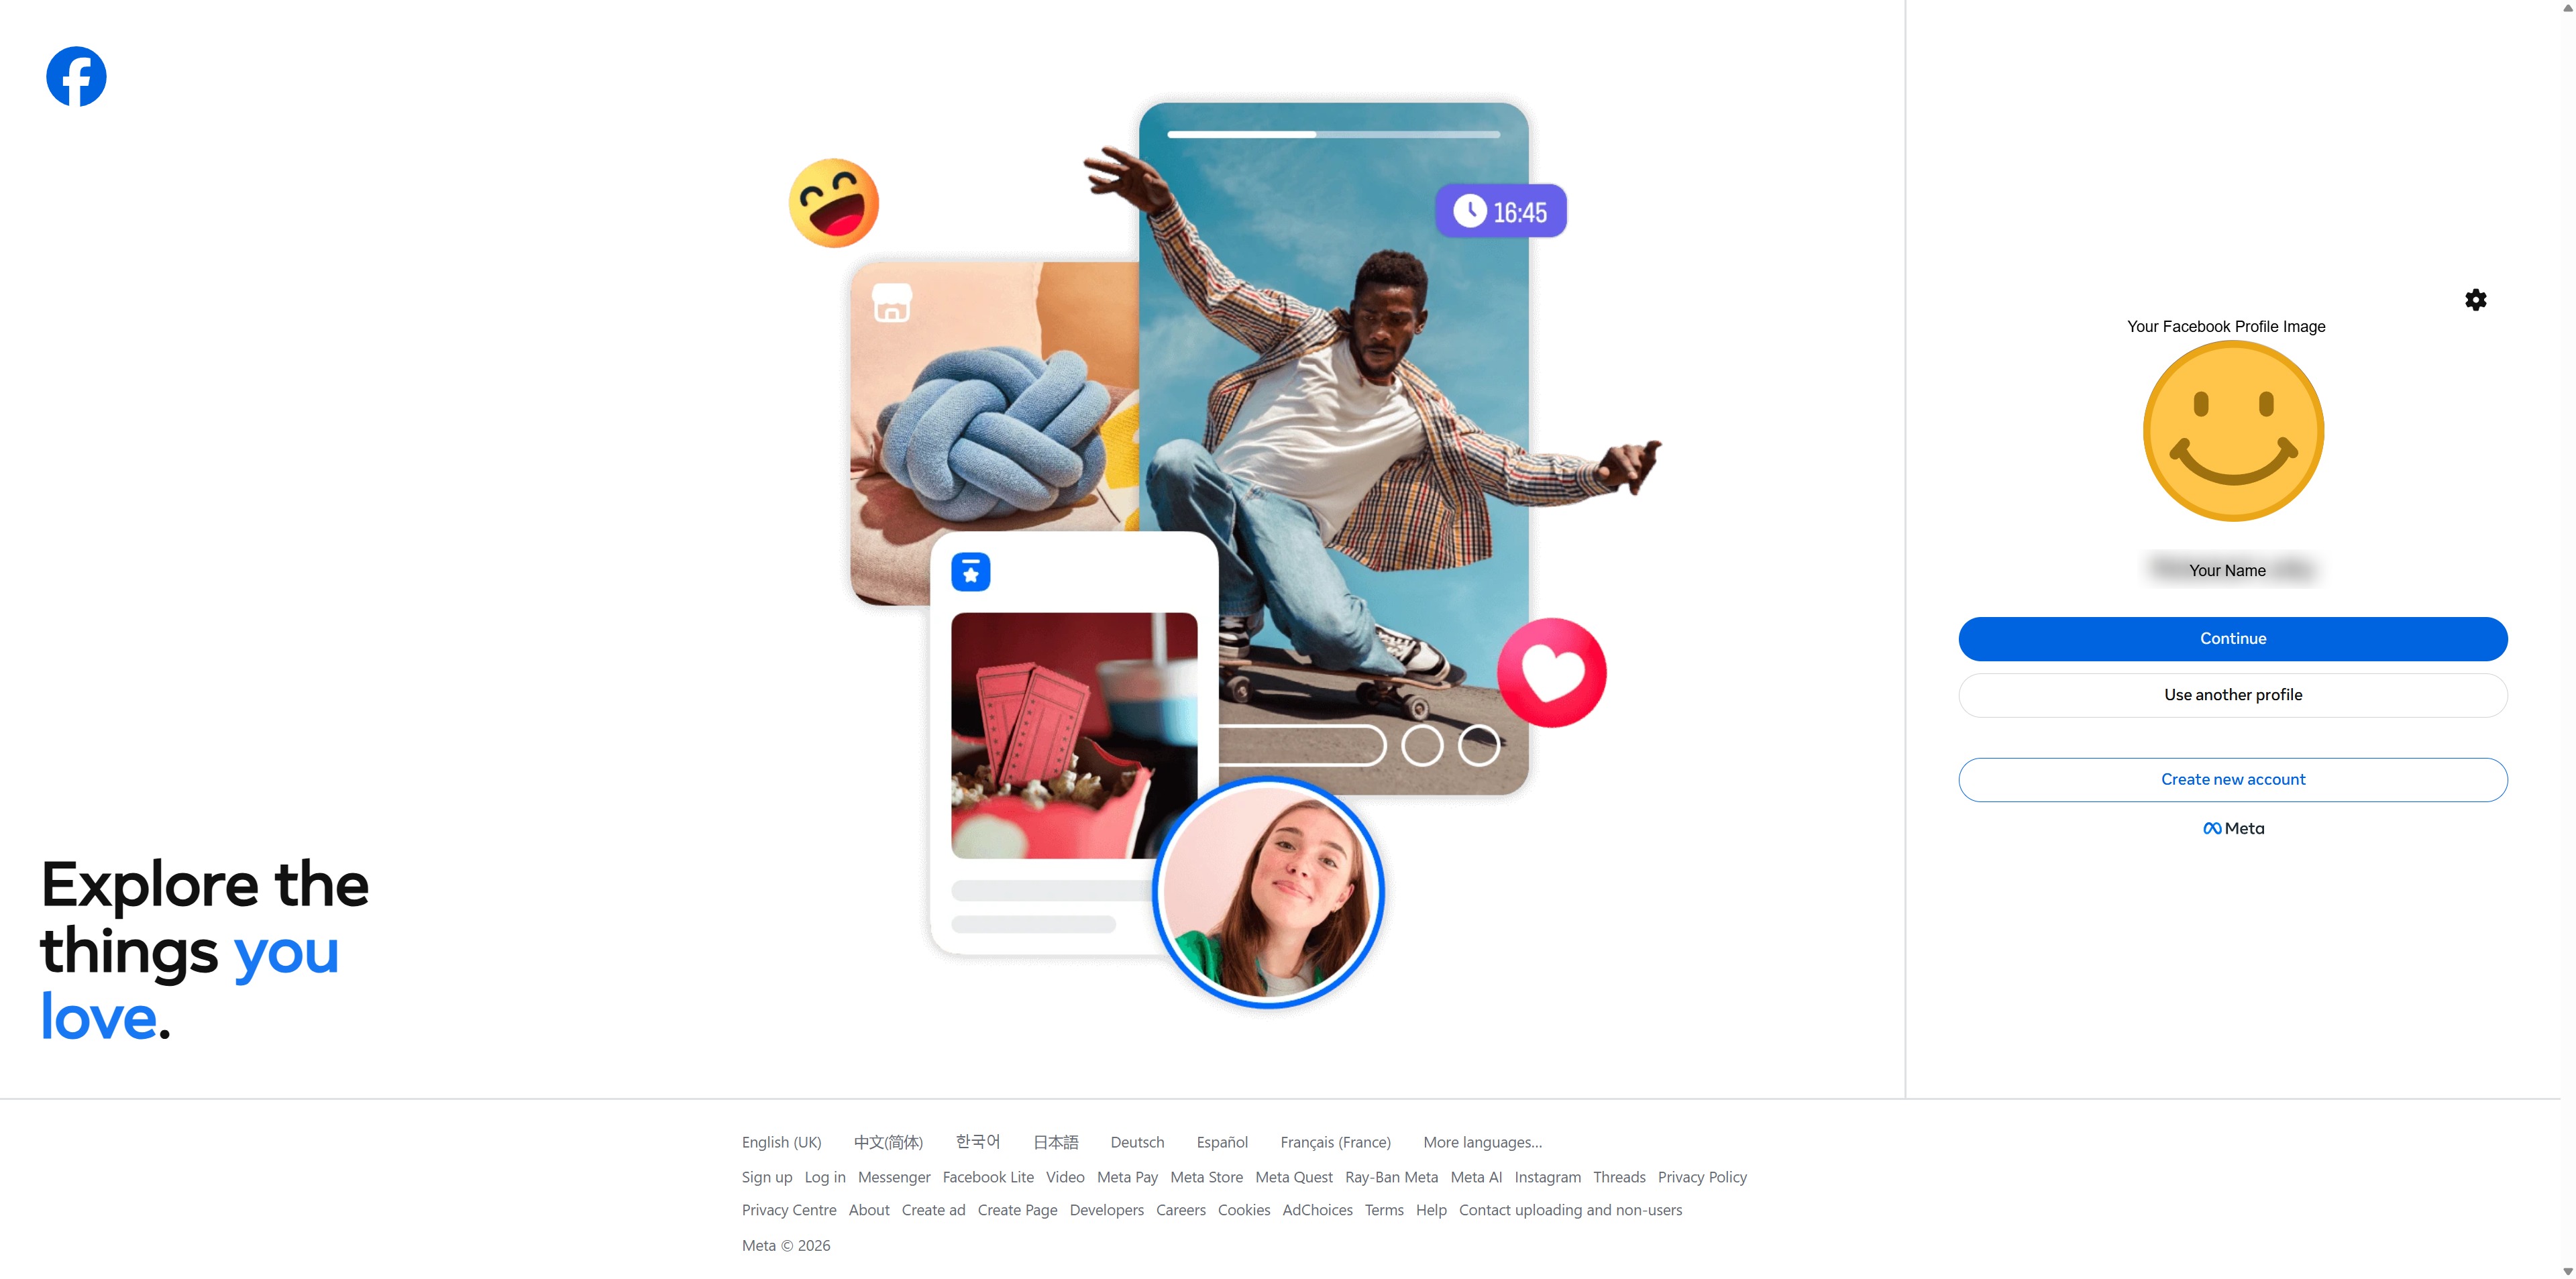
If you are already signed into Facebook, it will show your profile image and name. Click Continue.
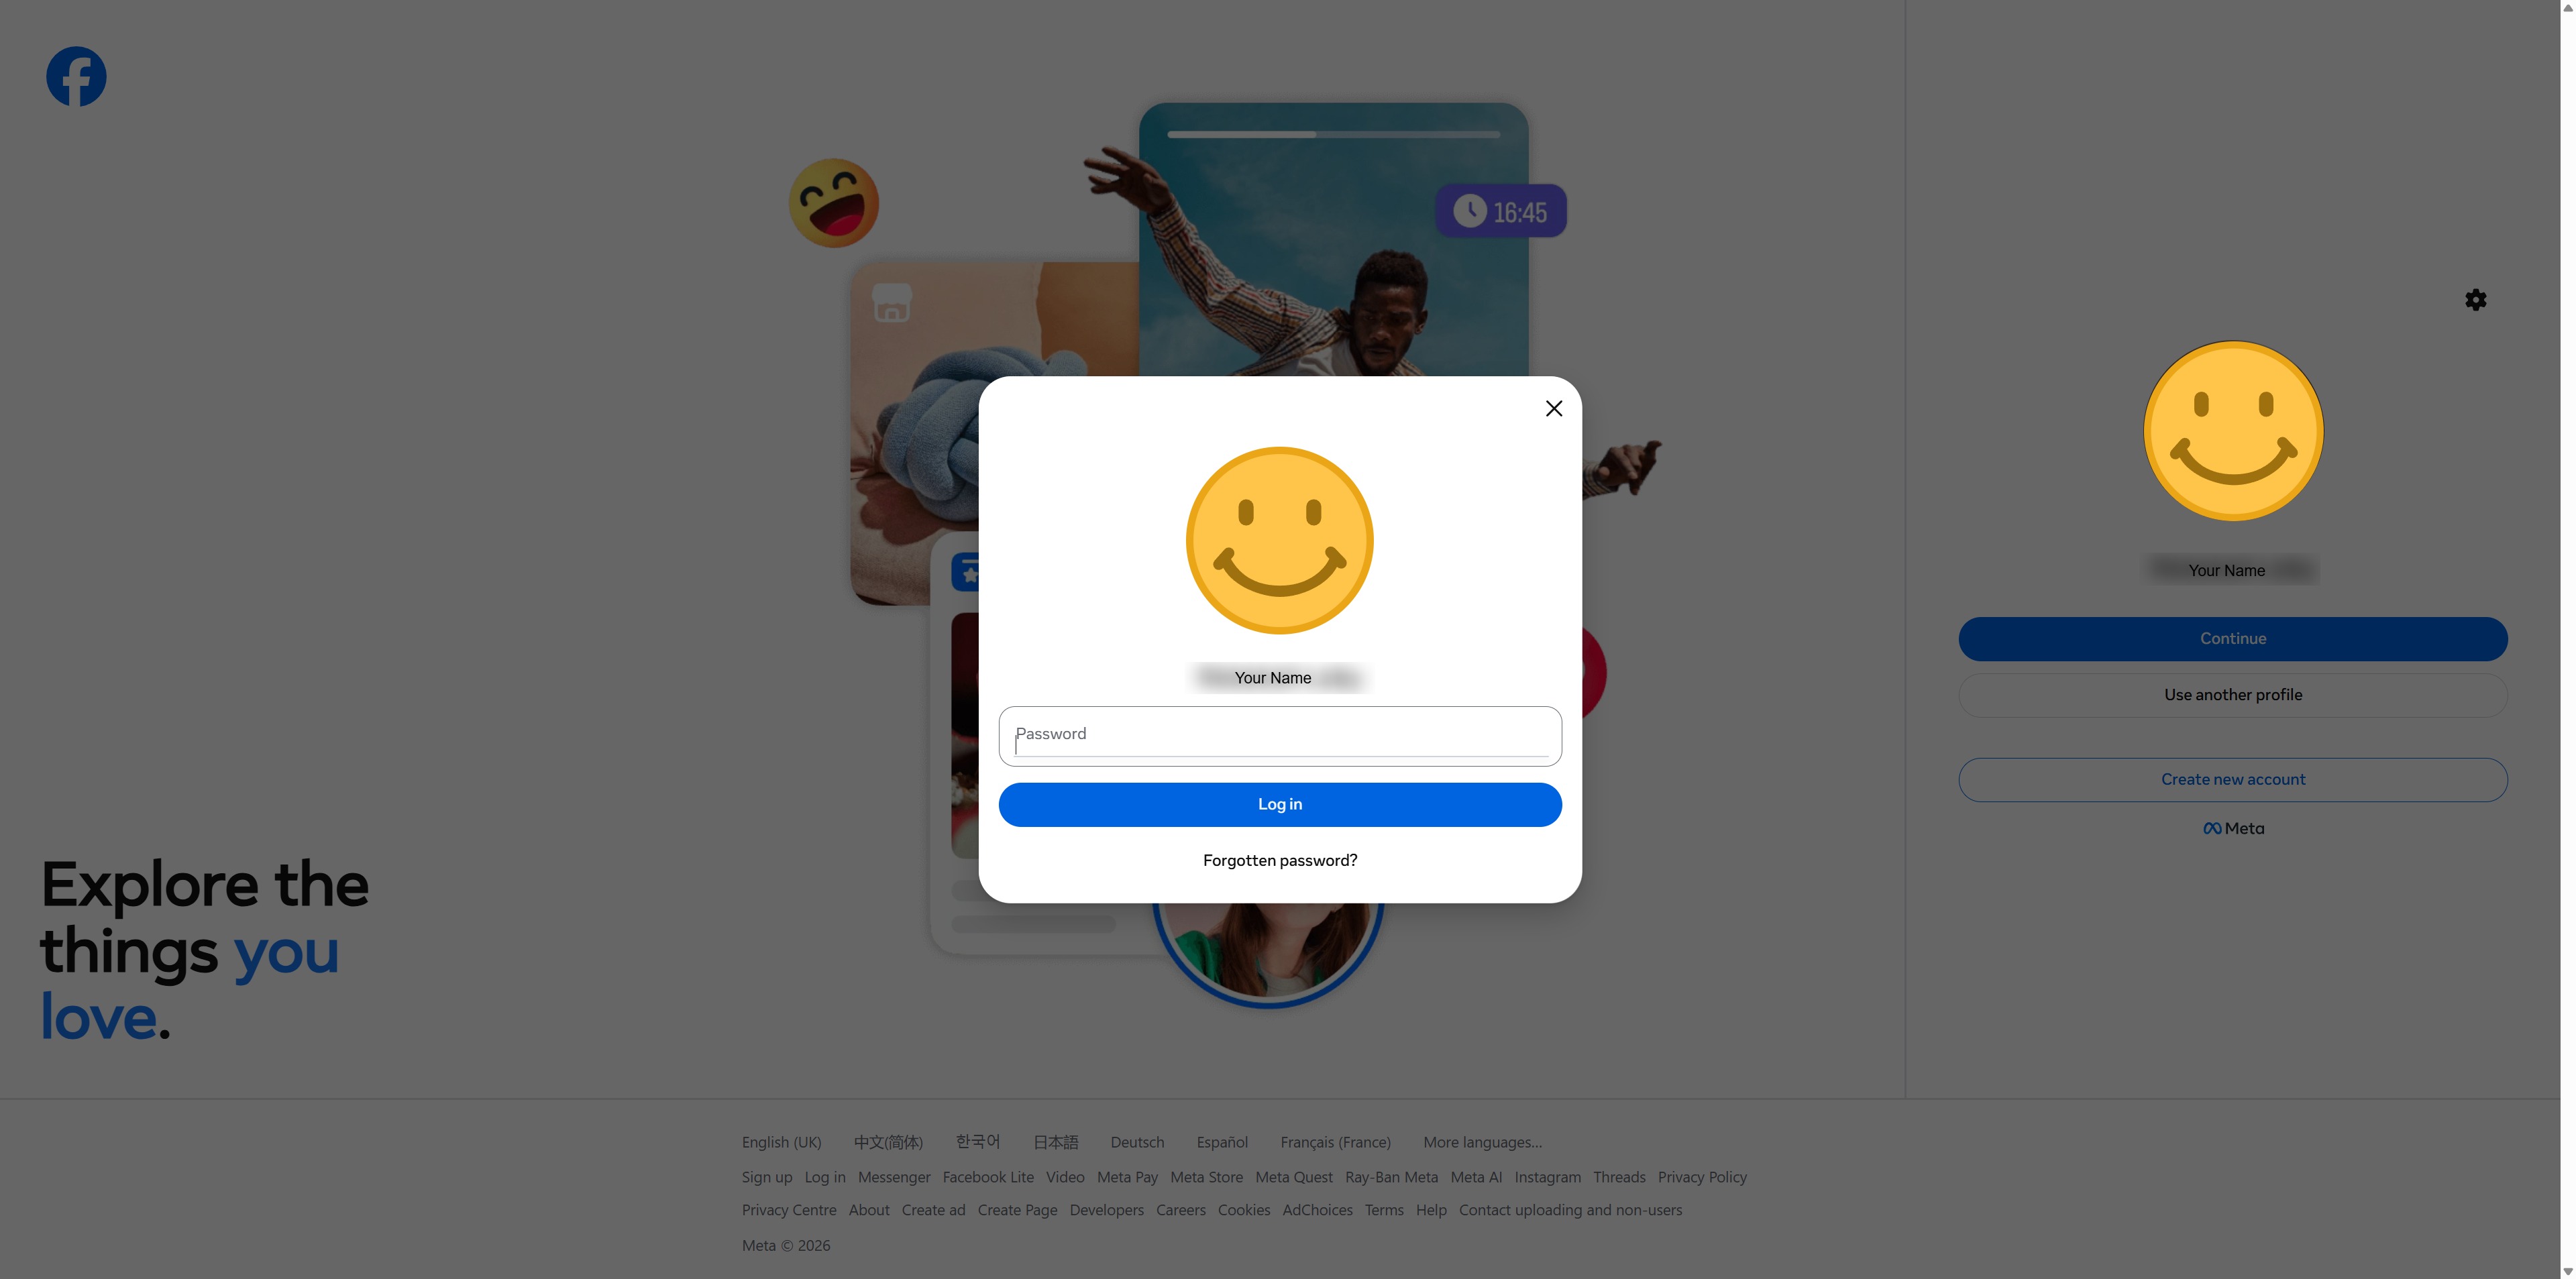
Enter your Facebook password if prompted and select Log In
Complete any multi-factor authentication required by your organisation.
You will be securely redirected into Rave.
Sign In With Email
Use this option if you normally sign in to Rave using your email address and password.
Go to the Rave login page.
Select the Continue with Email/Username sign-in option.
Type in the email address you want to use for SSO (single sign on into Rave)
If that email is linked to Google or Microsoft, you will be prompted to pick one of those
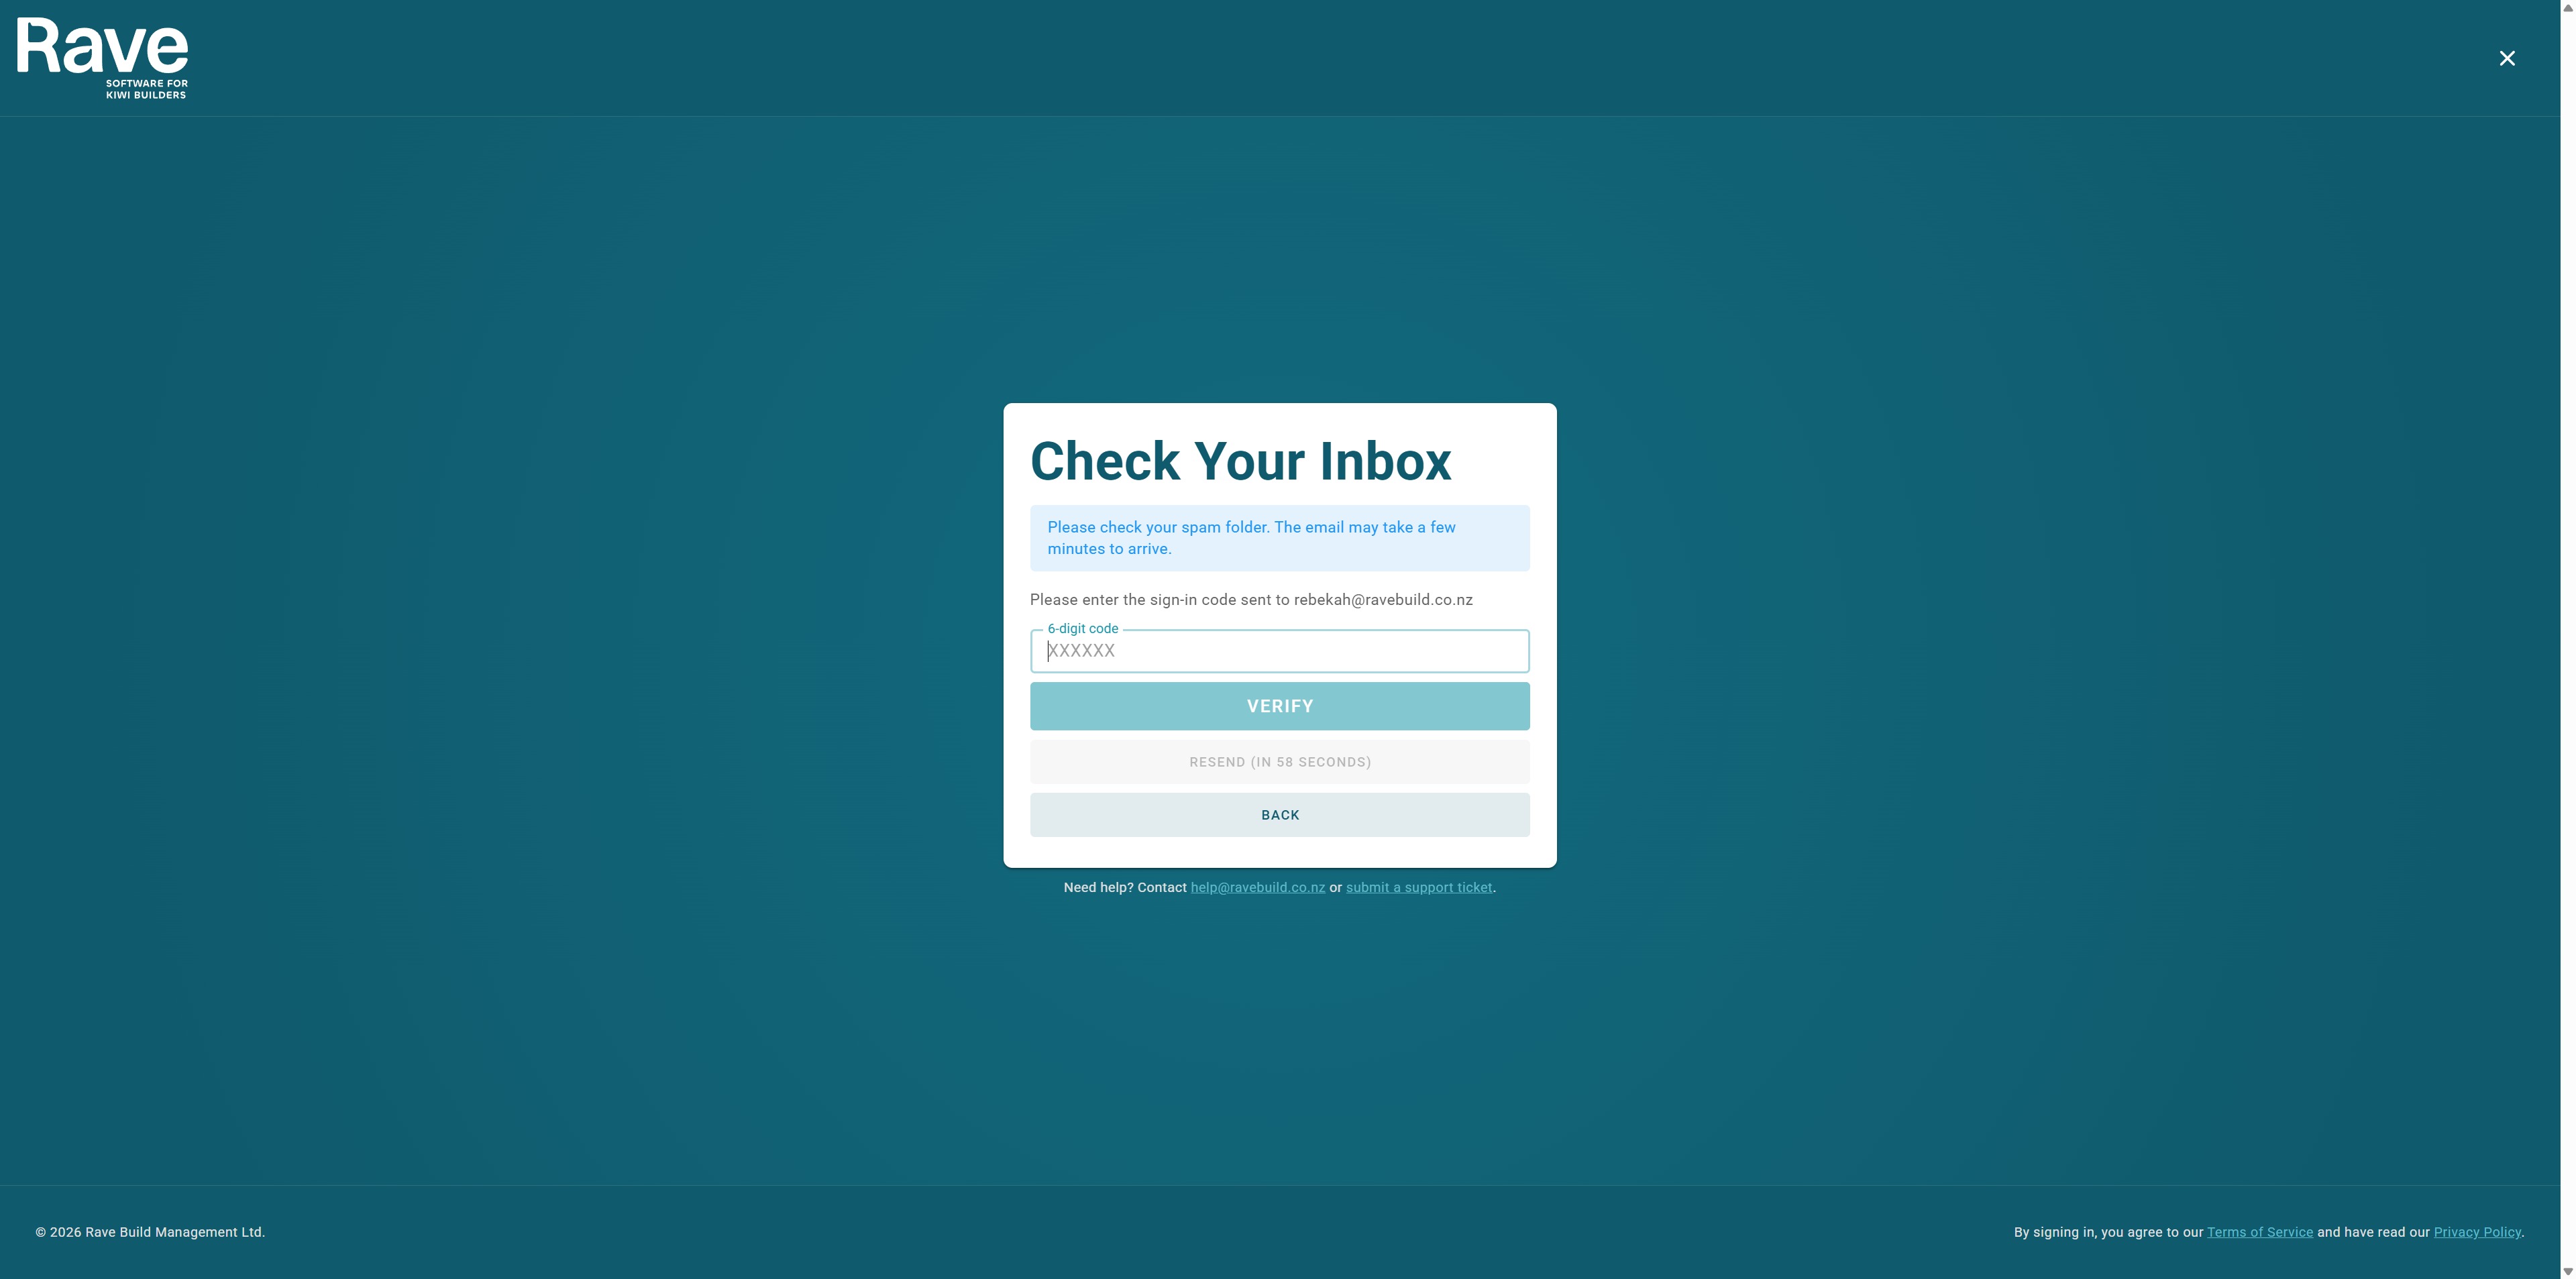
Alternatively, click on Email me a sign-in code.
Open your email and copy the 6-digit code from the email into the box and press verify
You will be securely redirected into Rave
Having Trouble?
The code can only be used once and will expire after a short period.
If the Code Does Not Arrive
Check:
Your spam or junk folder.
That you entered the correct email address.
That the email address is connected to an active Rave account.
Whether your organisation’s email security has blocked the message.
Important Information
Always use the same email address registered to your Rave account.
For example, if your Rave account was created usingname@company.co.nz, you must sign in using the Google, Microsoft, Facebook, or email connected to name@company.co.nz.
Signing in with a different email address may create an error or prevent Rave from locating your account.
Need Help?
If you are unable to sign in, contact your Rave Administrator or the Rave Support Team.
When requesting assistance, include:
Your name.
Your business name
Your email address/sign in for Rave
The sign-in option you are using.
A screenshot of any error message displayed.
Sign In Preferences for already logged-in users
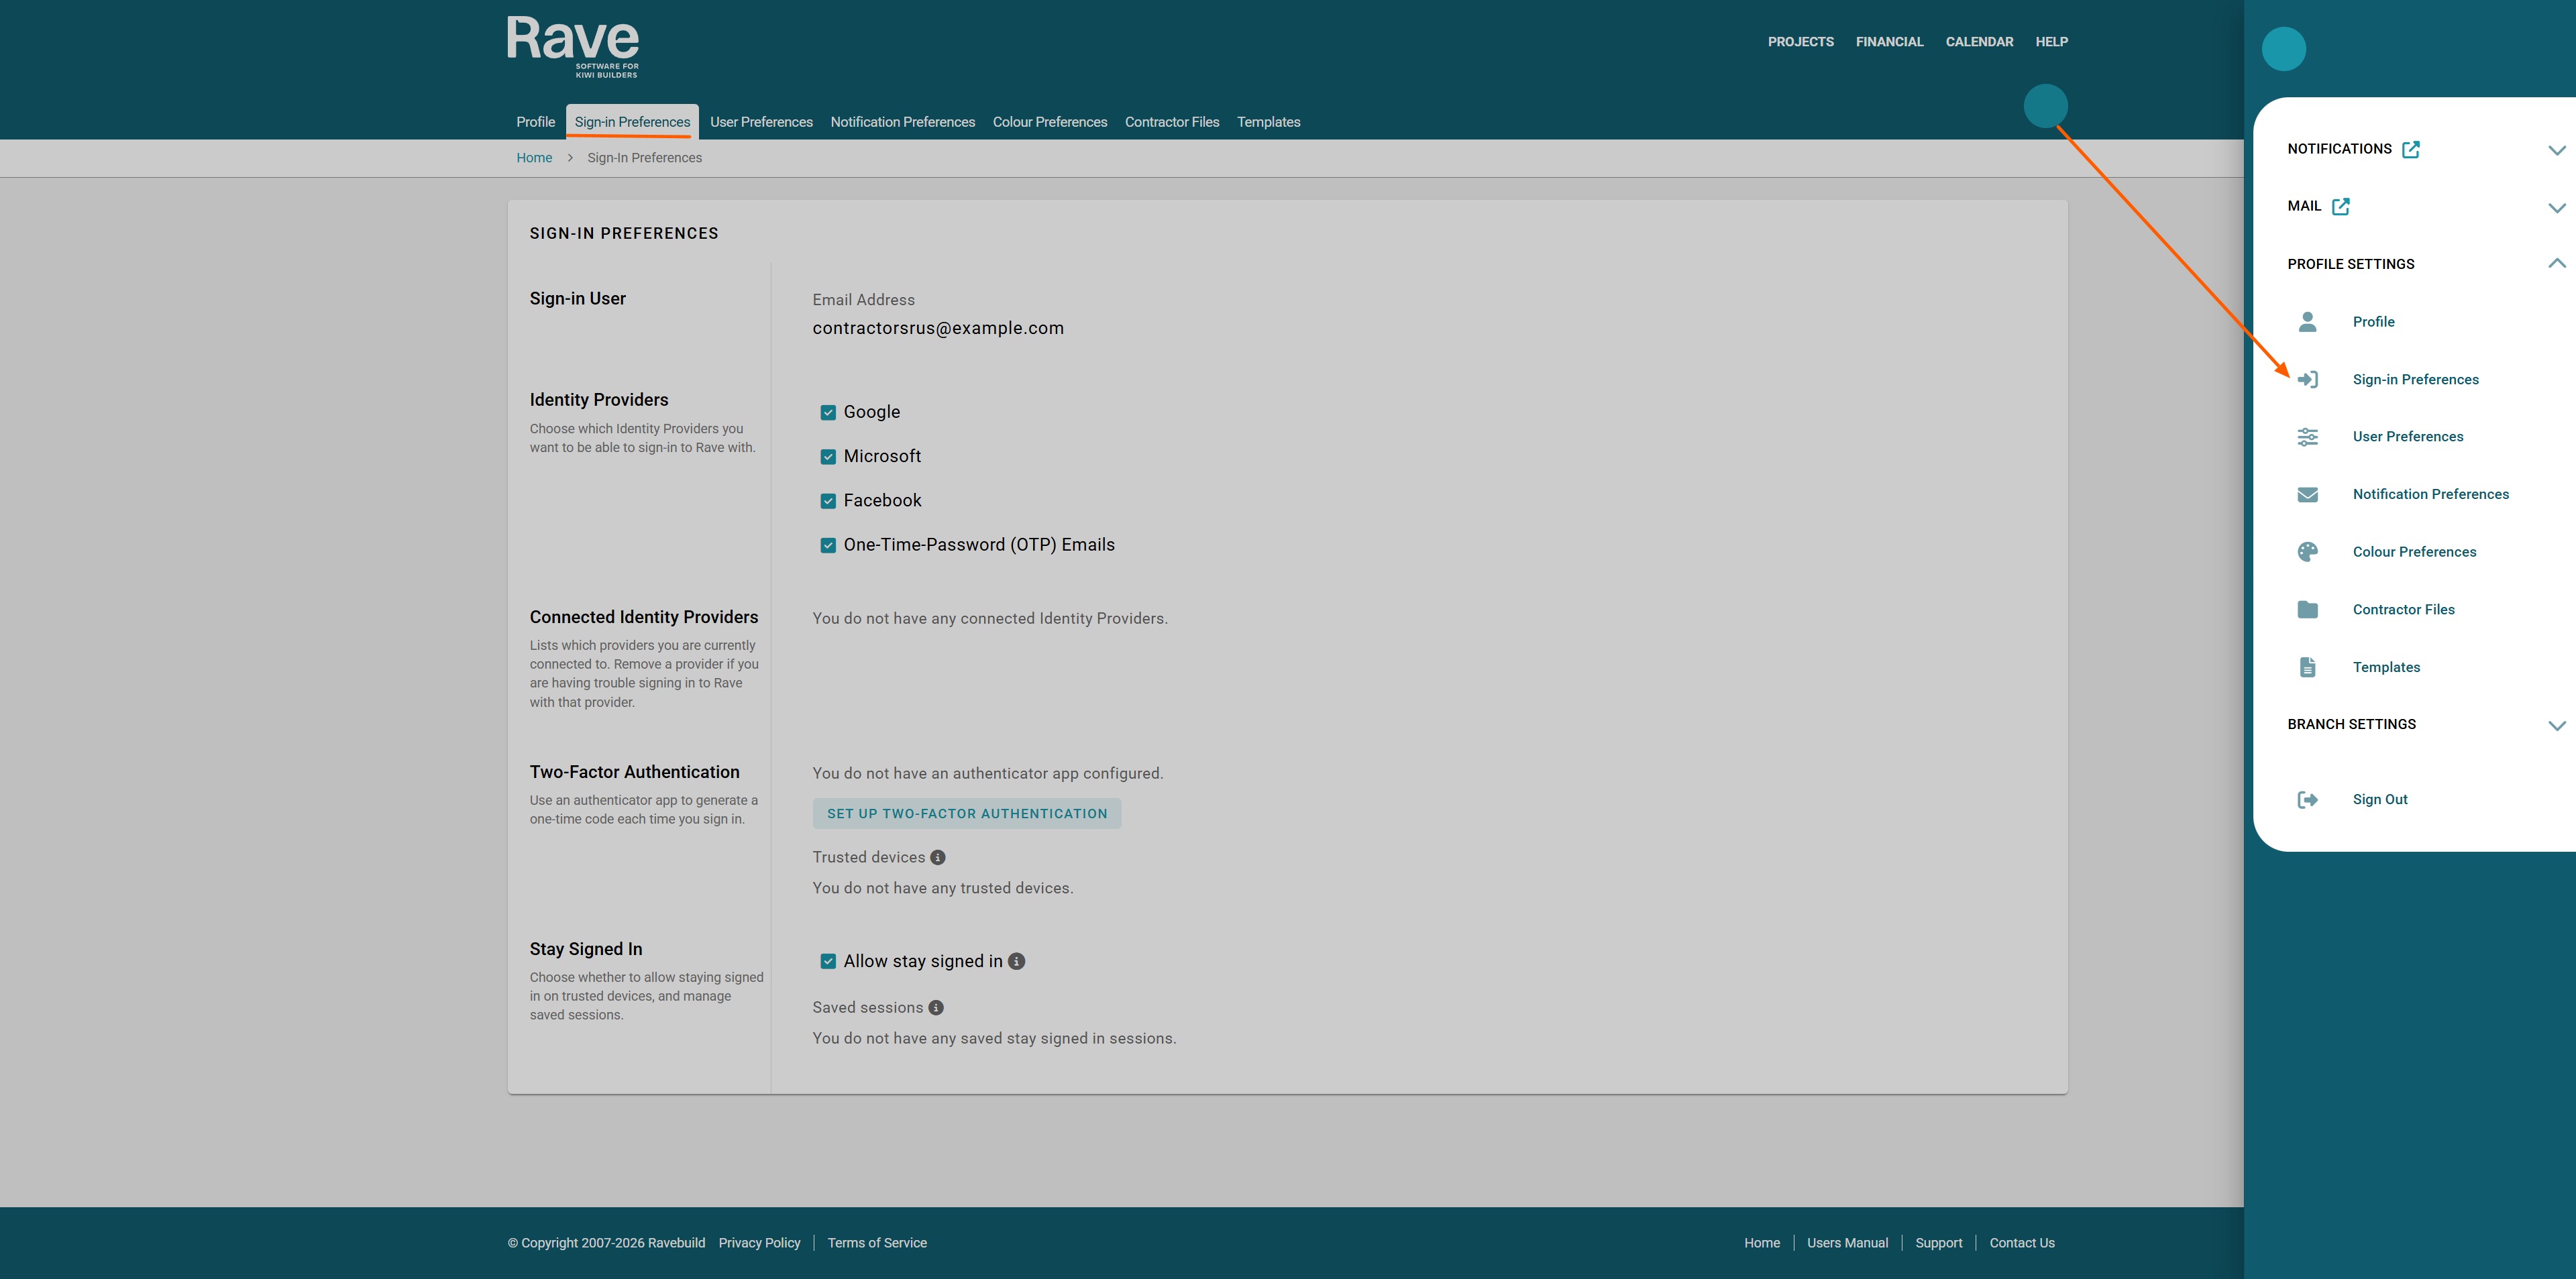
For existing Rave users who are already auto-signed in, you will need to either sign out and then sign back in and follow the above steps or navigate to Profile Settings - Sign-in Preference to set up your single sign-on and 2FA.
You can choose to Skip for Now until 31 August. After this date, selecting a sign-in method will become mandatory.
- Click Upgrade Now to begin setting up your preferred sign-in method.
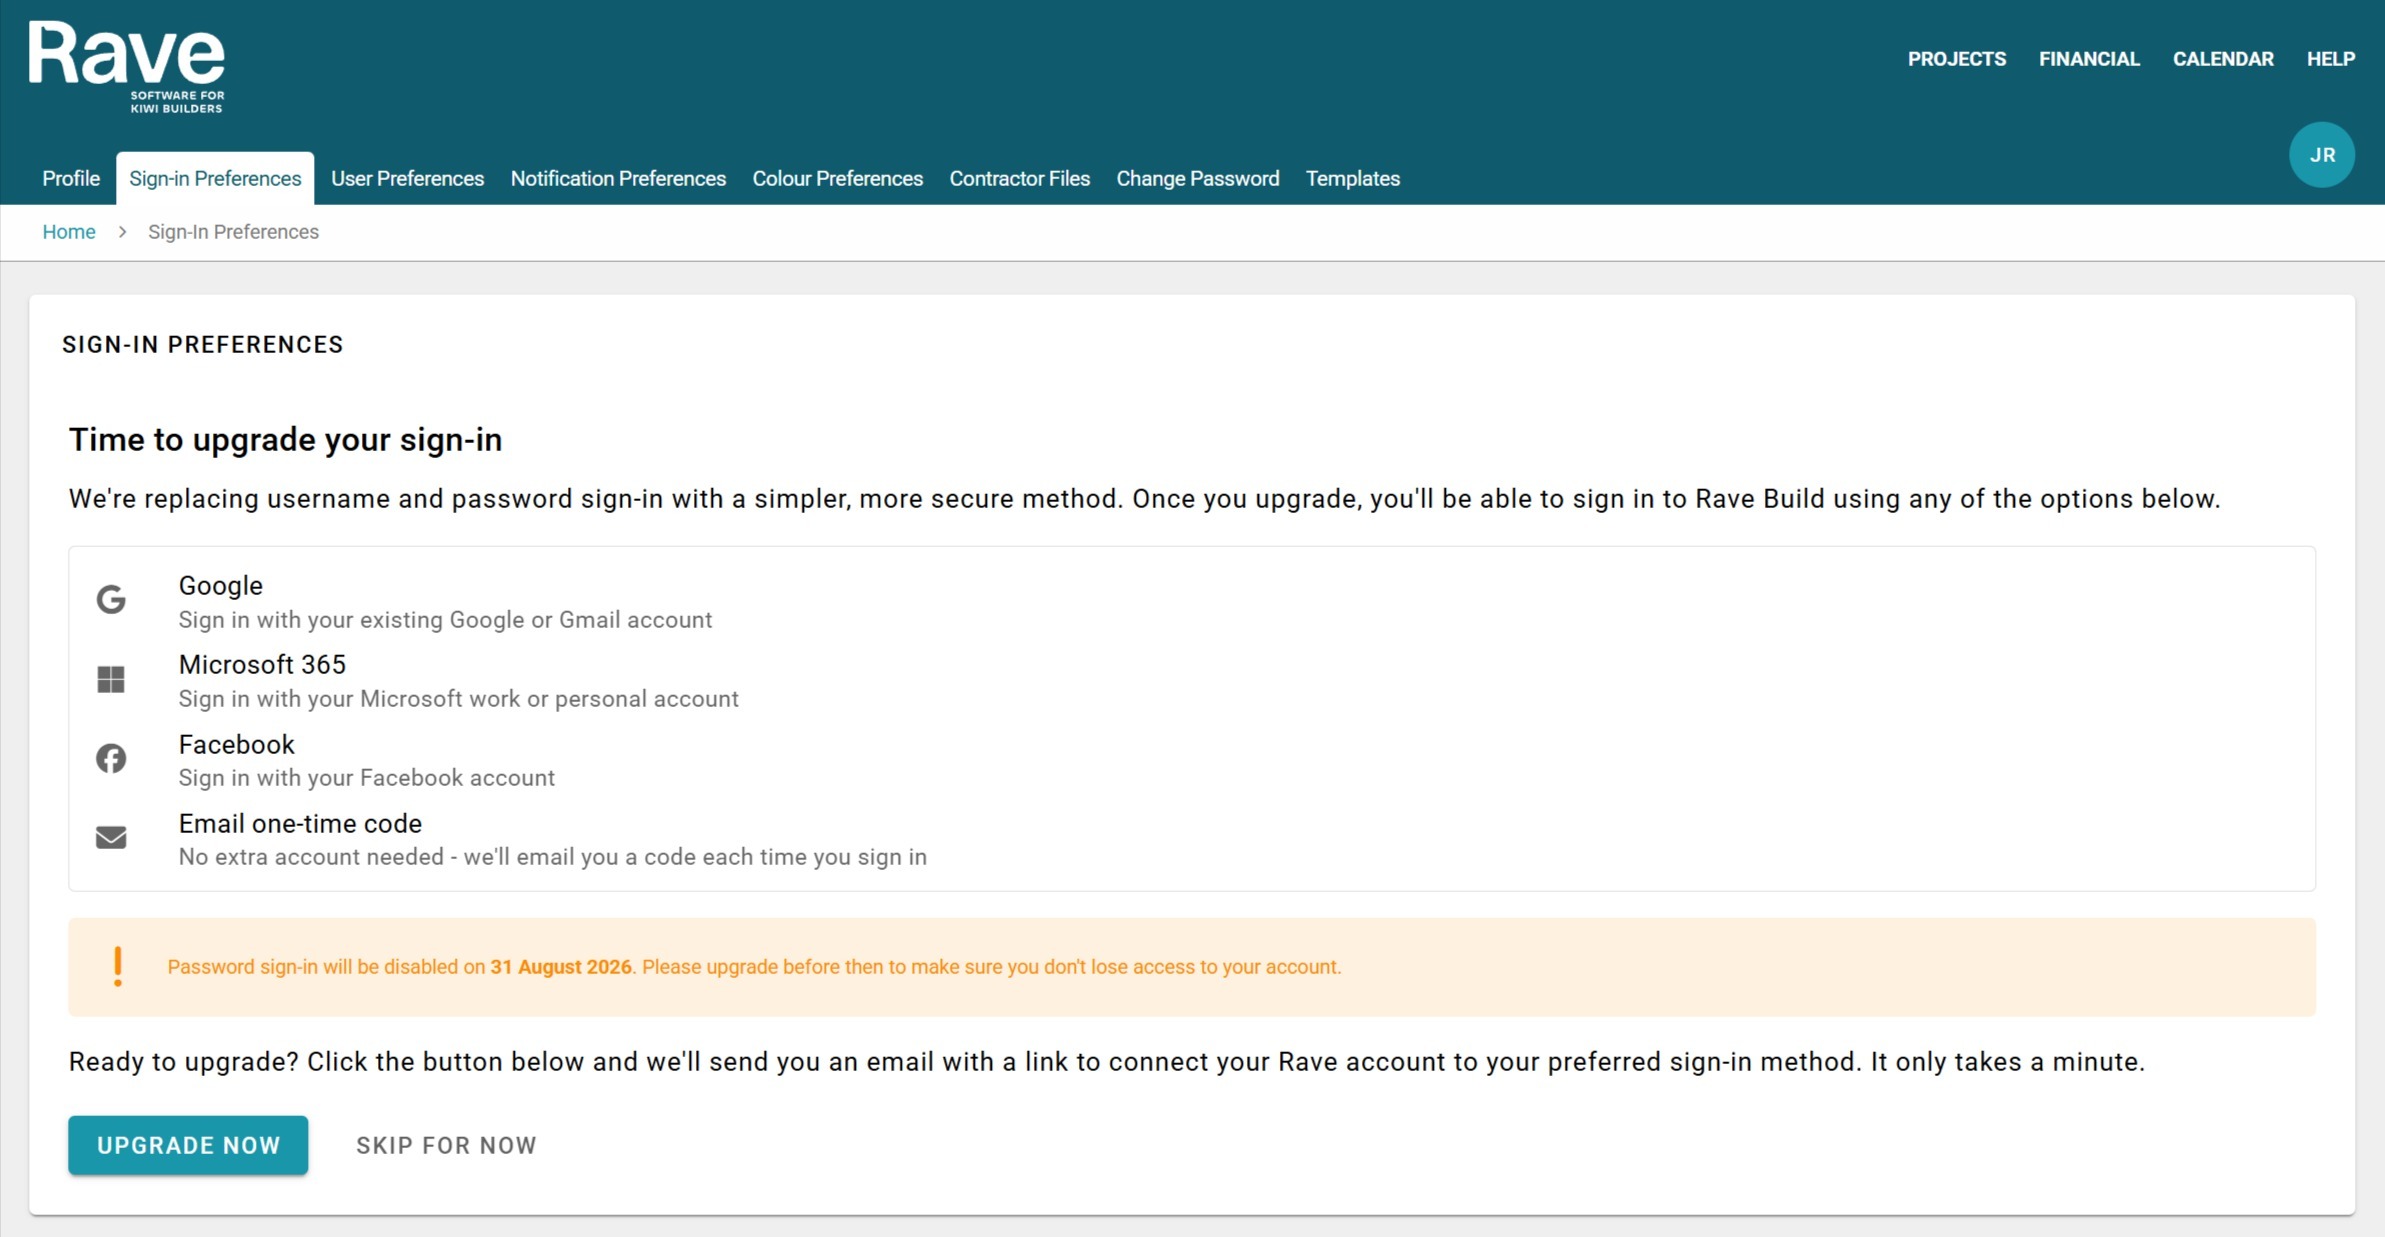
- Enter the email address you would like to use to sign in to Rave.
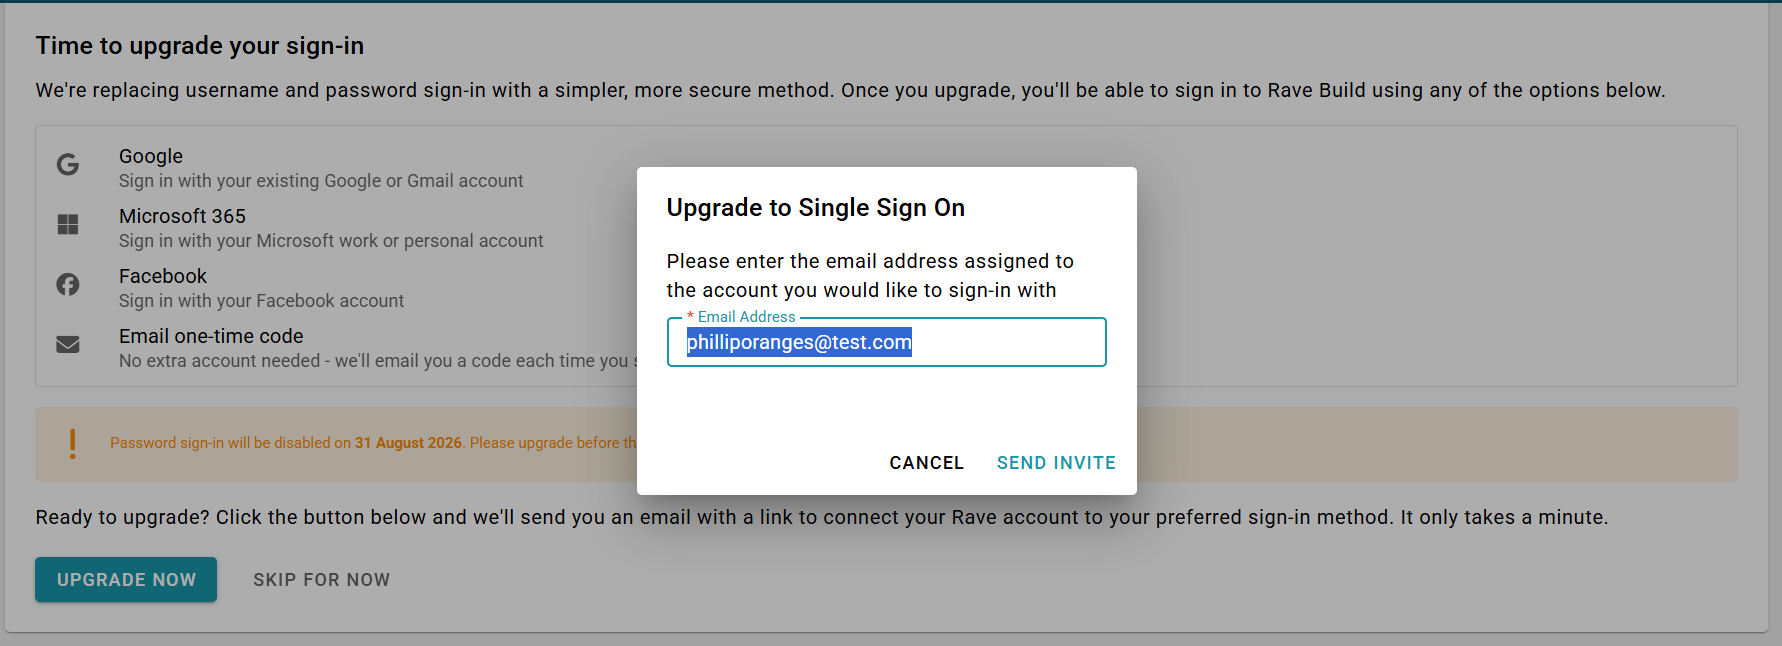
- Once you've entered your email address, Rave will send you a Single Sign-On invitation email containing instructions to complete the setup. If you dont see the email check your junk or spam folder before trying the Re-Send email button in Rave.
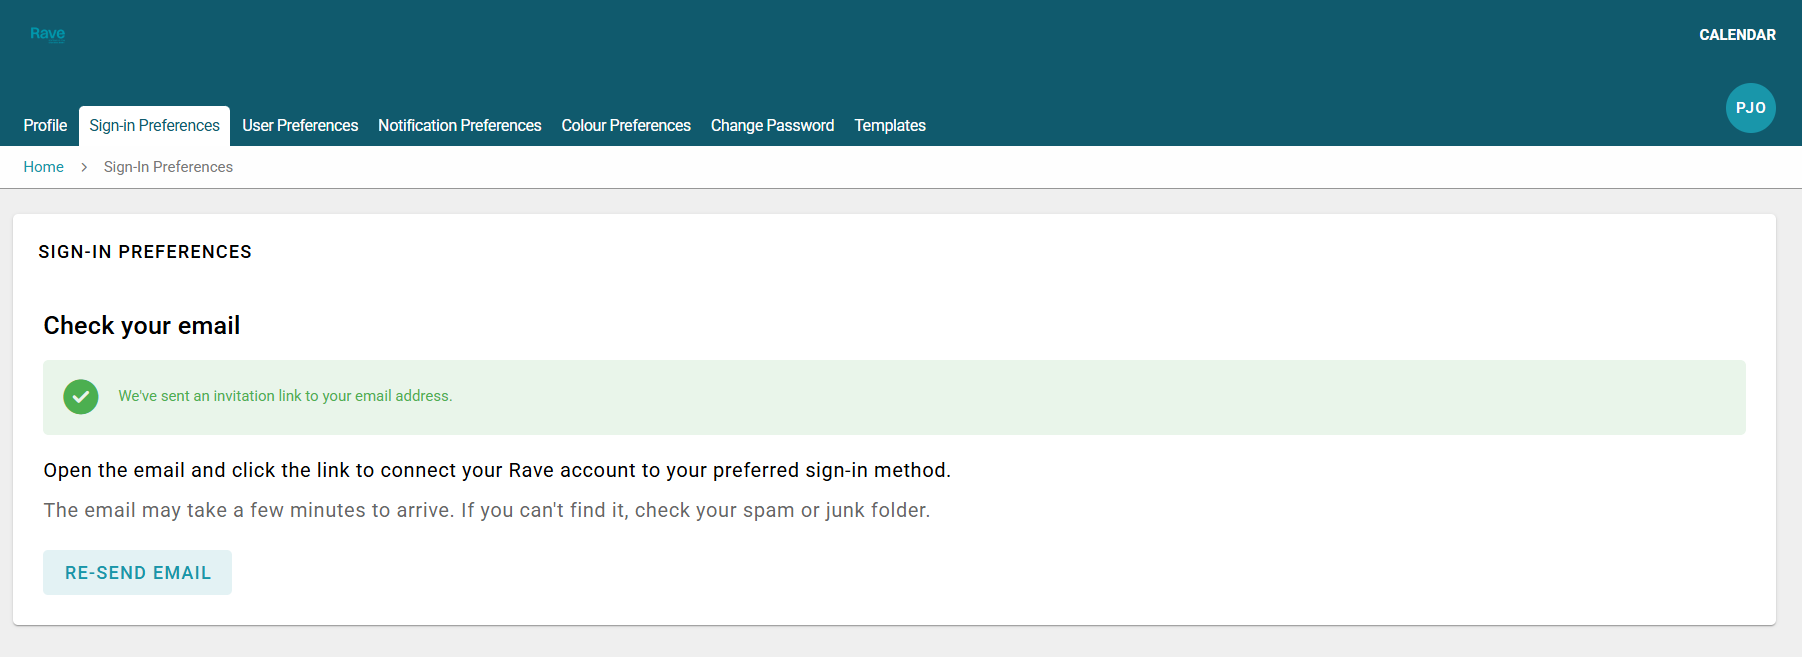
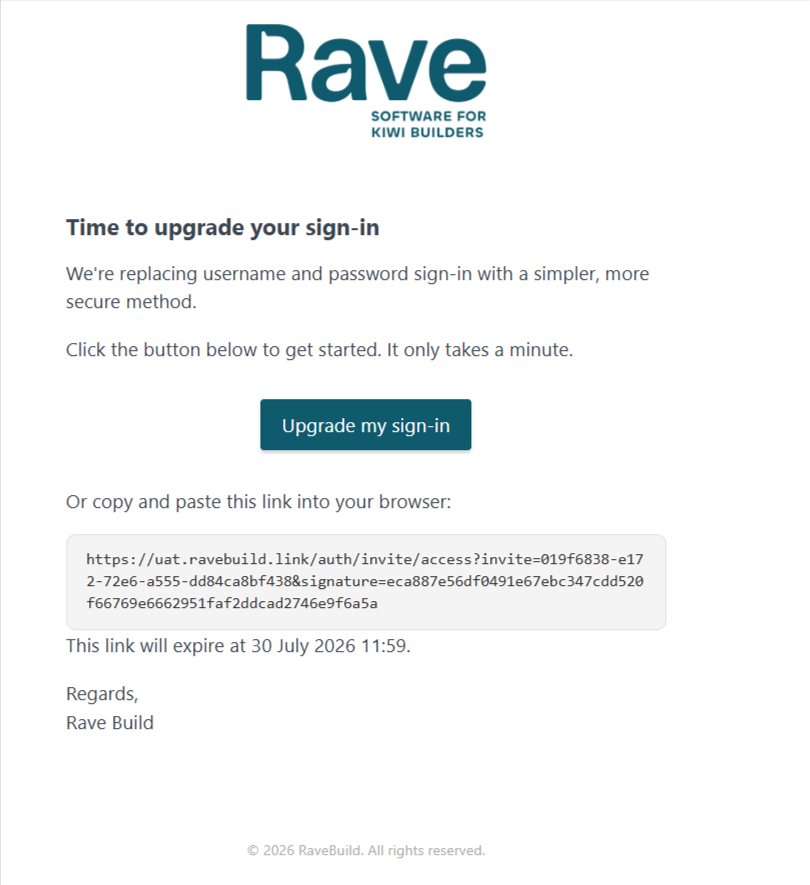
- Open the email and click Upgrade My Sign In.
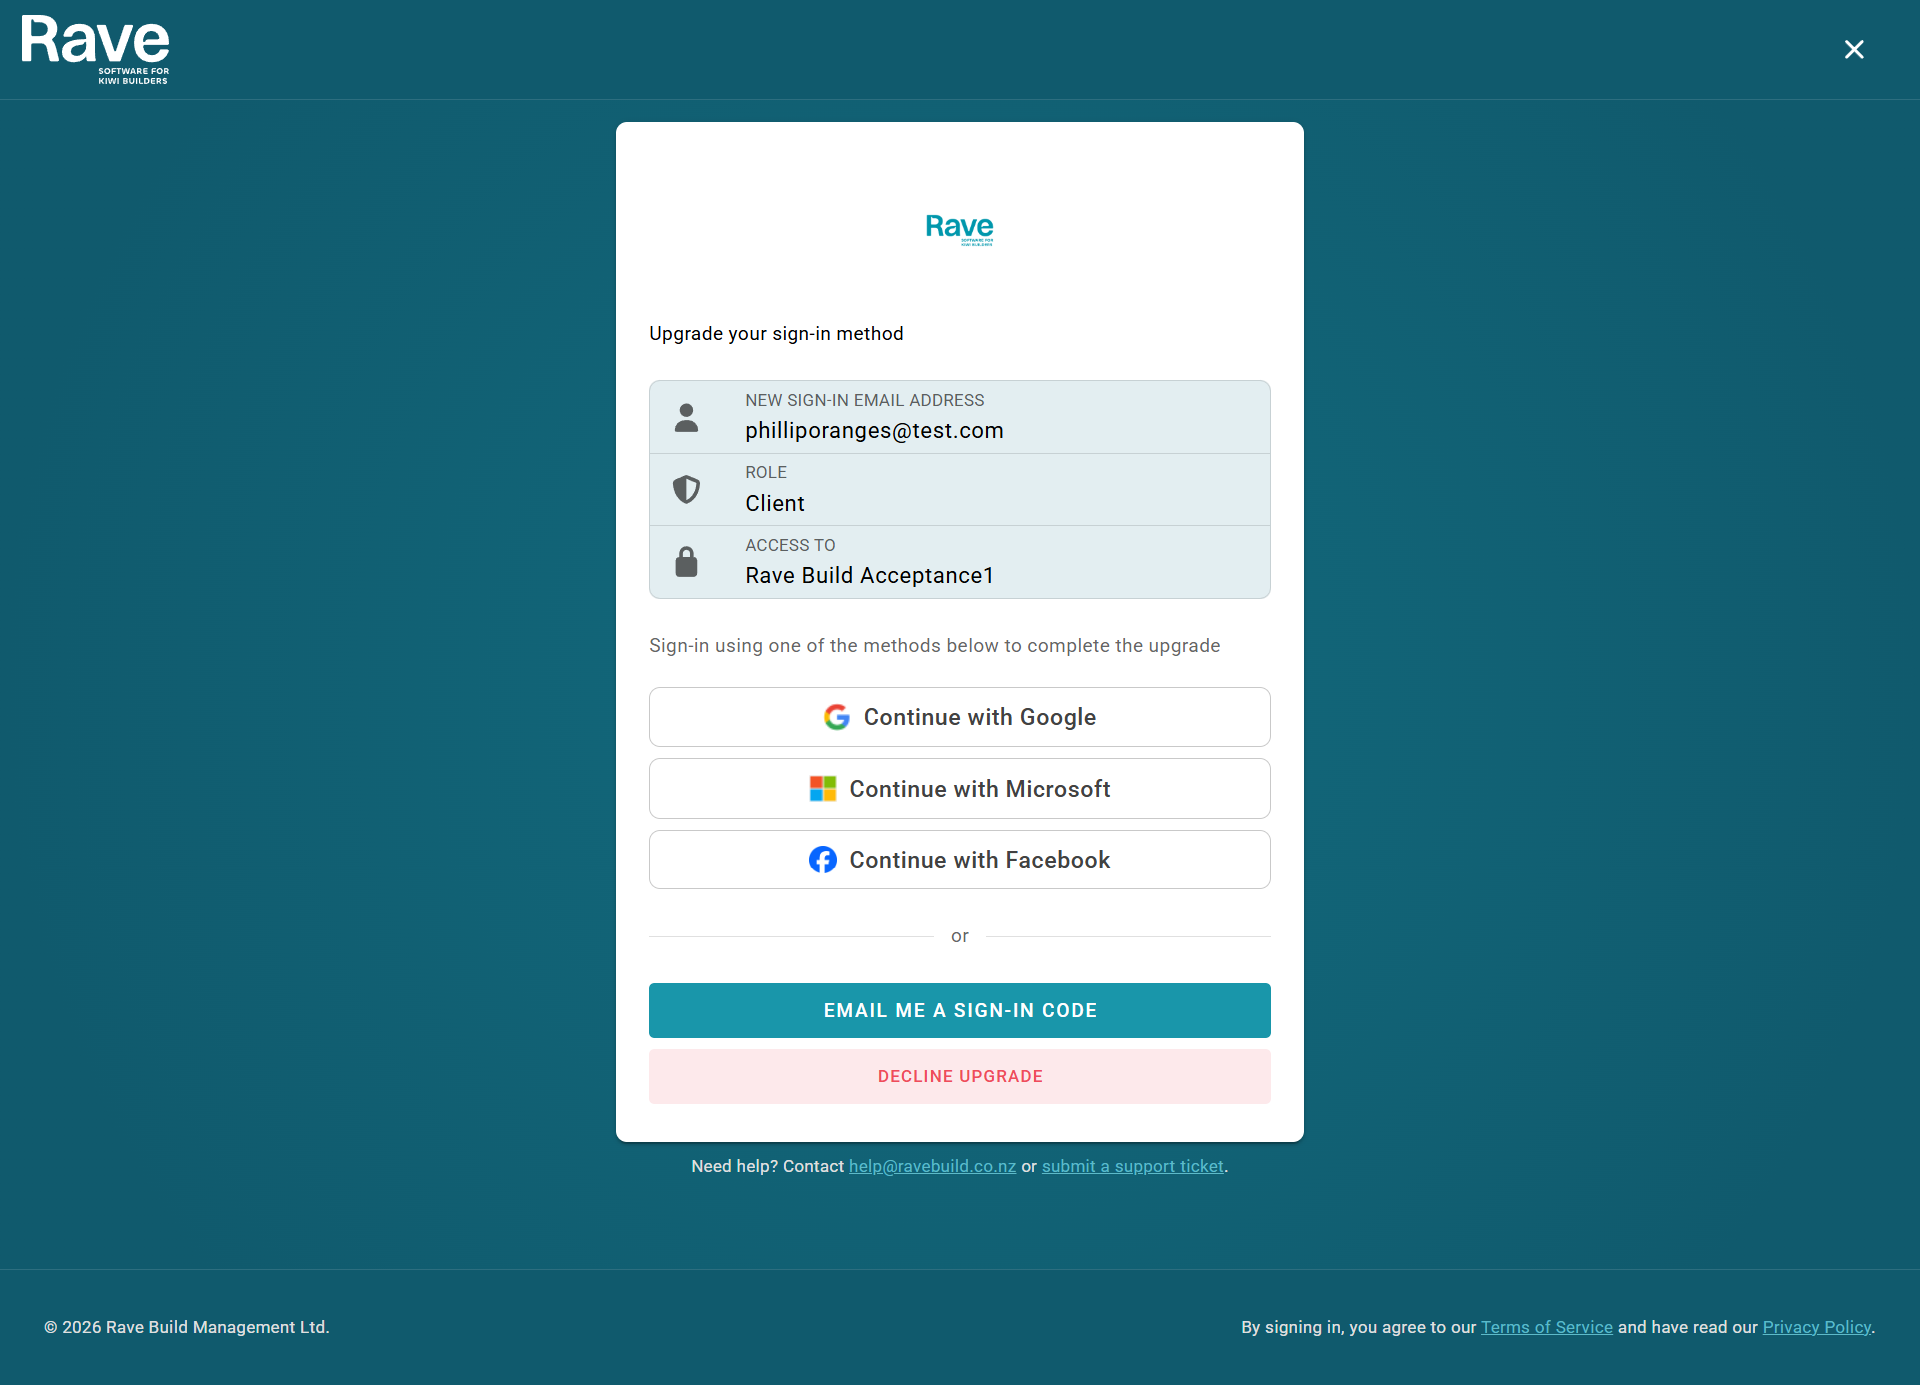
- You will then be redirected to the Rave Single Sign-On page, where you can choose your preferred sign-in provider and complete the setup process. The options to choose from are the same as the beginning of this article.
Once you have successfully completed the SSO steps to help keep your Rave account secure, you'll need to set up Two-Factor Authentication (2FA).
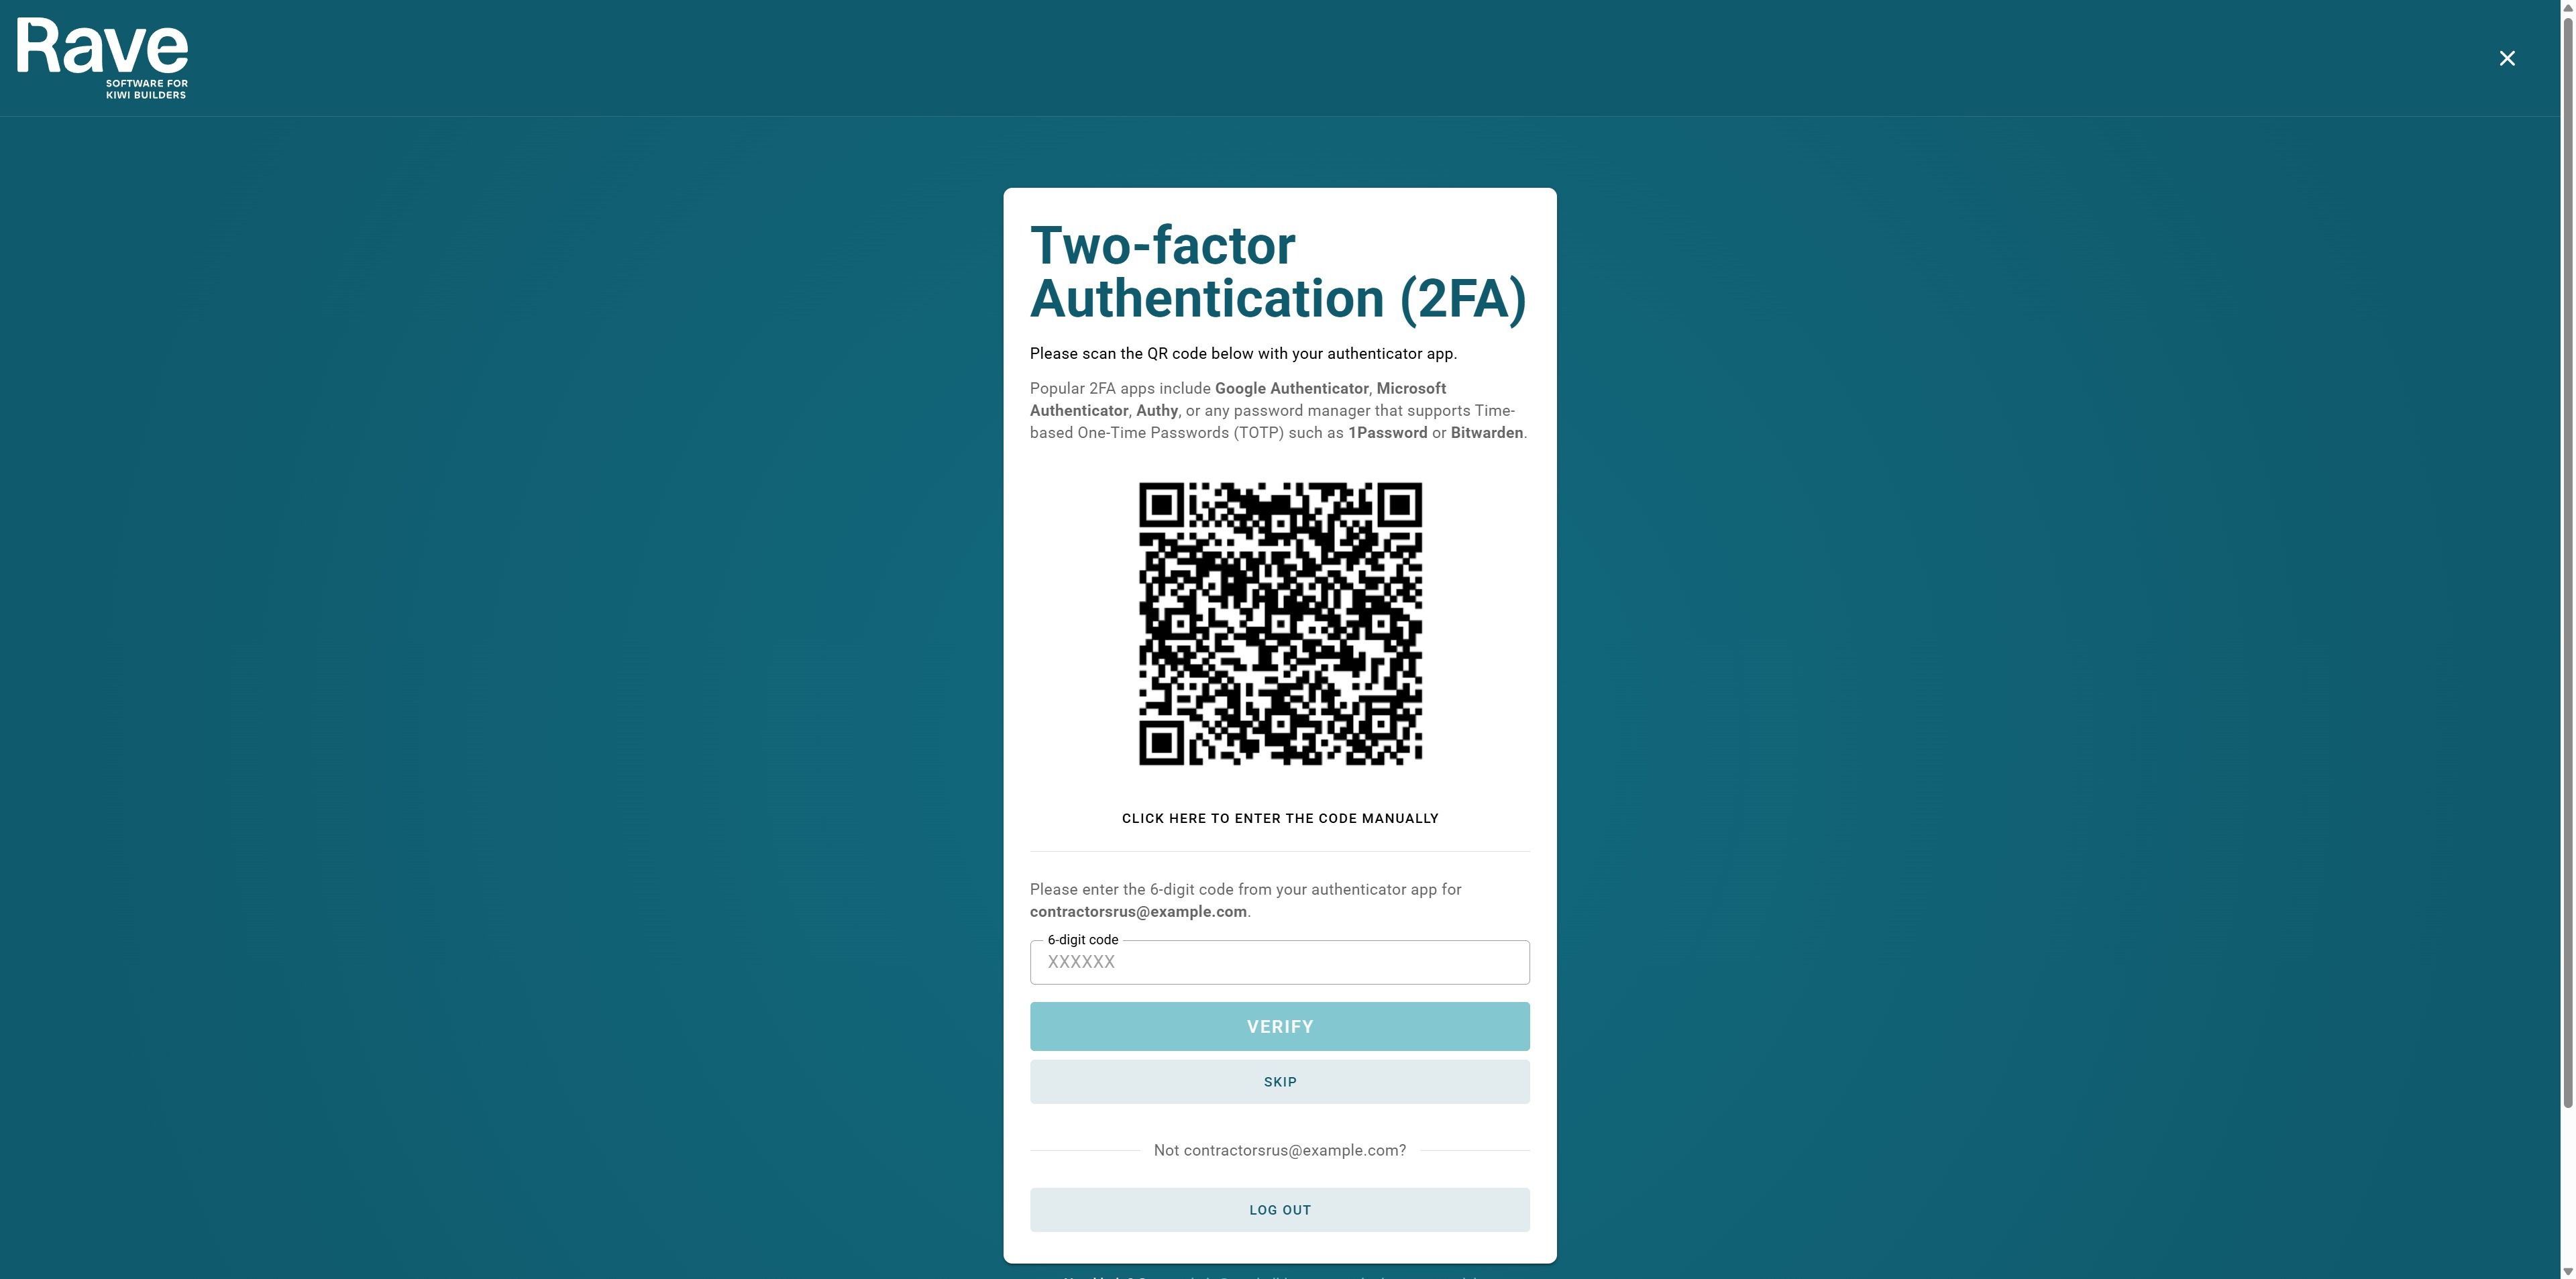
Step 1: Once the 2FA box pops up download or open an authenticator app on your mobile device. Supported apps include:
- Google Authenticator
- Microsoft Authenticator
- Authy
- 1Password
- Bitwarden
- Any app that supports Time-based One-Time Passwords (TOTP)
Step 2: Scan the QR Code
Using your authenticator app:
- Select Add Account or the + icon.
- Choose Scan QR Code.
- Scan the QR code displayed on the Rave screen.
Can't scan the QR code?
Click "click here" to enter the code manually and copy the setup key into your authenticator app instead.
Step 3: Enter the Verification Code
Once the account has been added, your authenticator app will generate a unique 6-digit code.
- Enter the 6-digit code into the 6-digit code field in Rave.
- Click Verify.
Note: The verification code refreshes every 30 seconds. If the code expires before you enter it, simply use the new code displayed in your authenticator app.
Step 4: Skip (If Available)
If your organisation has allowed it, you may see a Skip button. This allows you to postpone setting up 2FA until a later date.
Important: Once the skip period has expired, you will be required to complete 2FA setup before you can continue using Rave.
Need to Sign In with a Different Account?
If you've signed in with the wrong account, click Log Out at the bottom of the screen and sign in again with the correct email address.
Sign-In Preferences
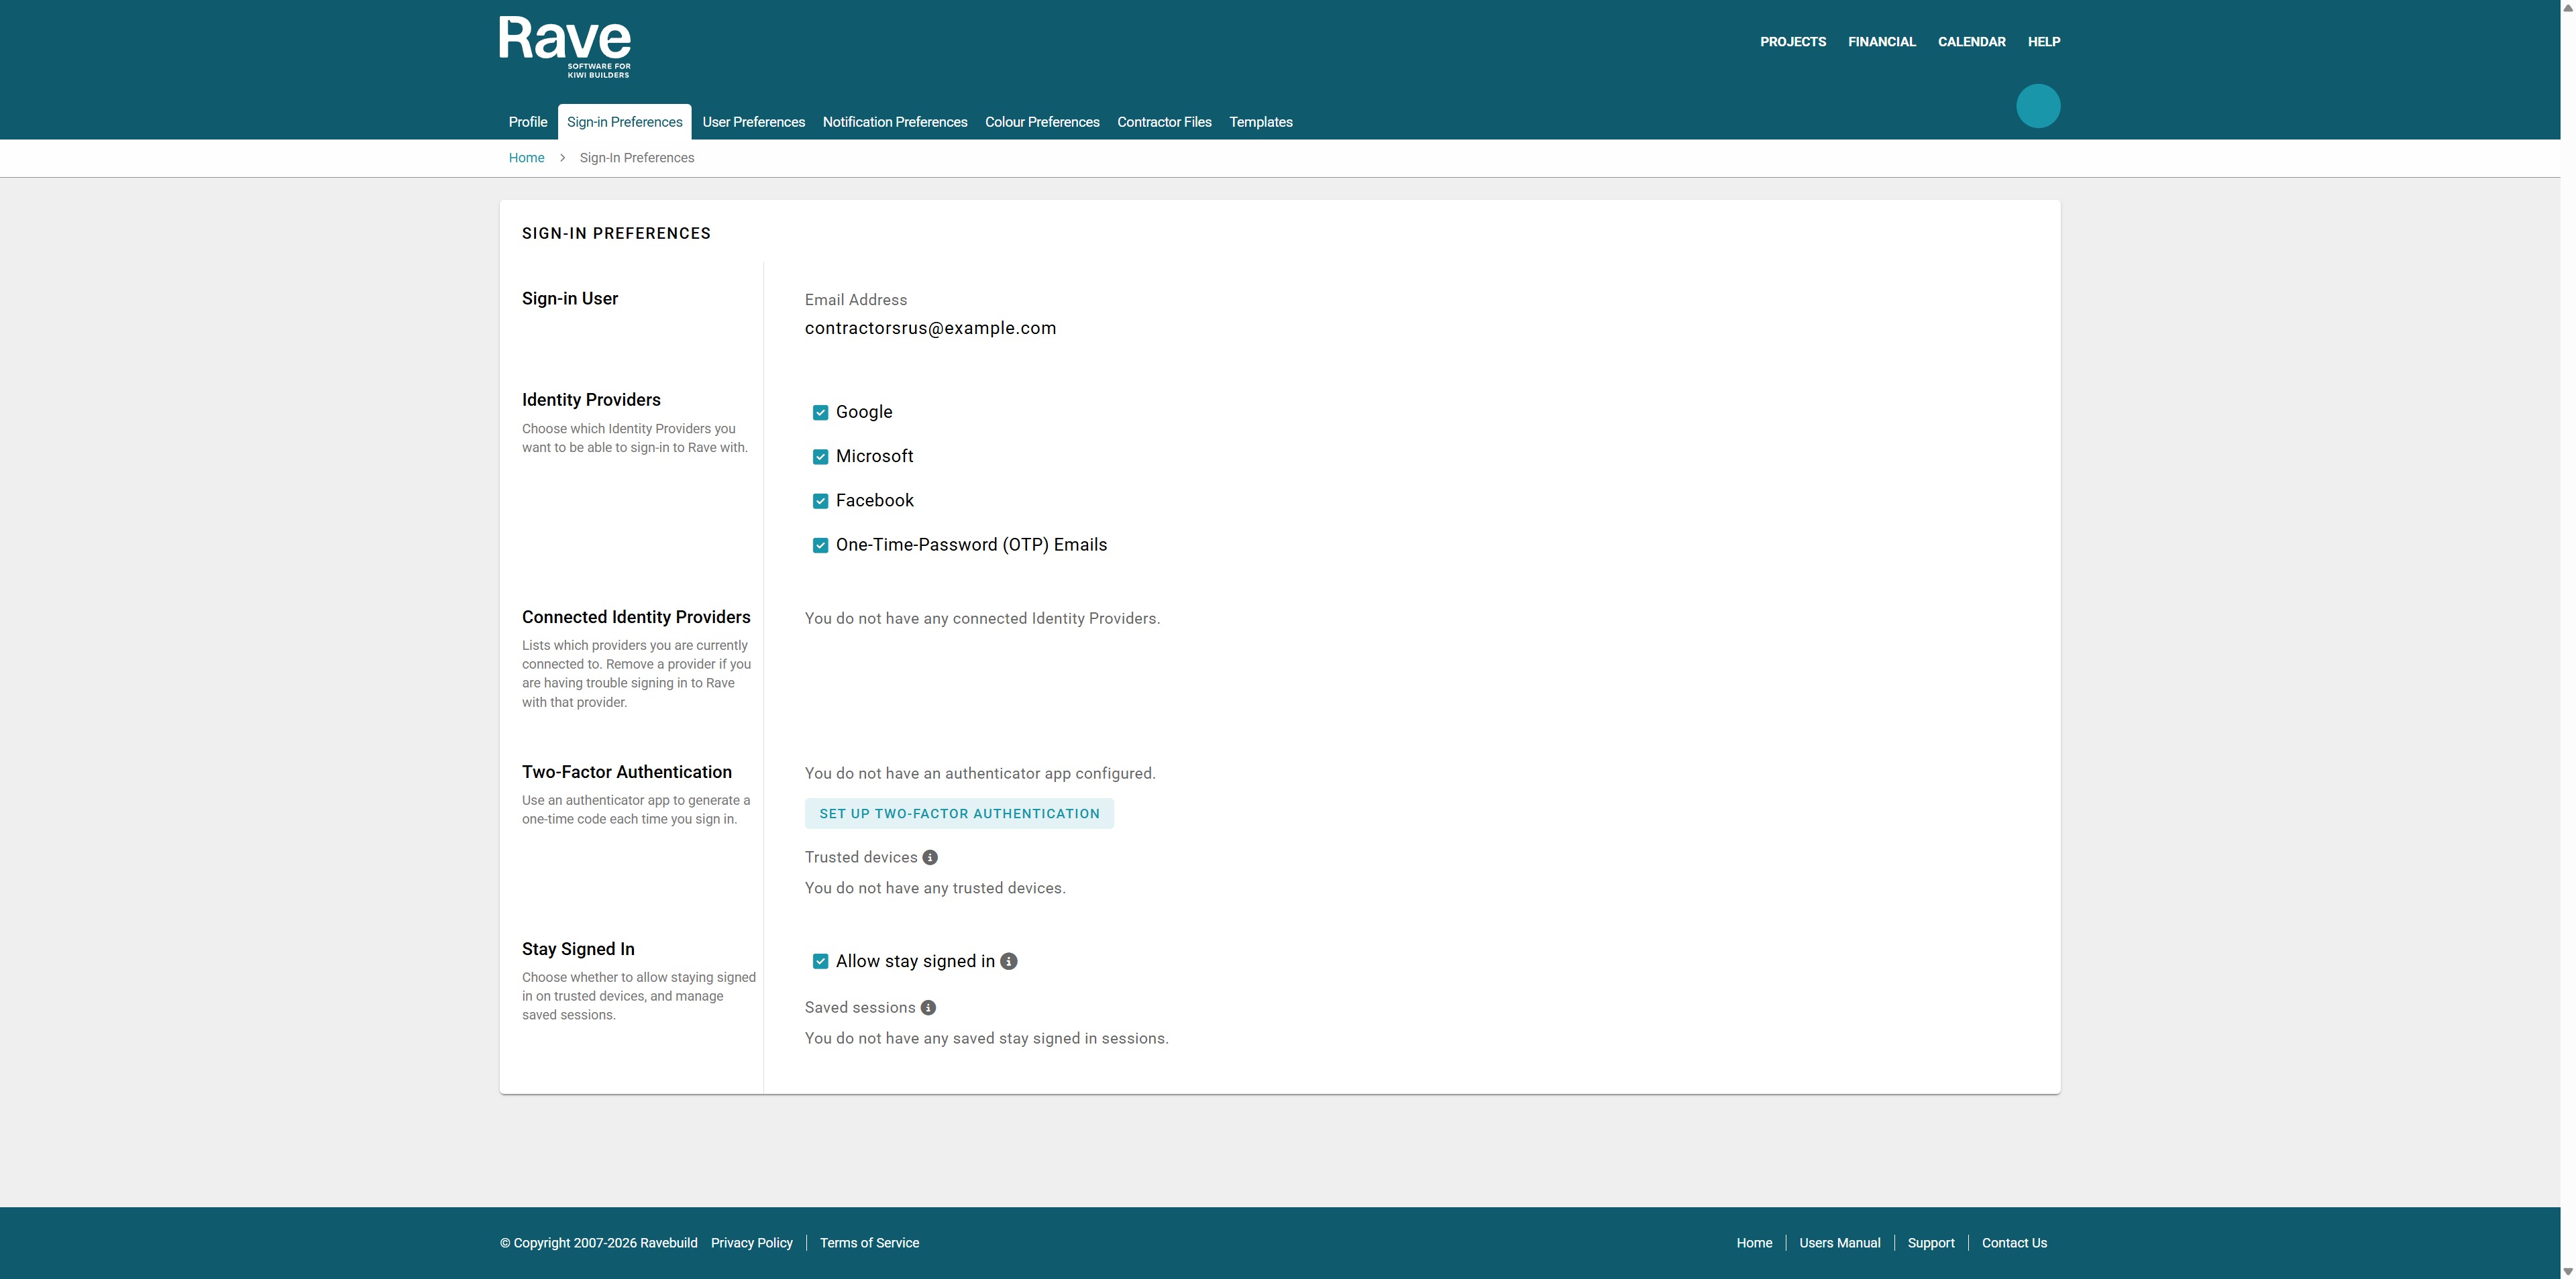
From your profile drop-down, select Sign In Preferences.
This will open your options for signing in.
Sign-in User - This is your email address associated with your Rave Profile or Profiles.
Identity Providers - Here, you can uncheck the options you don't want to use to sign in to Rave. Note: not all options will appear if your business owner or head office has disabled certain options.
Connected Identity Providers - This will show the current approved email address and provider, along with the creation date and last access date.
Two-Factor Authentication - This will show whether you have enabled two-factor authentication. It shows what the current option is (i.e., the authenticator app), when it was created, and when it was last accessed. Below, it will also show the trusted devices you have approved.
Stay Signed in- With this box checked, you will be auto-signed in for 30 days before you have to re-sign in again.
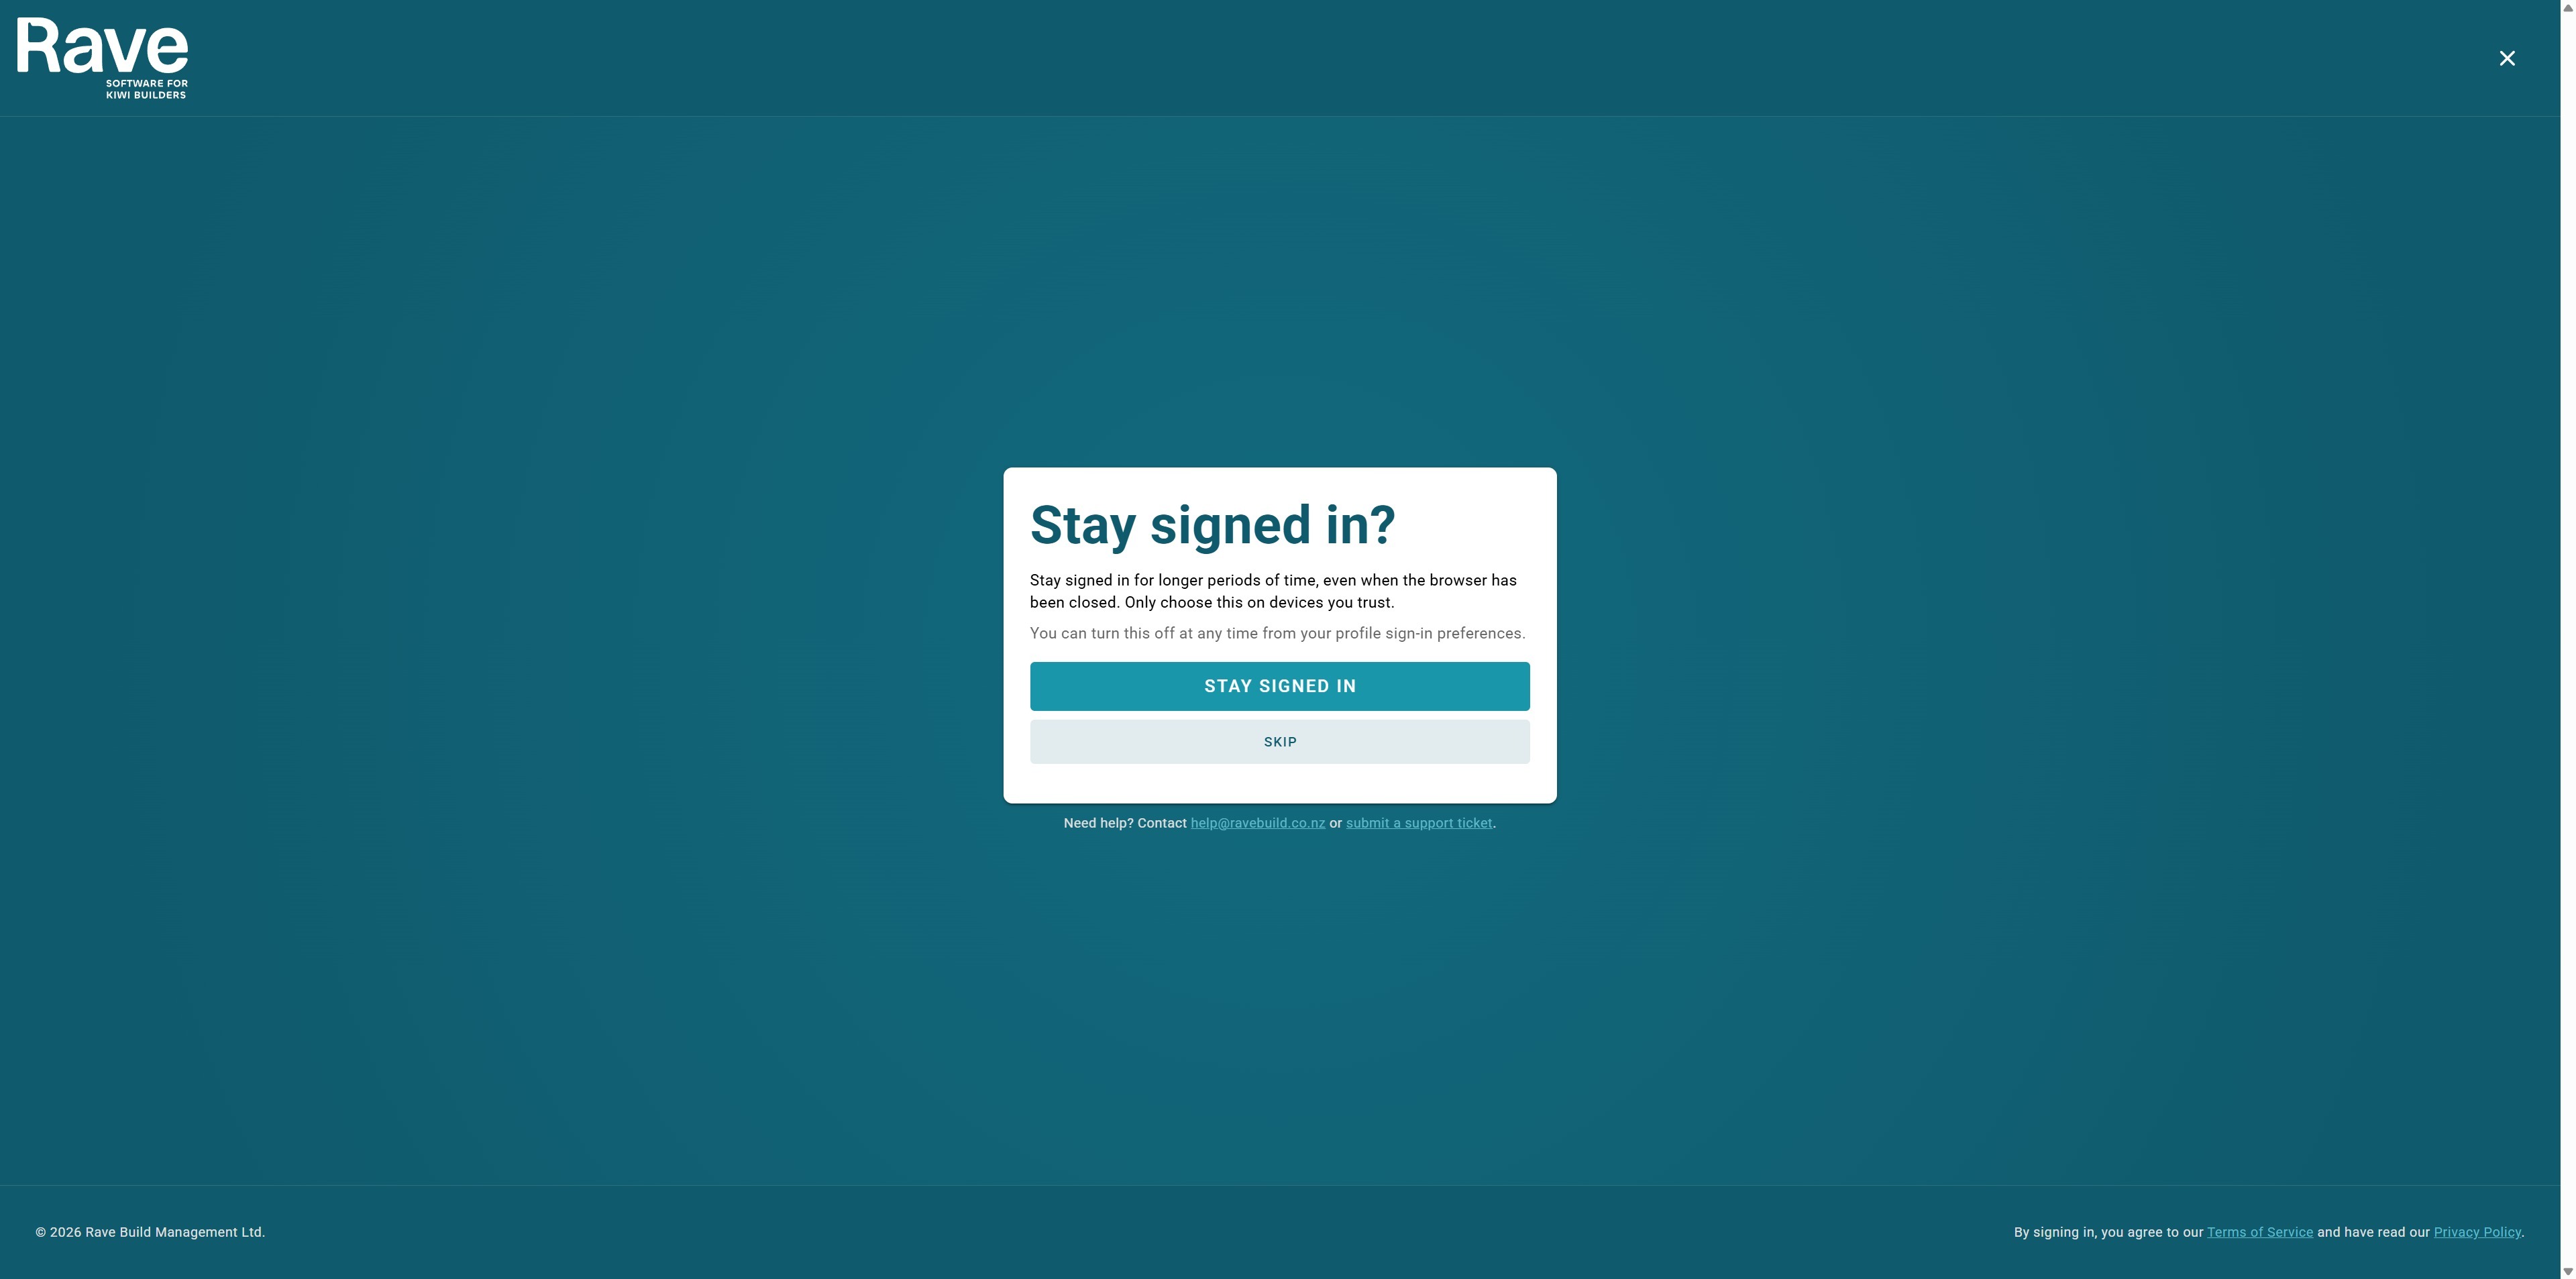
Once you have signed in to Rave, you can choose to Stay Signed in. Select the Stay signed in tab as shown below, and you'll be auto-logged in for 30 days before you are required to sign back in.
Sharing a Rave Build Login
If multiple people need access to the same Rave Build account, this can be configured while still maintaining the security requirements of Two-Factor Authentication (2FA).
How it Works
A single Rave Build login can be accessed by multiple users. To set this up, we require:
The primary email address currently registered to the Rave Build login.
The individual email address for each additional person who requires access.
Each person will receive their own invitation to access the shared Rave Build login using their own email address.
Important: Two-Factor Authentication (2FA)
Every user must have their own unique email address.
Shared email addresses cannot be used for multiple users, as each person must complete their own Two-Factor Authentication (2FA) verification when signing in. This ensures your Rave Build account remains secure and provides an audit trail of who has accessed the account.
What You Need to Provide to help@ravebuild.co.nz
To request shared access, send us:
The primary email address currently registered with your Rave Build account.
The email address of each additional user who requires access.
Once we receive these details, we will send an invitation to each user so they can access the same Rave Build login using their own credentials.
Was this article helpful?
That’s Great!
Thank you for your feedback
Sorry! We couldn't be helpful
Thank you for your feedback
Feedback sent
We appreciate your effort and will try to fix the article