If you are looking for the help article Signing into Rave with Single Sign On, click here to read.
If you are looking for the help article How do I set up Single Sign-In (SSO) if I have many log-ins, click here to read.
If you are looking for the help article Controls for Single Sign-On (SSO) and Two-Factor Authentication (2FA), click here to read.
If you are looking for the help article on Sharing a Rave Build Login (Contractors and Clients only), click here to read.
Sign-In Preferences
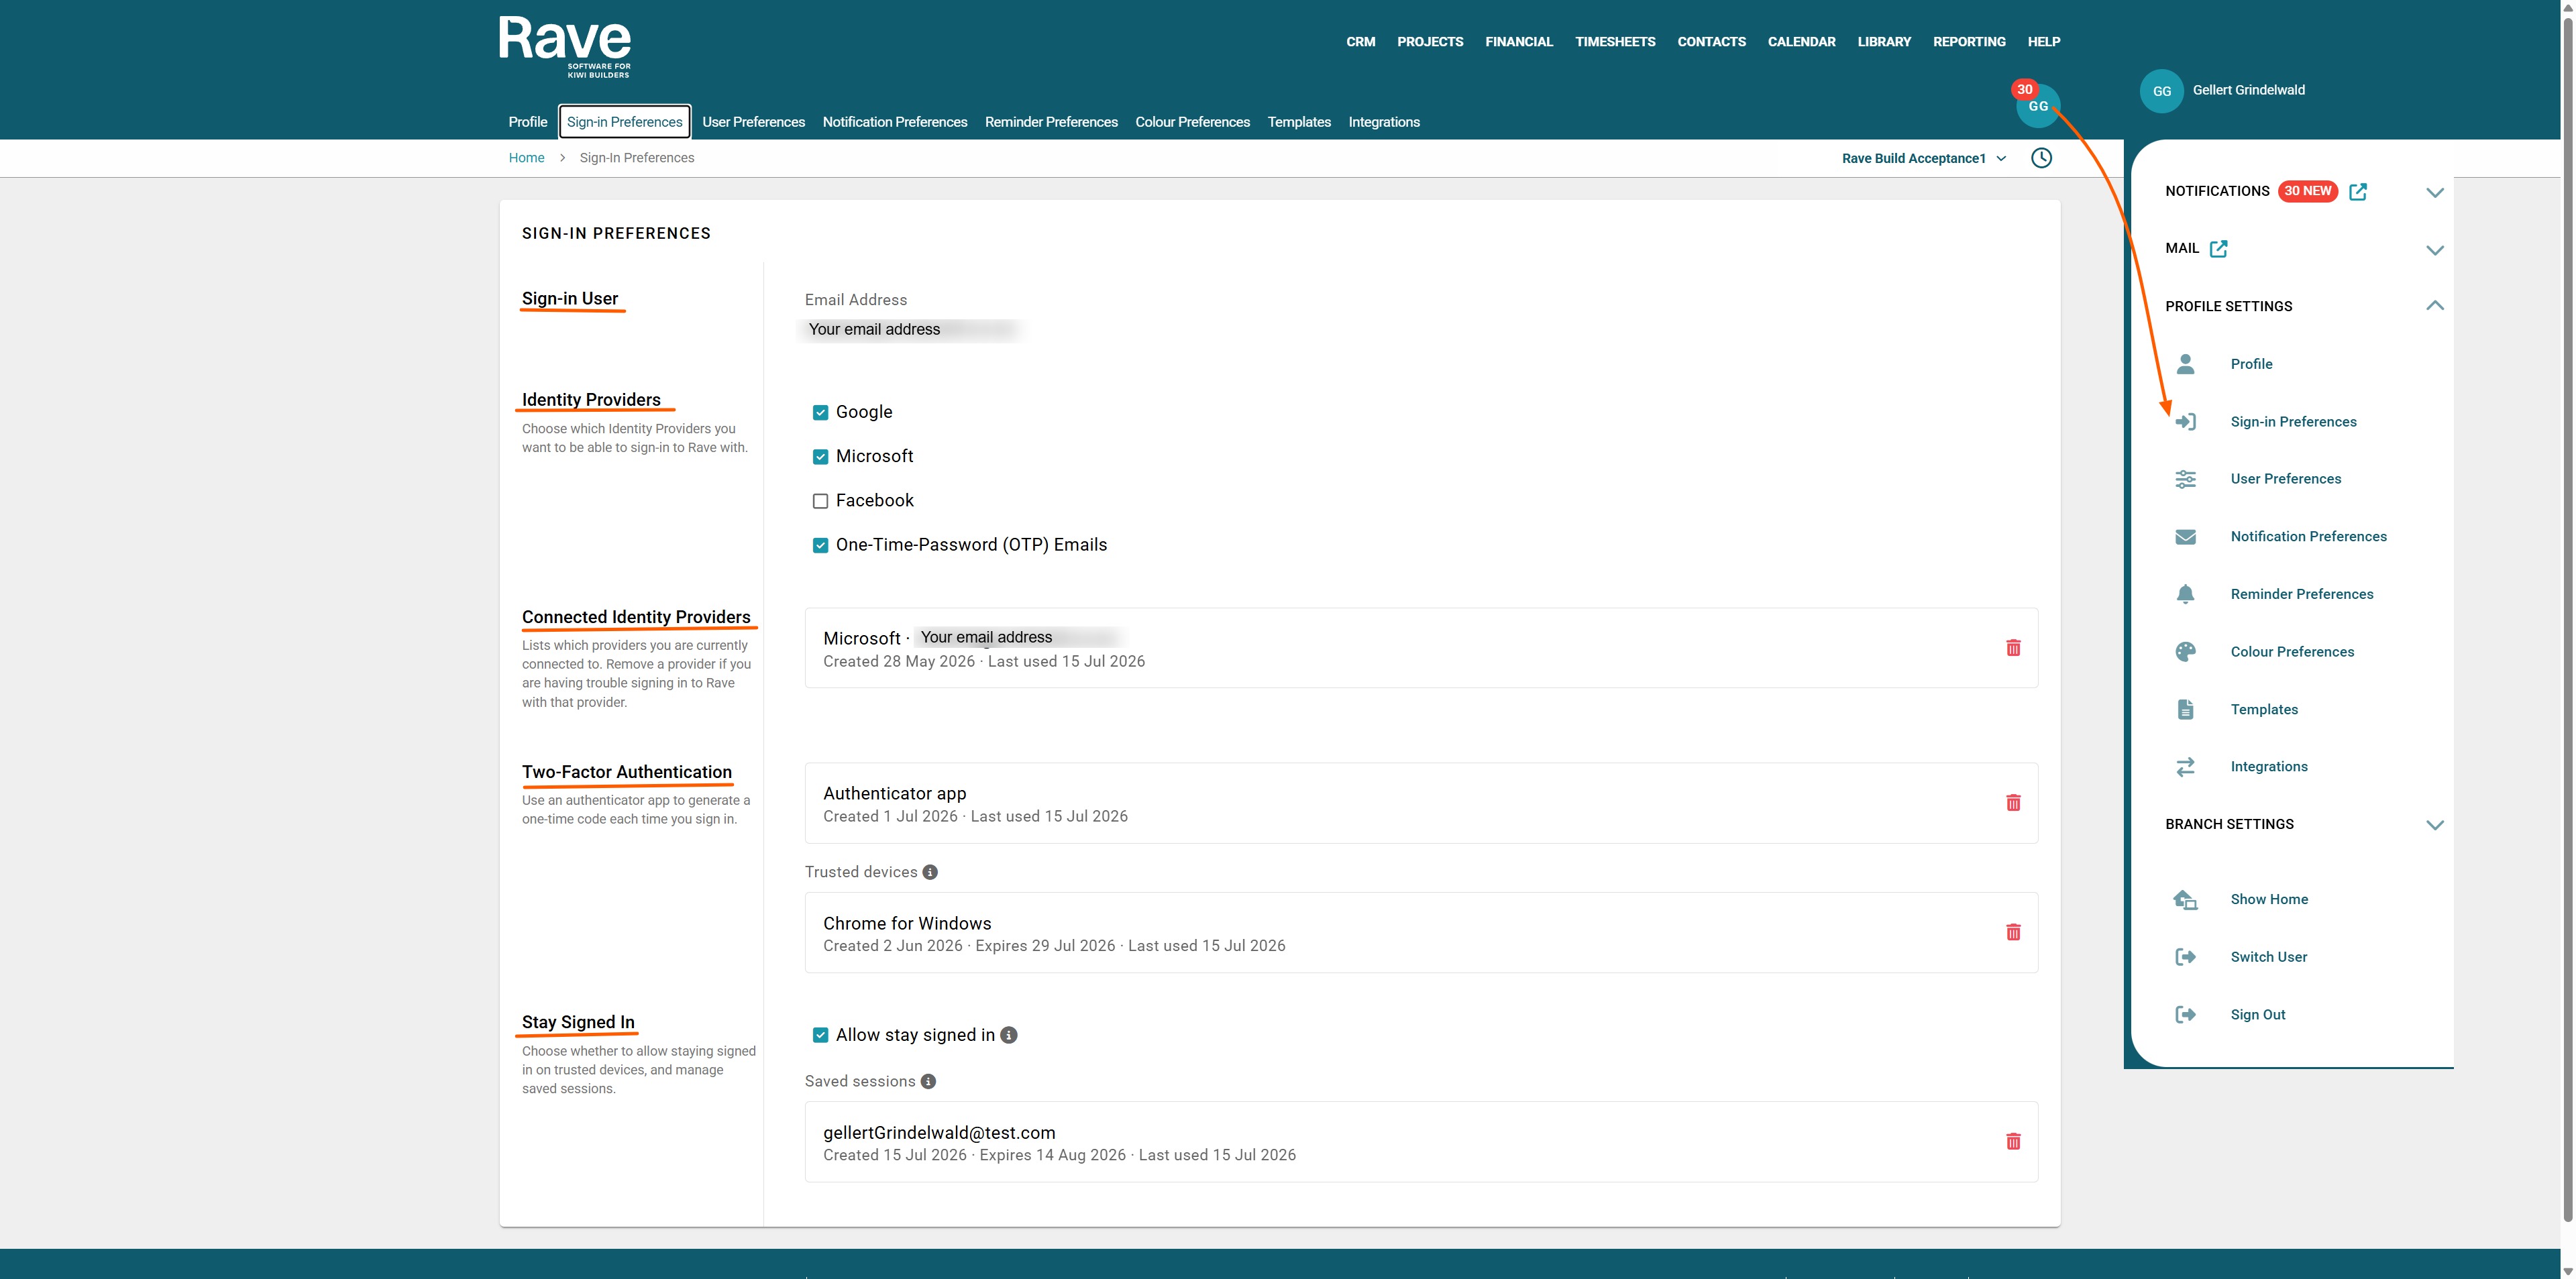
From your profile drop-down, select Sign In Preferences.
This will open your options for signing in.
Sign-in User - This is your email address associated with your Rave Profile or Profiles.
Identity Providers - Here, you can uncheck the options you don't want to use to sign in to Rave. Note: If your business owner or head office has disabled certain options, they will show as Blocked.
Connected Identity Providers - This will show the current approved email address and provider, along with the creation date and last access date.
Two-Factor Authentication - This will show whether you have enabled two-factor authentication. It shows what the current option is (i.e., the authenticator app), when it was created, and when it was last accessed. Below, it will also show the trusted devices you have approved.
Stay Signed in- With this box checked, you will be auto-signed in for up to 30 days before you have to re-sign in again. Note This can be adjusted by the Branch Owner or Head Office and is reduced if you do not use Rave for 7 days (also configurable).
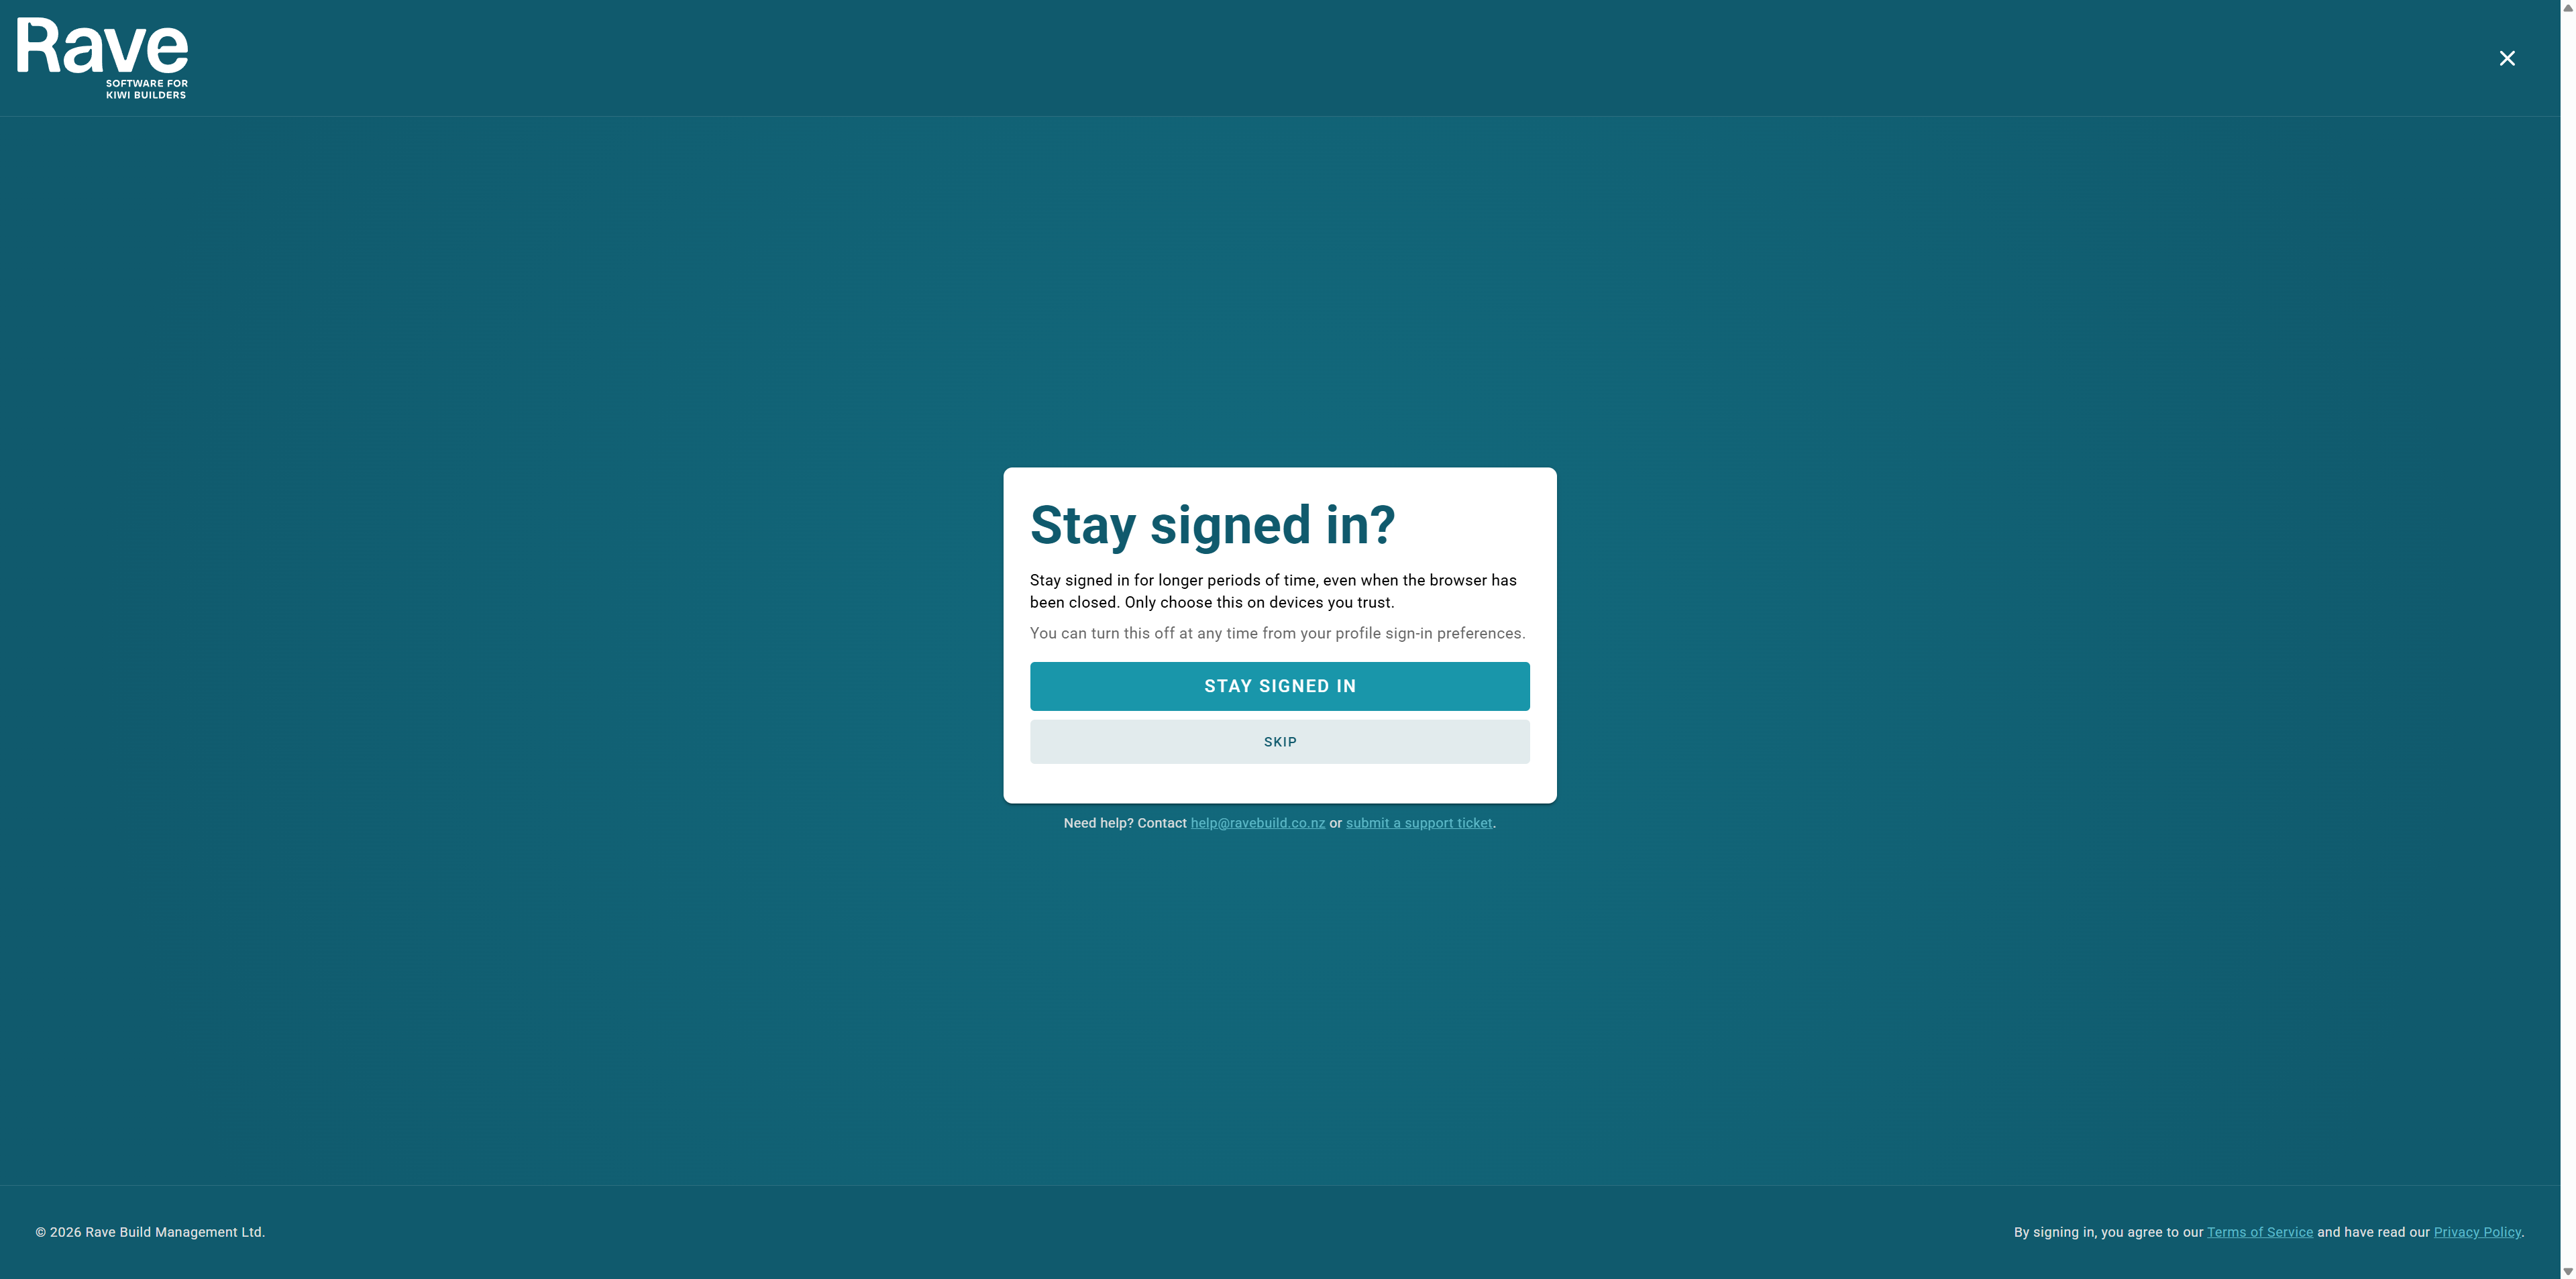
Once you have signed in to Rave, you can choose to Stay Signed in. Select the Stay signed in tab as shown below, and you'll be auto-logged in for 30 days before you are required to sign back in.
Setting Up Two-Factor Authentication (2FA)
Two-Factor Authentication (2FA) adds an extra layer of security to your Rave account by requiring a verification code from your authenticator app when you sign in.
To set up 2FA
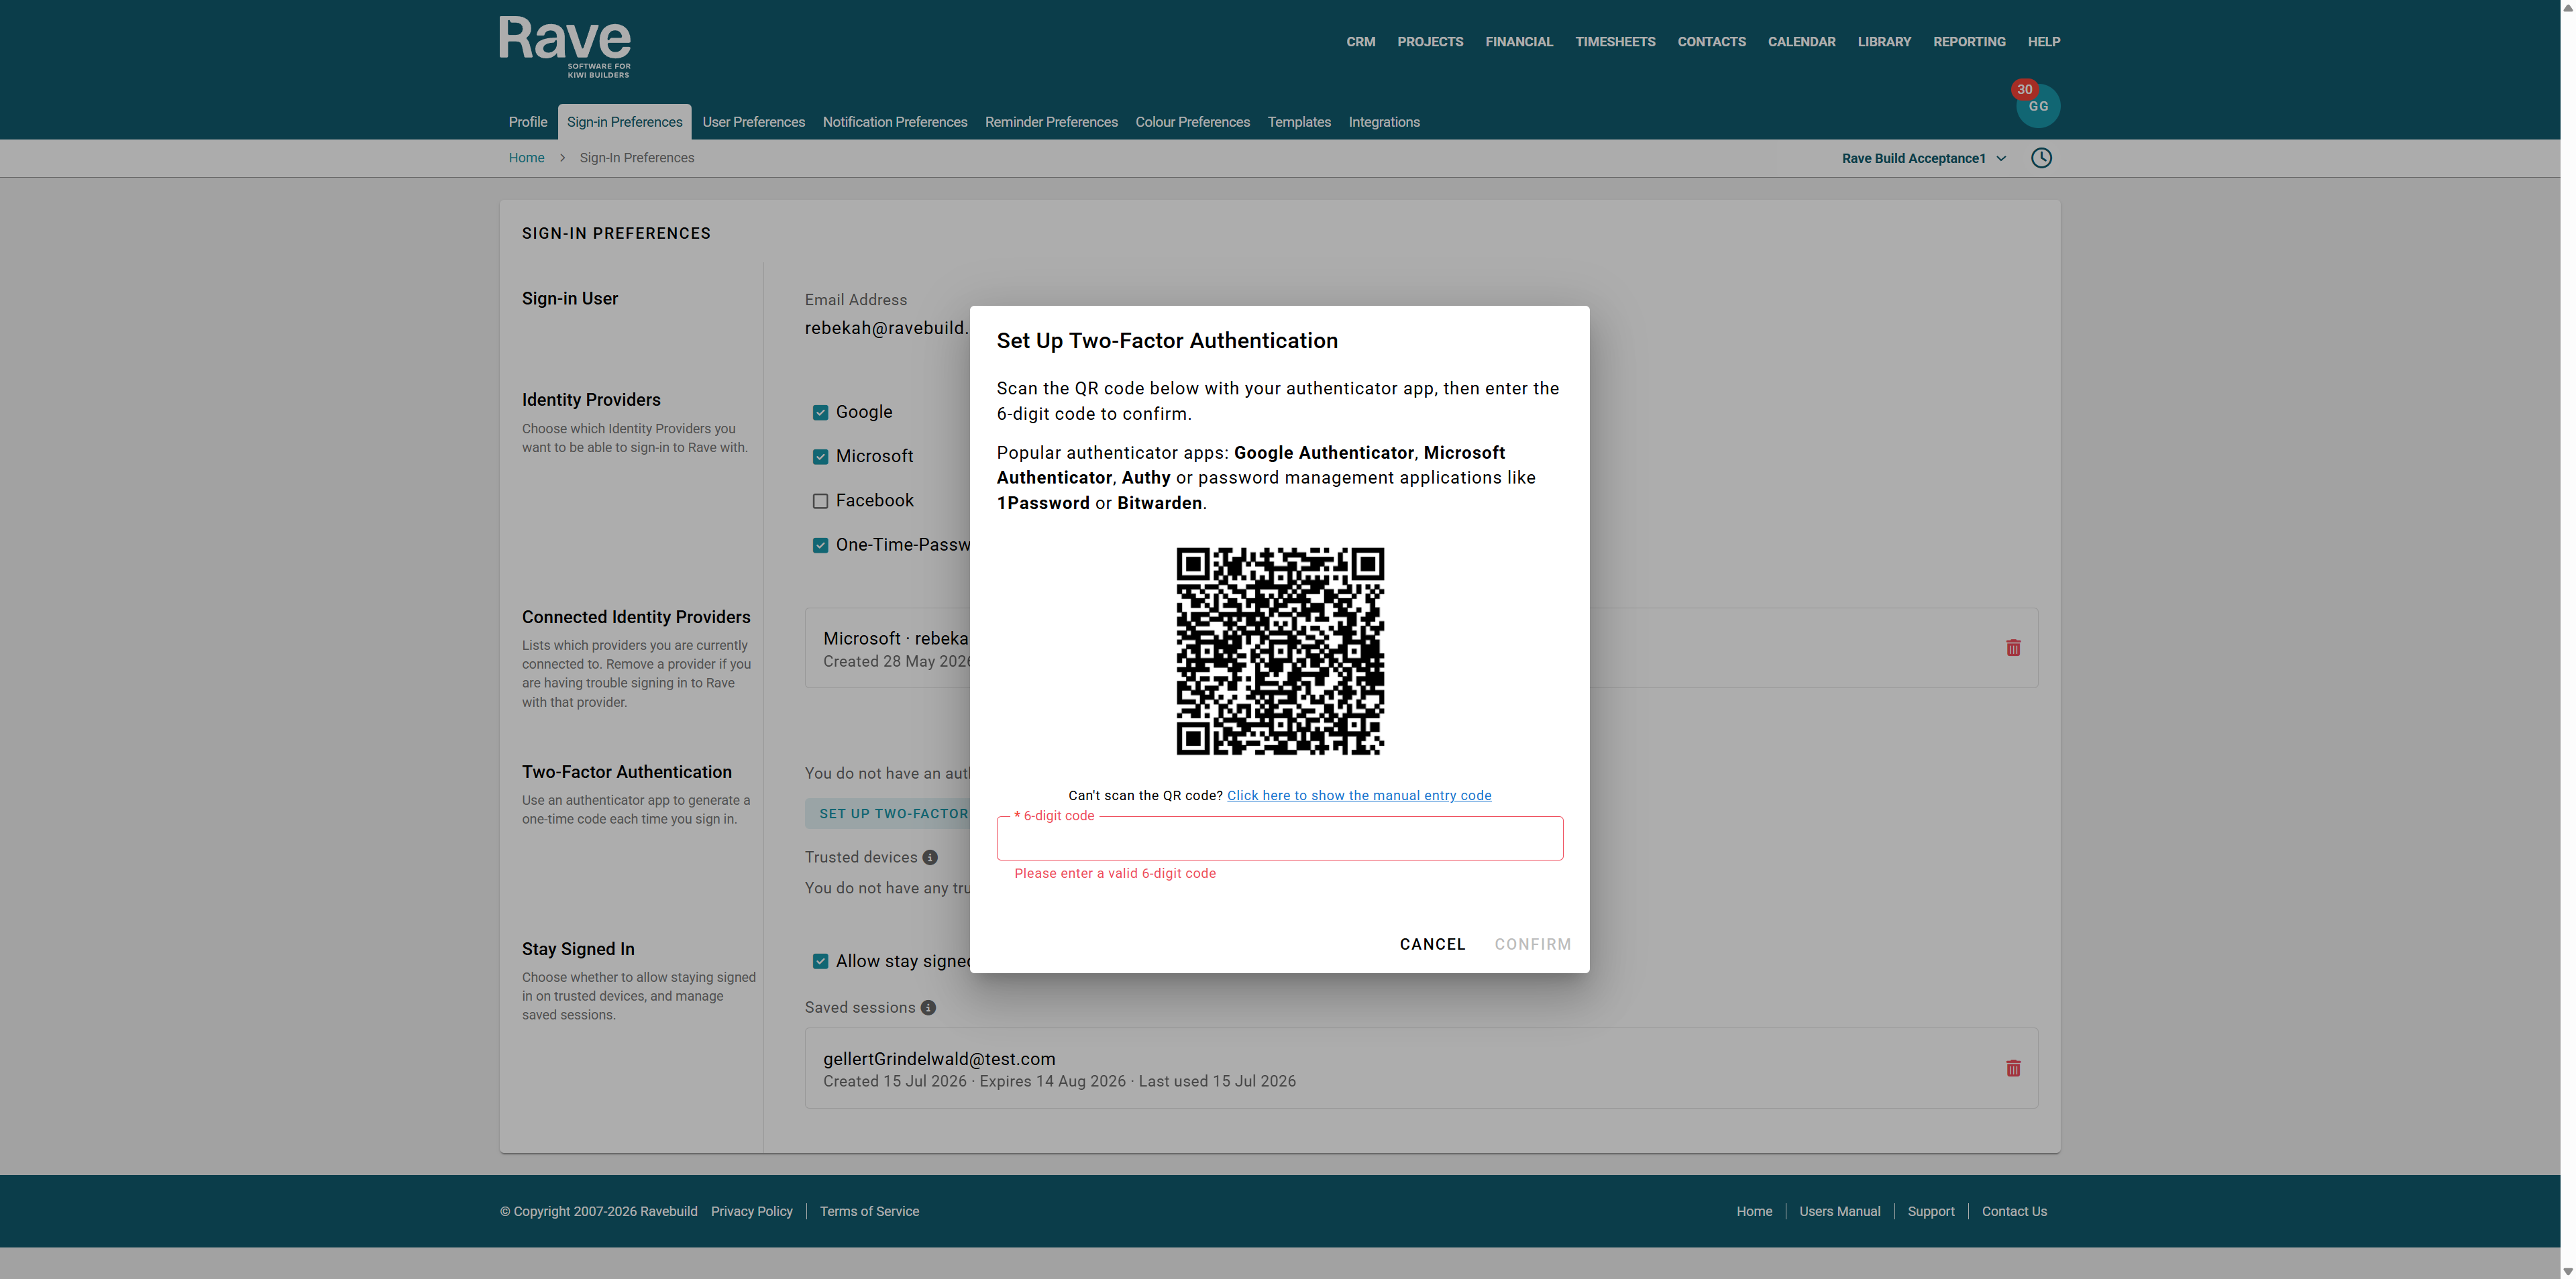
Click Set up Two-Factor Authenticator.
Open your preferred authenticator app (such as Microsoft Authenticator, Google Authenticator, or Authy).
Scan the QR code displayed in Rave.
Once the account has been added to your authenticator app, a 6-digit verification code will be generated.
Enter the 6-digit code into the verification field in Rave.
Click Confirm to complete the setup.
Once confirmed, Two-Factor Authentication will be enabled for your account. You will be asked to enter a new verification code from your authenticator app each time you sign in.
Optional: If you tick the Trust this device checkbox, you can give the device a name. This allows you to easily identify and manage trusted devices later in Sign On Preferences, where you can view or remove devices trusted for your account. 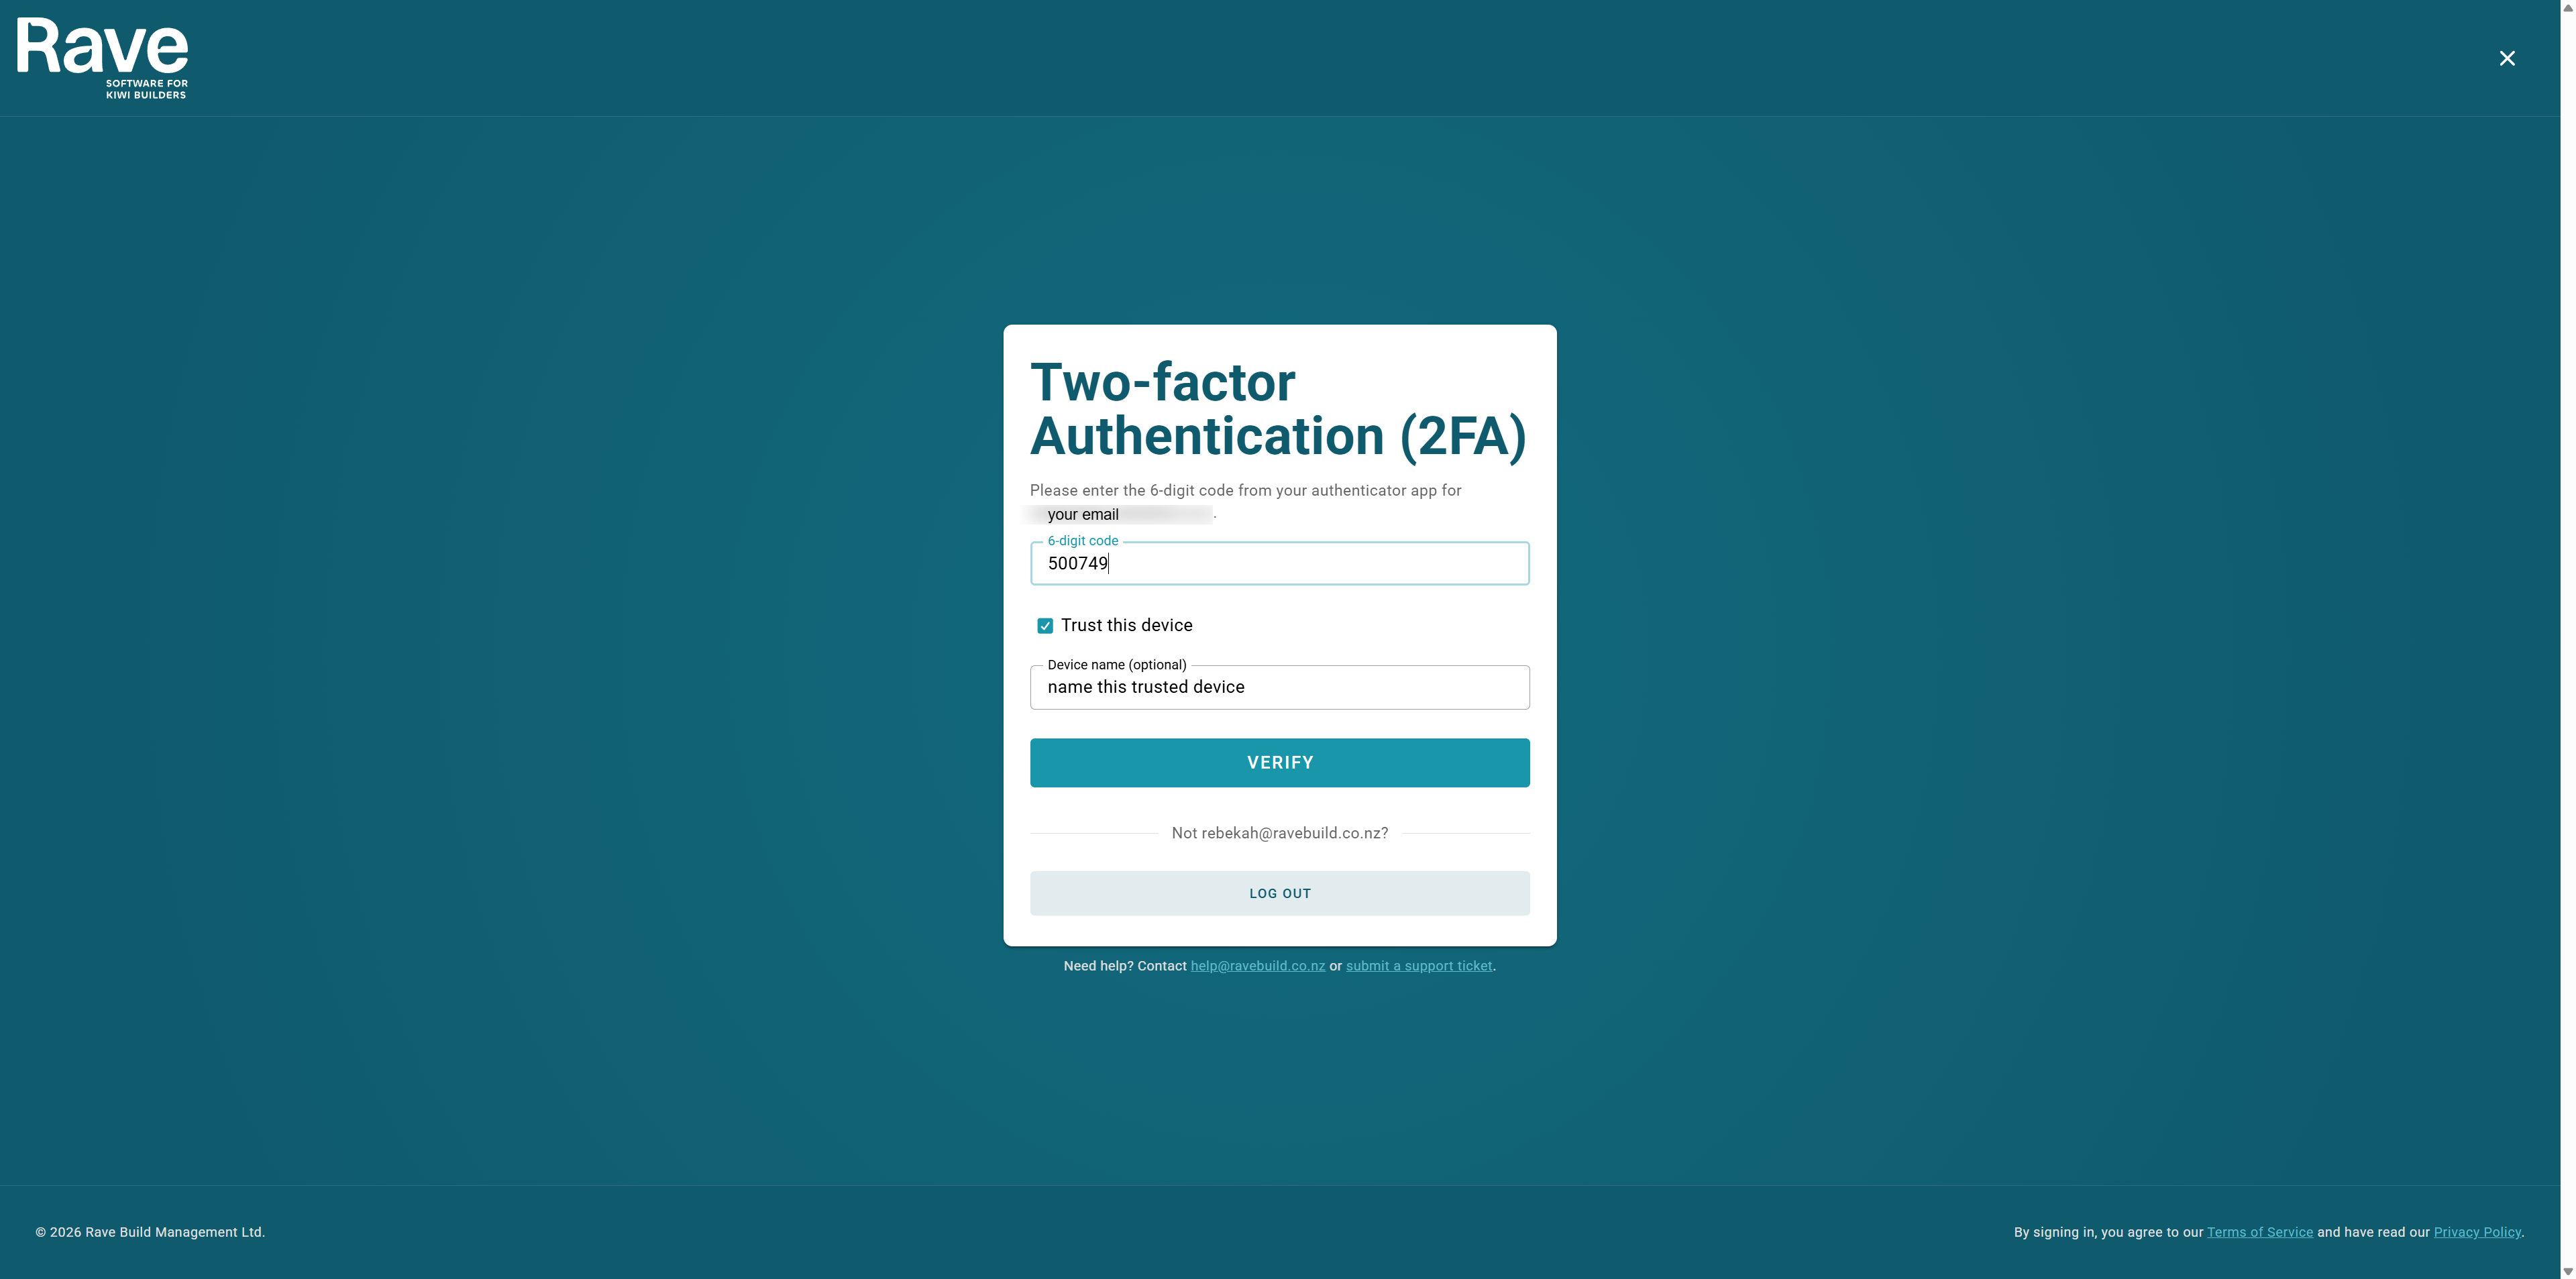
Was this article helpful?
That’s Great!
Thank you for your feedback
Sorry! We couldn't be helpful
Thank you for your feedback
Feedback sent
We appreciate your effort and will try to fix the article