Those with permissions can edit their Rave Timesheets branch settings - including the new payroll 'entry type' and 'timesheets require a task' Advanced Timesheet options - via their profile drop-down.
Note: The Branch Settings page and its various options can only be accessed by individuals with the necessary permissions. If you cannot see the relevant branch settings option, you will need to request this via your branch owner or a Rave Help support ticket.
To access the Branch Settings page
- Select your profile drop-down - the circle to the top right of your screen with your initials
- Select Branch Settings
- Select Timesheet
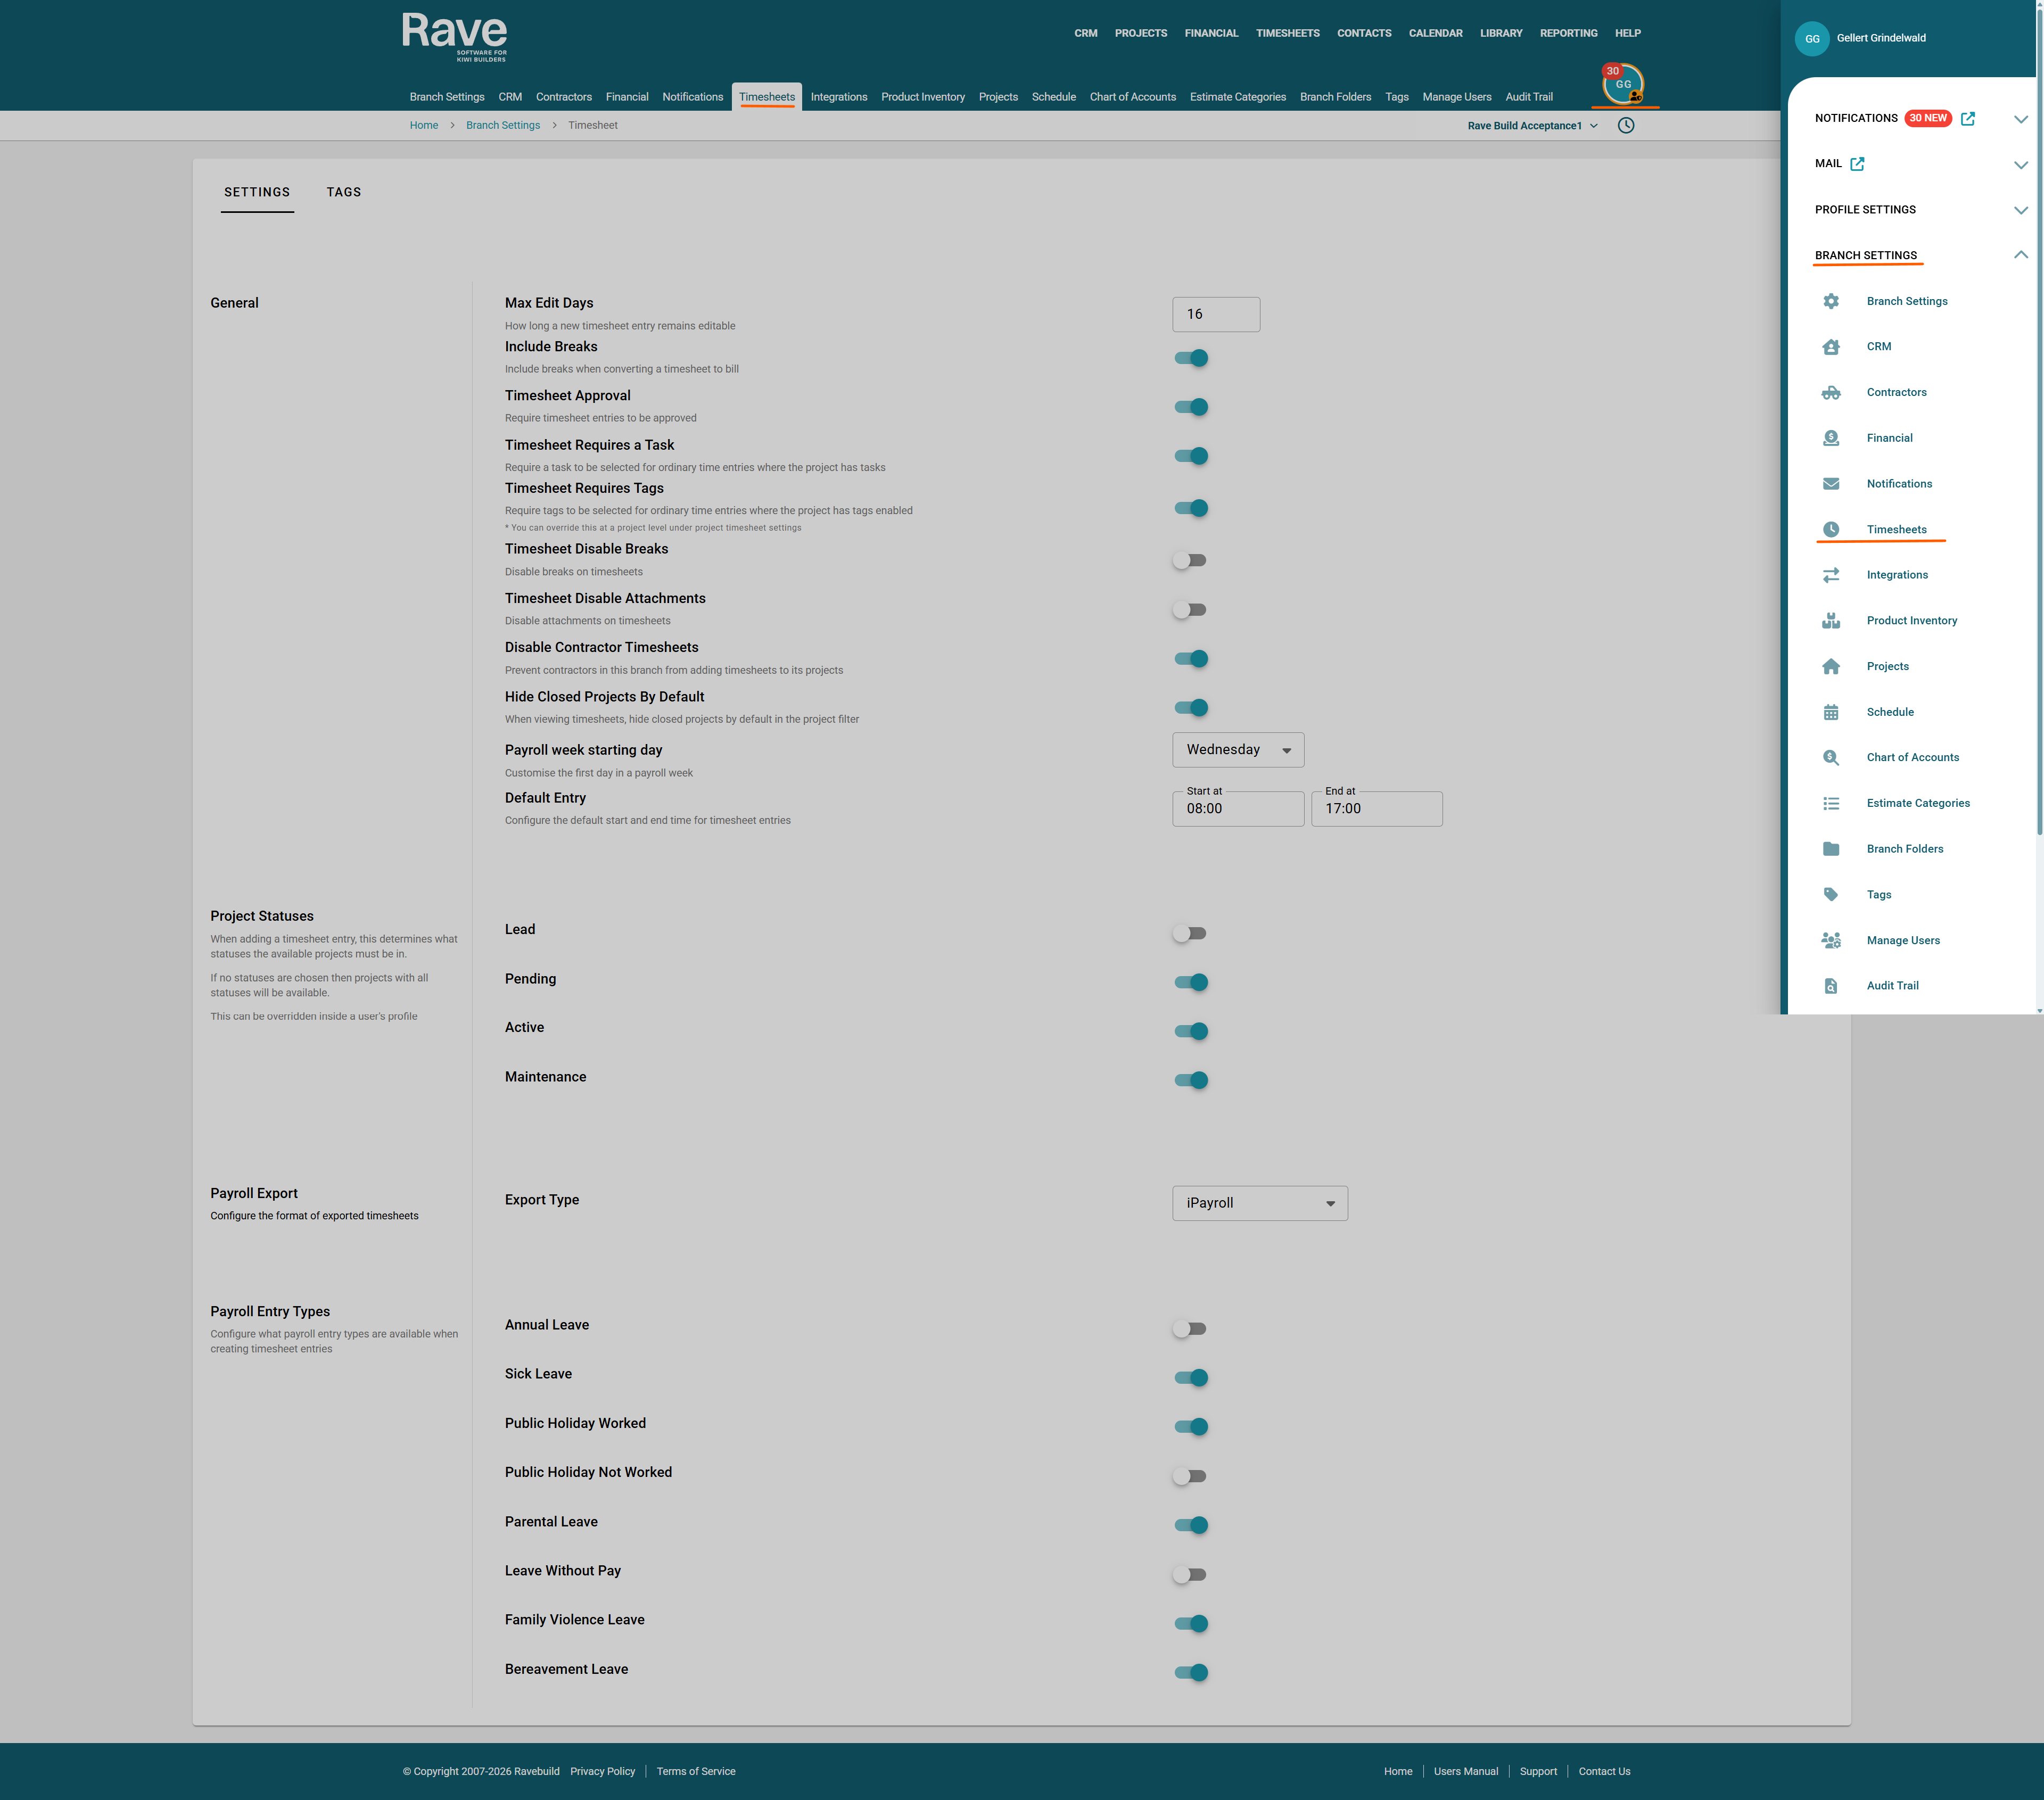
You will now see the Timesheet Options for Branch Settings and Timesheet Tags - from here you can edit the following:
Max Edit Days:
This allows a user to edit their timesheet up to 'X' number of days, provided it hasn't been approved already
Include Breaks - when converting a timesheet to a bill - as a default:
This switch sets a default for ALL projects charging clients for the break times entered when on-charging labour. With this off, the client will not pay for the break times your team enter - by default.
Note: This setting can also be enabled or disabled at the project level.
Timesheet Approval (Advanced Timesheets only):
This enables timesheet entries to require approval before they can be finalised. Who can perform this approval is controlled by a permission under Manage Users in the profile drop-down menu.
Our help article on how Timesheet Approval works can he found here.
Timesheet Requires a Task (Advanced Timesheets only):
This enables timesheet entries to require a task to be selected for ordinary time entries, where the project has tasks. With this off, a timesheet entry can be entered under ordinary time without having to choose a task if the Project has tasks loaded.
Timesheet Requires a Tag
This enables timesheet entries to require a tag to be selected for ordinary time entries. With this off, a timesheet entry can be entered under ordinary time without having to choose a tag.
Timesheet Disable Breaks
This enables you to turn off allowing breaks to be used in our time sheeting system. When slide off all options to load a break are disabled for all timesheet users.
Timesheet Disable Attachments
This enables you to turn off allowing users to upload attachments to their timesheet entries. When slide off all options to load an attachment are disabled for all timesheet users.
Timesheets Disable Contractors
This prevents contractors from being able to add timesheets to your projects.
Hide Closed Projects By Default
With this enabled, when viewing the branch timesheets tab all projects that are closed will be hidden from view. You can still click on the page to view closed projects and you can still choose to export timesheets for closed projects. This just sets the default view.
Payroll Week Starting Day (Advanced Timesheets only):
This dropdown allows you to customise the first day of your payroll week, so whichever day is selected here will update the Timesheets/Branch Timesheets/Overview and Summary reports.
Default Entry - Time:
This allows you to set the default clock-in and clock-out times whenever your team adds a timesheet entry. They can adjust the time to whatever they choose, but it will open with the default time you set here.

Project Statuses:
You can select which project statuses will display projects for your team to choose from when adding a timesheet entry. For example, if you turn off the "Maintenance" switch, all projects with the 'Maintenance' status will be removed from the list when adding a timesheet entry.

Note: We have also added a per-user override option. This will grant staff and/or contractors permission to view all projects on their clock-in/out widget, which they already have access to.

Payroll Export (Advanced Timesheets only):
You can select your default payroll system from our drop-down list. This will customise your payroll export into the format accepted by the system you use - our current choices are listed below. Once selected, you can then go to your branch timesheets - details page and click export, select your payroll system, select the date range, and we will provide an import file for you to use for Payroll.
- Smartly - If you use smartly Department/Job feature you can enter your Quick code for each project in the project timesheet settings.
- Employment Hero
- Pay Hero
- Crystal Payroll
- iPayroll
Payroll Entry Types (Advanced Timesheets only):
You can select (switch on or off) which payroll entry types are available when your team creates a payroll entry - in addition to a normal timesheet/payroll entry, the additional payroll entry types are:
- Annual Leave
- Sick Leave
- Public Holiday Worked
- Public Holiday Not Worked
- Parental Leave
- Leave Without Pay
- Family Violence Leave
- Bereavement Leave

Timesheets Branch Tags
The second tab is our Branch Tags control panel. Users with permission can add new tags, merge, archive and delete timesheet tags.
- The horizontal lines beside each tag name allow you to drag and organise the tags in any order you like.
- The pencil icon allows you to rename a Tag
- The Archive Box icon allows you to archive a tag. This will NOT remove any data from existing tags, but will prevent your team from using this tag in the future.
- Archived Tags will drop to the bottom of your tag list. You can click the same icon on an Archived Tag to Un-Archive it. Or you can merge an Archived tag into an existing Tag.
- The Merge icon is the next option. Select the tag you want to merge from and to. Rave will then merge all timesheet entries into the new tag and remove the old one. This action cannot be undone.
- The last icon is the trash can or 'delete' option. You can only delete tags that do not have any timesheets against them. If, while on the Branch timesheet details page, you are struggling to find a project associated with a tag, ensure that you also check 'CLOSED' projects.

Was this article helpful?
That’s Great!
Thank you for your feedback
Sorry! We couldn't be helpful
Thank you for your feedback
Feedback sent
We appreciate your effort and will try to fix the article