The help article to set up your lead options is here; please click the link to access it.
Rave offers an optional Website Lead integration module that lets leads submitted through 3rd-party sites like your website, META, and Google flow directly into Rave Build CRM, helping your team capture and manage new leads without manually entering their details.
This article covers all Lead Types.
- Website - Live for use
- META - Live for use
- Google - Live for use
How to access Leads via CRM
Users with the appropriate permissions will see a Leads tab at the top of the CRM page.
If you do not see the Leads tab, this usually means either:
Your user profile does not have permission to access Website Leads, or
Your branch has not enabled the Website Leads module.
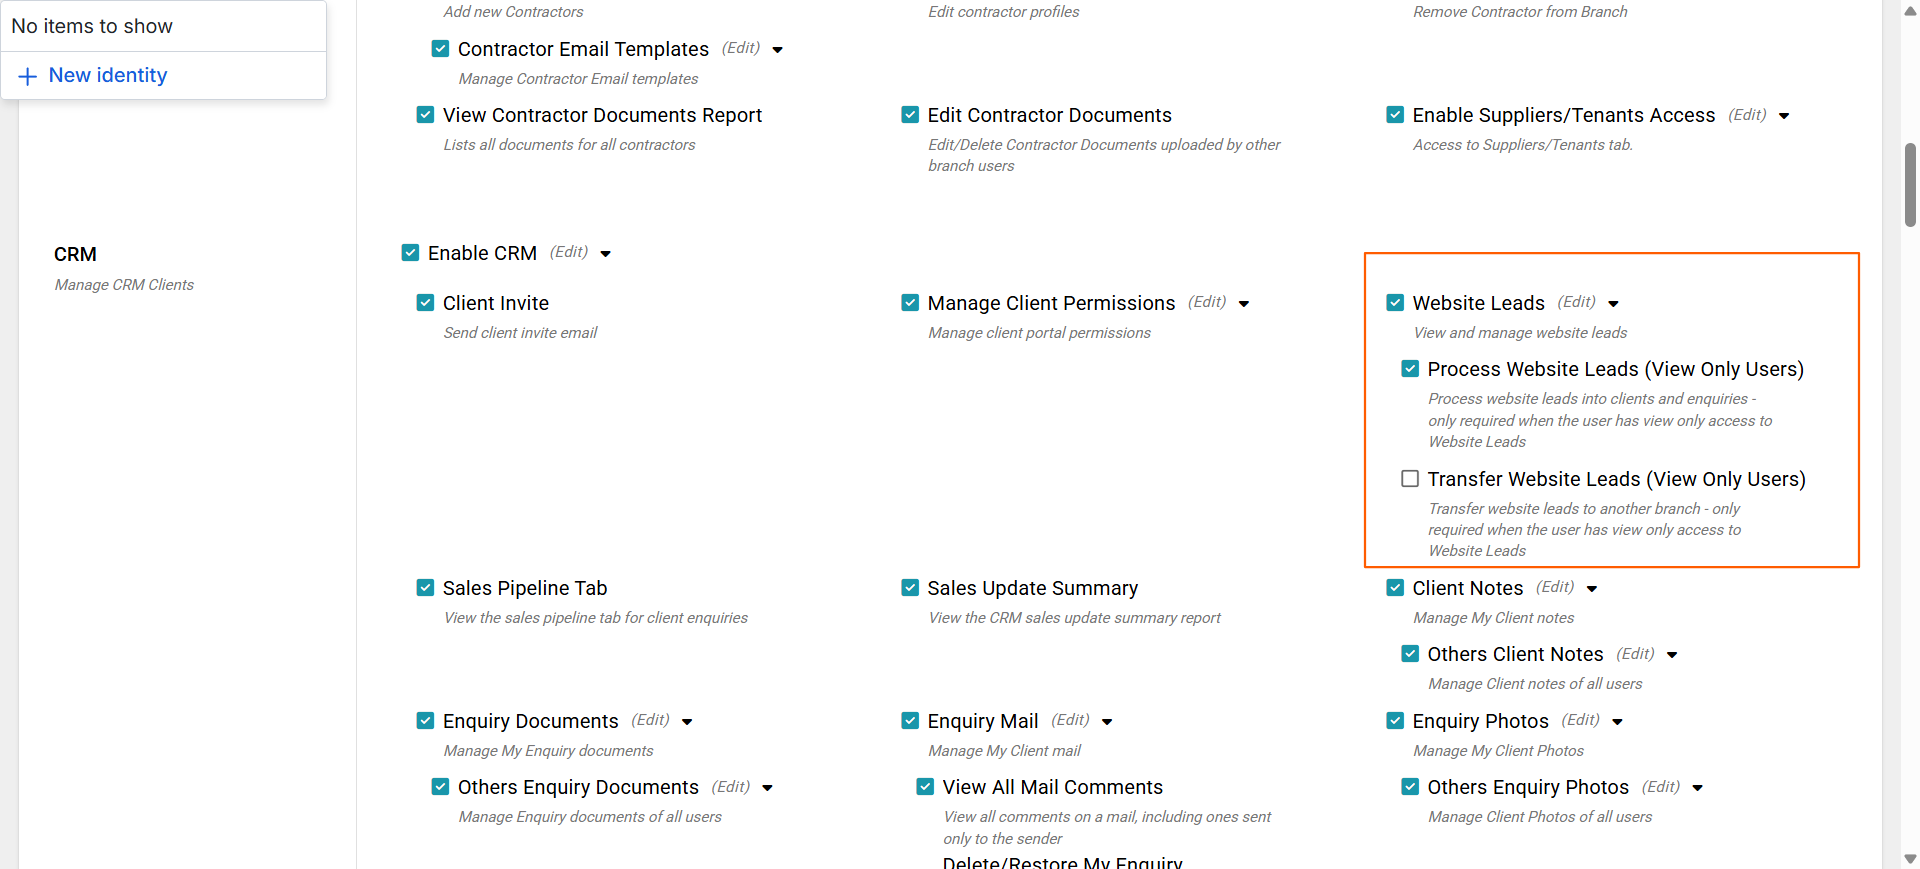
There are several permission levels available:
Website Lead Edit - Provides full control over website leads, including the ability to add, edit and delete lead information.
Process Lead - Allows the user to review and process incoming website leads. (You only get this option if you have Website lead View as your primary permission)
Transfer Lead to Another Branch - Allows the user to transfer a lead from the current branch to another Rave Build branch they have access to (restricted access and you only get this option if you have Website lead View as your primary permission)
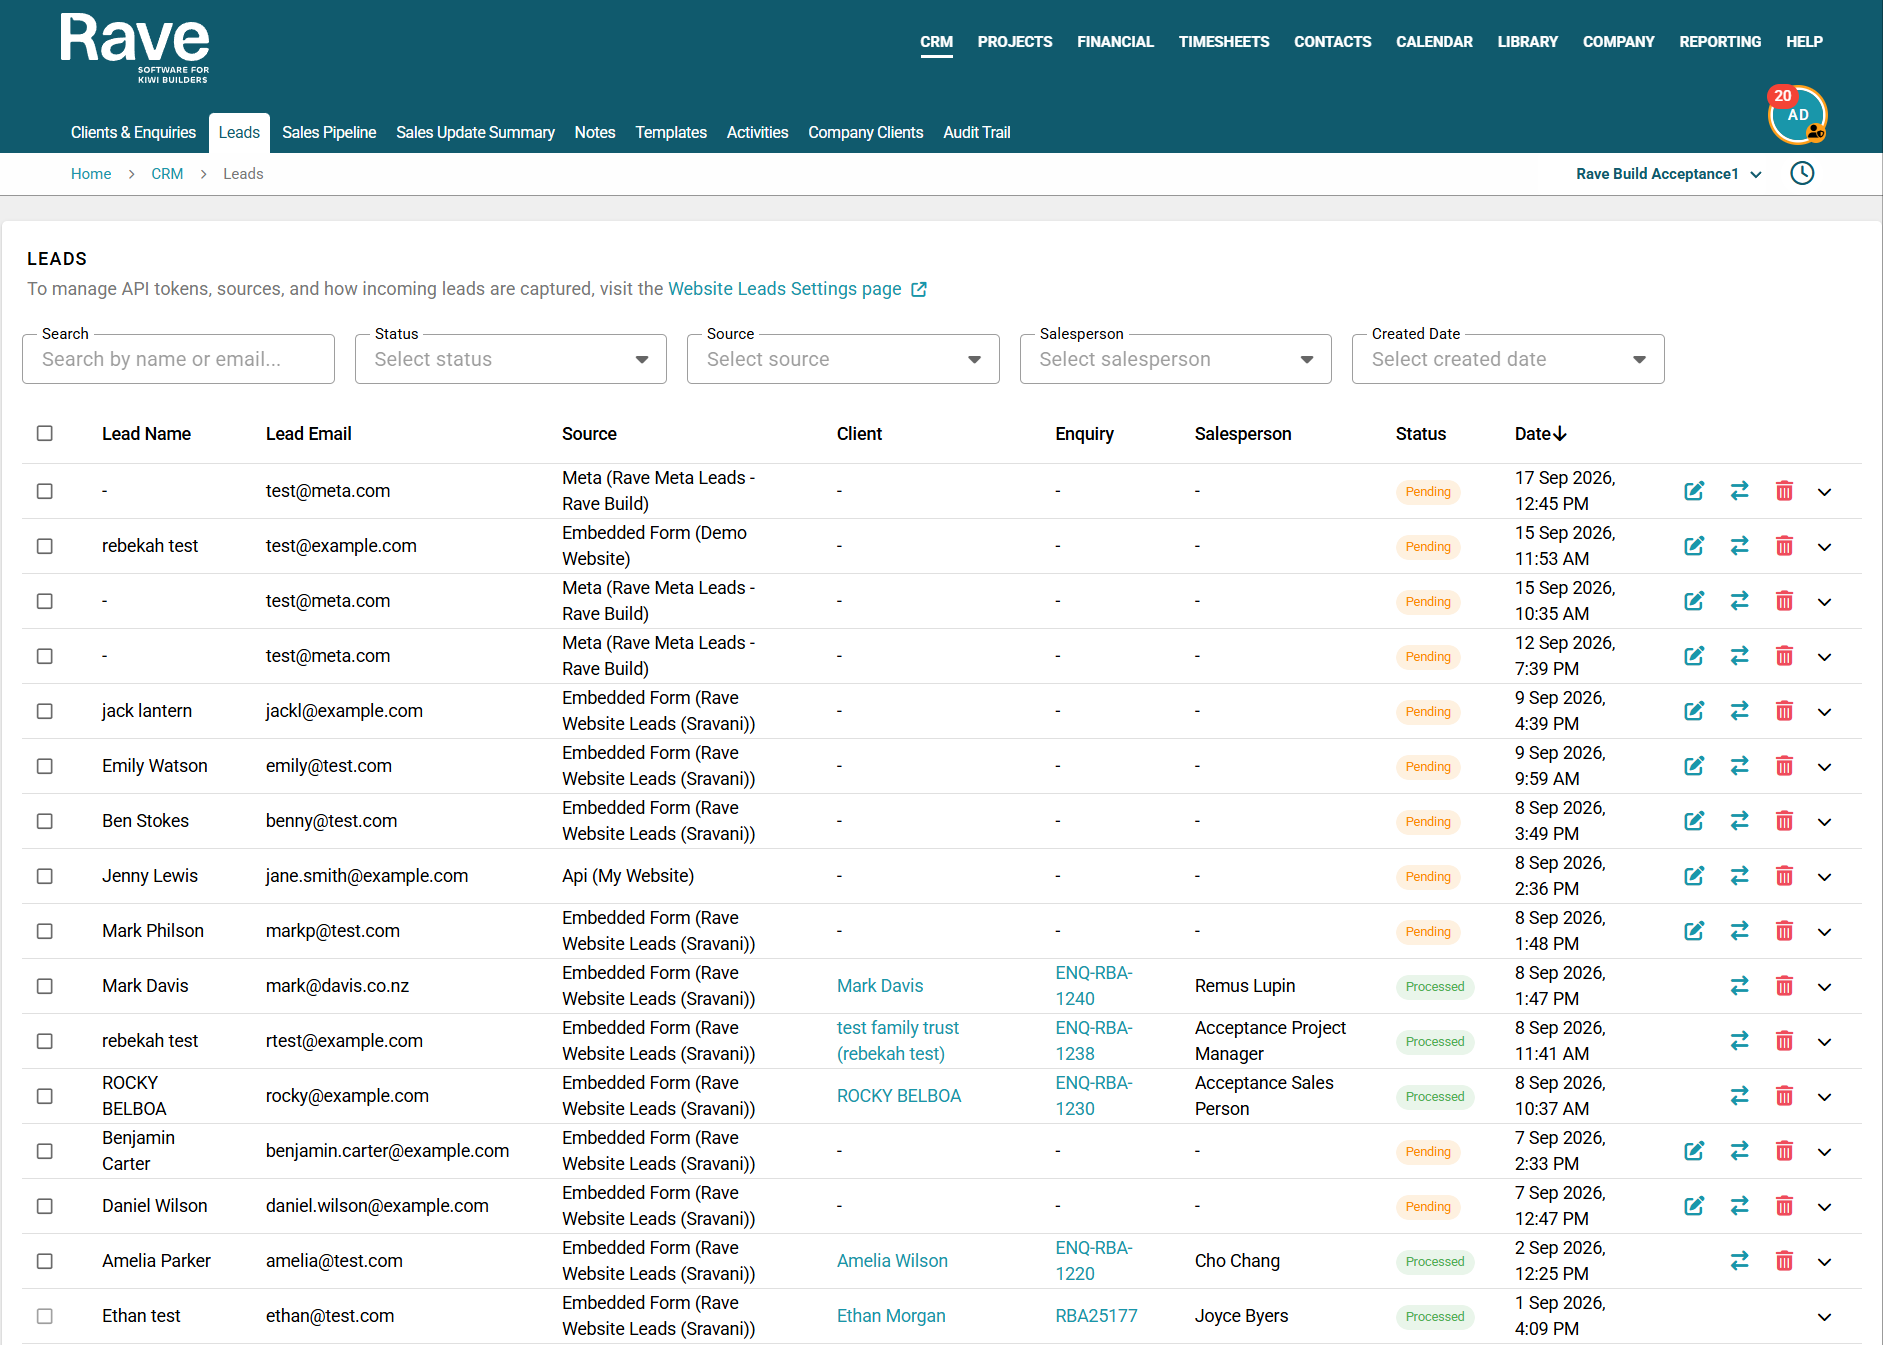
Open the Leads tab to view new leads that have been received through your connected sources.
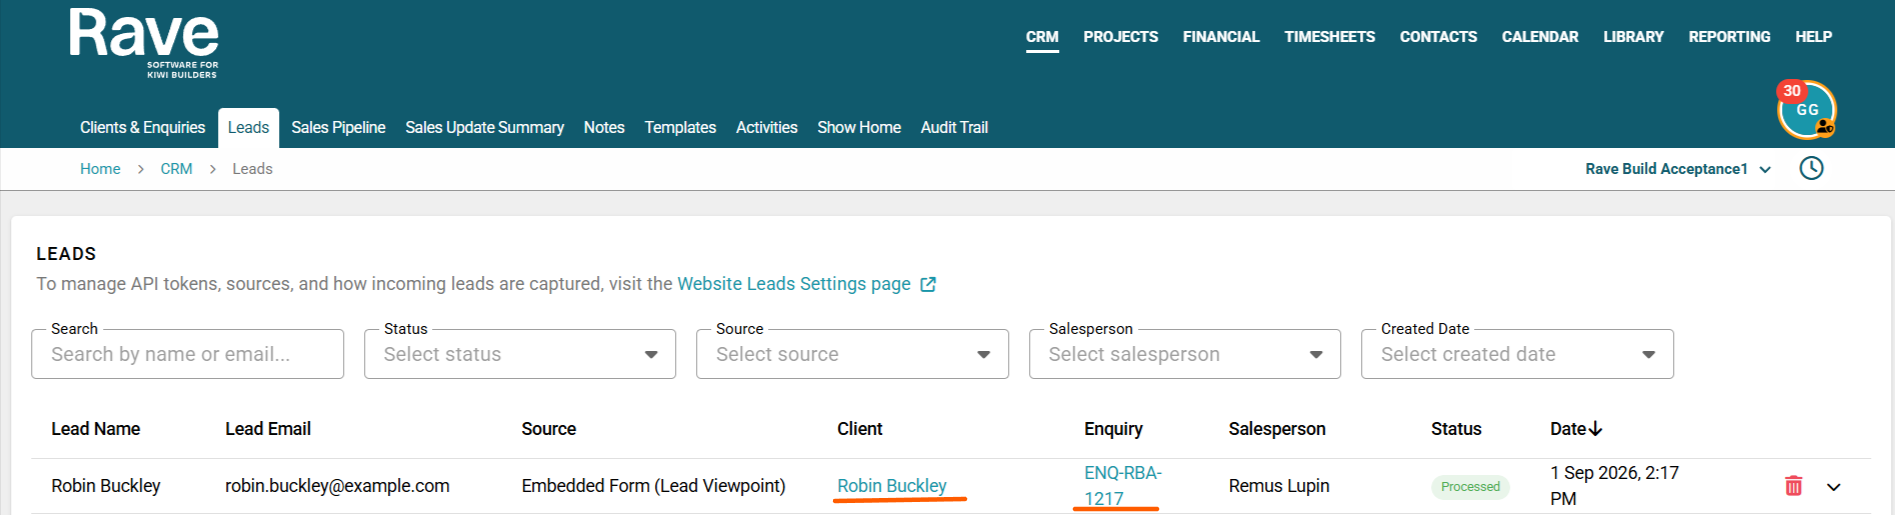
The leads list displays key information including:
- Lead Name
- Lead Email
- Source
- Client
- Enquiry
- Salesperson
- Status
- Date
This makes it easy to see where each lead came from and whether it has already been processed into Rave CRM.
The bulk selector checkbox to the left of the lead name lets you bulk-select leads to delete (with permission).
Search and Filter Leads
Use the filters at the top of the Leads tab to narrow down the list.
You can filter by:
- Name or email
- Status
- Source
- Salesperson
- Created Date
This is useful when reviewing leads from a particular website form, salesperson or time period.
Lead Status
Leads can display different statuses, including:
- Pending – the lead has been received but has not yet been fully processed.
- Processed – the lead has been processed into Rave as an enquiry.
Where a lead has been processed, the associated Client and Enquiry can be displayed as links, allowing you to open the corresponding CRM record directly.
Depending on the lead's status, additional actions may also be available from the right-hand side of the lead row to manage or process the lead.
Processing a Lead
To process a lead, click the Process Lead icon (paper and pencil).
A window will open where you can review the lead details before creating the enquiry.
You will need to:
Assign a Salesperson – If you don't set a salesperson here, it will pick the salesperson set in your general settings. Who is next on the list. So skip this if you have an assignment system set up.
Choose whether to create a new client or add the enquiry to an existing client. If you don't choose, it will automatically create a new one for you.
Review the information that has come through from the website form and choose whether to exclude any fields that you do not want added to Rave.
Mandatory fields cannot be excluded.
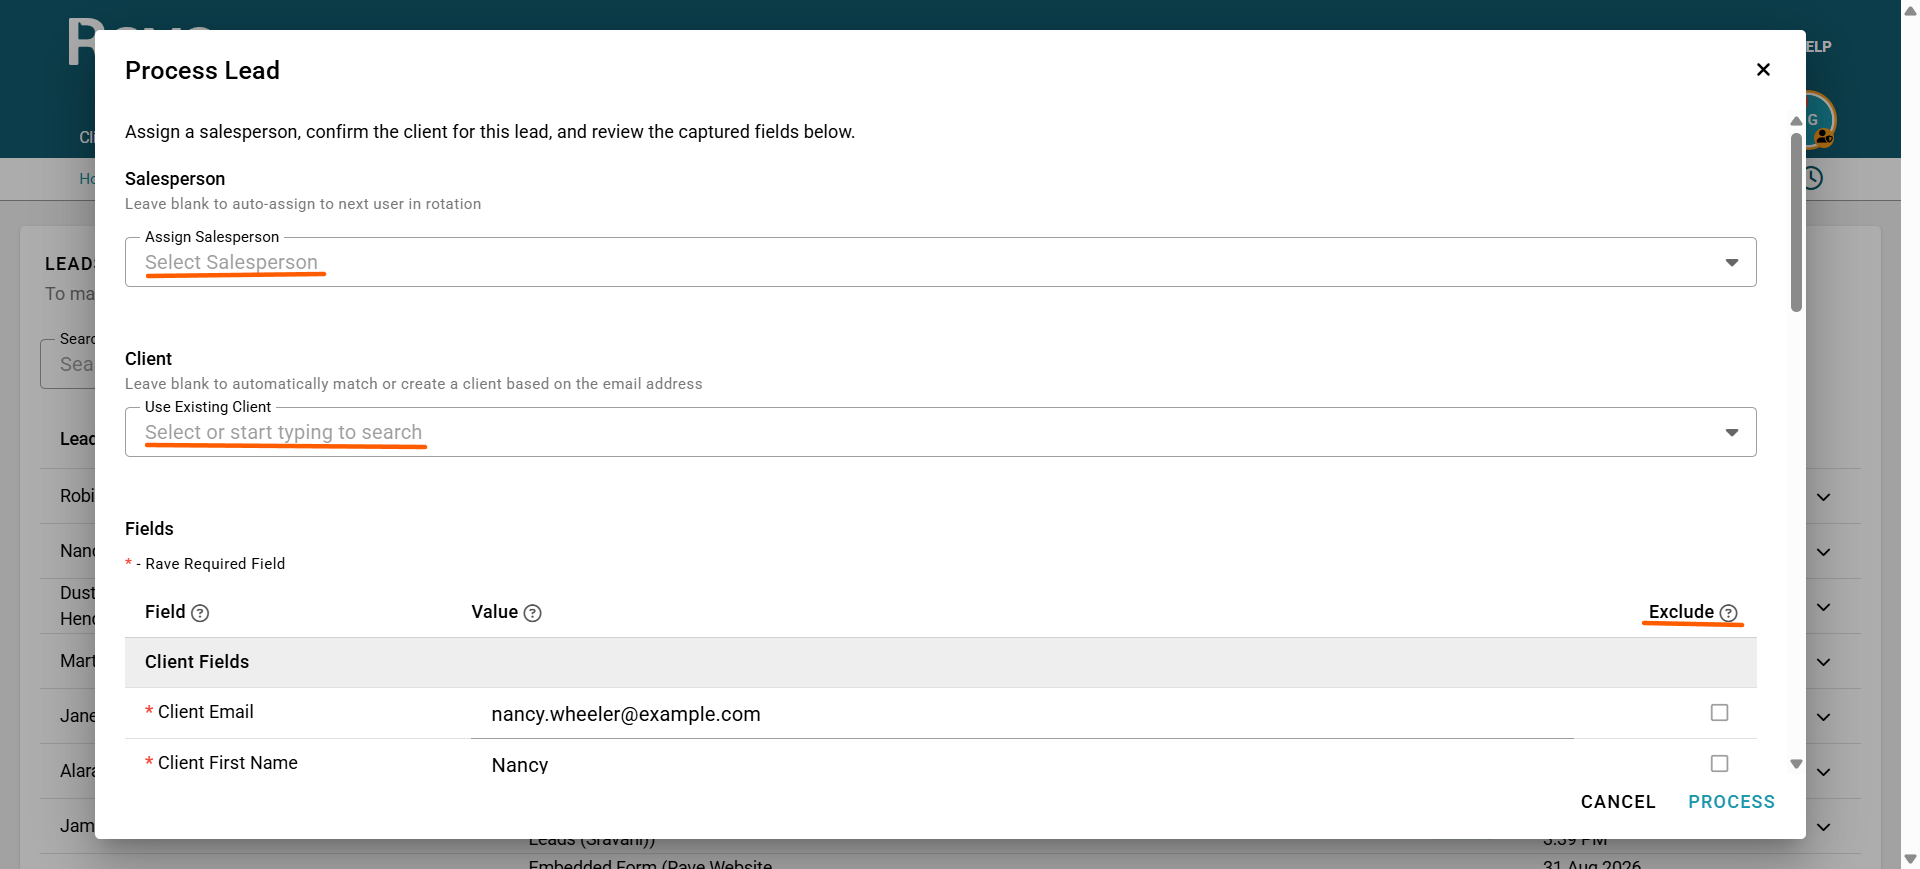 Once you are happy with the information, click Process to continue.
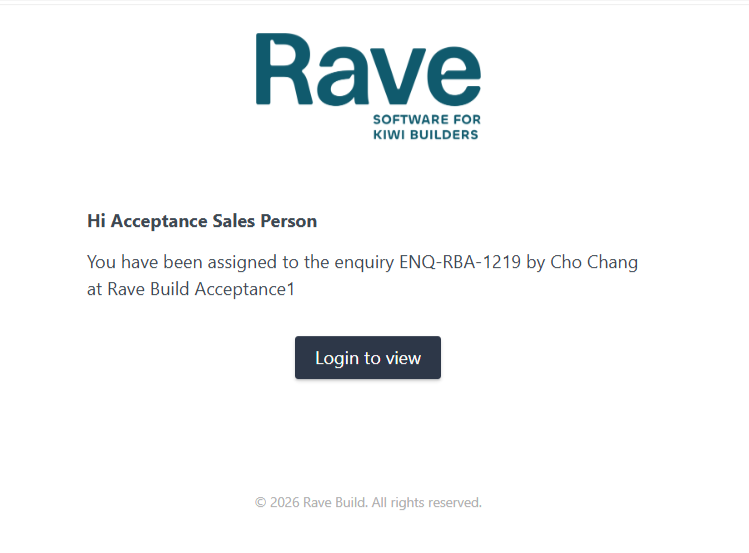
If the salesperson has enabled their notifications, they will receive an email saying a new lead has been assigned to them
The lead will now switch to say Processed, and an enquiry and client hyperlink will show in the leads table.
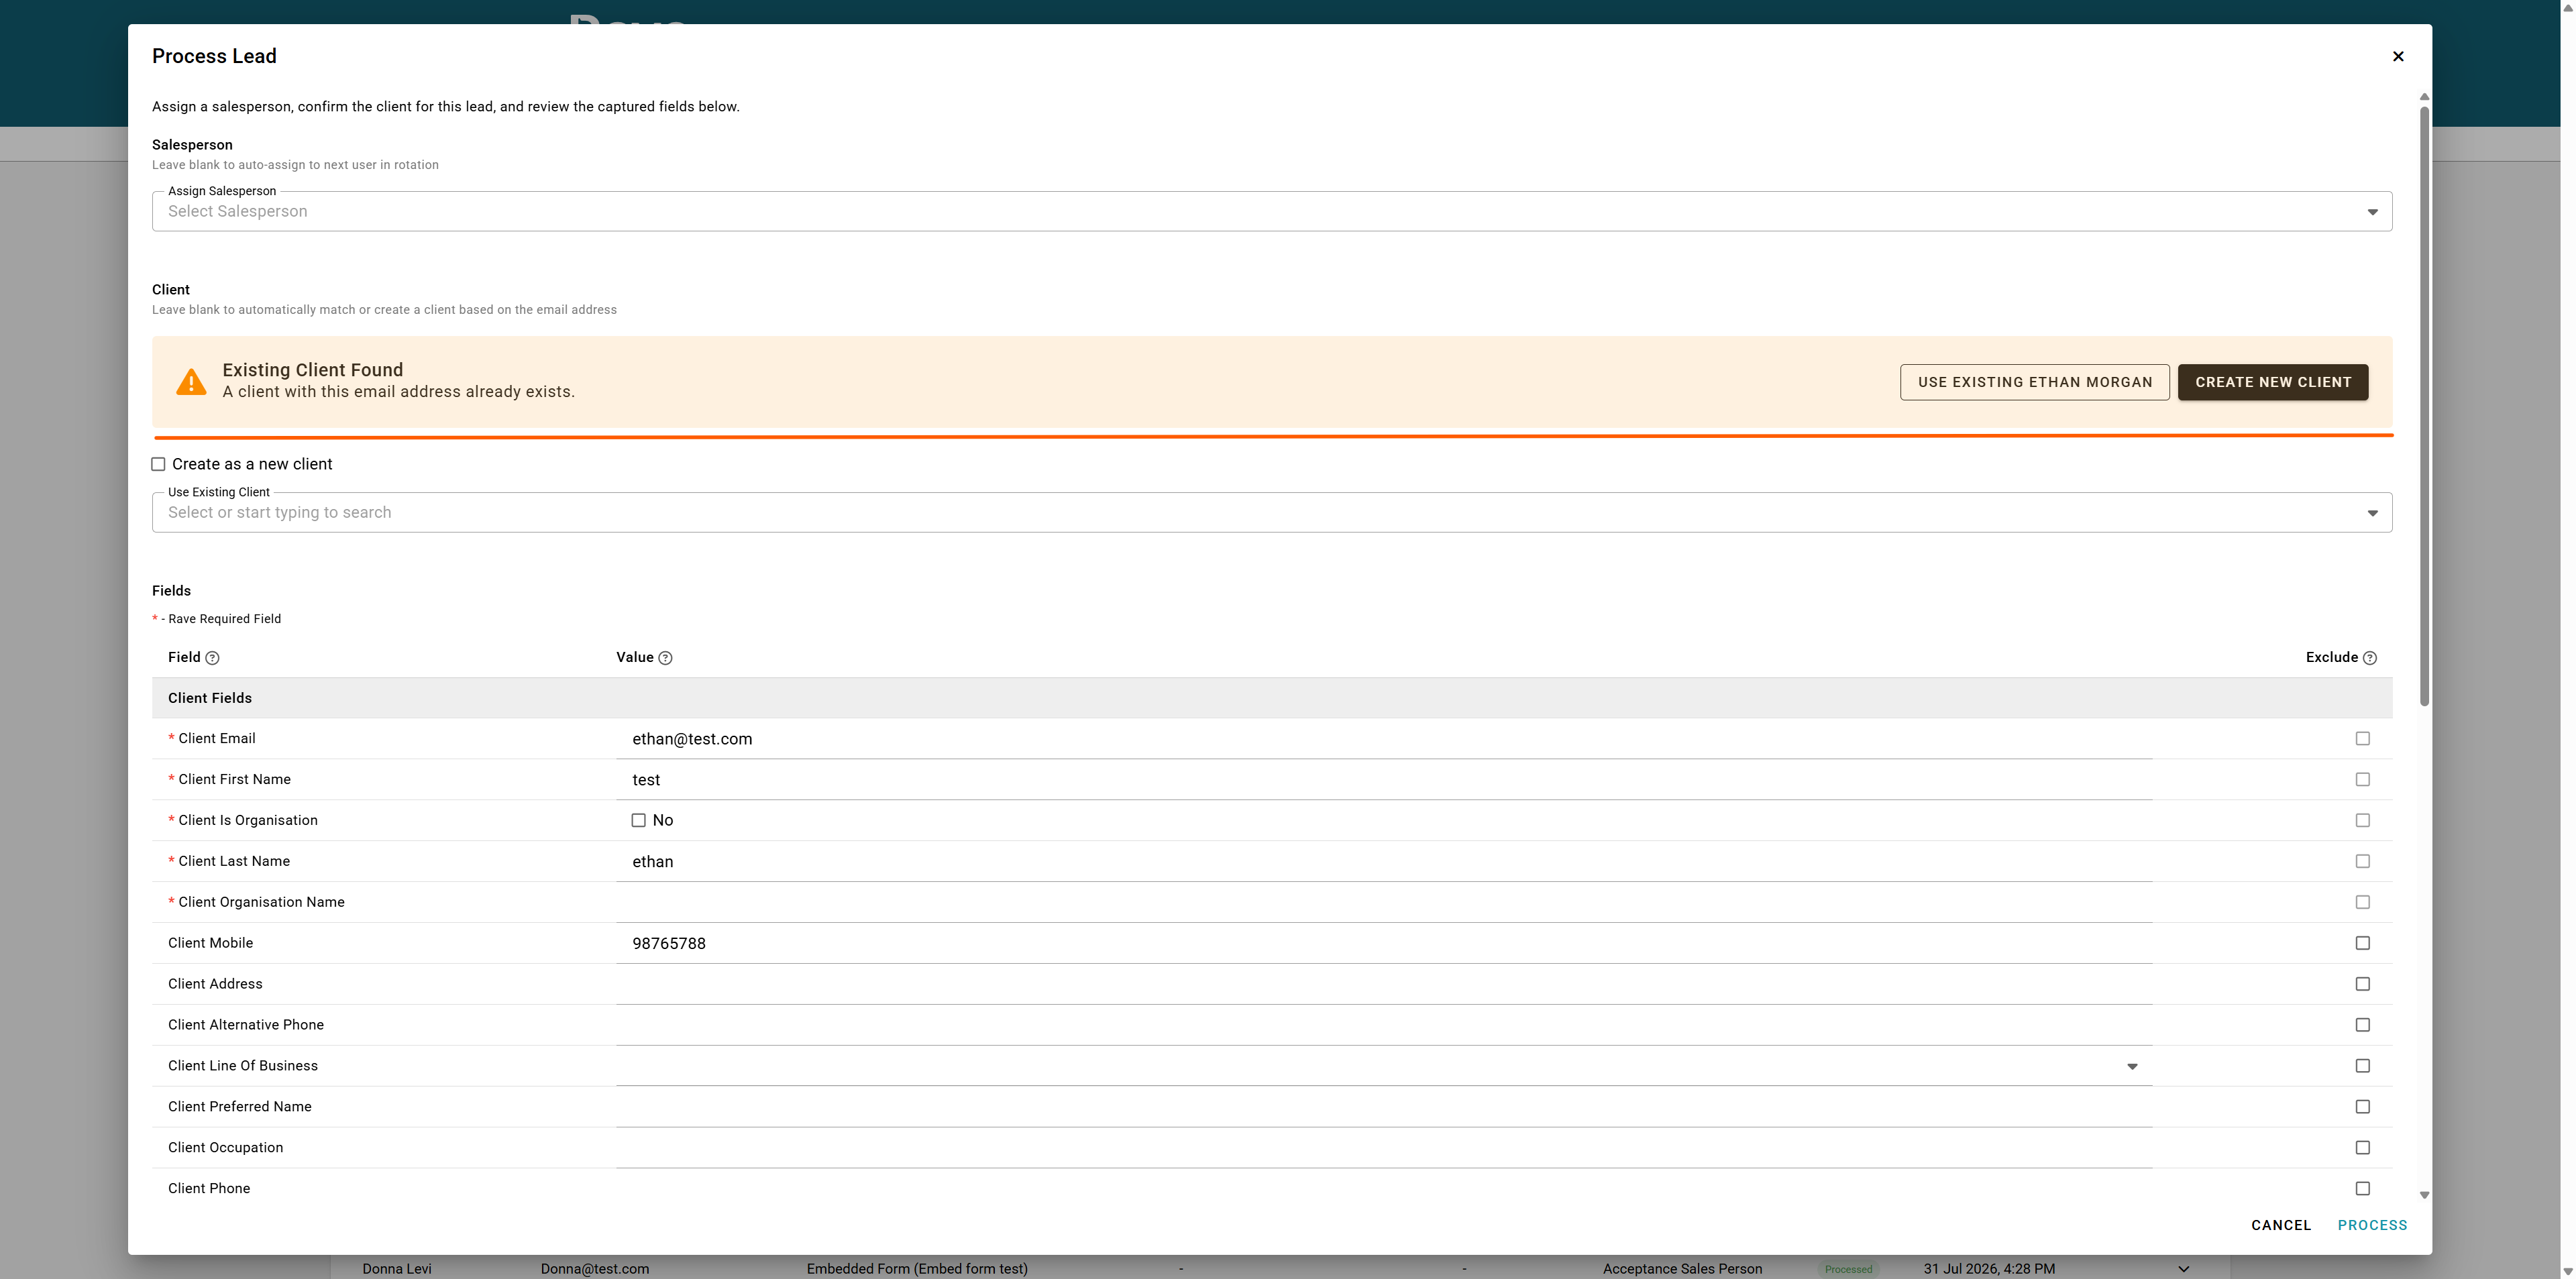
Process a new lead with an existing Client
When you click to process a new lead, if the client email already exists, you can choose to process this lead against the existing client or create a duplicate.
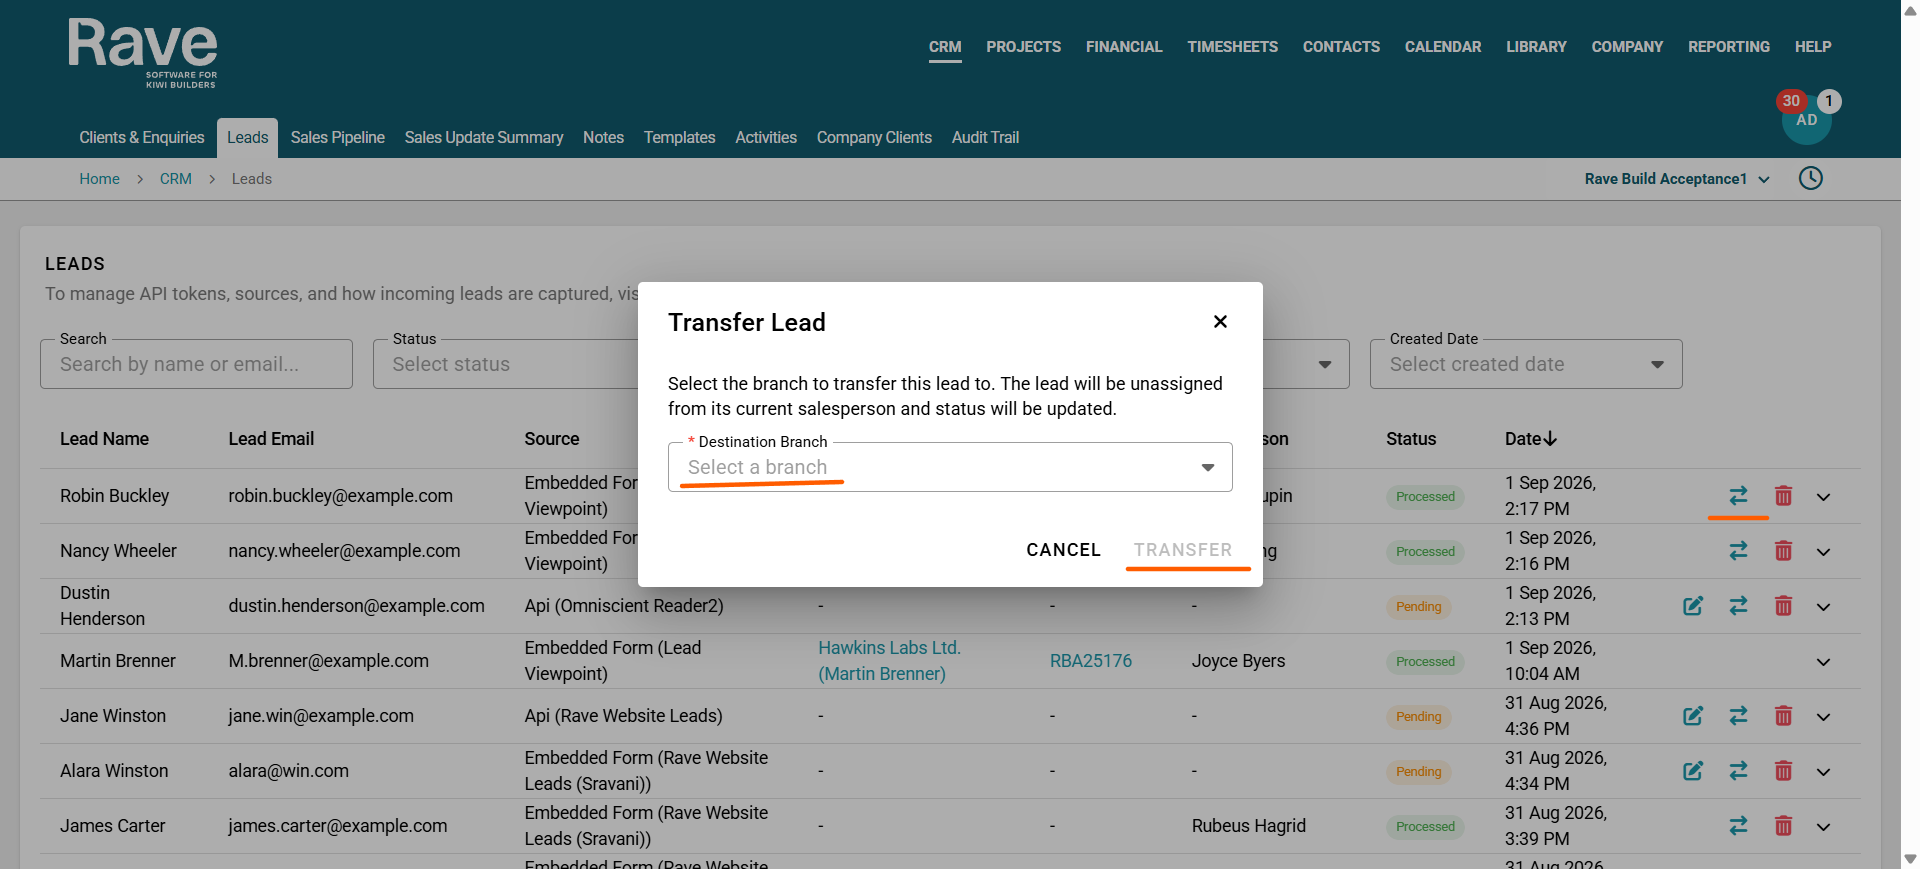
Transfer a Lead to Another Branch (Permission-based)
For multi-branch clients, leads can be transferred to another branch directly from the Leads tab.
Locate the lead you want to transfer.
Click the Transfer Lead icon on the right-hand side of the lead.
In the Transfer Lead window, select the Destination Branch.
Click Transfer.
When a lead is transferred:
The lead is moved to the selected branch.
The lead is unassigned from its current salesperson.
The lead status is updated.
This is useful when a website enquiry has been received by the wrong branch or needs to be handled by another branch within the same organisation.
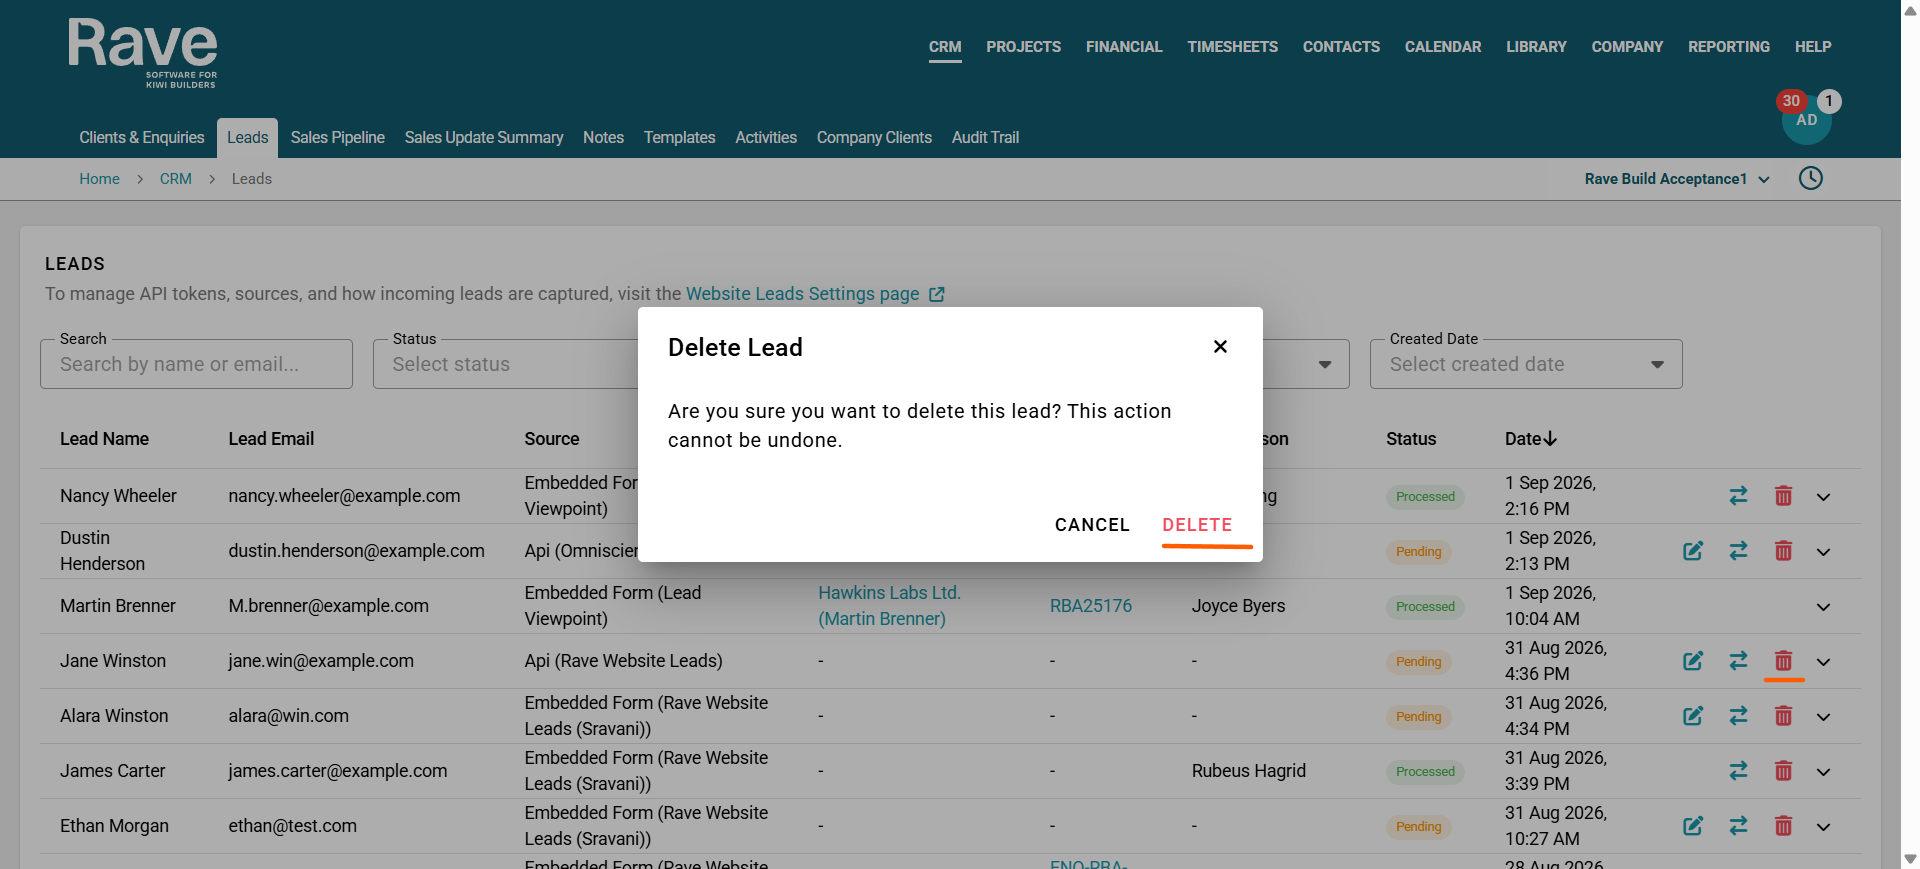
Deleting a Lead
To delete a lead, click the Trash Can icon to the right of the lead.
A confirmation window will appear advising that this action cannot be undone.
Click Delete to permanently remove the lead, or Cancel to exit without making any changes.
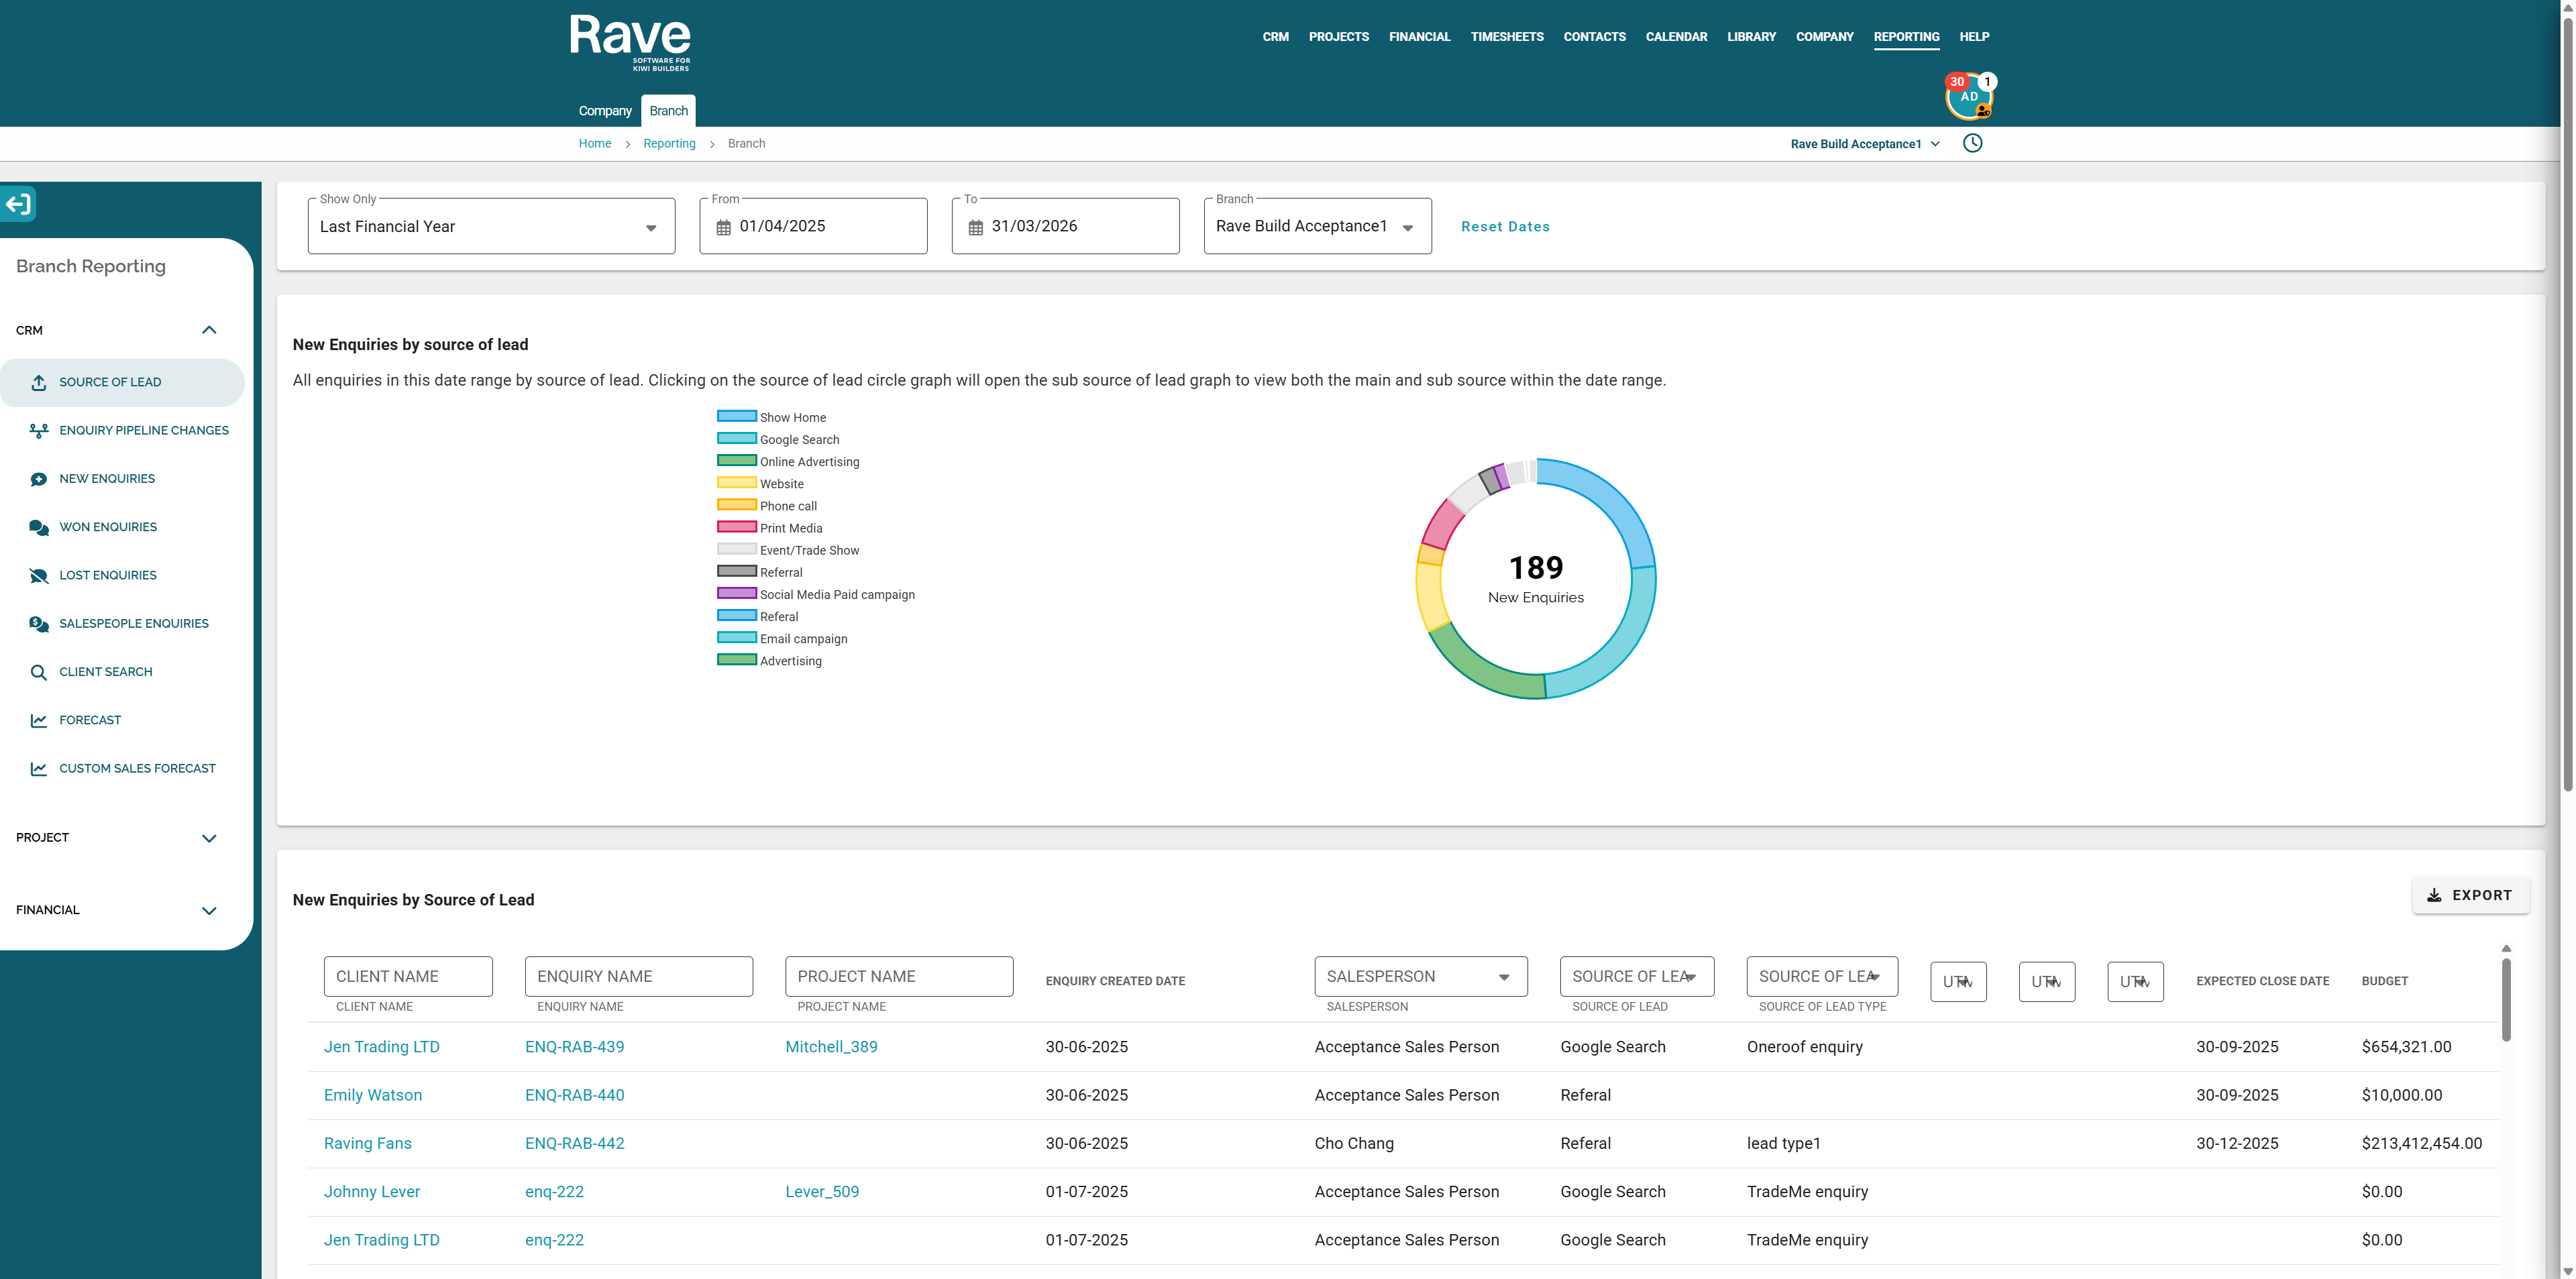
New Lead Reporting
To access your new Lead Reporting, go to Reporting → CRM → Source of Lead or New Enquiries.
Both of these reports will have the UTM information if it was provided from the website lead.
If you dont see Reporting you need to check with your branch owner or Rave Support as this is a permission based feature.
Was this article helpful?
That’s Great!
Thank you for your feedback
Sorry! We couldn't be helpful
Thank you for your feedback
Feedback sent
We appreciate your effort and will try to fix the article