Mail tags are used to categorise and organise Your Mail in Rave. They help keep information structured and easy to find. Mail Tags allow users to tag their mail when creating Enquiry Mail, Project Mail or our coming soon Branch Mail, making it easier to find important information, track progress updates, Client issues, Project Kick off Emails and much more.
If you are looking for Managing Notes Tags click here for the article.
Click on your Profile dropdown menu.
Select Branch Settings.
Scroll down to the Tags section.
Open the Mail Tags Management area.
From here, you can add, edit, archive, delete, or merge tags.
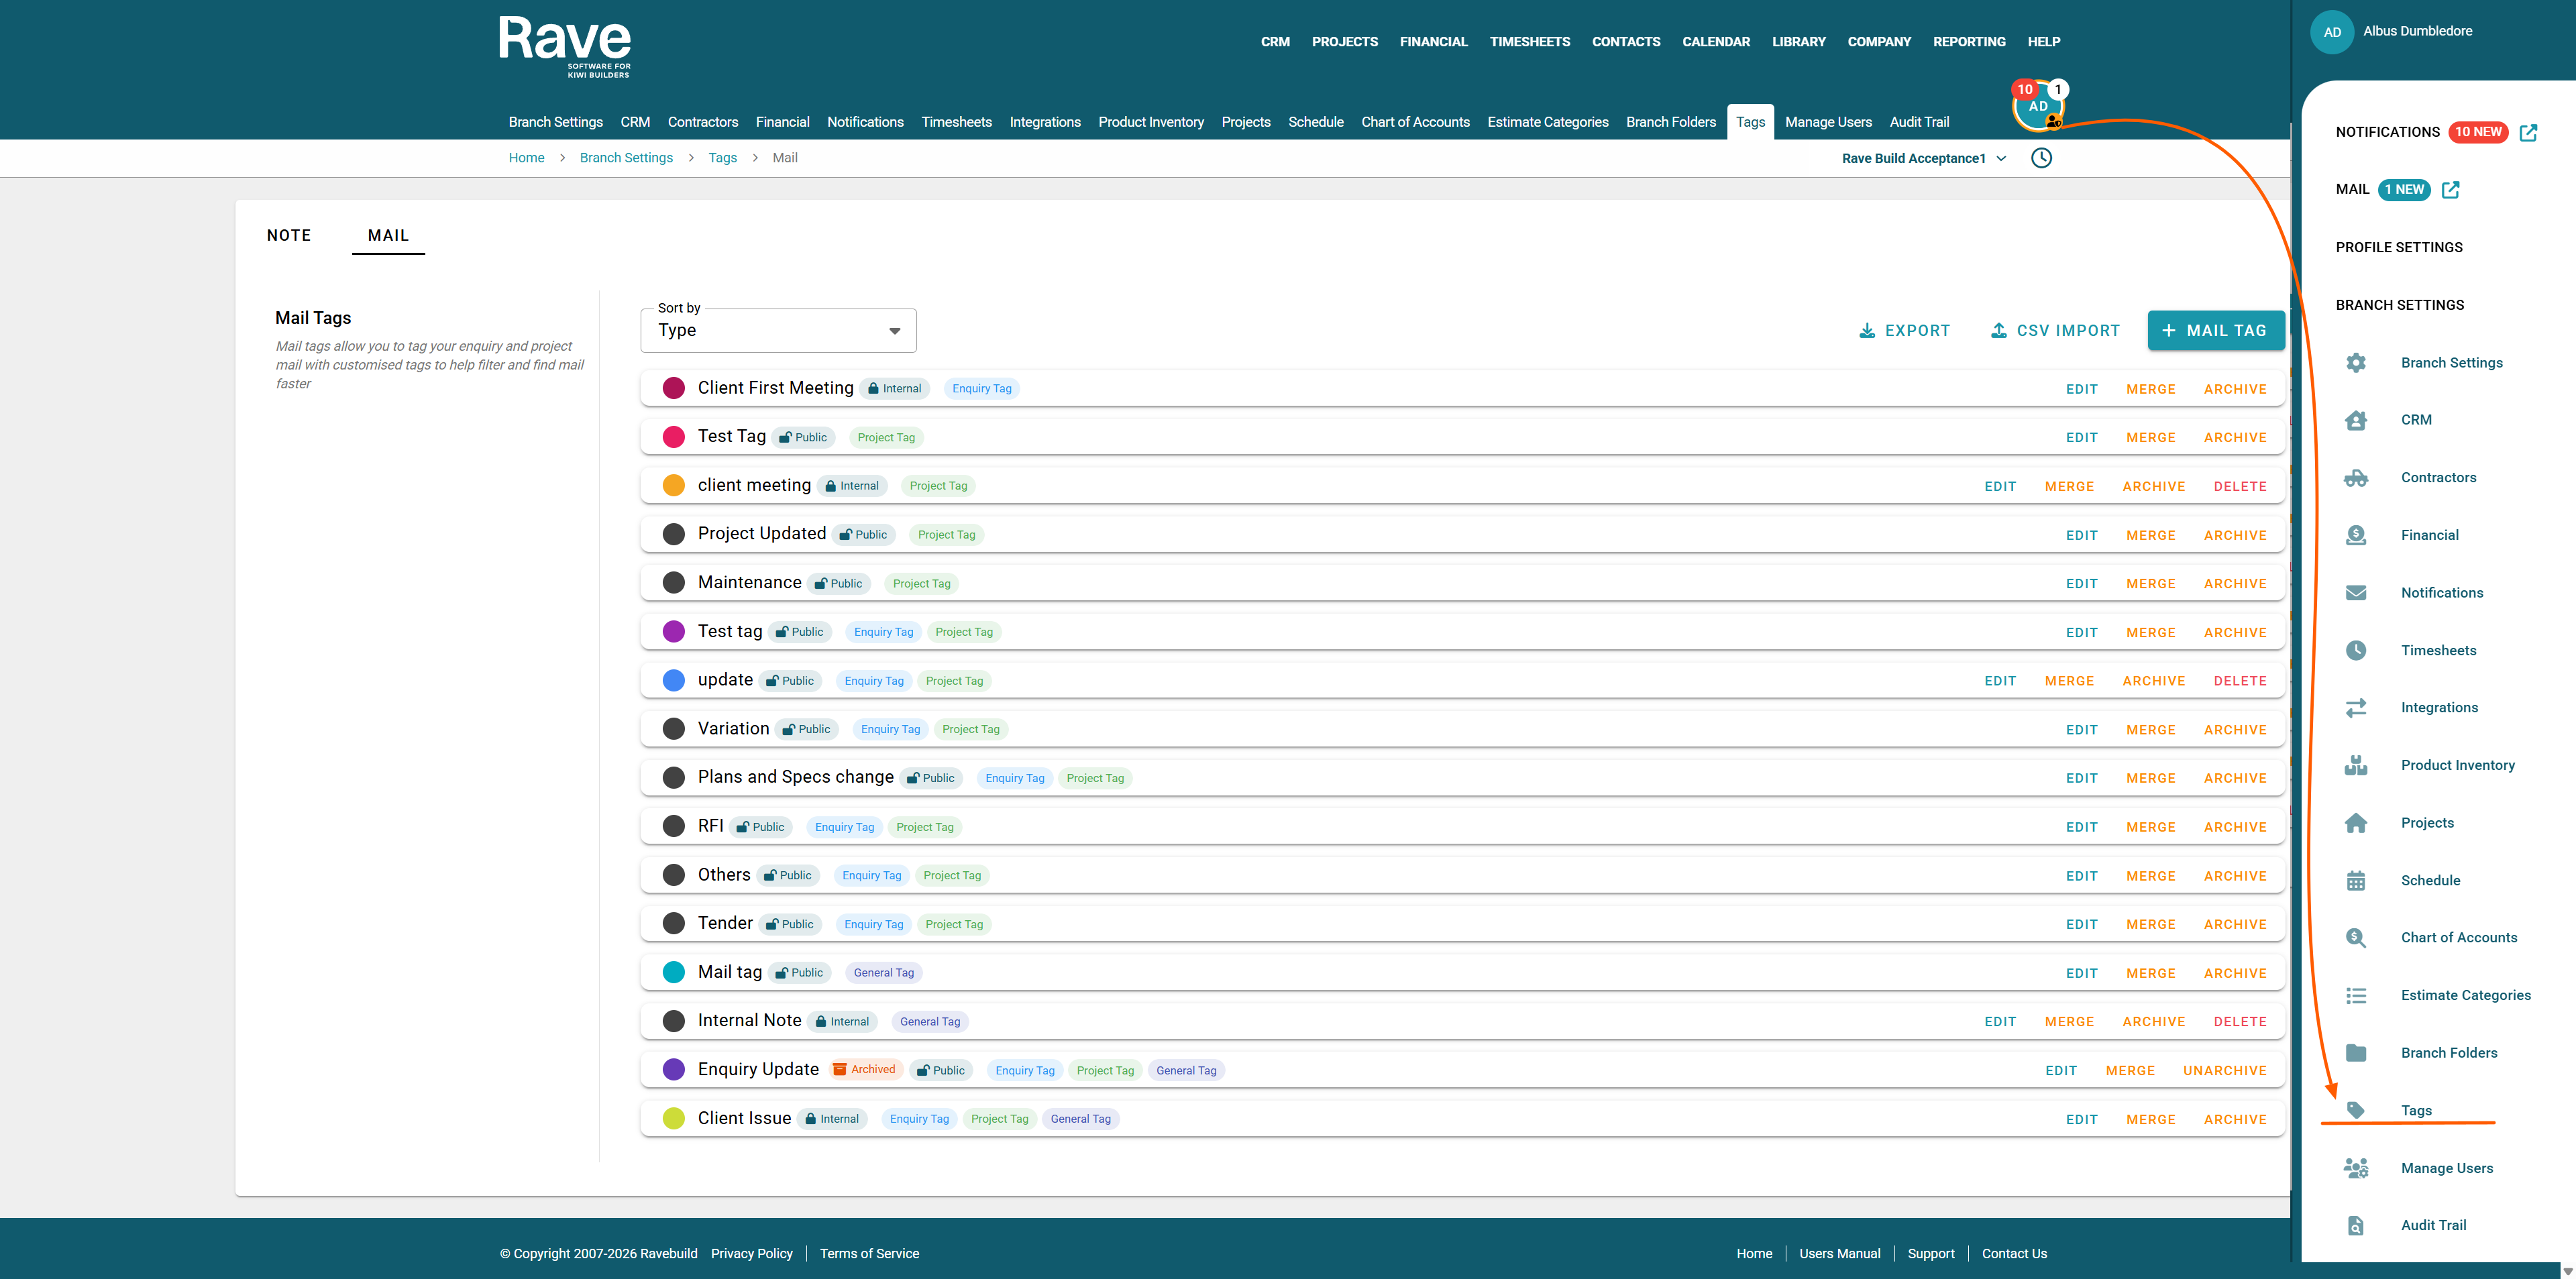
To the top right you have the + note tag button to create a new tag
the CSV import to bulk load tags via CSV import
The CSV export option to export your existing tags to CSV
Creating a Mail Tag
Click + Mail Tag to create your first tag.
A pop window will appear allowing you to:
Select a colour for the tag.
Enter a name for the tag.
Choose which mail type(s) the tag can be used in (Enquiry, Project, or Branch Mail).
Then Select Visibility (either internal use only or Clients/Contractors can also use/see)
Once you have made your selections, click Create.
Your tag will then appear in the list, displaying:
The selected colour
The Tag Name
The mail type(s) it applies to
The Visibility (Internal or Public)

Managing Existing Tags
You can manage tags using the following options:
Edit – Update the tag name, colour, or applicable mail types and visibility.
Delete – Remove a tag that is not currently in use.
Merge – Combine duplicate or unwanted tags into a single new tag.
Archive – Retain historical data while preventing the tag from being used again.

These Mail Tags can now be used in CRM mail or Project Mail.
The help article for CRM mail is here.
The help article for Project mail is here.
Was this article helpful?
That’s Great!
Thank you for your feedback
Sorry! We couldn't be helpful
Thank you for your feedback
Feedback sent
We appreciate your effort and will try to fix the article