Log in to Rave or click the Home icon to land on (or return to) the Rave homepage/dashboard.
At the top centre right of the home screen (and on any other screen within Rave), you'll find the main navigation buttons.
Click on the CRM button to open the CRM module.
Then click on Sales Pipeline to access the Sales Pipeline view.
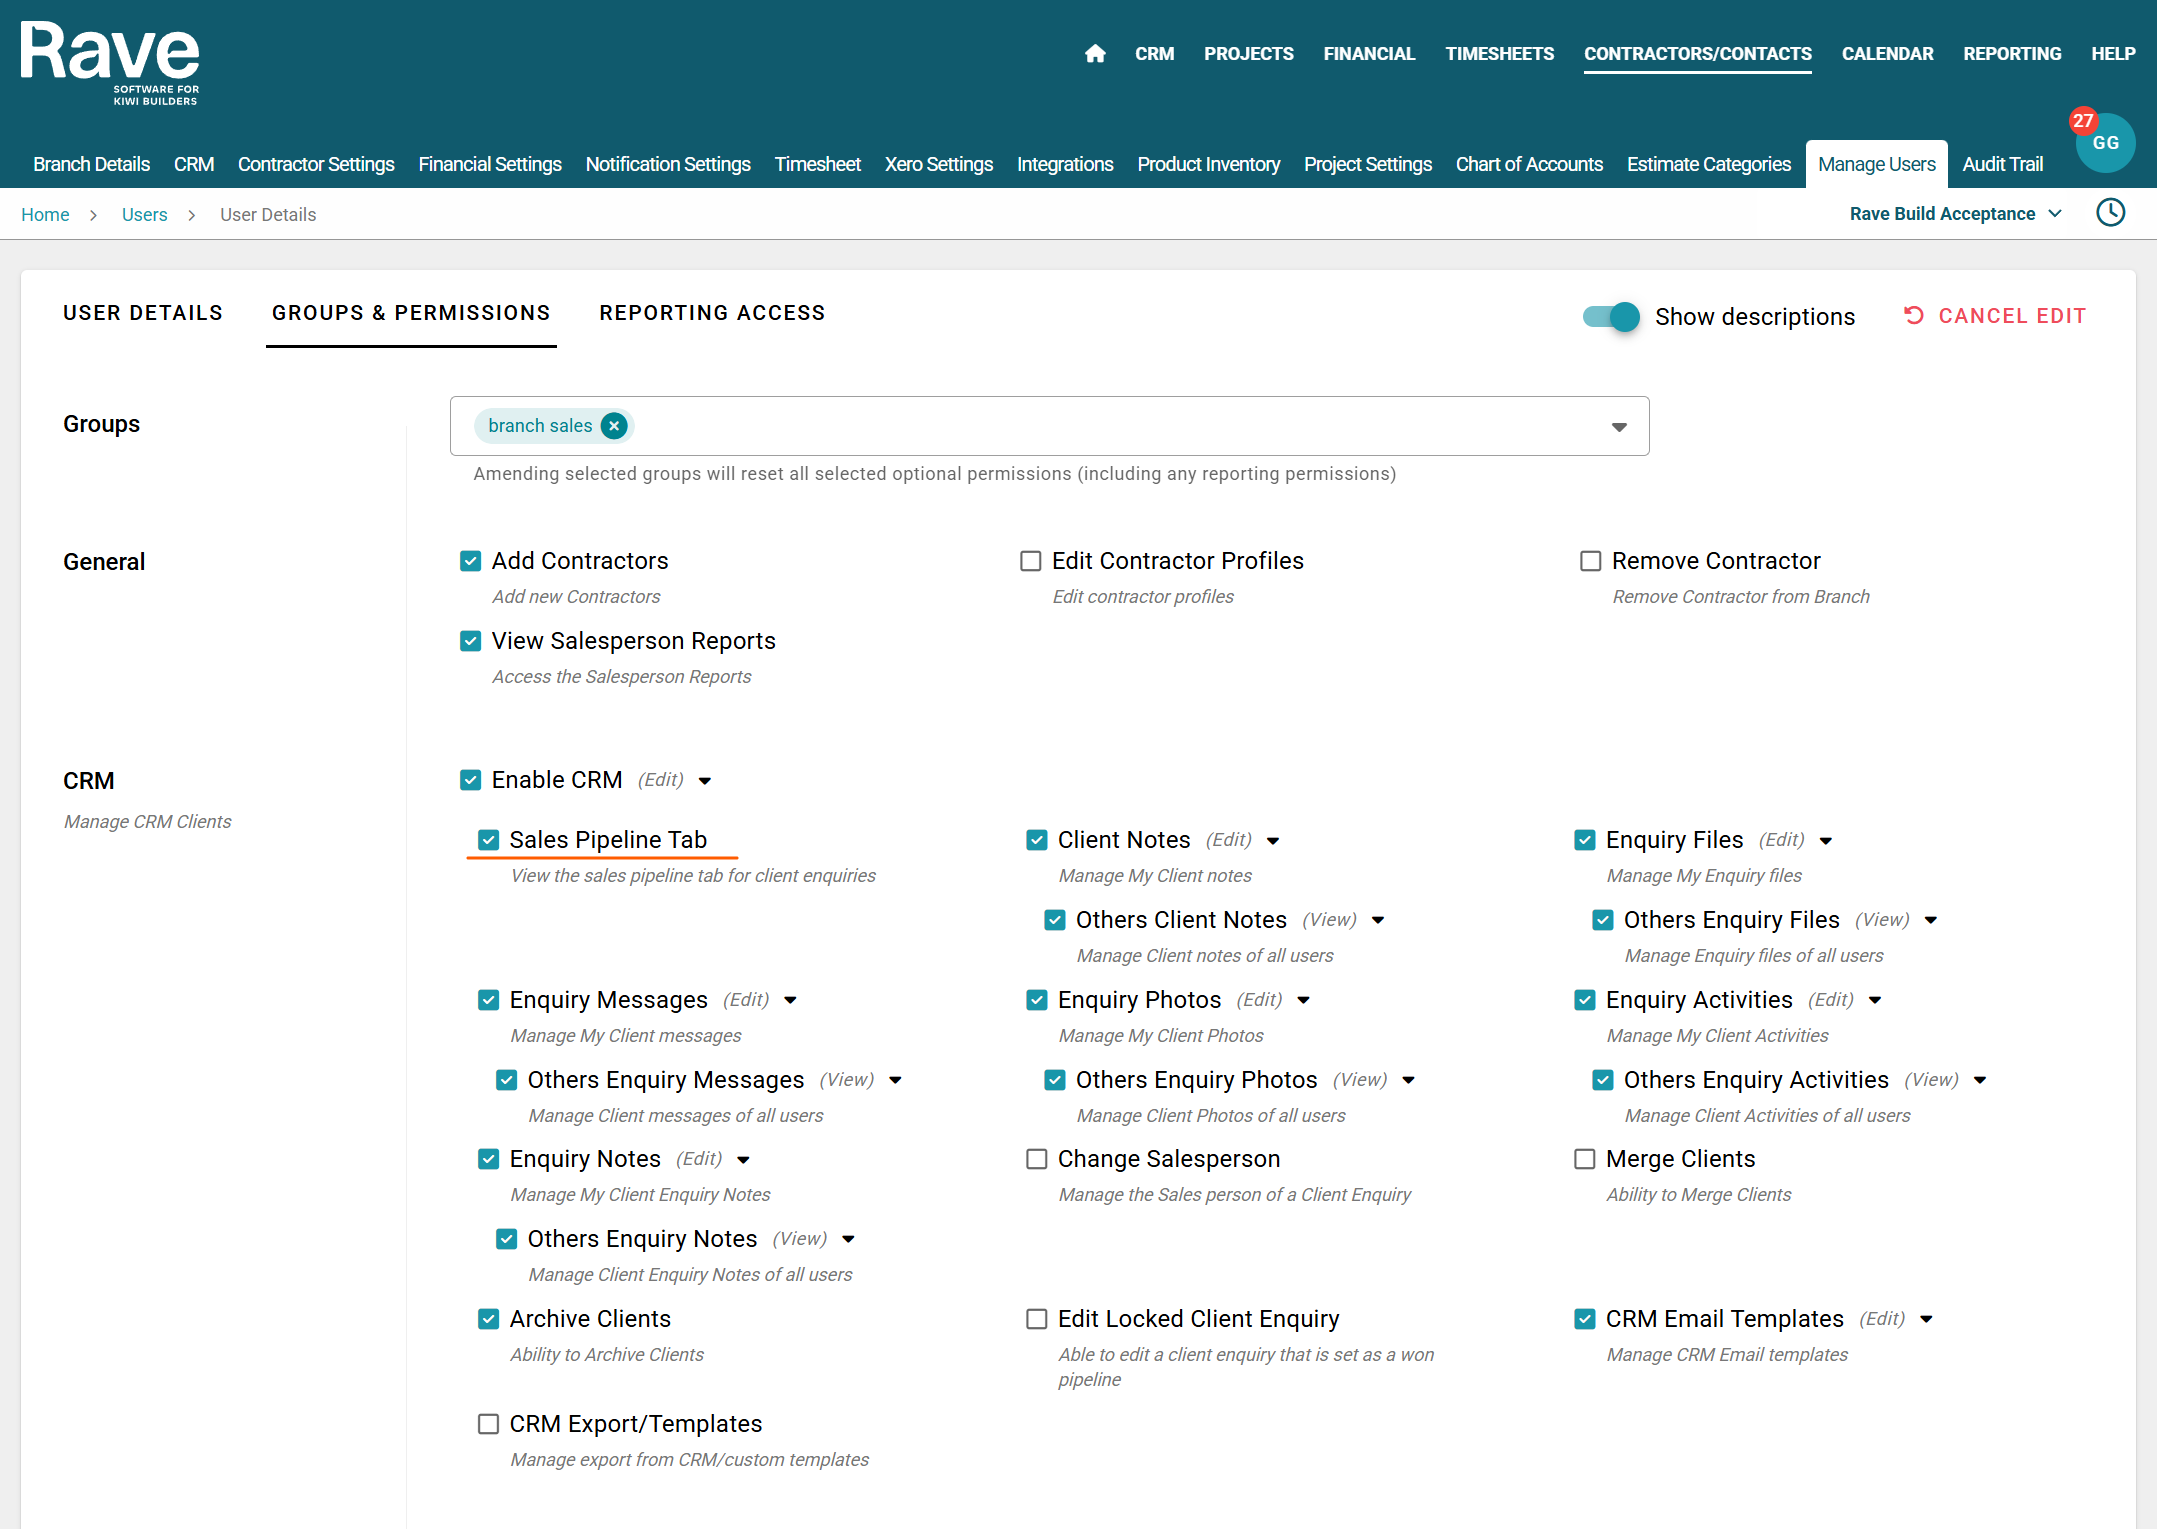
This view is turned on by default for all users who have CRM access excluding Clients, Contractors, Site Managers, Site Staff and Timesheet.
If you don't see this view and would like it turned on contact your branch owner or Rave support.
If you have permission to edit users you'll find the permission to turn this view on/off here.
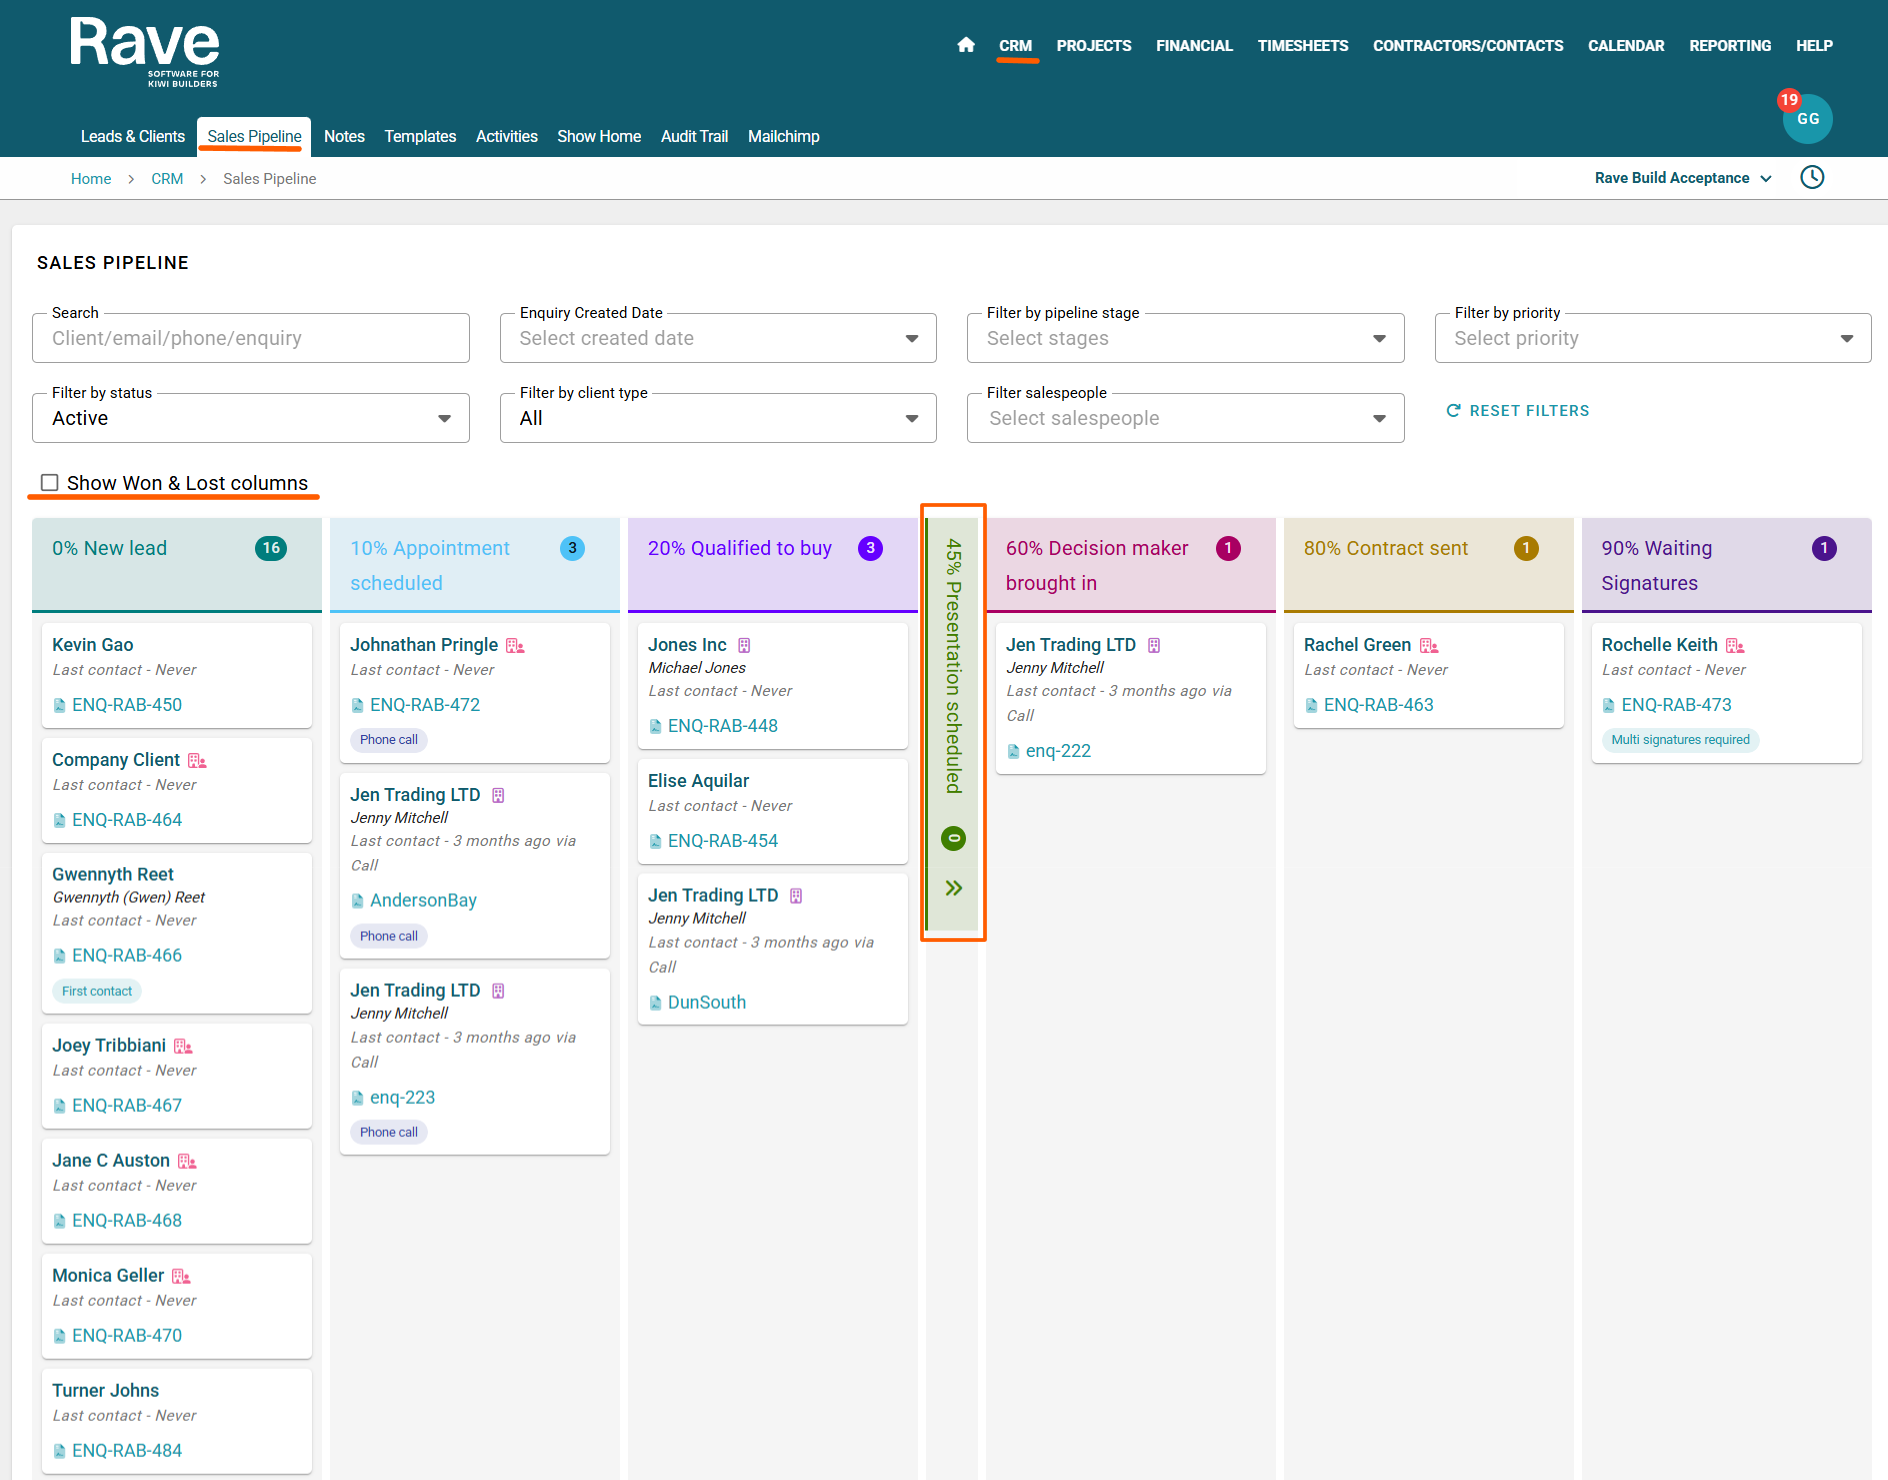
The Sales Pipeline view provides a traditional Kanban CRM-style interface, allowing you to track and manage your current enquiries in a clear, column-based format.
Key Features:
Filtering Options: Use the filters at the top of the page to refine the enquiries displayed based on various criteria.
Pipeline Stages: Each column represents a stage in the pipeline and displays the total number of enquiries currently in that stage.
Client Information: Each enquiry displays the client’s name. Hovering over the name reveals their email address and phone number. We also display the handy company and Organisation icons to distinguish between clients who belong to an organisation and those who are owned by head/support office.
Enquiry Reference: The Enquiry Reference is a clickable link that takes you directly to the detailed Enquiry Page.
Project Icon: If a project is linked to the enquiry, a spanner and screwdriver icon will be shown to direct you to the project page for that enquiry.
Recent Activity: If there's been recent interaction, the type of activity (e.g., Phone, Email) will be displayed with the date it was completed.
Sub-Sales Pipelines: If you use sub-sales pipelines, their names will appear within the enquiry box in the custom colour set within your CRM settings.
Sales Pipeline Functionality Overview
Collapsed Pipelines: Pipelines with no enquiries will automatically collapse to save screen space.
Drag & Drop Enquiries: You can easily move enquiries between pipelines by clicking and dragging them to the desired stage.
WON Enquiries Requirements:
To move an enquiry to the WON stage, you must complete the pop up to enter either;A signed contract value and date, or
Select the Charge Up checkbox and enter a date.
Automation Triggers:
If you have automations configured (e.g. project creation), dragging an enquiry into a stage with automation will automatically trigger the associated actions. This works similarly to the Leads and Clients pages.Show/Hide WON & LOST Columns:
Use the checkbox in the top-left of the filtering options to toggle visibility of the WON and LOST columns.Infinite Scrolling:
Scroll down the page to continuously load more enquiries—no need to manually change pages.
Was this article helpful?
That’s Great!
Thank you for your feedback
Sorry! We couldn't be helpful
Thank you for your feedback
Feedback sent
We appreciate your effort and will try to fix the article