 The following is the recorded version of giving your client project permissions - covered in the client project permissions portion of the article below.
Inviting a client to Rave and Managing their permissions is a permission based feature.
From Manage Users you must have Client Invite selected as well as Mange Client permission Add/Edit/Delete in order to do both inviting and setting permission.

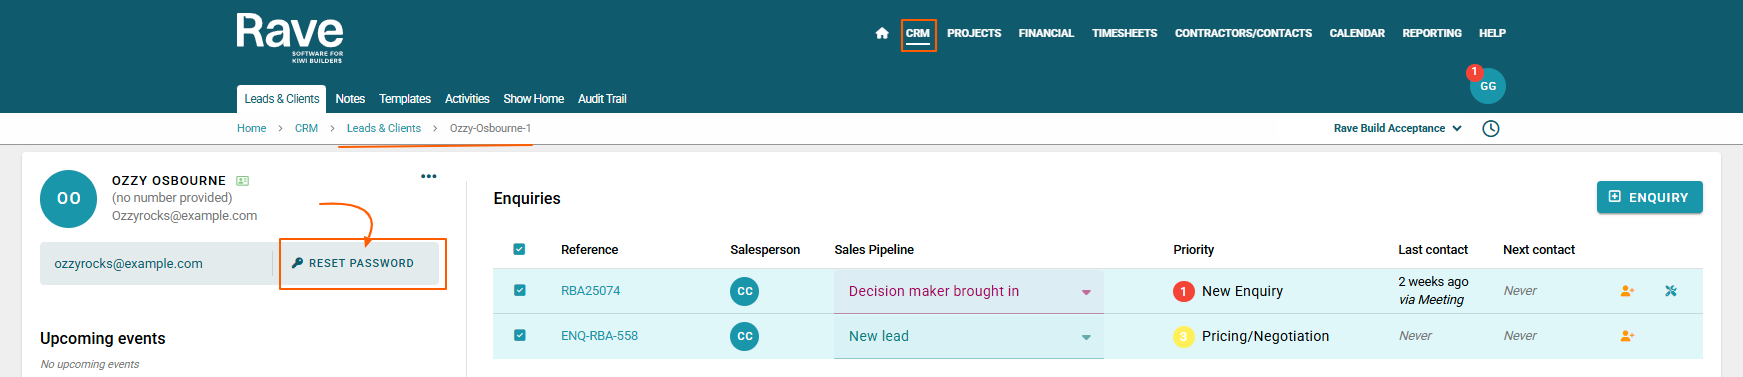
Creating and managing a client user login, as well as resetting their login password, is done via the CRM Tab within the Lead/Client profile.
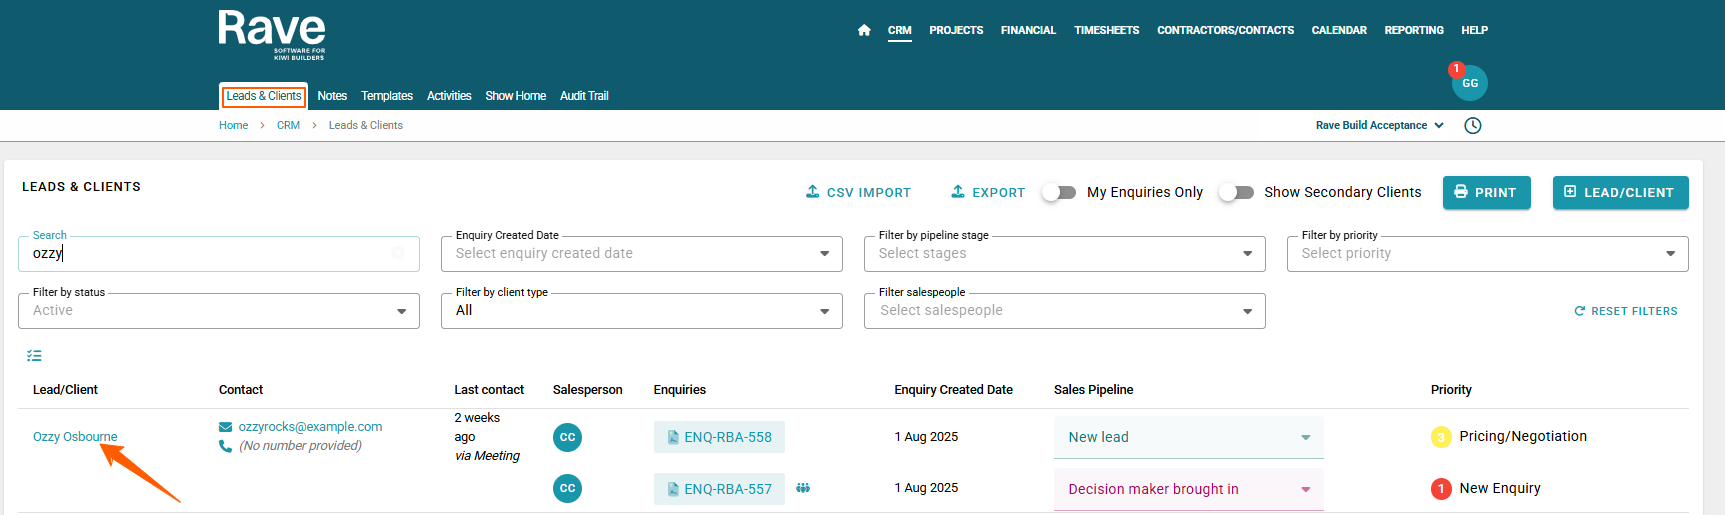
On the CRM Leads and Clients page, if a client has a Rave login, a green "Has Login" icon will be displayed next to their profile name.
When you click into the client’s profile, the same icon will appear, along with their login username and a Reset Password button. These details are displayed in a light teal field located immediately below the profile name.
If the client does not have a login, this field will instead display a "No Login" icon and an Invite button, which can be used to send the client an invitation to create their login.
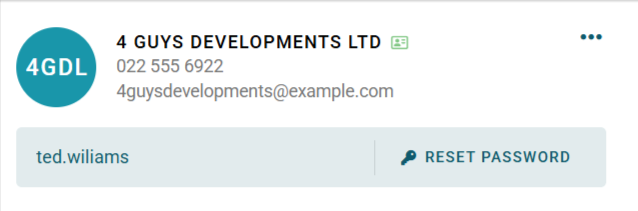
If the client is a Company Client you can only invite them to Rave you cannot send them a Reset Password or manage their Profile as this is done by Head Office Users.
If you notice the clients user name is a combination of their First Name.Last Name with numbers after it and not their email address its because they have already been invited to Rave at a previous stage by someone else and that user name has been suspended. You can submit a help ticket to ask the Customer Support team to change the user name to be their email address.

If your client has a Log in already then the Reset Password and key icon will appear in place of the Invite paper plane icon
To Create a Client Login
Click the Invite button to open the ‘Send Welcome Email’ pop-up window.
In the pop-up, select a client welcome email template. If the option is clickable, select either salesperson or current user as the sender of the welcome email. Set the email subject line if needed. These templates are managed in the CRM Templates menu.
You can customise the welcome message using the formatting options provided. As soon as you begin typing, a ‘Save Template’ button will appear, allowing you to save your custom message as a new template. You can also manage the client’s Enquiry and/or Project access permissions on the right-hand side. (See more details on access permissions below.)
Once an email subject line has been added, the ‘Send’ button becomes clickable. Clicking Send will immediately send the welcome email to your client. You can also preview the email before sending. If you’ve changed any wording in the Rave template, you’ll have the option to save your updated version as a new custom template.


Enquiry Permissions

Project Permissions

Client Enquiry Permissions (Client log in permissions)
Client enquiry access permissions can be set at an enquiry level, using the multi-select tick box or by selecting one enquiry at a time. To update or remove a client's enquiry access, open your client's profile to display their list of enquiries. And then, click on the tick box to the left of any enquiry reference to be edited. This will display an Add/Edit/Remove Client Permissions pop-up footer:
- Clicking on the Remove Client Permissions option removes the client's access and all permissions on the selected enquiries.
- Clicking on the Add/Edit Client Permissions option - opens a Client Enquiry Permissions pop-up box for the selected enquiries with the current permissions selected. Simply click the desired access permissions for files and albums, and then click the Submit button to save.
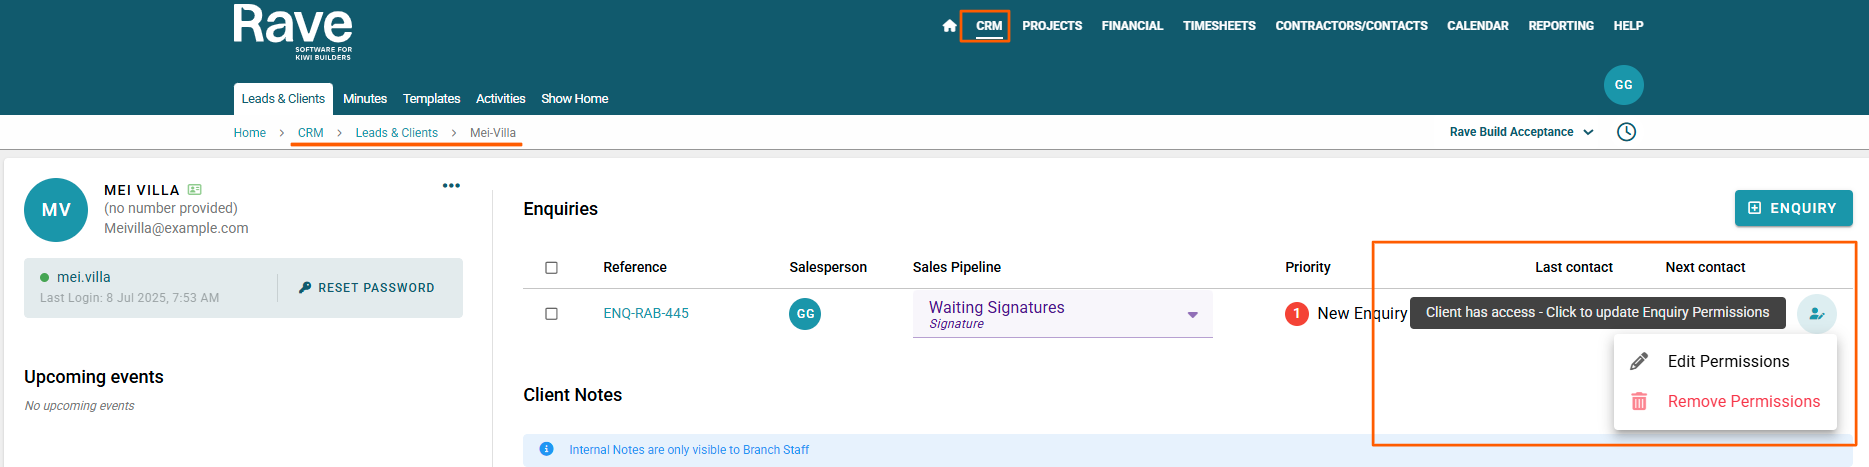
Note: A client's permissions can also be added/updated by clicking on the enquiries access permissions icon to the right of the enquiry line:- The teal coloured person with a pencil icon - allows you to edit or remove permissions
- The teal coloured person with a pencil AND a project icon - allows you to give Enquiry and Project permissions
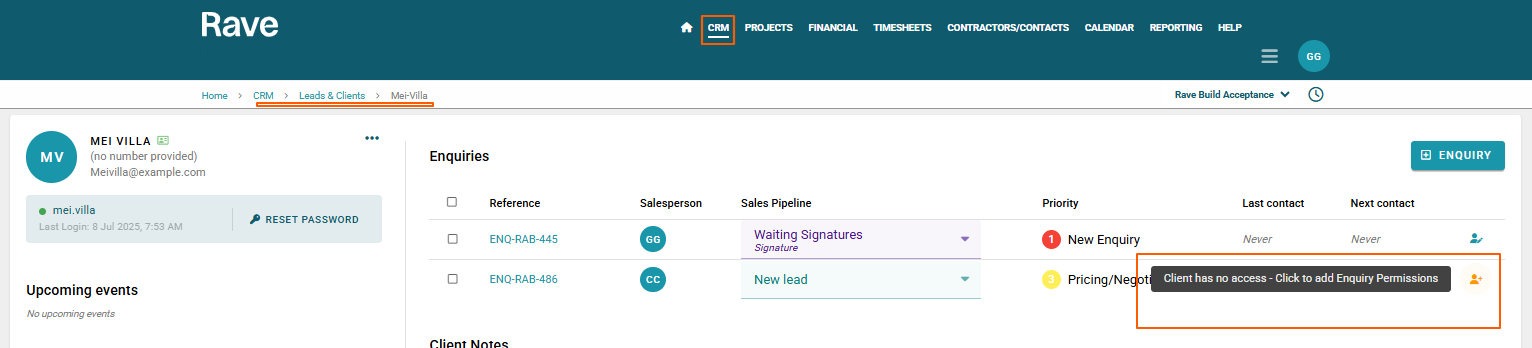
- The orange coloured person with a plus icon - allows you to give enquiry access permissions
The client's enquiry permission options are:
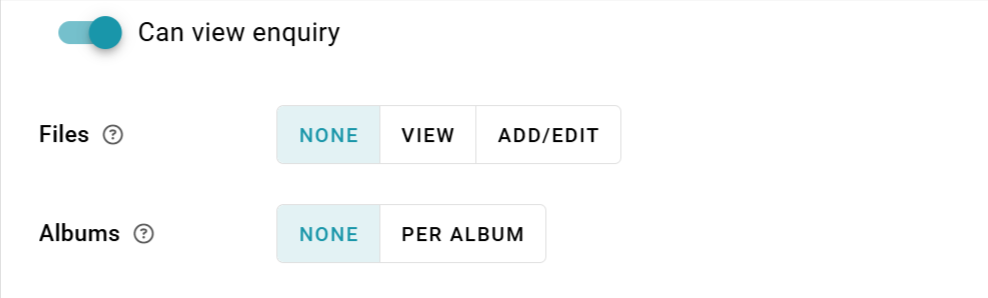
- Can View Enquiries toggle - turning the slide on will allow you to select more options for the client enquiry
Note: Unless this toggle is switched on - your client will have ZERO visibility to their Enquiry files and albums. Once this toggle is switched on you can choose what your client can and cannot see. - Files
- None - No access to enquiry Files
- View - View only access to the files uploaded by your building partner or Sales Team
- Add/Edit - To be able to view/add/edit enquiry files you upload, and view only the ones uploaded by your building partner or Sales Team
- Albums
- None - No access
- Per Album - To be able to access albums - also dependent on each album's client access permissions
Client Project Permissions
Important Note: The project must be in active status for the client to see it once logged in.
Slide on Can View Projects toggle - turning this slide on will allow you to select more options for the client's project/s. Tick as many of the options below to give access to each
Note: Unless this toggle is switched on, your client will have ZERO visibility of their Project Schedule and Financial Access. Once the toggle is switched on, you can choose what your client can and cannot see.
- Project Schedule Access
View Milestone Gantt
View Task List
View Task Gantt
View Task Calendar
View all visible tasks - available if any of the task list views have been provided
View only tasks assigned to the client - they can only see scheduled tasks assigned to them
View task assignees - they can see the task description and the primary task assignee's name
- Project Financial Access
View Progress Payment Page - view the progress payment page and accepted/declined variations
View Invoice Page - they can view and open their invoices within Rave
View Charge Up Report - they can view the client charge-up report (if this is enabled on Branch CRM Settings page)
Invoices to Secondary Clients - Permission for the secondary client(s) to view invoices assigned to primary clients.
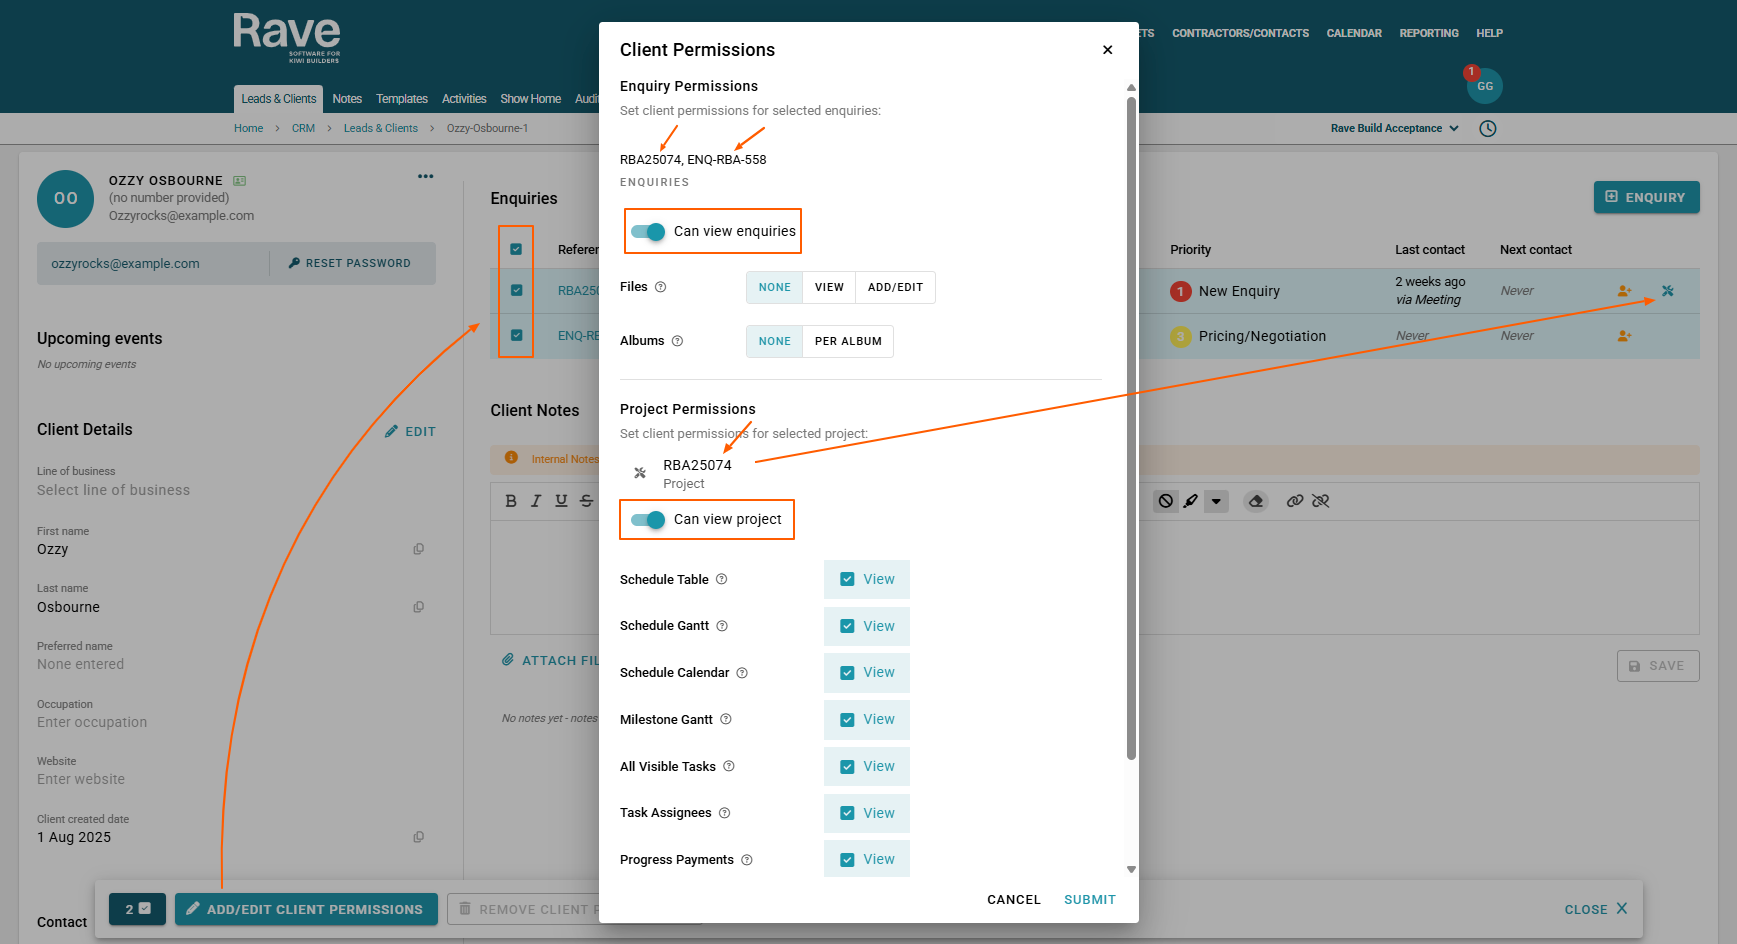
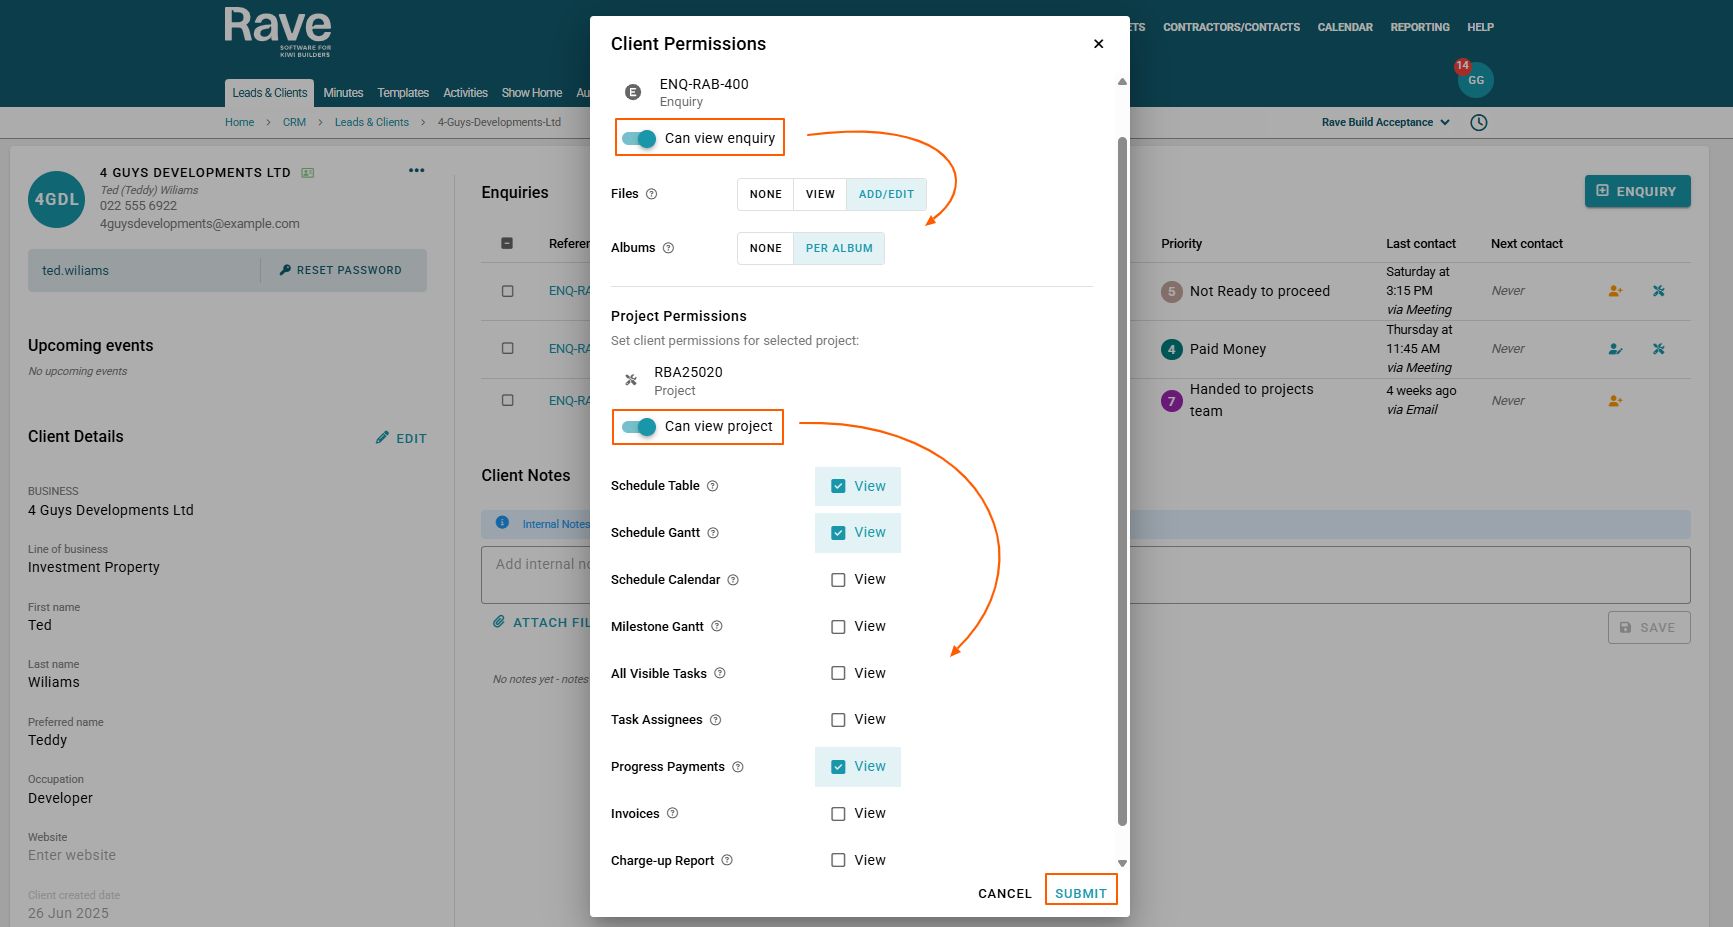
The screenshot below is an example of the Client Enquiry and Project Permissions.
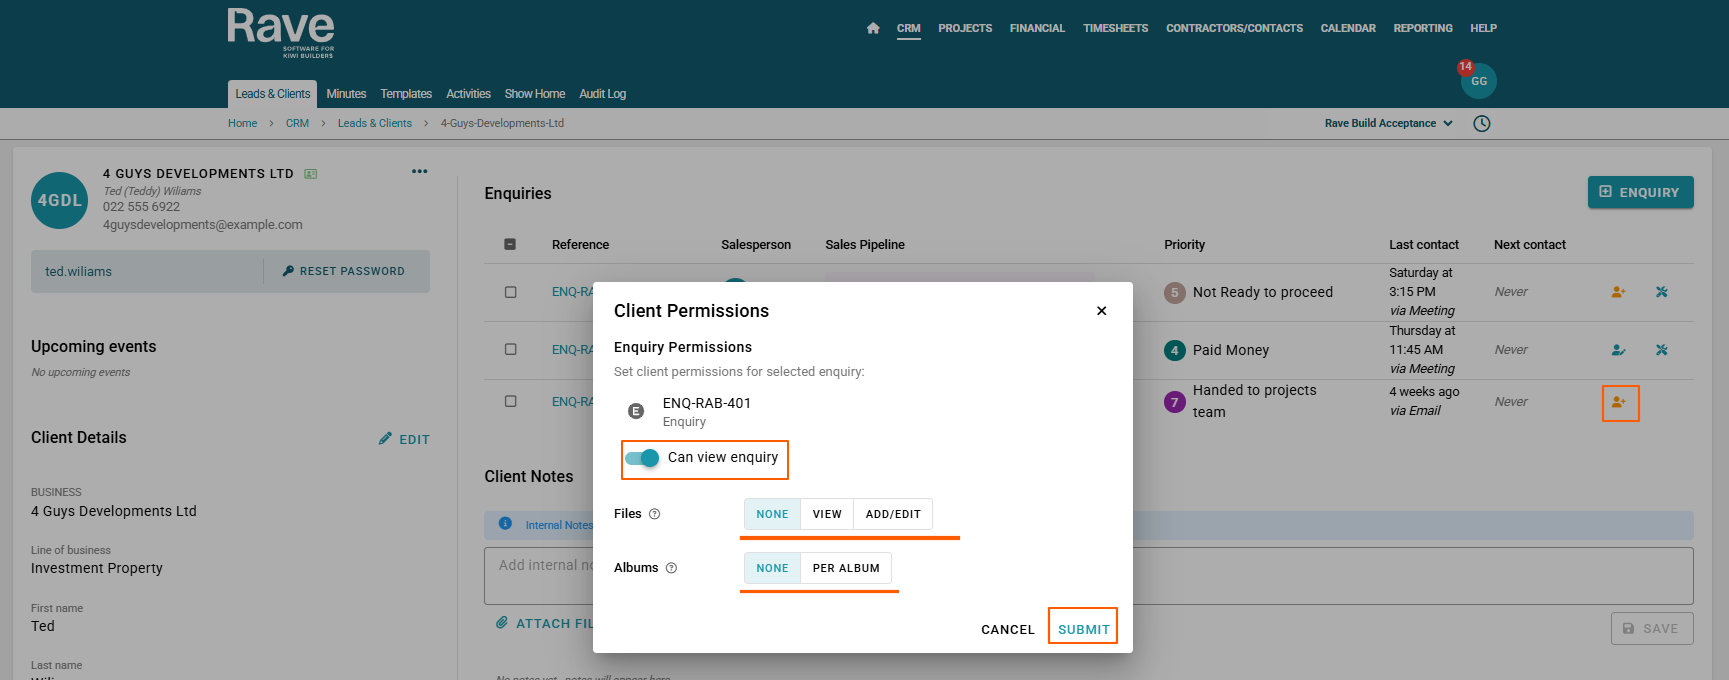
Screenshot below of Adding Client Enquiry Permissions (orange coloured person with NO Project).
Secondary Client Project Notifications Note:
Both primary and secondary clients will need a client login to be created for access, AND secondary clients require the project 'People' sub-tabs 'Receive Notifications' toggle switched on for project notifications to be sent to them - these notifications include:
- Generating and sending the Preliminary Budget PDF Export to clients
- Sending/Resending Progress Payment Variation approval requests
- Sending/Resending Estimate Version Variation approval requests
- Client Project Notes
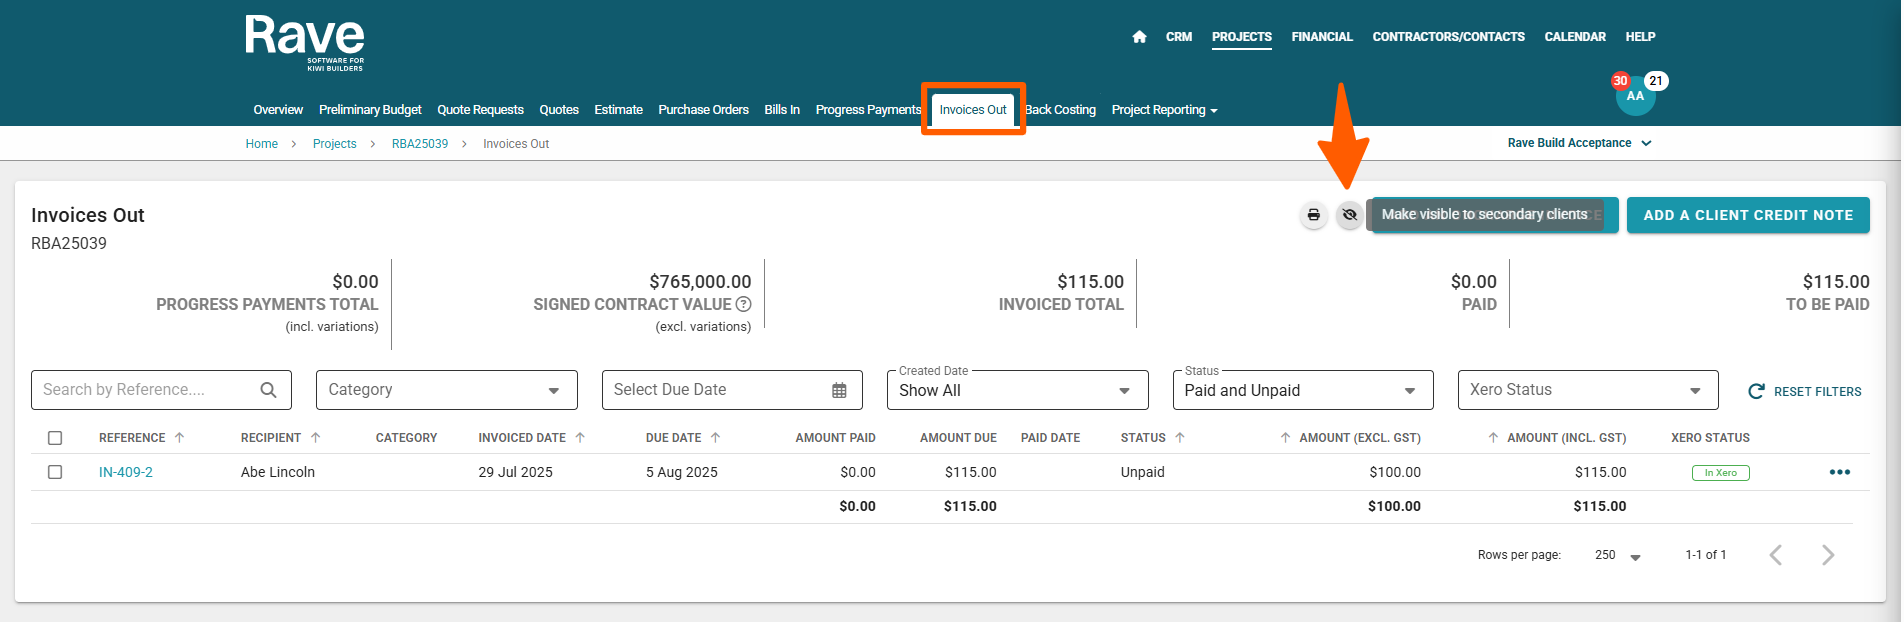
If you want your secondary client to receive progress payment notifications, you also need to ensure the Invoices Out 'Hide from secondary clients' eyeball is not crossed out - you can turn this mode on and off by clicking on the eyeball icon via the Invoices Out screen.

Resetting a Client Login Password
Once a client login has been set up, you can assist in resetting the client's login password by clicking on the 'Reset Password' button. This will open a 'Reset Password' pop-up, where you can select a password reset email template, edit the subject line and or message body. As soon as a subject line has been added, the 'Send' button will become clickable. Clicking on this will send a password reset email to your client immediately.
Was this article helpful?
That’s Great!
Thank you for your feedback
Sorry! We couldn't be helpful
Thank you for your feedback
Feedback sent
We appreciate your effort and will try to fix the article