Integrating RAVE FMS with Xero allows you to sync your Chart of Accounts, manage payments, link project tracking and more.
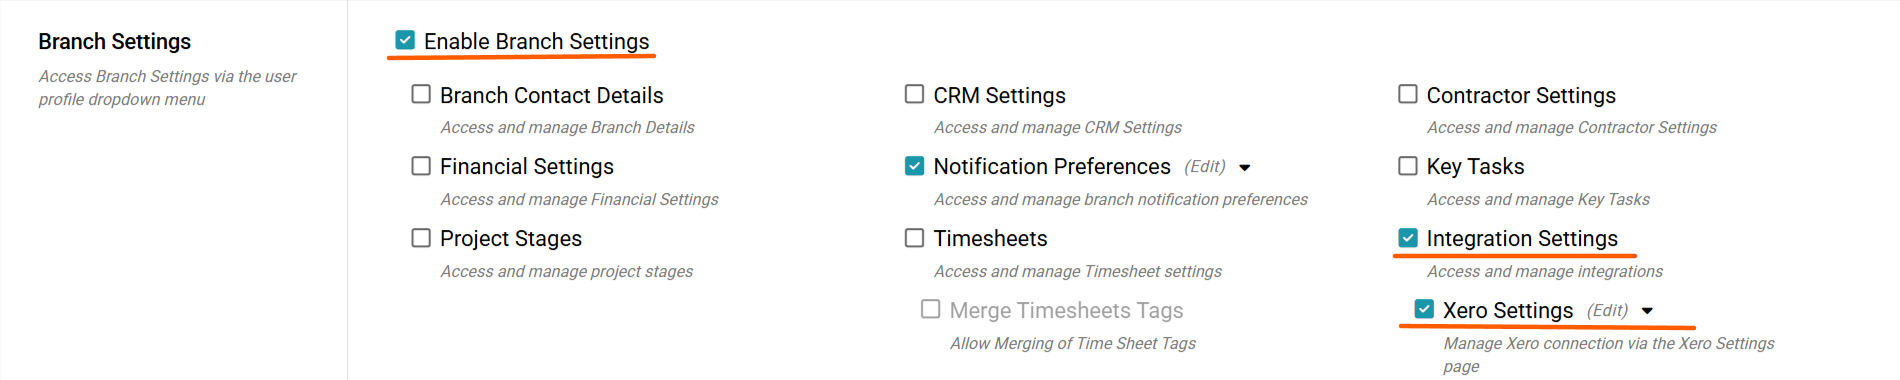
You must have the Branch Settings - Integration - Xero permission enabled in order to complete this setup. If you don't see this option, contact your branch owner or Rave Support.
Our Previous Articles stepped you through how to connect to Xero, you can read that article Here. Or, how to set up your Xero Settings, you can read that article here.
We will now run through the Project Tracking Set up
Xero Tracking Categories is how Xero manages (and groups) a RAVE project's documents using your project's job number as the unifying reference. You can filter reports in Xero using the tracking category to find all expenses and income related to a specific project or projects.
Click your Profile dropdown in RAVE.
From the Branch Settings menu, select Integrations
If you don’t see this option, contact your Business Owner for access permissions.
Once in Integrations, find Xero and click Manage.
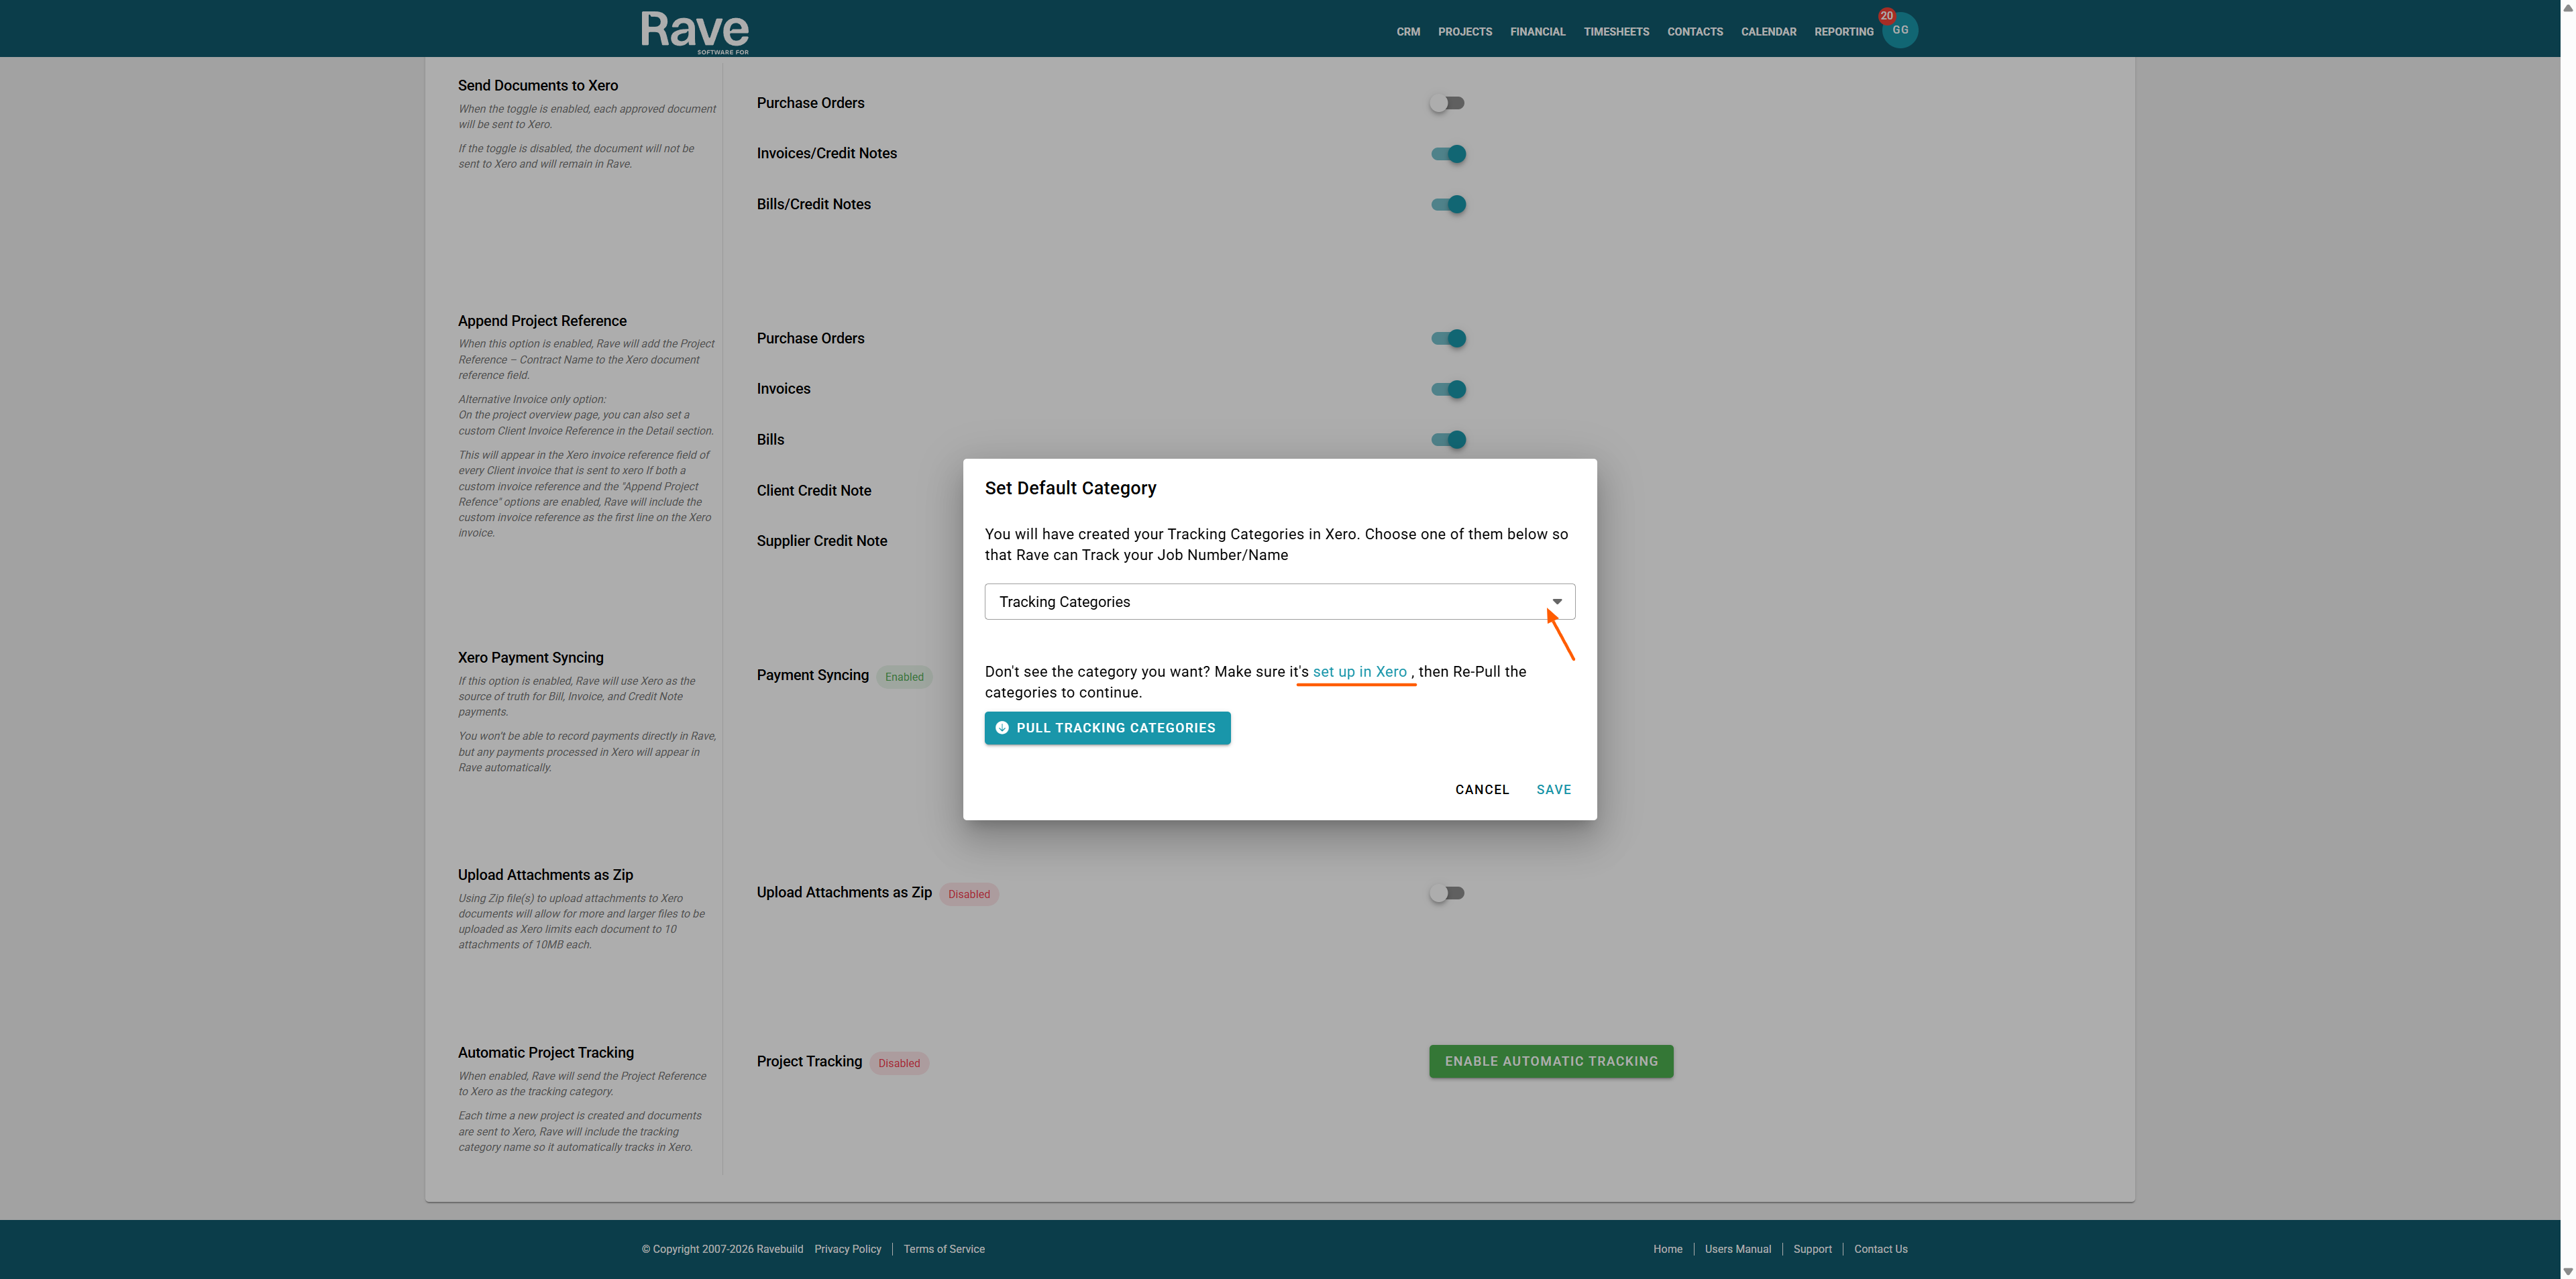
Select Enable Automatic Tracking

The Pop-up will then ask you to choose one of your pre-set up Xero Tracking Categories. If you don't see anything in the drop-down to select, you can click on the blue hyperlink to set up Xero with your First Category Name.
The link will take you to Xero, to your Accounting - Accounting settings - Tracking Categories subtab. Your Xero page may look slightly different to our screenshot, but the Tracking Categories is where you will end up.
Click on Add Tracking Category - Type The Category Name Box "Rave Project Number" or "Rave", then type in or copy and paste in at least 1 existing Rave Project Reference name as the Tracking Category option.
Once you have done this, click Save.
You can now close the Xero Box down and go back to your Rave Tracking set-up 

Refresh your Rave Page, then click Enable Automatic Tracking again.
When the box pops up, click your newly created Tracking Category, then press Pull Tracking Categories, and then Press Save.
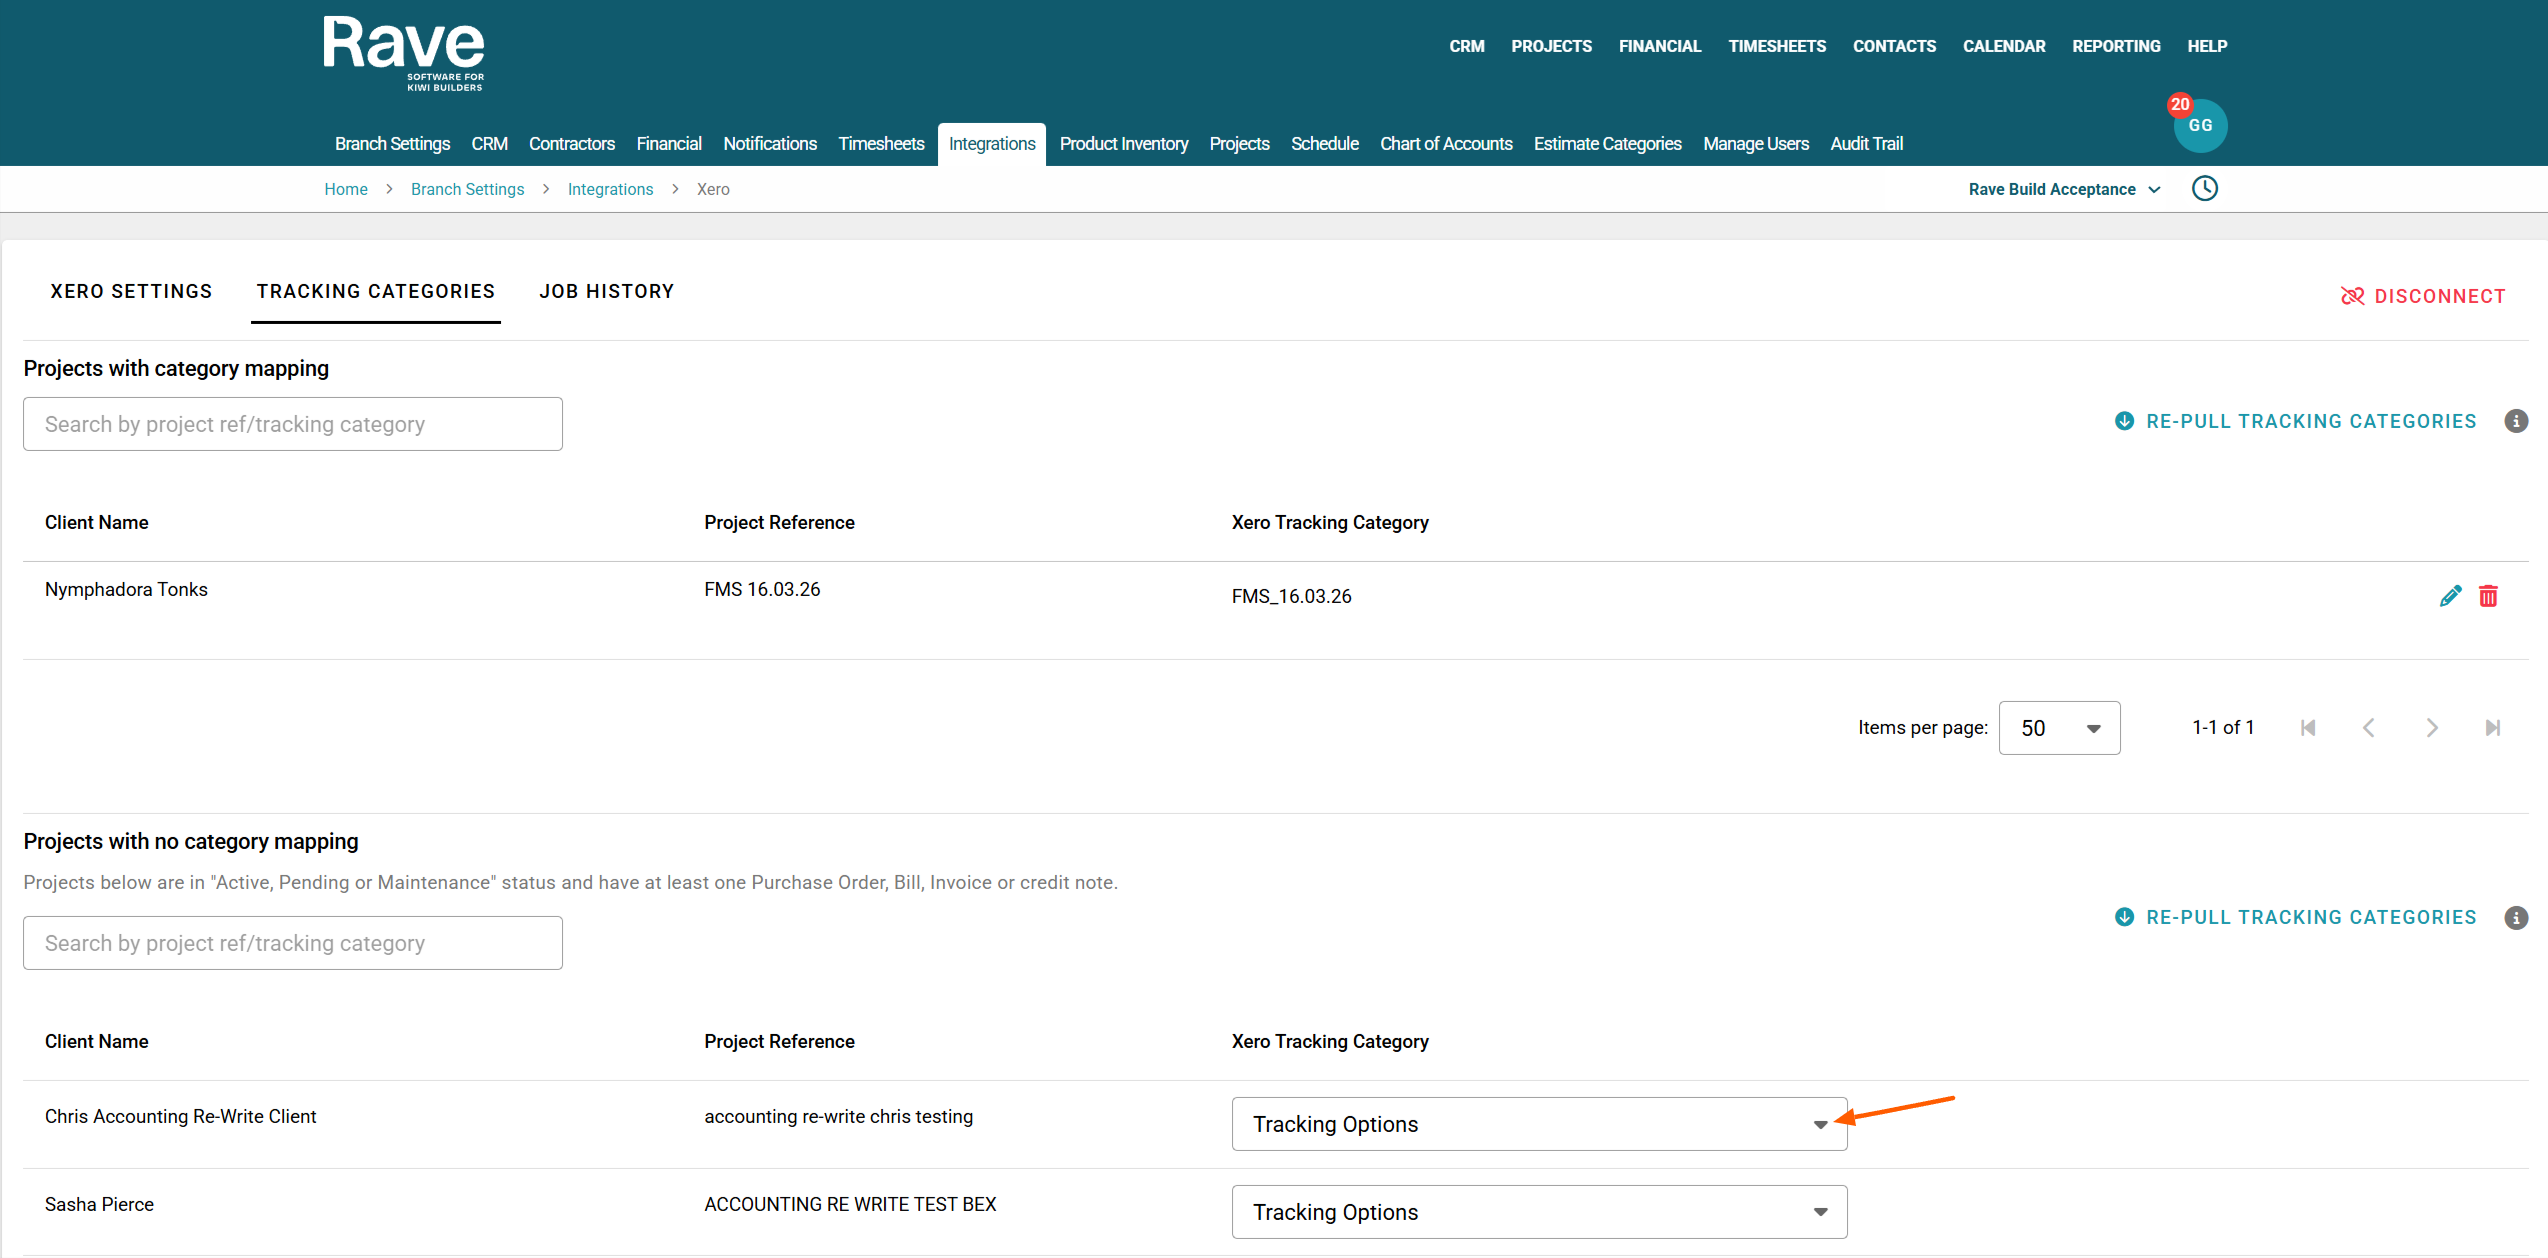
You will now see a new Tab appear at the top of the page called Tracking Categories.
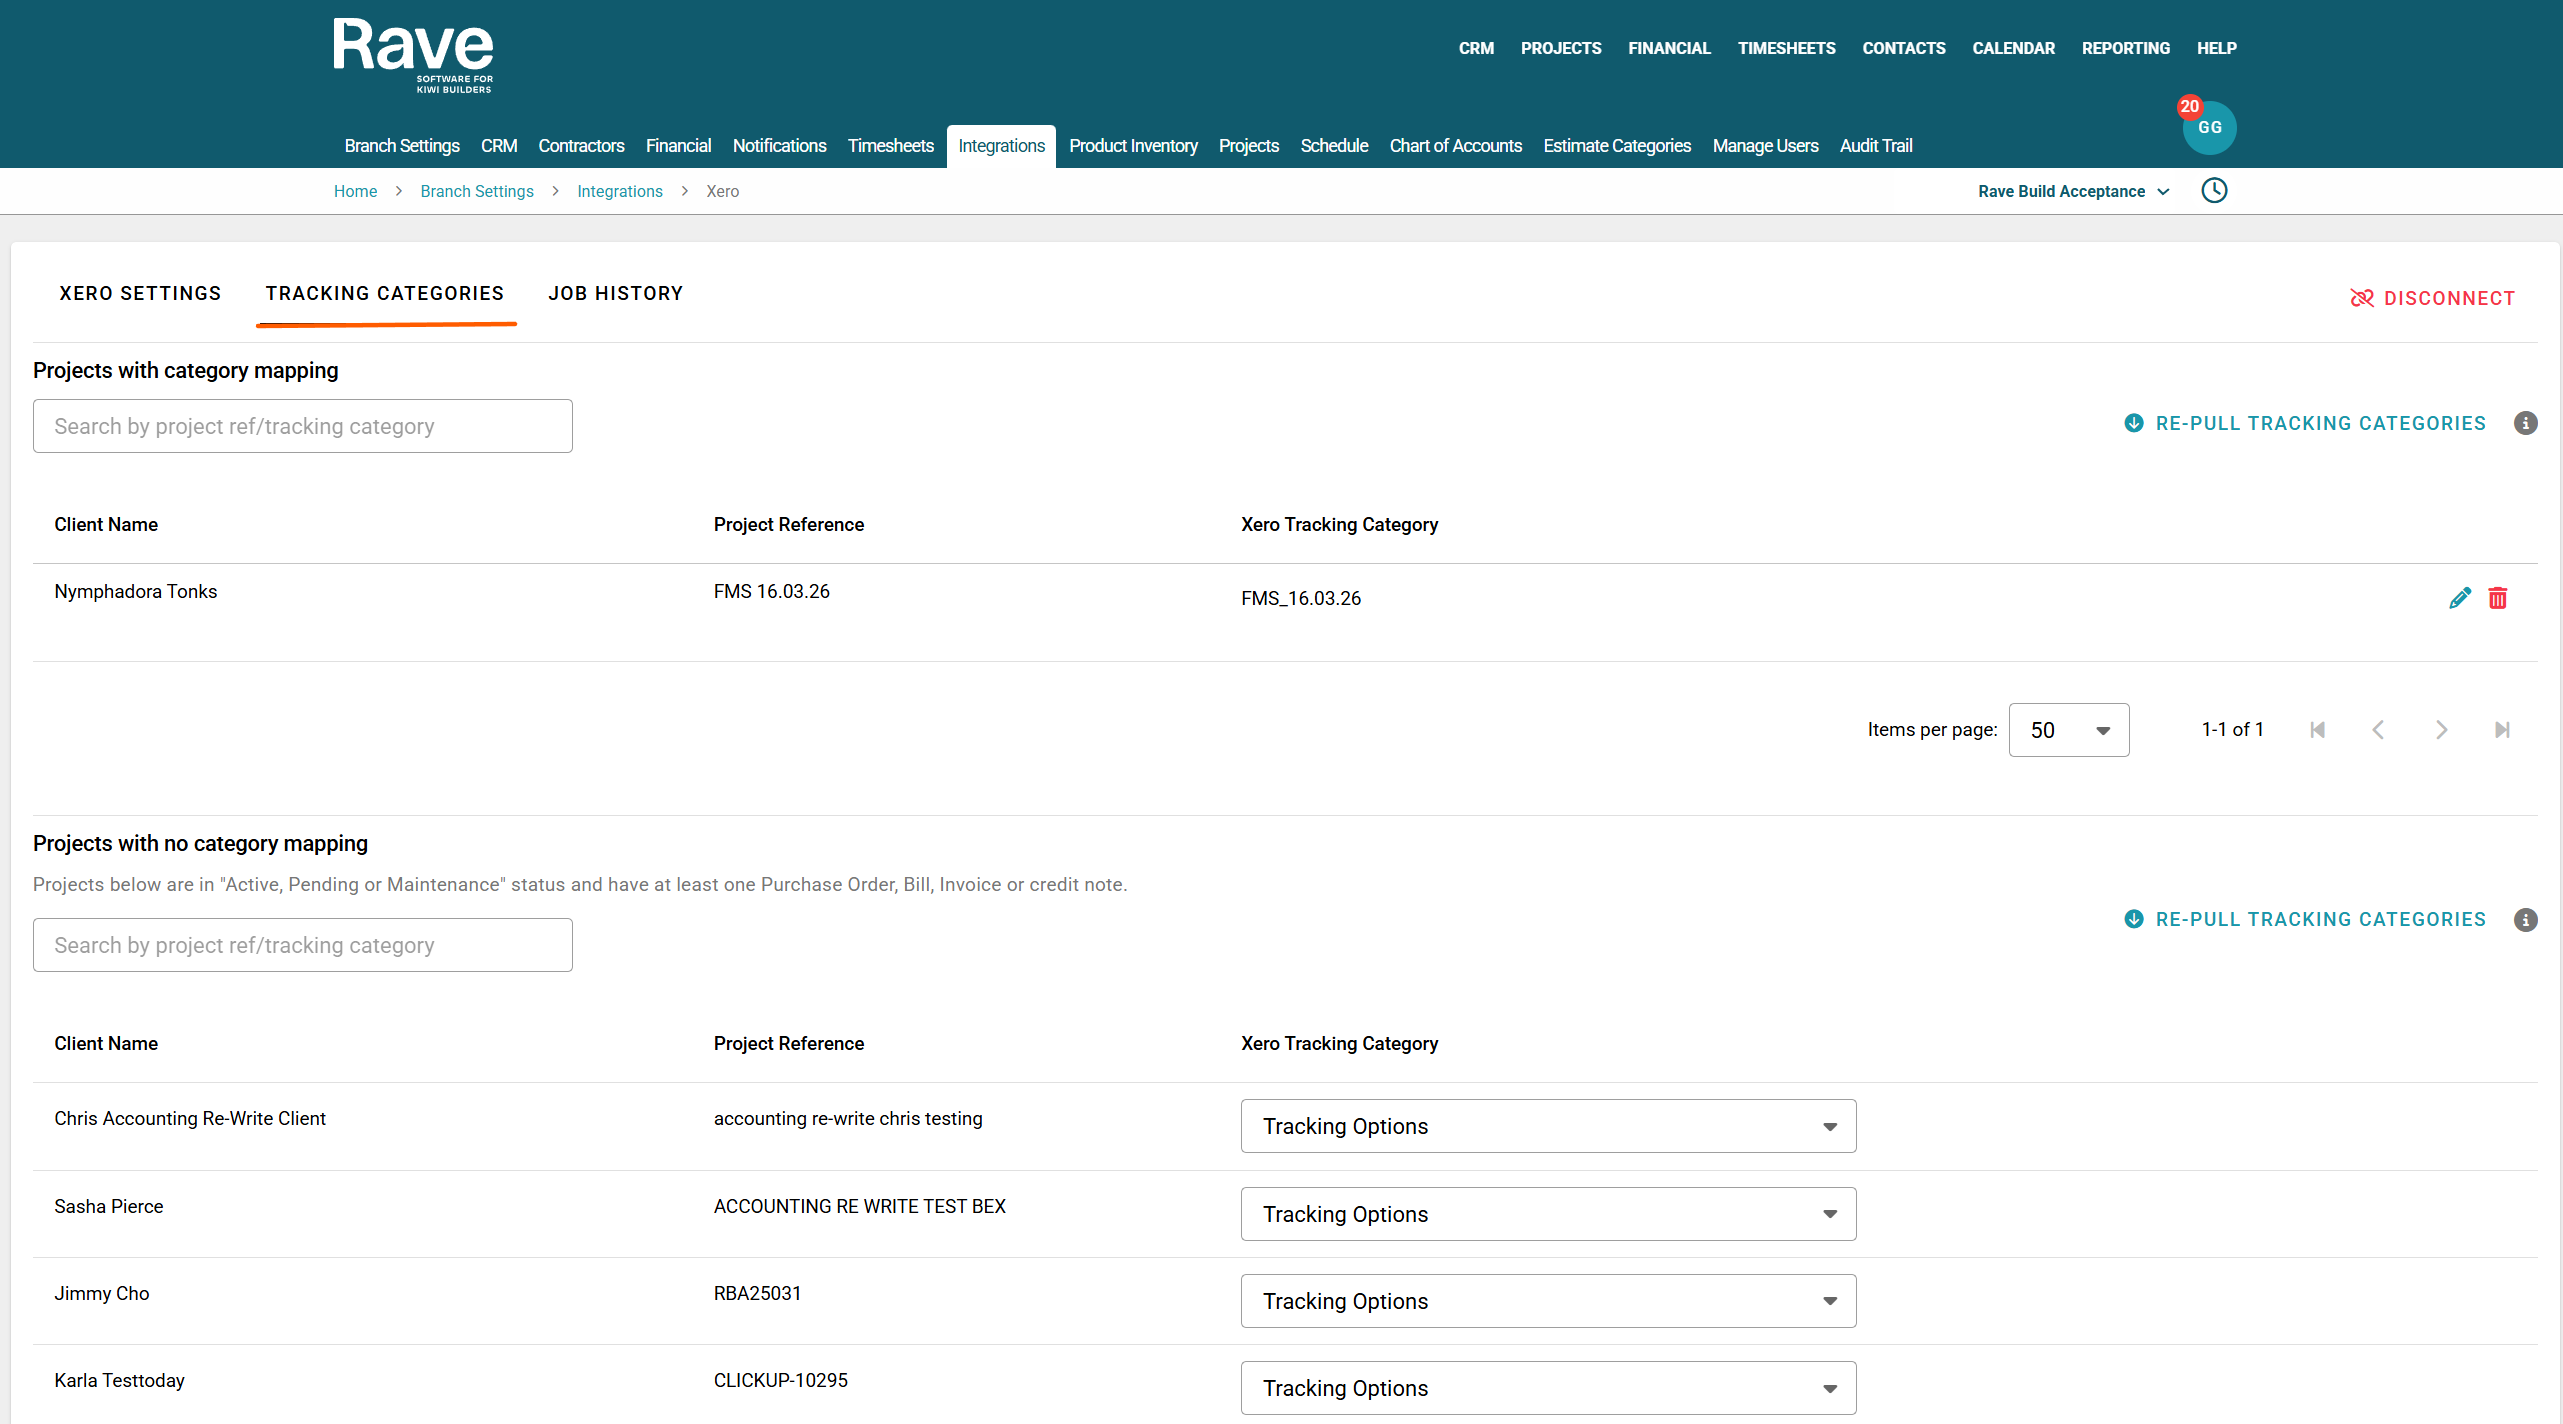
The first box is all your Projects with Category Mapping. I.e., Projects that are mapped correctly in Rave and Xero.
You can change the mapping by clicking the pencil icon and selecting a different category to map the project to, or remove the mapping by clicking the trash can icon.
Note:
This will remove/change the mapping for all documents going forward; it will not change existing ones in Xero.
The second Box is titled "Projects with No Category Mapping". I.e., all projects in Rave that have at least one financial document in Xero and are mapped to a Xero Tracking Category.
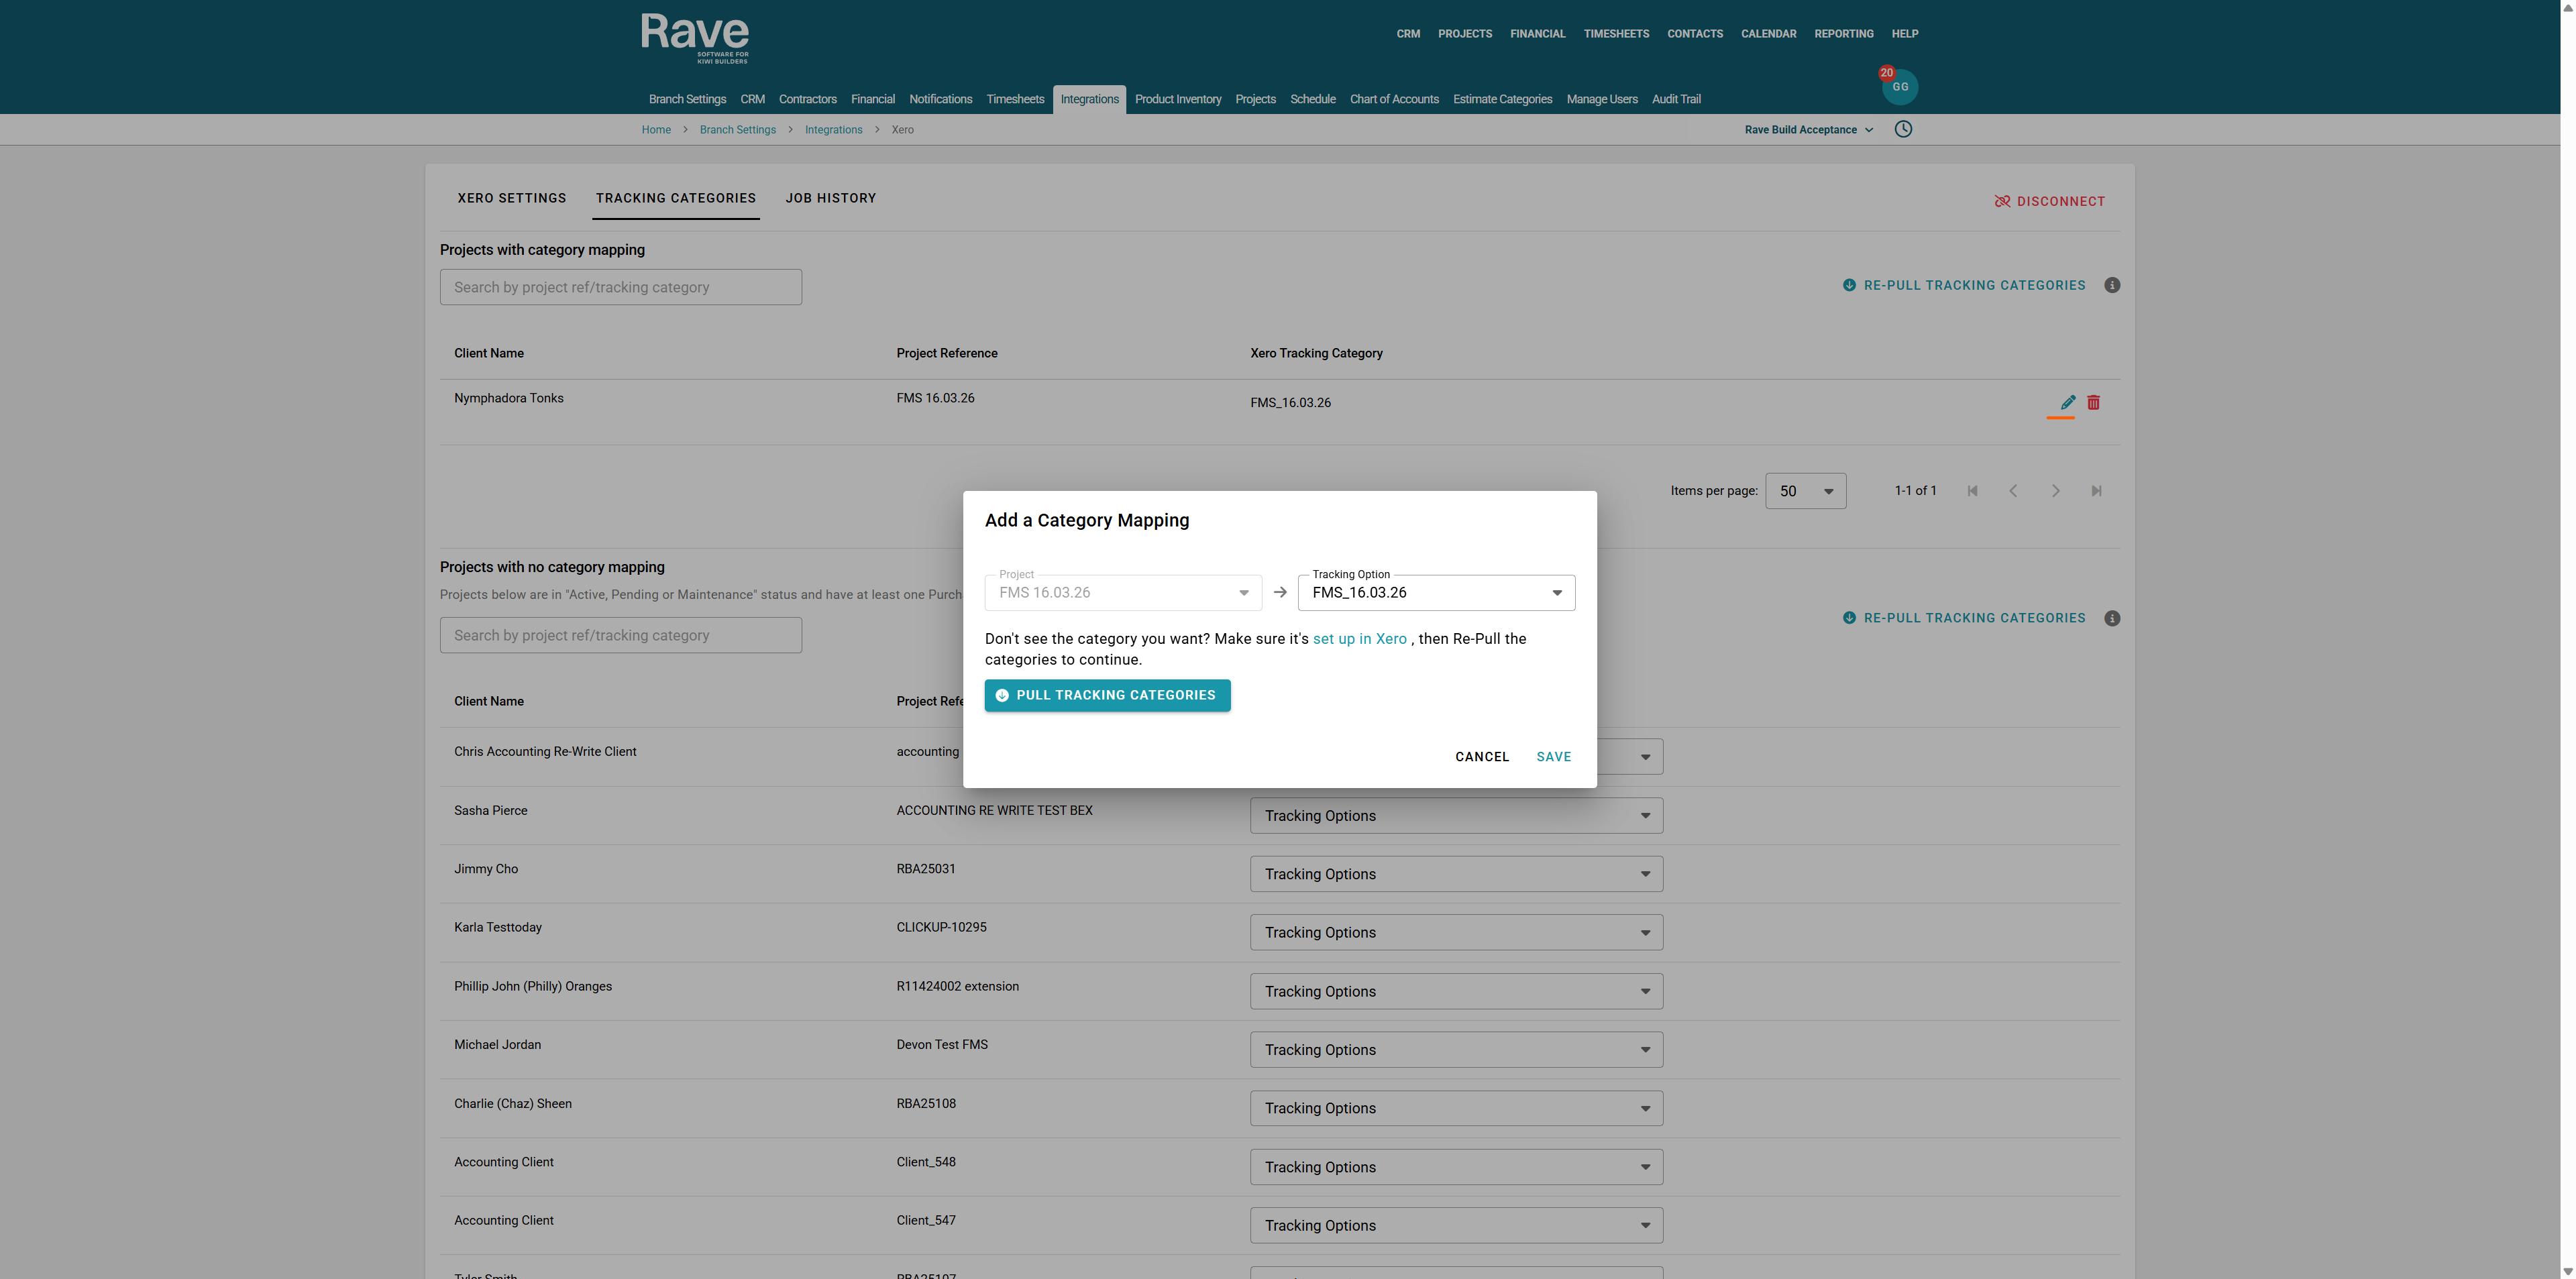
You can now select the correct tracking category from the drop-down to match an existing Xero category to the Rave Project. Or you can leave the box blank, and Rave will automatically create a new tracking category for each project when you send your first document to Xero.
If you choose to match an existing Category to a project, it will move from the No Category Mapping Section to the Projects with Category Mapping.
Xero + RAVE Tracking Summary Reports
You can now run a Tracking Summary Report in Xero. The instructions are available from this Xero Tracking Summary report help article.
You can also run your Xero P&L (Profit and Loss) reports by Tracking Name - comparing periods within a search range.

Was this article helpful?
That’s Great!
Thank you for your feedback
Sorry! We couldn't be helpful
Thank you for your feedback
Feedback sent
We appreciate your effort and will try to fix the article