If you are looking for Google Calendar instructions, please click here.
If you are looking for Schedule task syncing instructions, please click here.
The following is the recorded version of the help article outlined below - using Google Workspace (Google Calendar) as an example, the process for setting up Outlook Calendar is the same.
You can now sync your Outlook calendar directly with Rave using your Microsoft 365 account. Here’s how to set it up:
Note: If you see the screen below after following the instructions, you are not subscribed to this module and will need to upgrade your branch with our Customer Support team.

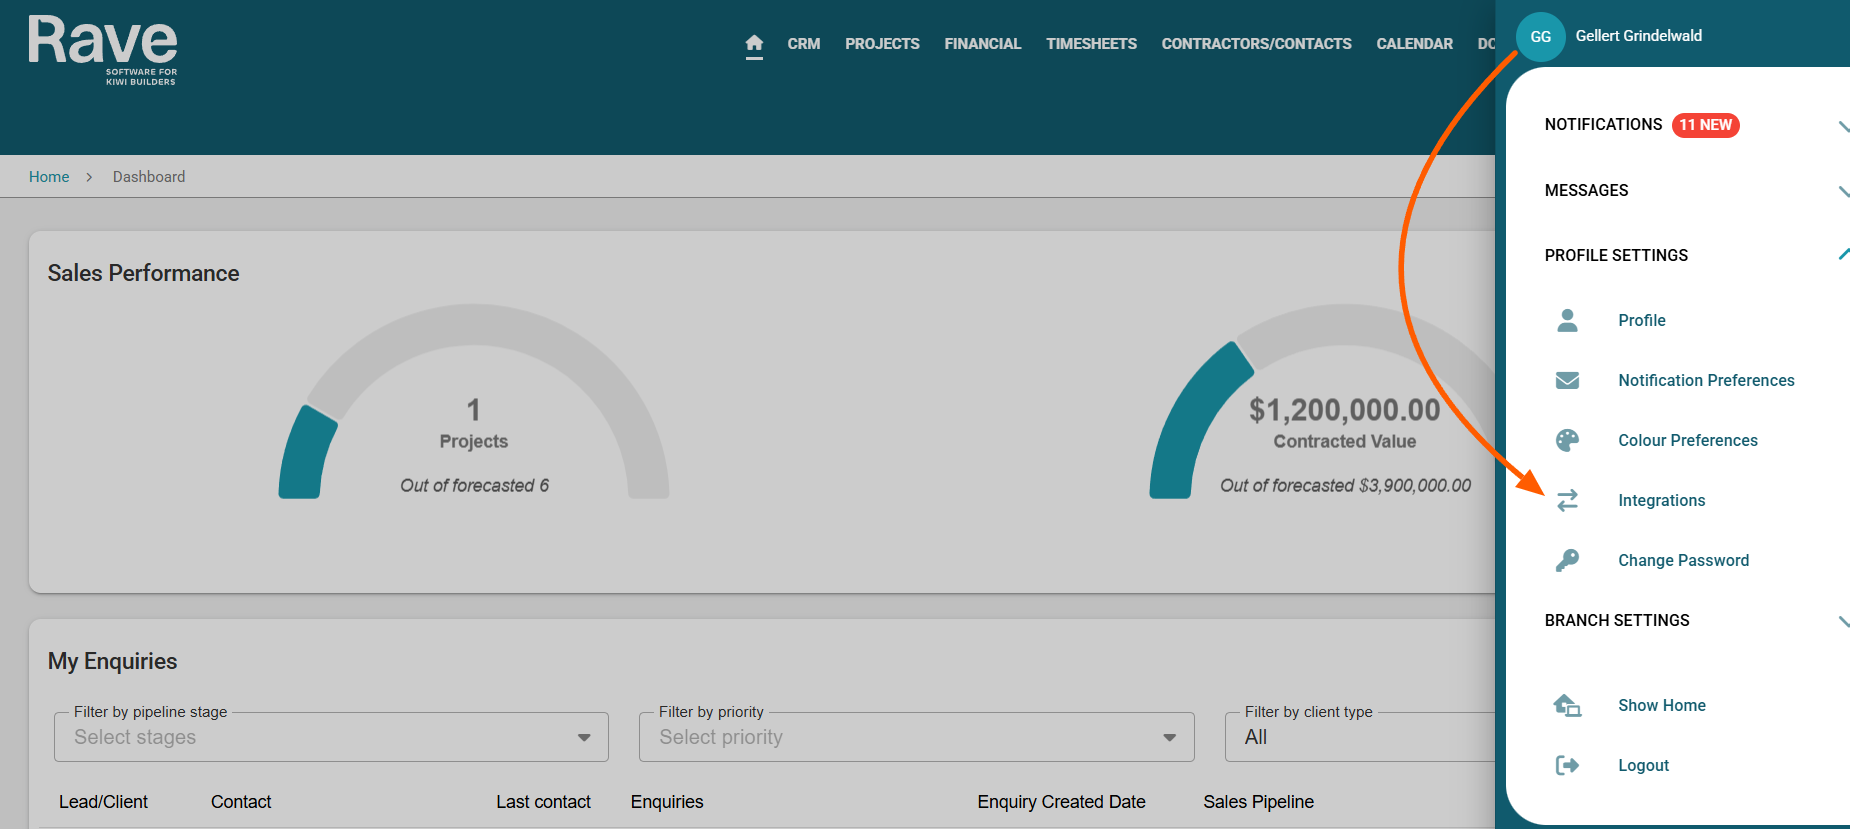
- Click on your profile dropdown in the top-right corner of the Rave screen.
- Select Profile Settings, then navigate to the Integrations tab.
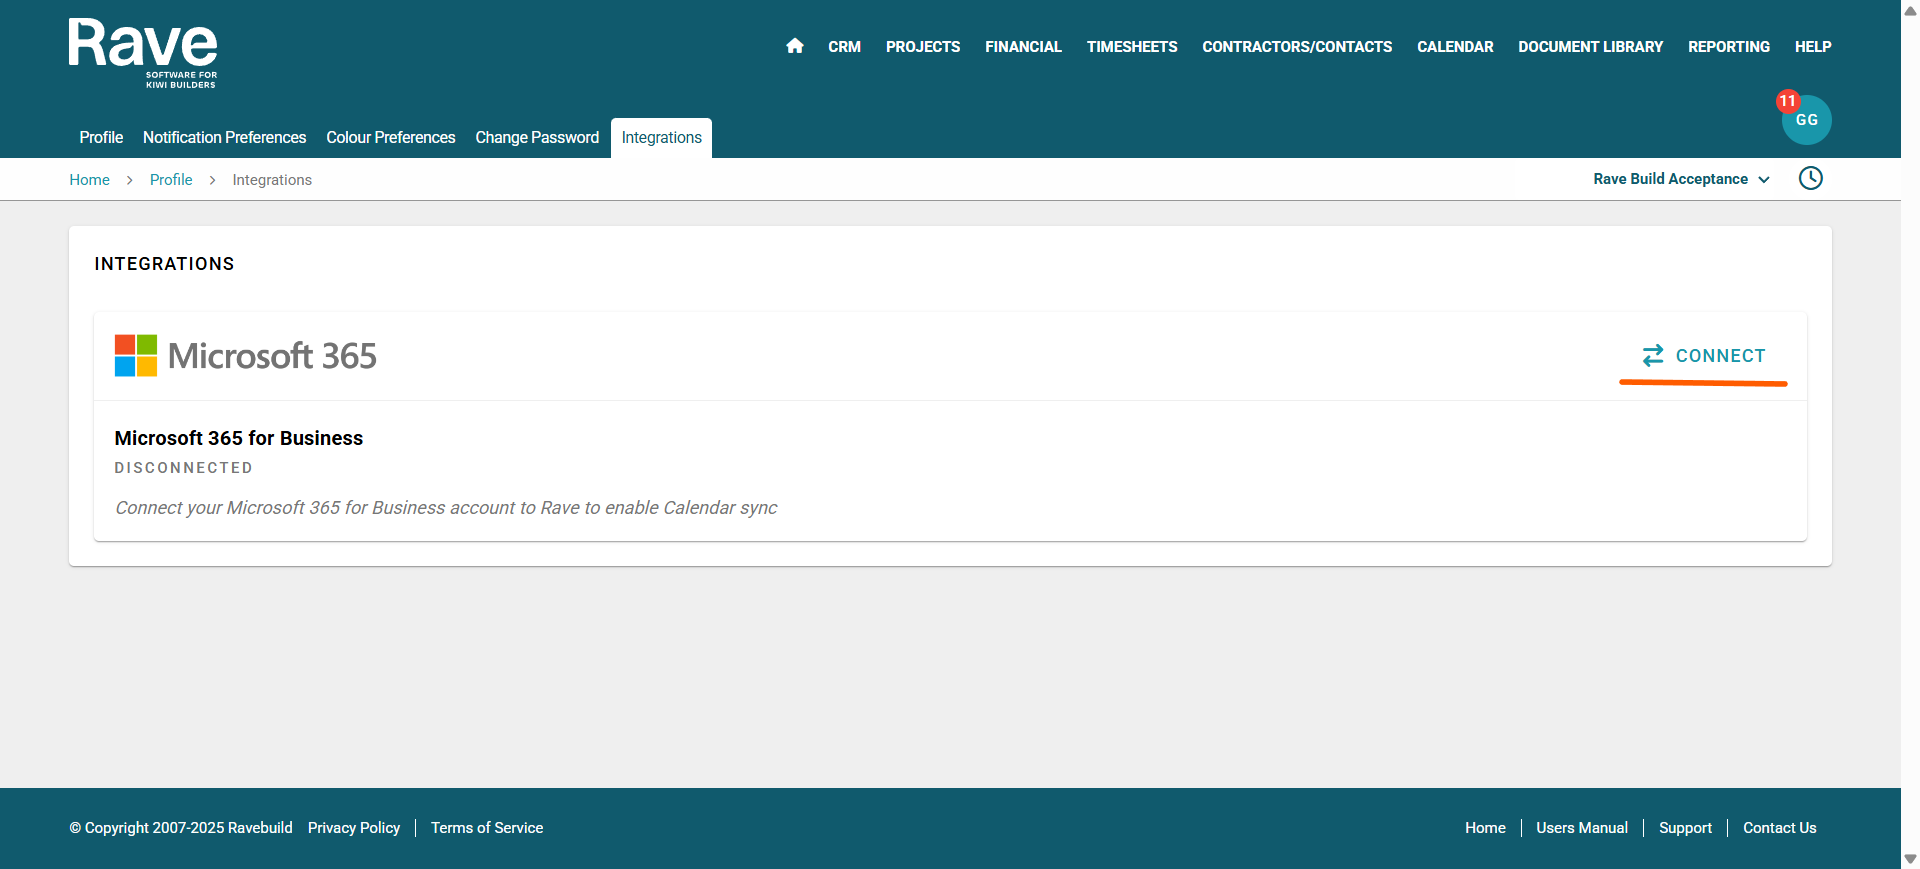
- On the Microsoft 365 integration page, click Connect.
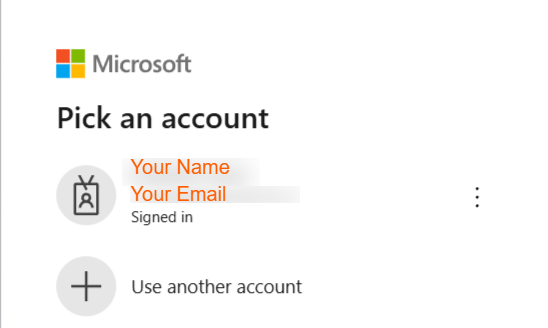
- When prompted, choose your default email account. Note: You may have multiple 365 accounts, but you can sync only one Microsoft calendar to Rave. If you are an admin on your accounts, please ensure you choose the correct email to sync, as your admin email may not be the correct one.
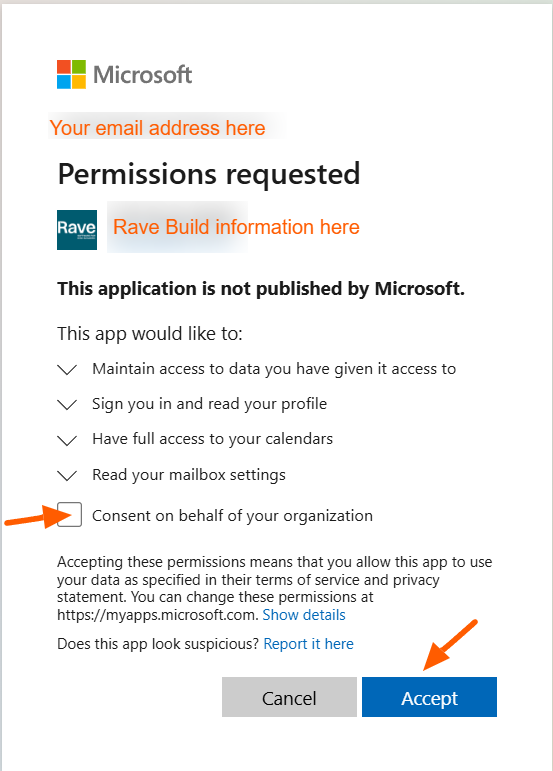
- Check the Consent box and click Accept. If you get a Need admin approval image, you will need to get the owner of your Microsoft account to approve the connection between Rave and Microsoft. This could be your IT manager or your Business Owner
- You'll be redirected to the integration screen, where the box will display your name and email address, along with a Disconnect option in the top right. A Manage button in the bottom left.
- Click Manage to choose your specific calendar syncing and category preferences and press Sync. Please note that it can take up to 10 minutes for your sync to be completed successfully. It will say active in green text beside the calendar once complete. The category is used to display Rave events in your external calendar. It applies only to new events and will not affect existing ones.
With Category Choices, you can now select a different colour for each calendar type. General, CRM, Project and schedule task. - If you also have a Google Calendar sync set up, you will need to choose one as the default. If you only have one setup, it will default to that calendar.
- Your calendar is now syncing.

Note: Cancelling out of the process at any point before the sync is complete will send you to the dashboard/home page in Rave.
When a user is suspended, all calendars associated with that user are removed. If the option to suspend and replace is selected, the new user will assume ownership of the activities. If the user is not replaced, they will remain as the activity owner but not be able to participate in the activity.
Step 1 and 2
Step 3
Step 4
Step 5
Step 6

Step 7

Step 8

To stop syncing your calendar you can select the red Stop Sync button and then you can press back to integrations and then select disconnect which will remove the connection entirely.
All actions taken in the syncing process are audit trailed using the Branch Integration audit trail. To read more about this feature click here.
Was this article helpful?
That’s Great!
Thank you for your feedback
Sorry! We couldn't be helpful
Thank you for your feedback
Feedback sent
We appreciate your effort and will try to fix the article