
From the Projects main navigation, select Custom Templates, then select Mail.
With the correct permission, you can view only or add/edit/delete Mail templates.
To manage template permissions, you will need access to manage users. You will need to choose either or both:
Branch Mail Templates - This enables the user to create and manage mail templates all branch users can use in General, CRM and Projects 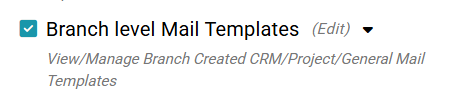
Others Mail Templates - This enables the user to edit/manage templates their team create for themselves in General, CRM and Project Mail

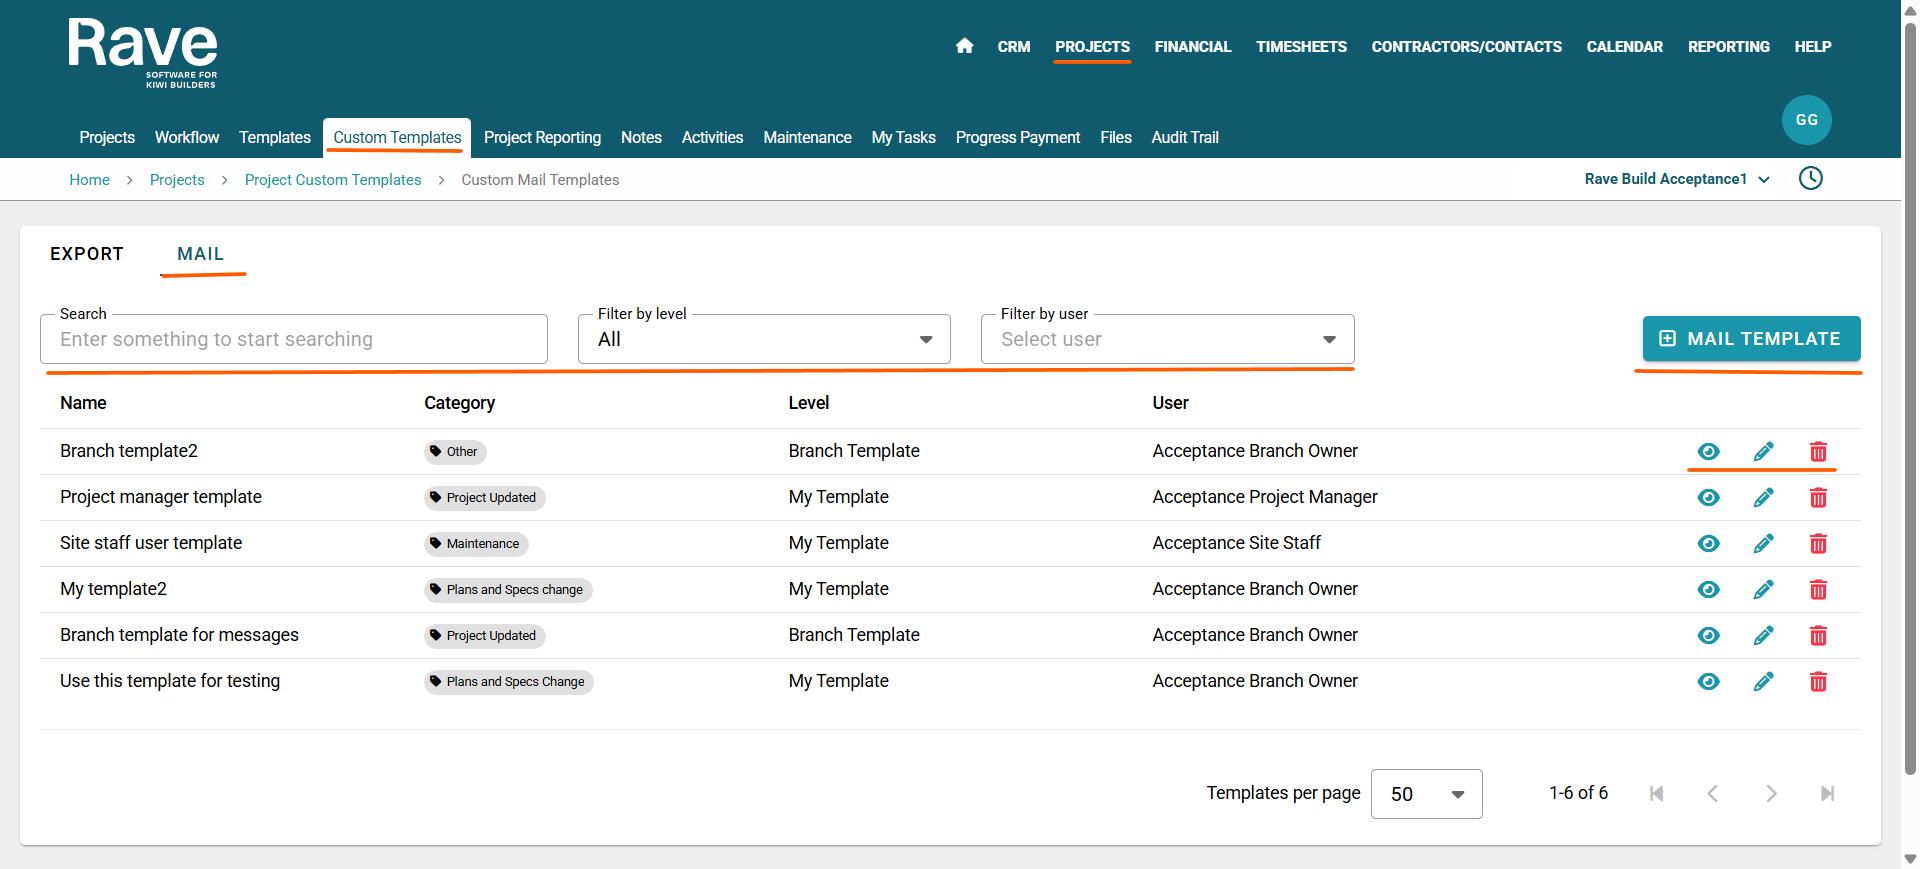
The Mail templates screen displays all your mail/message templates.
You can create a new mail template by clicking '+ Mail Template' button located at the top right of your screen.
You can search by the name of a template in the search box or a key word from the name.
While the action icons to the right allow you to do the following actions with your templates:
- The eyeball icon - allows you to preview the template i.e. how the mail looks when the client receives it
- The pencil edit icon - allows you to edit your template i.e. change the template name, type, mail subject line, and body of the mail with formatting options
- And finally, the Red Trashcan icon - allows you to delete your mail template
How to Create a Mail/Message Template
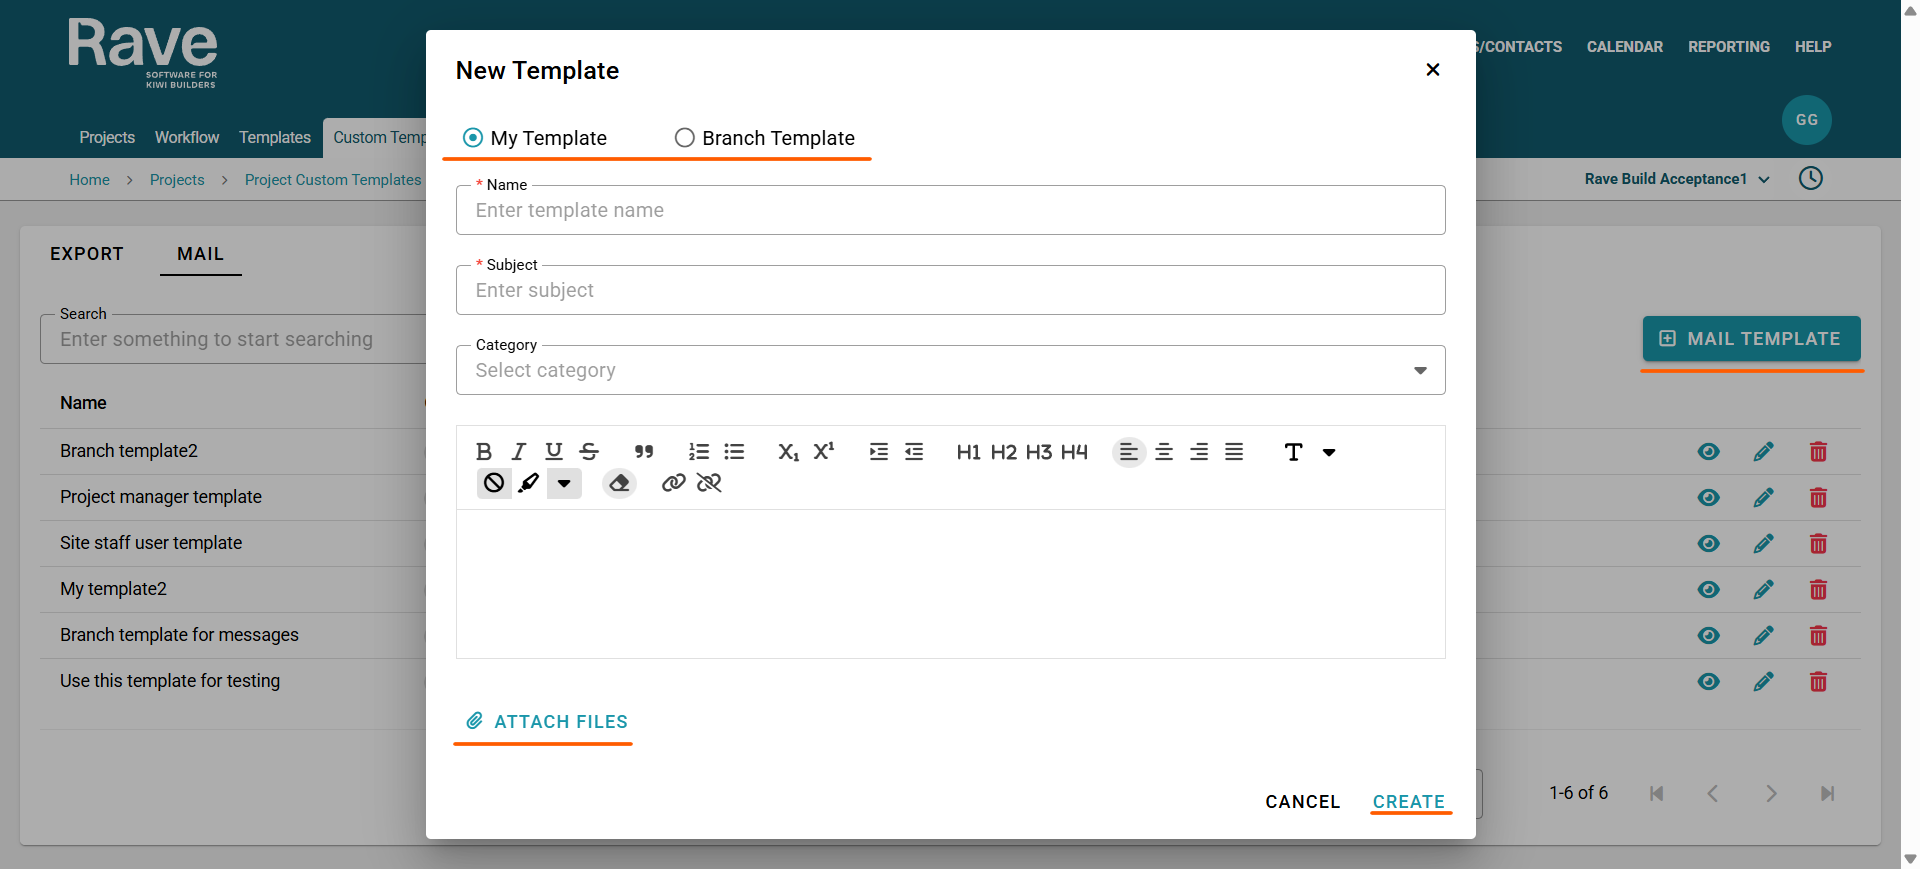
To create a new mail template, click the + Mail Template button in the top-right corner of your screen.
If you have permission to manage both branch and personal templates, you can choose whether the template is shared with all users or saved as your own.
Users with permission to create personal templates only will see the My Template option.
Enter a name for your template (e.g., Sales Update or Catch-Up Email).
Set the subject line.
Select a category to file the template under, or leave this blank if not needed.
Type the body content of your template. You can add attachments and use formatting tools such as highlighting, bullet points, and indentation.
When you’re finished, click Create, and your new template will be saved and appear in the main menu.
Was this article helpful?
That’s Great!
Thank you for your feedback
Sorry! We couldn't be helpful
Thank you for your feedback
Feedback sent
We appreciate your effort and will try to fix the article