Getting Started: Creating a Timesheets Labour Budget
Navigate to your Project
Go to your project's Timesheets sub-tab.Access Task Management
This will open the Project Timesheets / Manage Tasks sub-tab.Set Up Selection Options
Within this area, you can configure whether team members need to select from:Timesheet Tags, and/or
Timesheet Tasks
These options define how your team logs time against specific work items.
While you can enable both Timesheet Tags and Timesheet Tasks, we recommend using only one.
Choosing just Timesheet Tasks (if already set up) helps streamline the process for your staff.
Enabling both adds an extra step, requiring team members to select from two categories when submitting a timesheet entry.

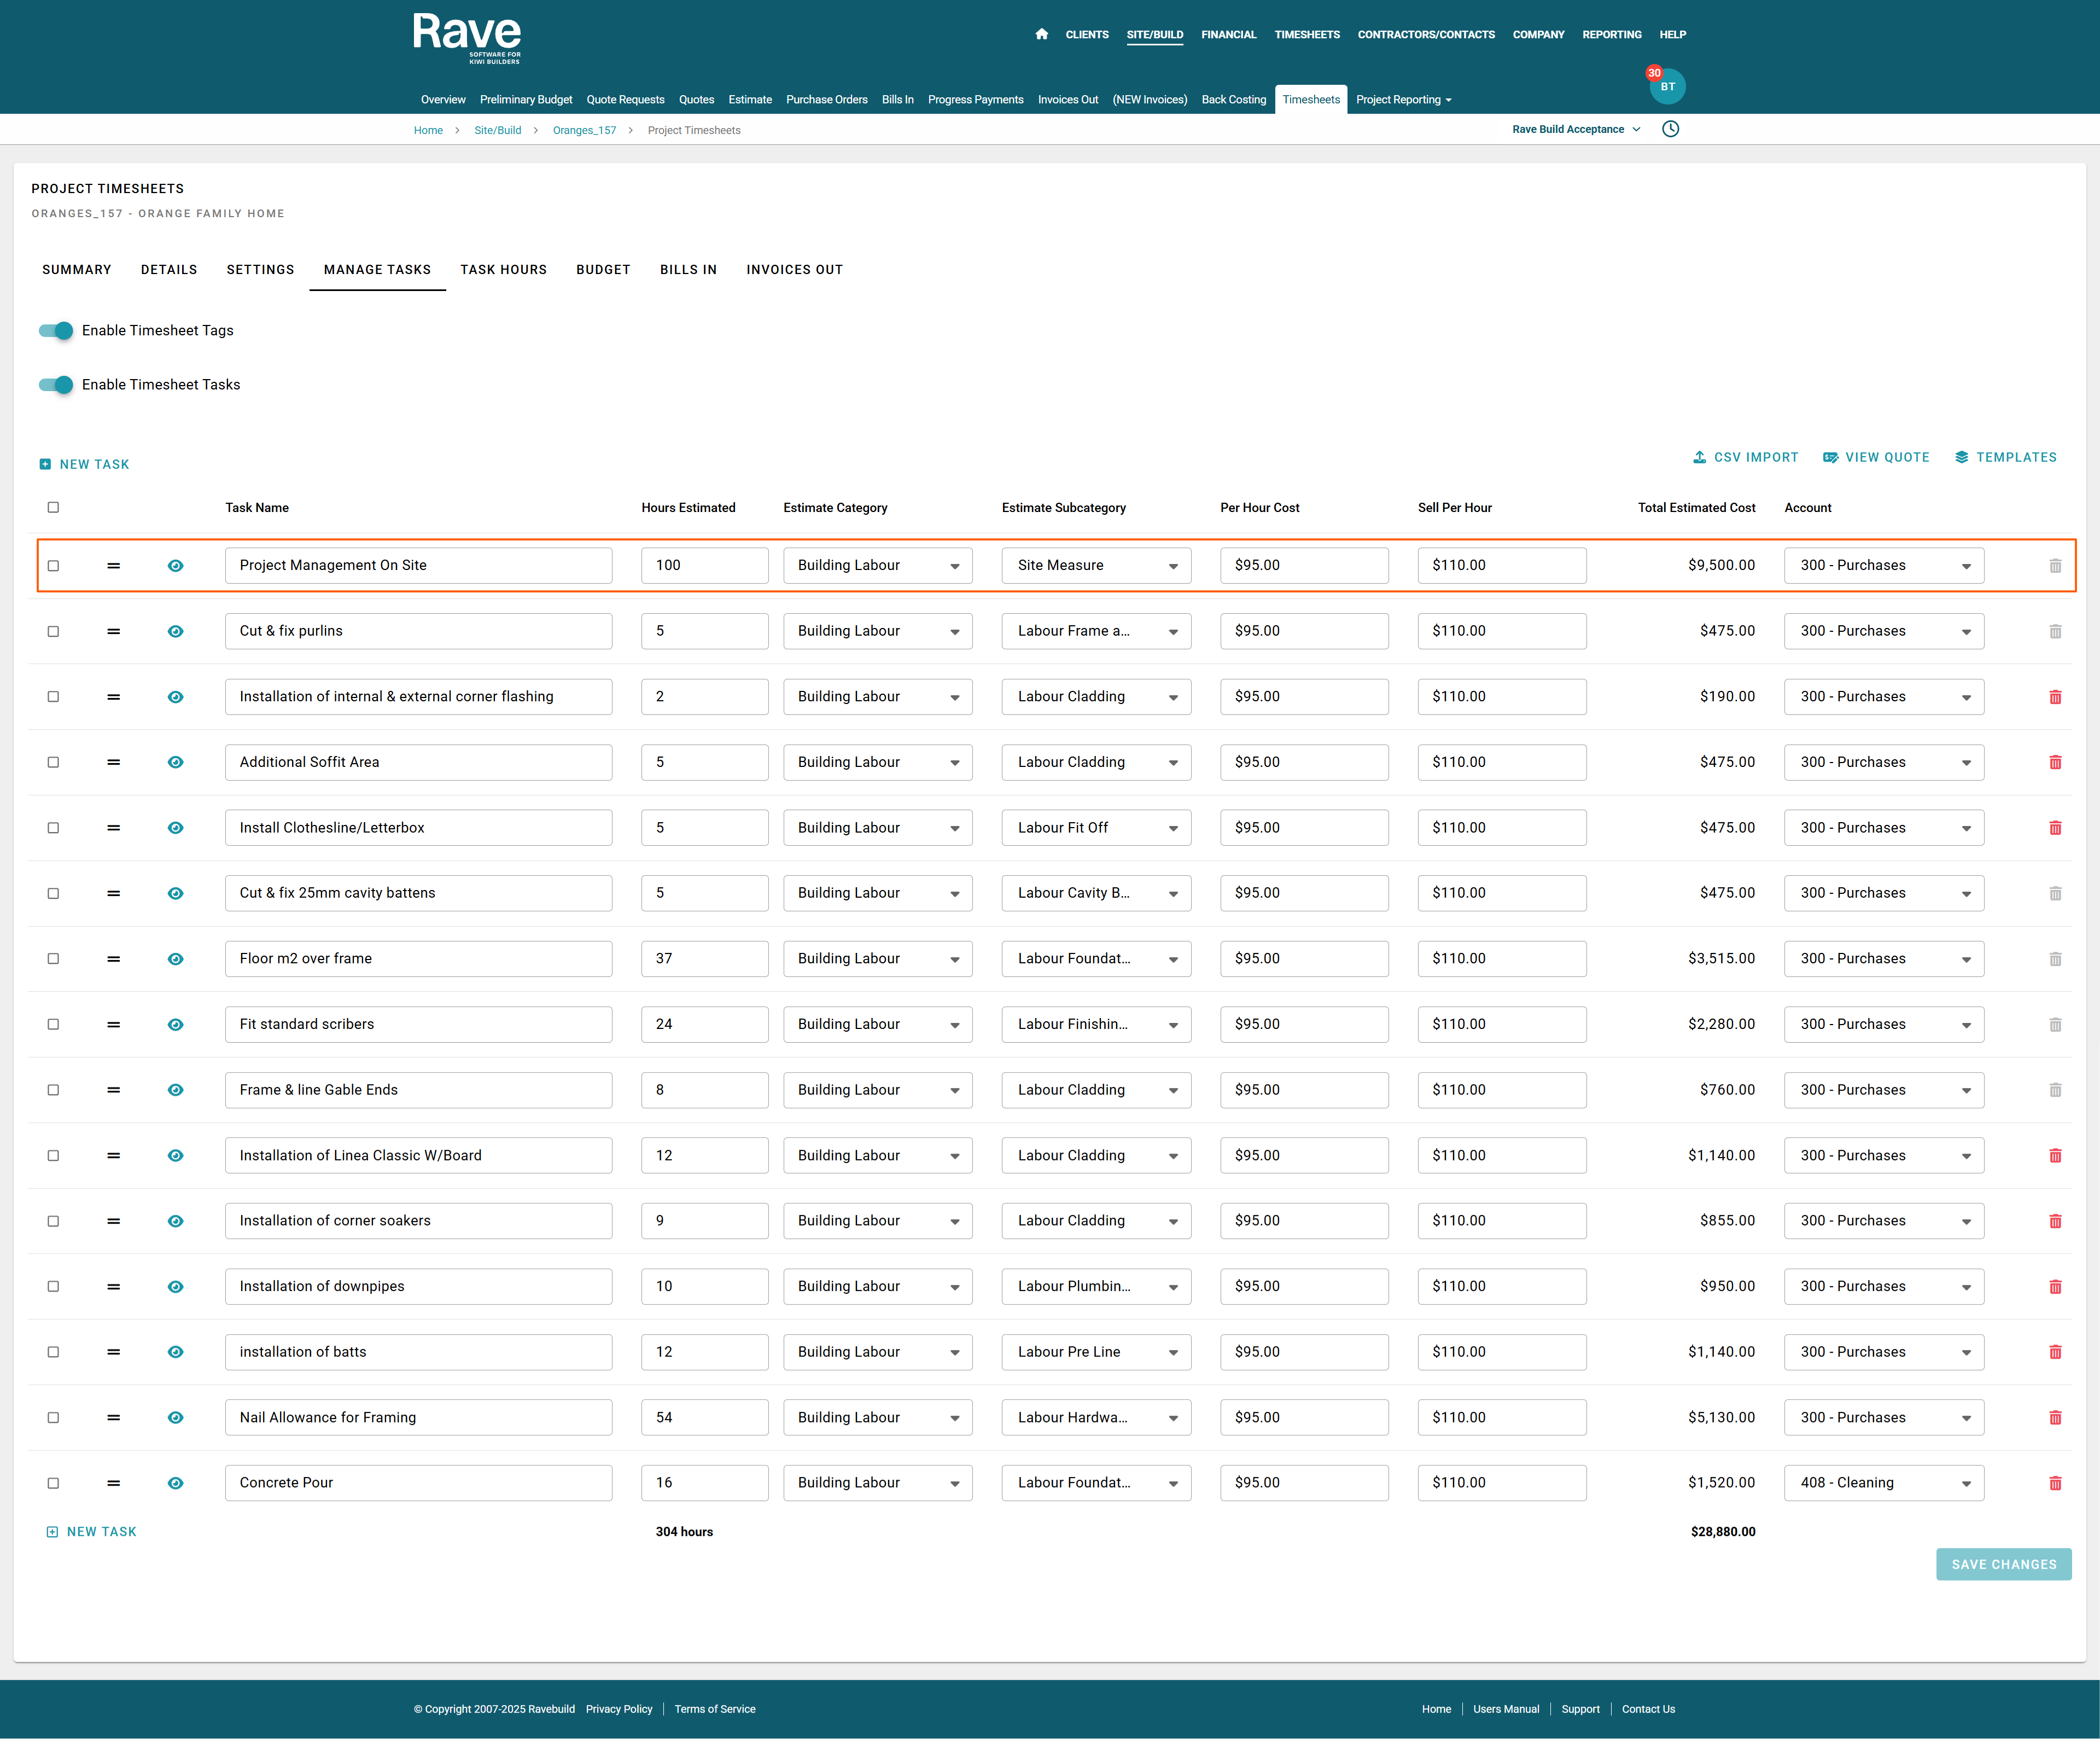
Creating Your Labour Budget or Task List Manually
You can manually build your labour budget or task list by clicking the ‘+ New Task’ button and completing the following fields for each task:
Task Name
Estimated Number of Hours required to complete the task
Estimate Category
Estimate Sub-Category
Average Cost Per Hour
Sell Per Hour Rate
This can be set per task, which is useful if certain tasks require more experienced (and therefore more expensive) staff.Total Estimated Cost
This is automatically calculated based on the Estimated Hours and Average Cost Per Hour.Account Code
Additional Notes
You can enter tasks with zero hours or use decimal hours (e.g. 100.5 hours).
It’s also possible to enter a task with no cost and no sell price.
If these fields are left blank, the system will automatically apply the profile-specific or project-specific cost and sell rates when generating bills or invoices, as per usual.
Importing or Loading a Labour Task List
Instead of entering tasks manually, you have two additional options:
Import via CSV
Click the CSV Import button to upload a CSV file.
Use the ‘Example File’ template as a guide for formatting your data.Load a Saved Template
Click the Templates button and select your desired template using the ‘Apply Template’ (magic wand) option.
Once your task list is loaded, you can make any necessary edits — such as updating task names, estimated hours, or sell rates.
Adding Additional Lines to an Existing Budget
You can now add extra lines to an existing budget in bulk in two ways:
Via the Template menu by selecting as many templates as you wish and choosing the magic wand icon to apply.
By uploading a new CSV
When using the Template option, a pop-up will appear with two choices:
Replace Tasks
This will delete all existing tasks that do not have any timesheet entries.
The new lines will then be added in their place.
Add to Bottom
This will keep all existing tasks and add the new lines to the bottom of the list.
You can reorder the list afterward if needed.
If you want to keep all current tasks, choose Add to Bottom.
Selecting Replace Tasks will remove any tasks that haven’t been used.
When using the CSV option, once validation has passed it will add the new lines to the bottom of the current task list.
You can then re order tasks using the = icon to drag and drop, delete, rename, and make other edits then press Save Changes.

Managing and Organising Tasks
Use the ‘=’ icon to the right of the task row to drag and reorder tasks into your preferred sequence.
Use the ‘eye’ icon to the left of each task to toggle task visibility for your team.
For example, tasks like ‘Director's Time’ may be hidden from staff.
If you have a large list (e.g. 50 tasks), you might choose to make only the current 5 and the next 5 tasks visible at a time.
Bulk Actions
Select multiple tasks to enable a floating footer.
From the footer, you can bulk update task visibility to visible or hidden, update the estimate category or subcategory, or cost code.
You can also export the selected lines into a CSV file in the same format as the import/export template csv.
Once your changes are complete a model will ask you to Proceed to lock them in.
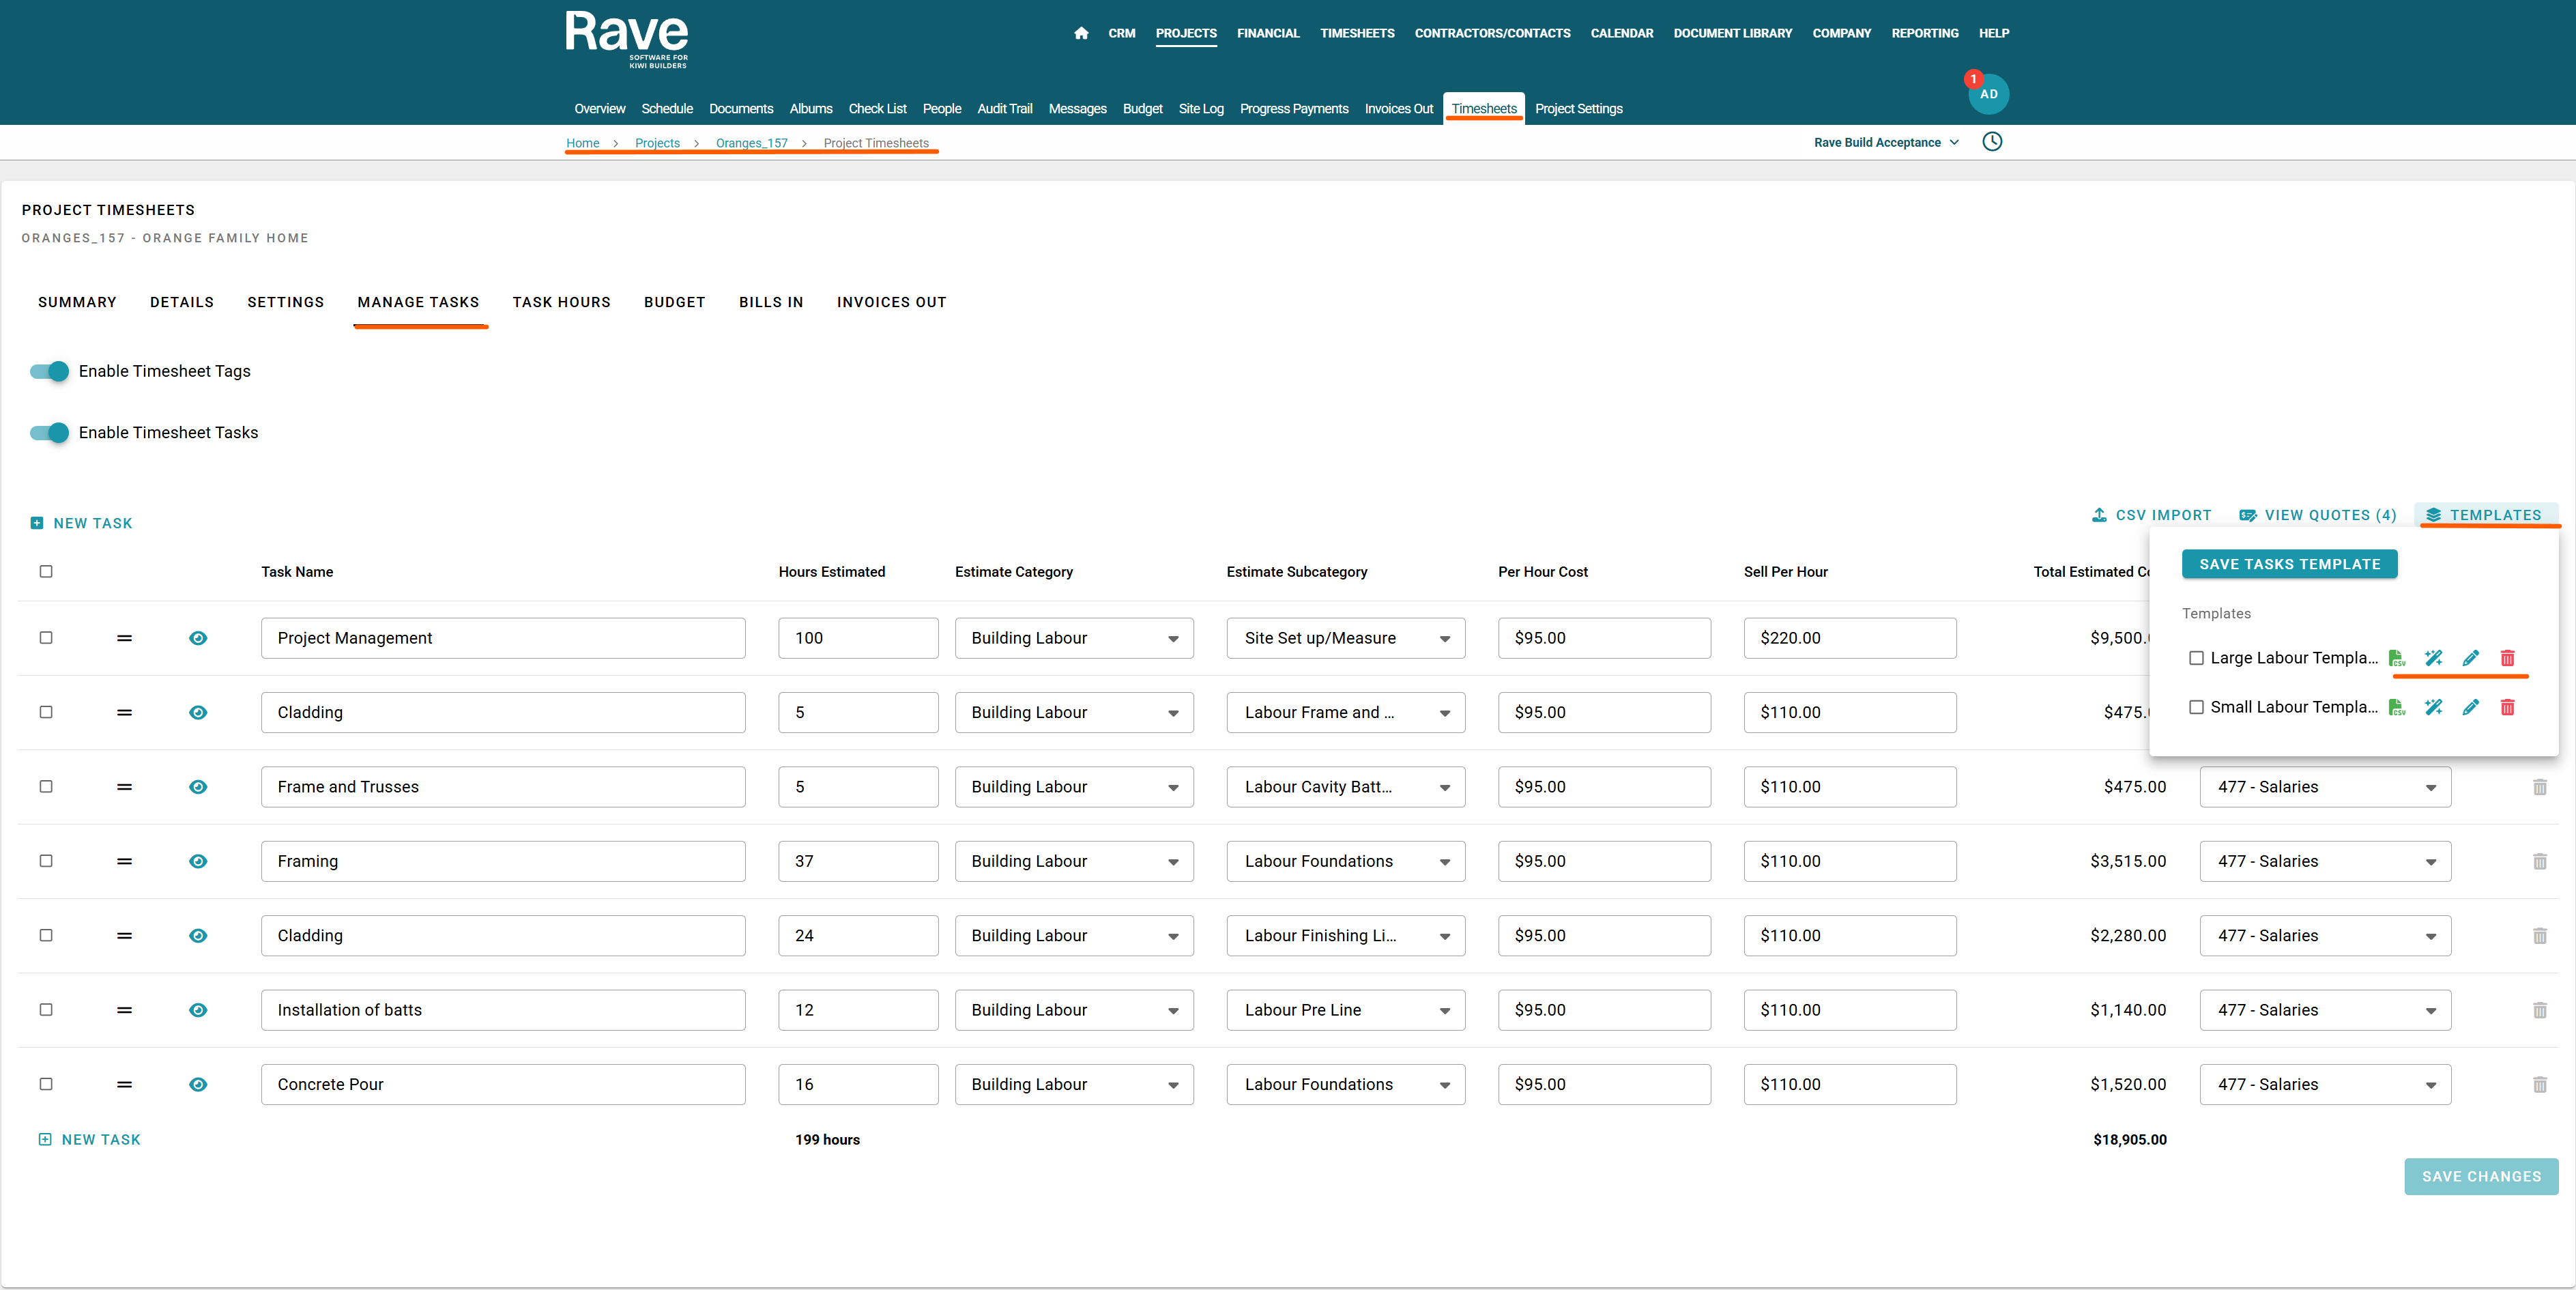
Saving and Managing Task Templates
Once you've created your first timesheet tasks budget—either manually or via CSV import—you can save it as a template for future use.
To save your current task list as a template:
Click the Templates button.
Select Save Tasks Template.
A Save as Template pop-up will appear.
Enter a name for your template, then click Proceed to save.
You can also use the Templates button to:
Load a template using the magic wand icon
Edit a template using the pencil icon
This opens the full template, allowing you to modify and re-save itDelete a template using the trash can icon
Export templates to CSV using the CSV icon
To export multiple templates into a single CSV file, select the desired templates and click Export Selected.

Note: Understanding "Per Hour Cost"
The Per Hour Cost field represents your actual or average hourly cost for labour.
Quick Method to Calculate Average Hourly Rate
A simple way to calculate this is:
Total the hourly rates paid to all team members working on the job.
Divide this total by the number of hours they’ll work on that job.
This gives you the average hourly rate per person.
Including True Costs (Optional)
Alternatively, you can calculate your true cost by including additional expenses such as:
Phone plans
Fuel
Apprenticeship contributions
ACC or insurance costs
While this gives a more accurate cost figure, it also raises your cost price, which will increase your sell rate. This may risk pricing your services out of the market.
Instead, it's often better to include those extra costs as a separate overhead recovery line in your quotes. This helps you:
Keep labour costs realistic and competitive
Clearly separate wages from business overheads
Maintain better pricing transparency in your estimates and invoices
The Create/View Quote Button: Converting Your Labour Budget into a Quote
Once you've created your Labour Budget, you can convert it into a formal quote by clicking the Convert to Quote button.
This action creates a pending quote in Rave’s FMS (Financial Management System).
Once the quote is approved, it will automatically appear in your Back Costing report and other Rave reporting tools.
After you've converted the budget:
The Convert to Quote button will change to View Quote, allowing you to easily access the labour quote directly from the Timesheets section at any time.
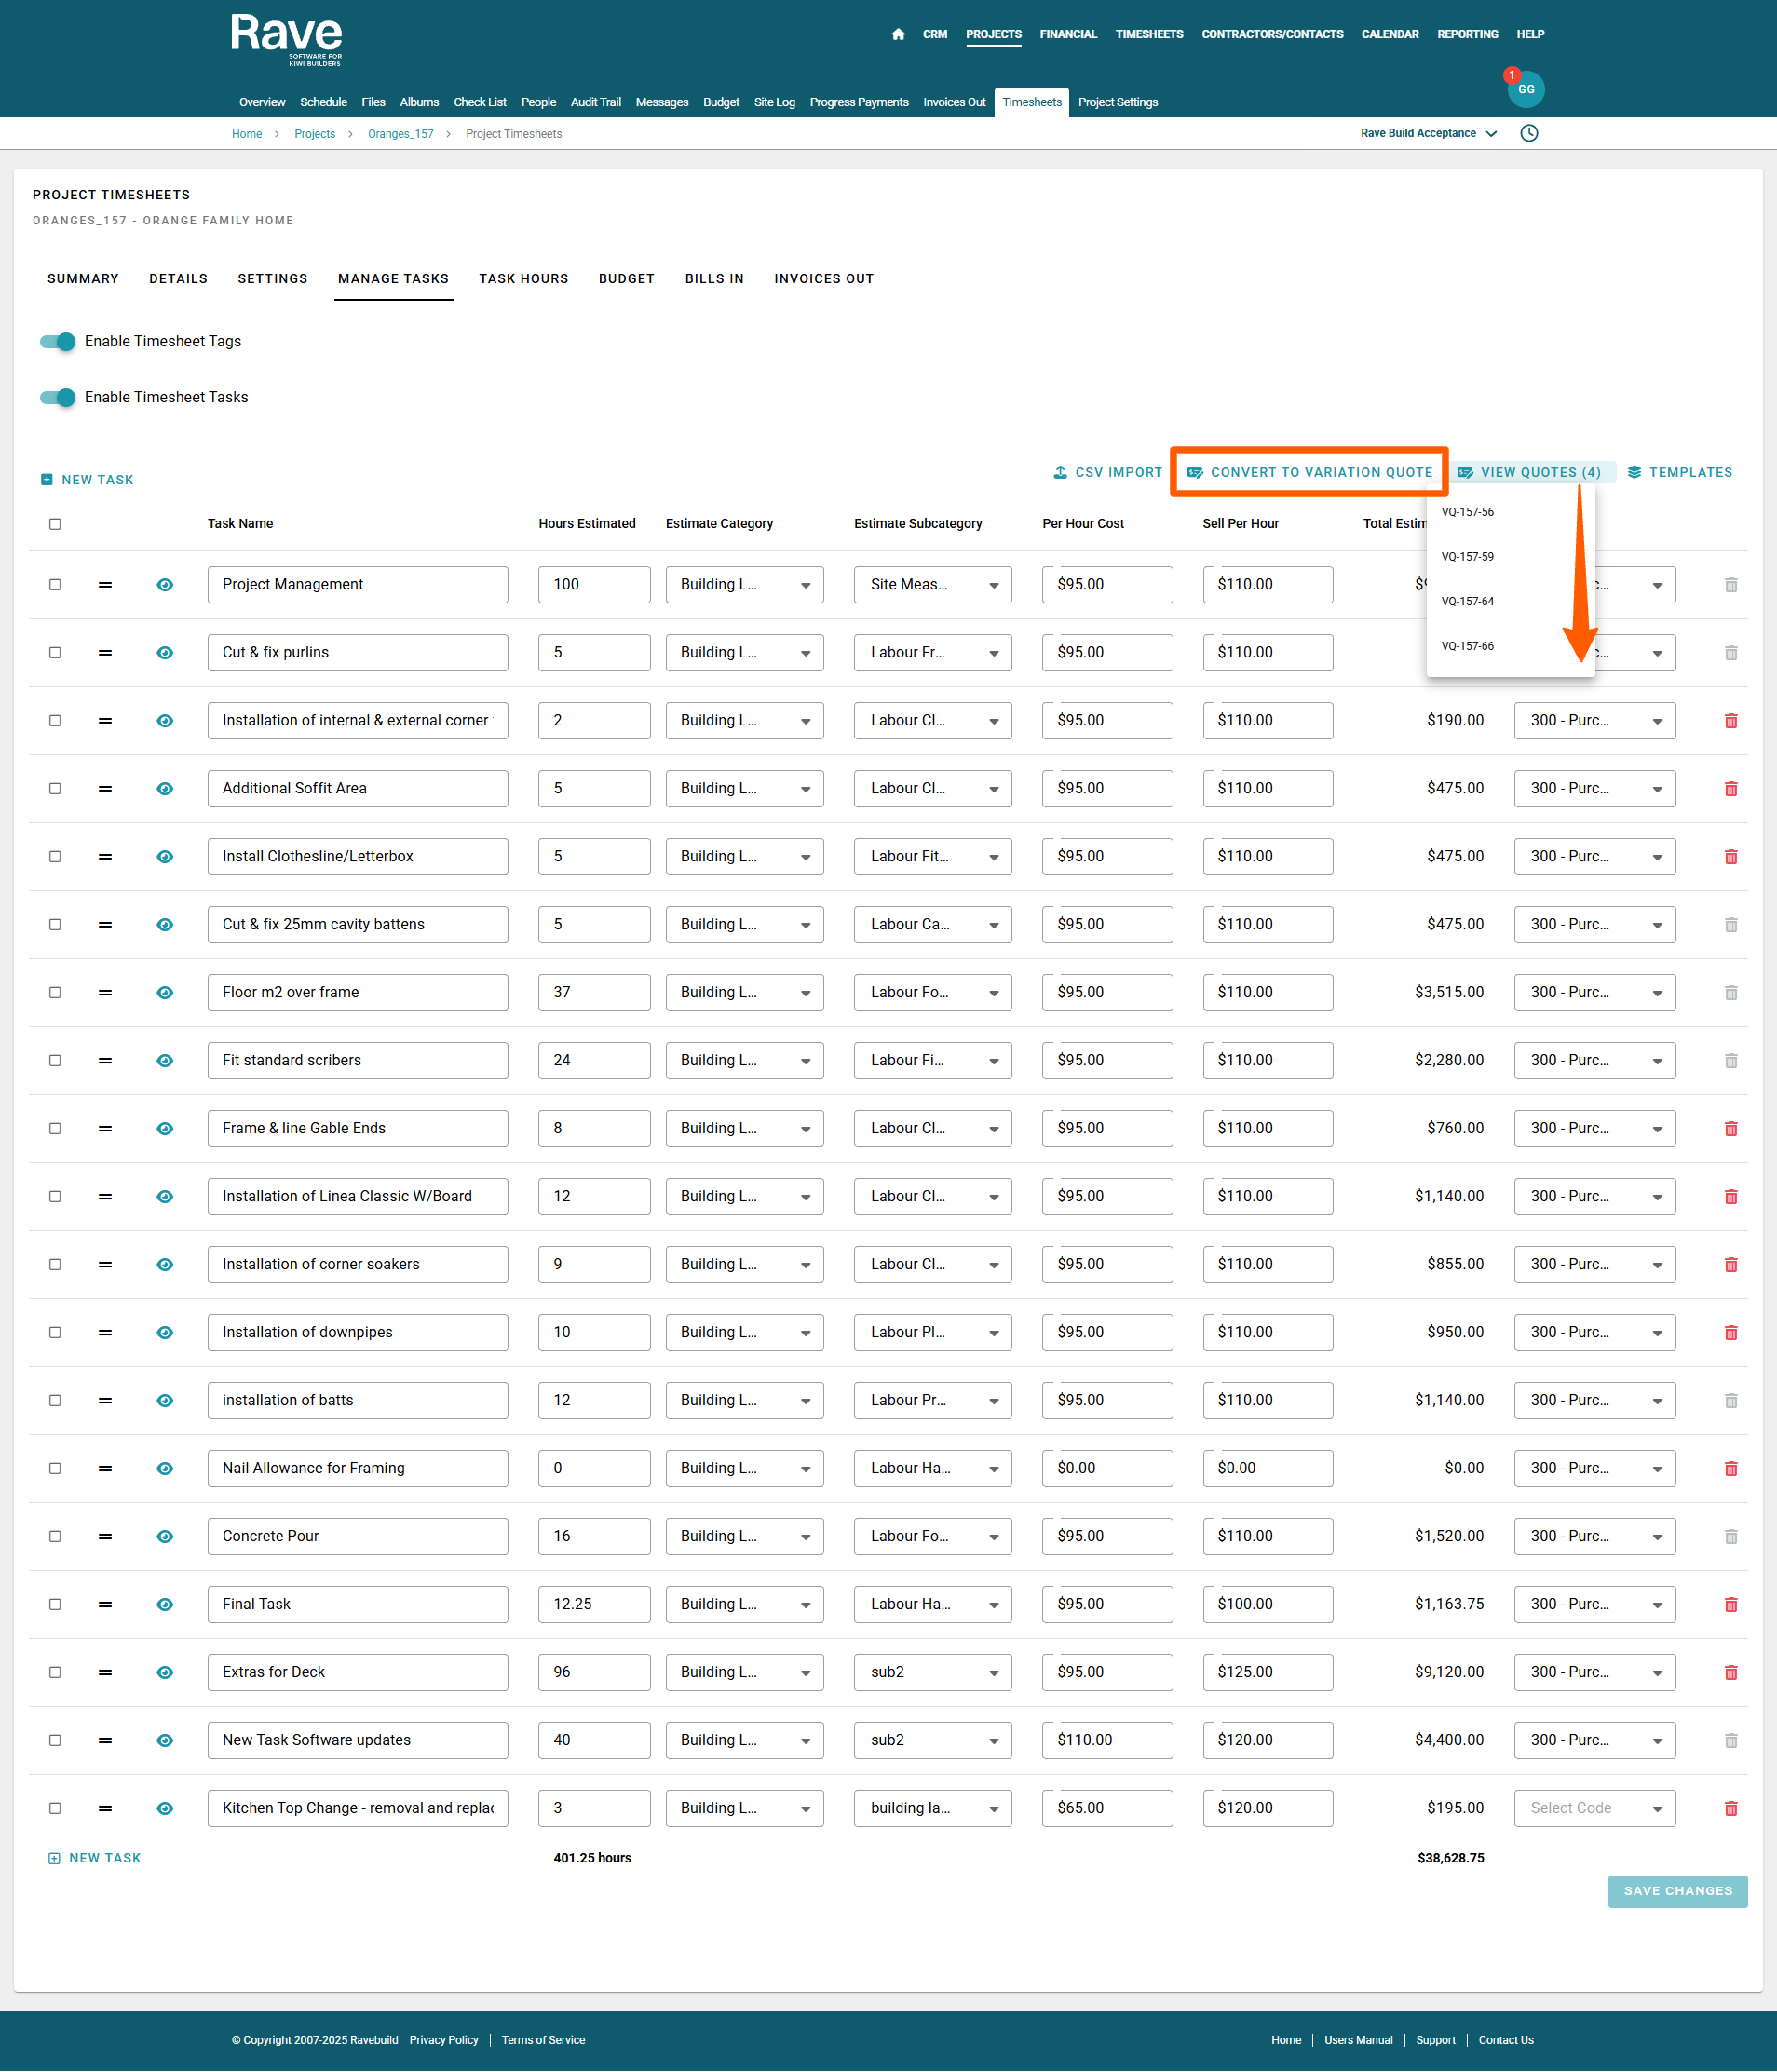
Creating Additional Labour Quotes (Variations)
If you add more task lines after sending the initial labour budget:
Use the Convert to Variation Quote button to generate an additional quote.
This sends a pending Variation Quote to the Quotes screen of your project for approval.
As with the original, these variation quotes will appear in your reporting once approved.
You can view all previously created labour quotes via the View Quote button within the Timesheets section.
Note: Tax Handling When Converting Labour Budget to a Quote
When you convert your Labour Budget to a Quote, the system will automatically add the quote to your estimate, with the document total excluding Tax. The labour lines will have a Cost price with No Tax and a Sell price of 15% Tax.
This allows you to:
Continue building the full client estimate
Apply GST at the appropriate stage, ensuring labour costs are correctly taxed when invoiced

To go back to the overview for ALL Timesheets Advanced features, click here
Are you ready to use Rave's Advanced Timesheets?
If you would like to add the Advanced Timesheets module to your Rave set-up, please contact us via help@ravebuild.co.nz
Was this article helpful?
That’s Great!
Thank you for your feedback
Sorry! We couldn't be helpful
Thank you for your feedback
Feedback sent
We appreciate your effort and will try to fix the article