RAVE’s financial management system is designed to help you manage all the financial aspects of your projects, including budgeting, bills, and invoices, with ease.
The Bills In sub-tab is where you add and manage all your project supplier/contractor invoices, which RAVE refers to as Bills. As with our Purchase Order page, there are multiple options to add a supplier bill to a project. The most common way is via the Purchase Orders Ready to Convert option.
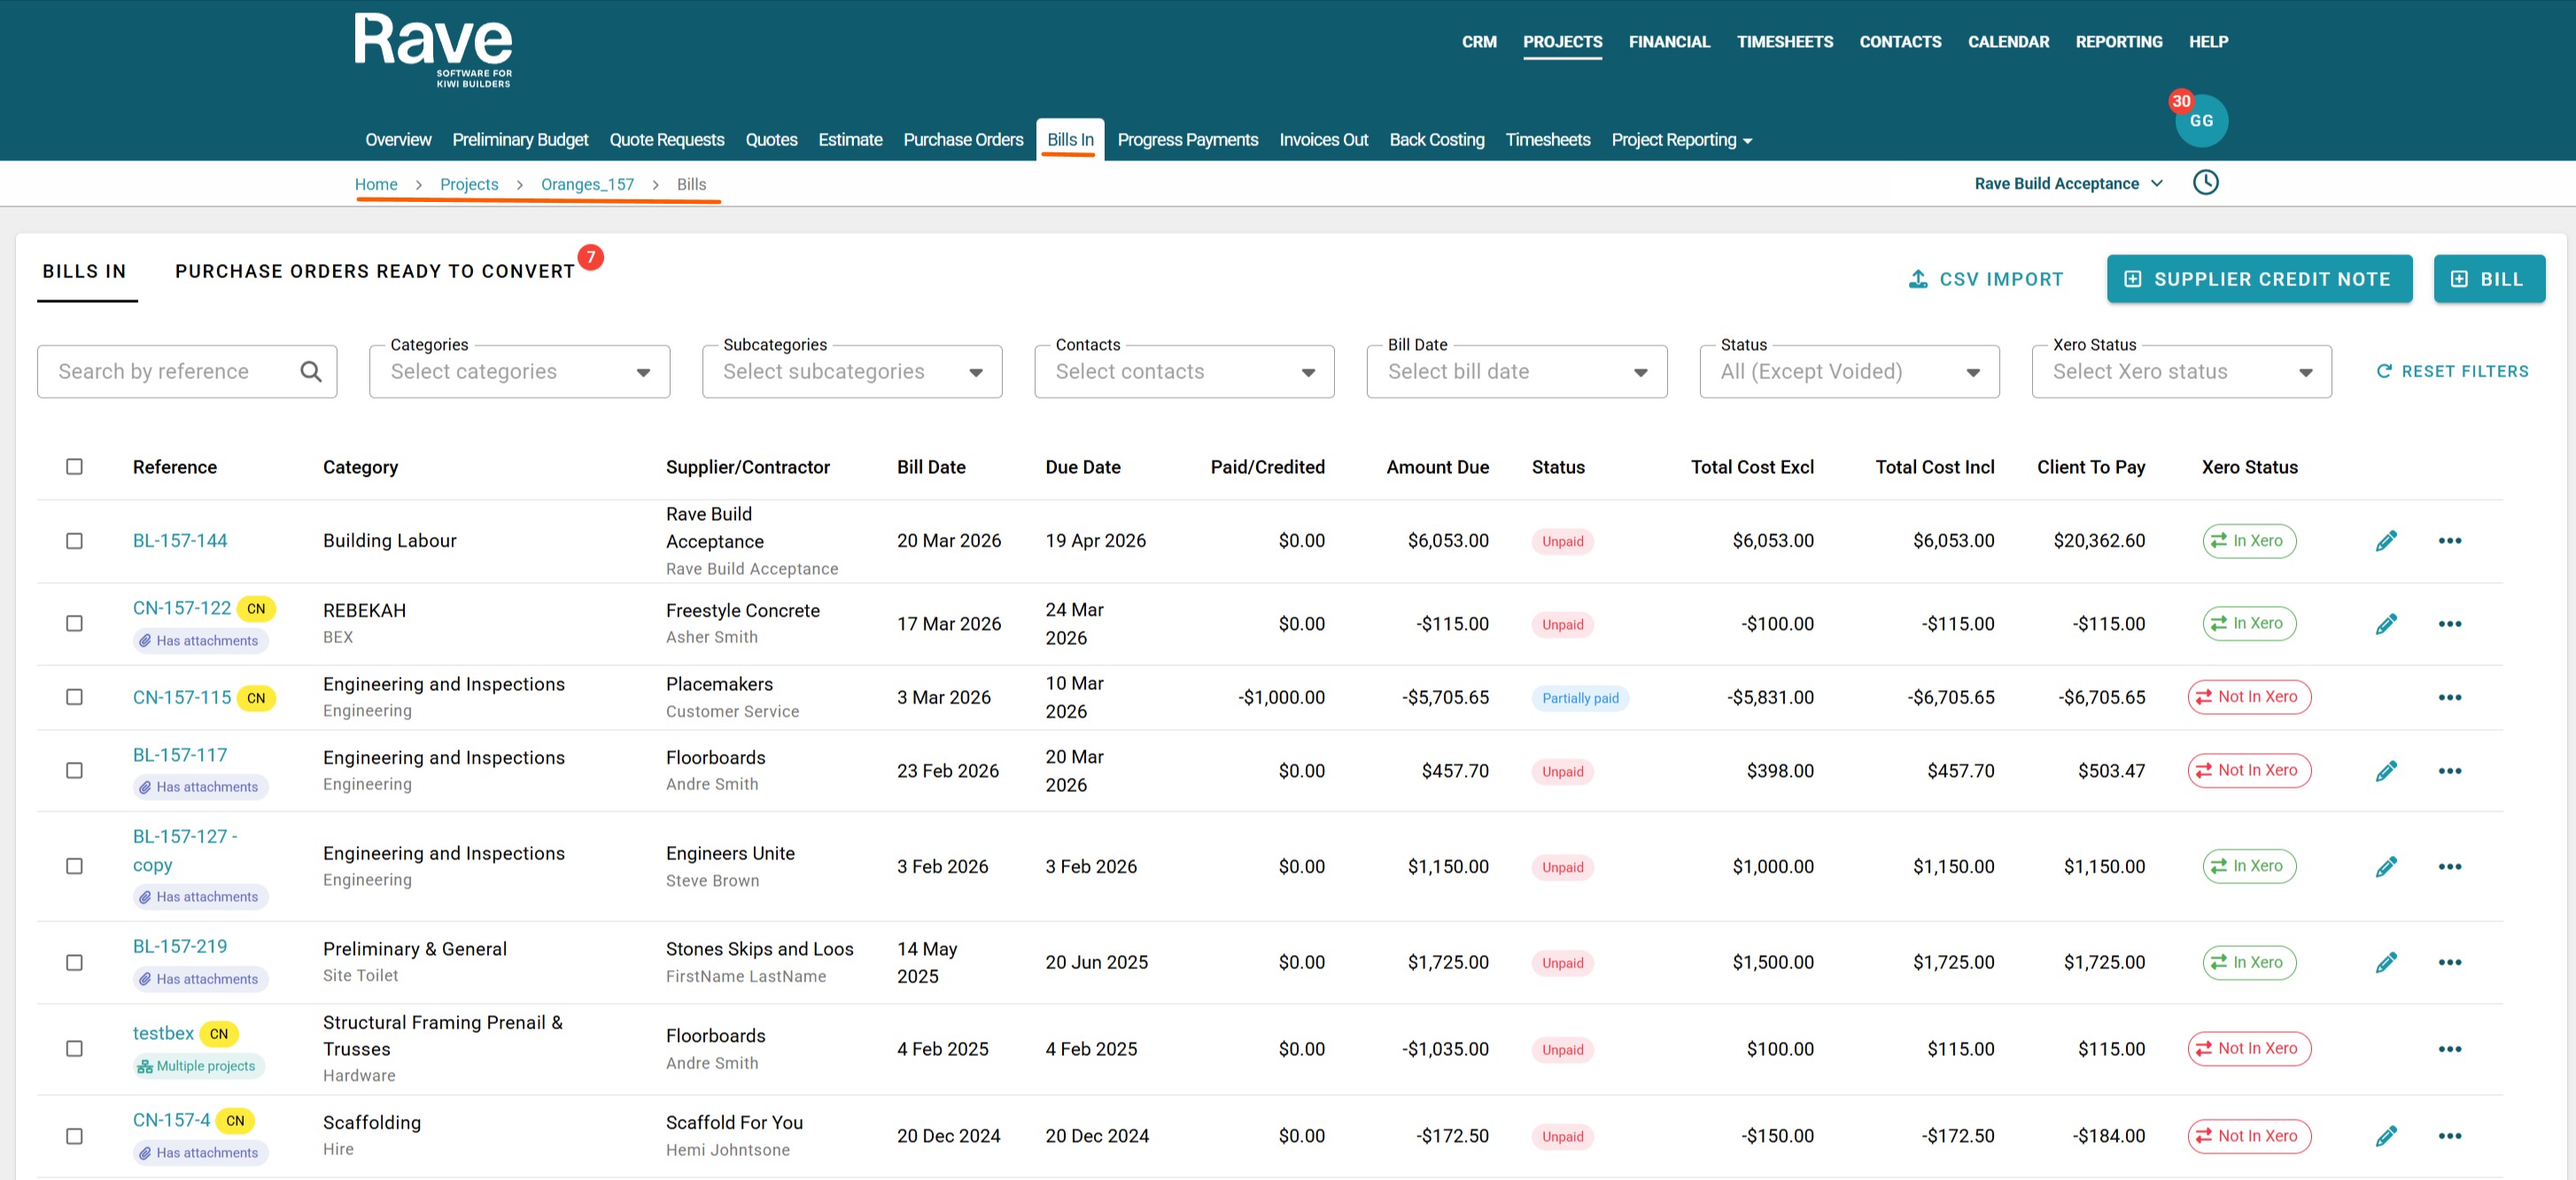
To learn about the Bills List page, click here.
To learn how to create a Bill by converting a Purchase order or orders to a Bill, click here.
To learn how to create a Bill (s) from a CSV file, click here.
You can access your Project’s financial workflows from either the Financial button or the Project button's Project list, clicking on the project’s reference number, and finally selecting the Budget sub-tab, then Bills.
Load Bills into RAVE via the Bills In + Bill Icon
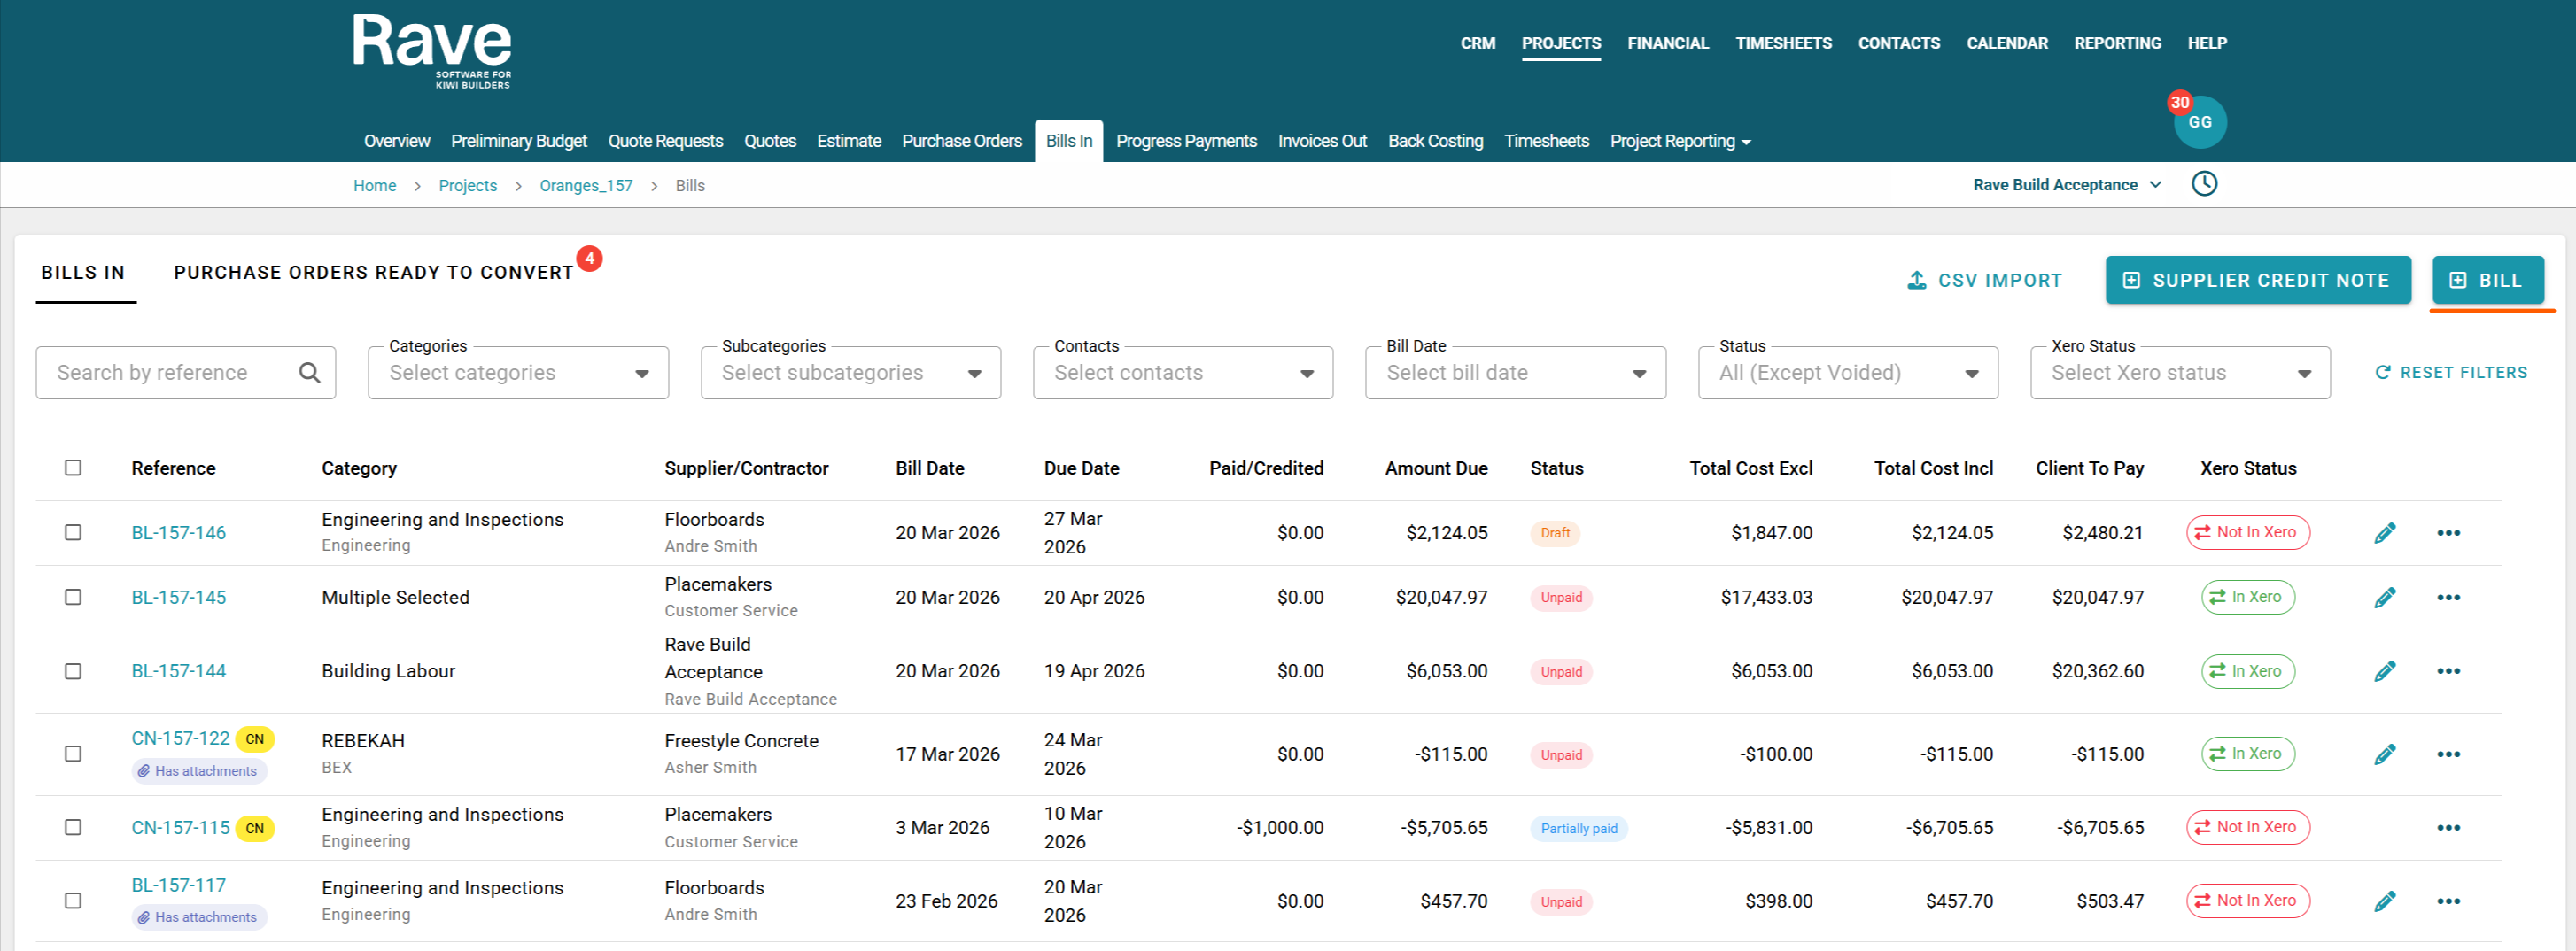
Click on the project's Bills In sub-tab
Click the + Bill icon at the top right of the screen.
You can preload previously saved information by selecting Load from at the top-right corner of the Bill creation page. This will allow you to select to load from:
Quote - allows you to populate information from a previously accepted quote
Purchase Order - allows you to populate information from a previously created purchase order
Template - select a previously saved bill template
Switching the Document Type lets you select the quote, purchase order or template you want to load. If you do choose the Load from option, all data already loaded on the screen will be replaced when you press Load.  If you wish to create a Bill from scratch, simply start entering the information on the page.
Select the supplier or contractor who issued the Bill.
Enter the supplier’s bill reference number (e.g., their invoice number).
Select the due Date
Ensure you choose the right Tax type, usually either Exclusive for the whole Document or inclusive, depending on how your supplier sends their bills to you.
Select the Billed date
Select the appropriate category/subcategory for this bill.
Attach your supplier bill by clicking the cloud icon or dragging and dropping the file.
Enter the Line Item information and select the correct project for each Line, making sure to double-check qty, pricing, and markup, if applicable.
One competed you can Save as a Draft for someone else to Approve, or click Approve.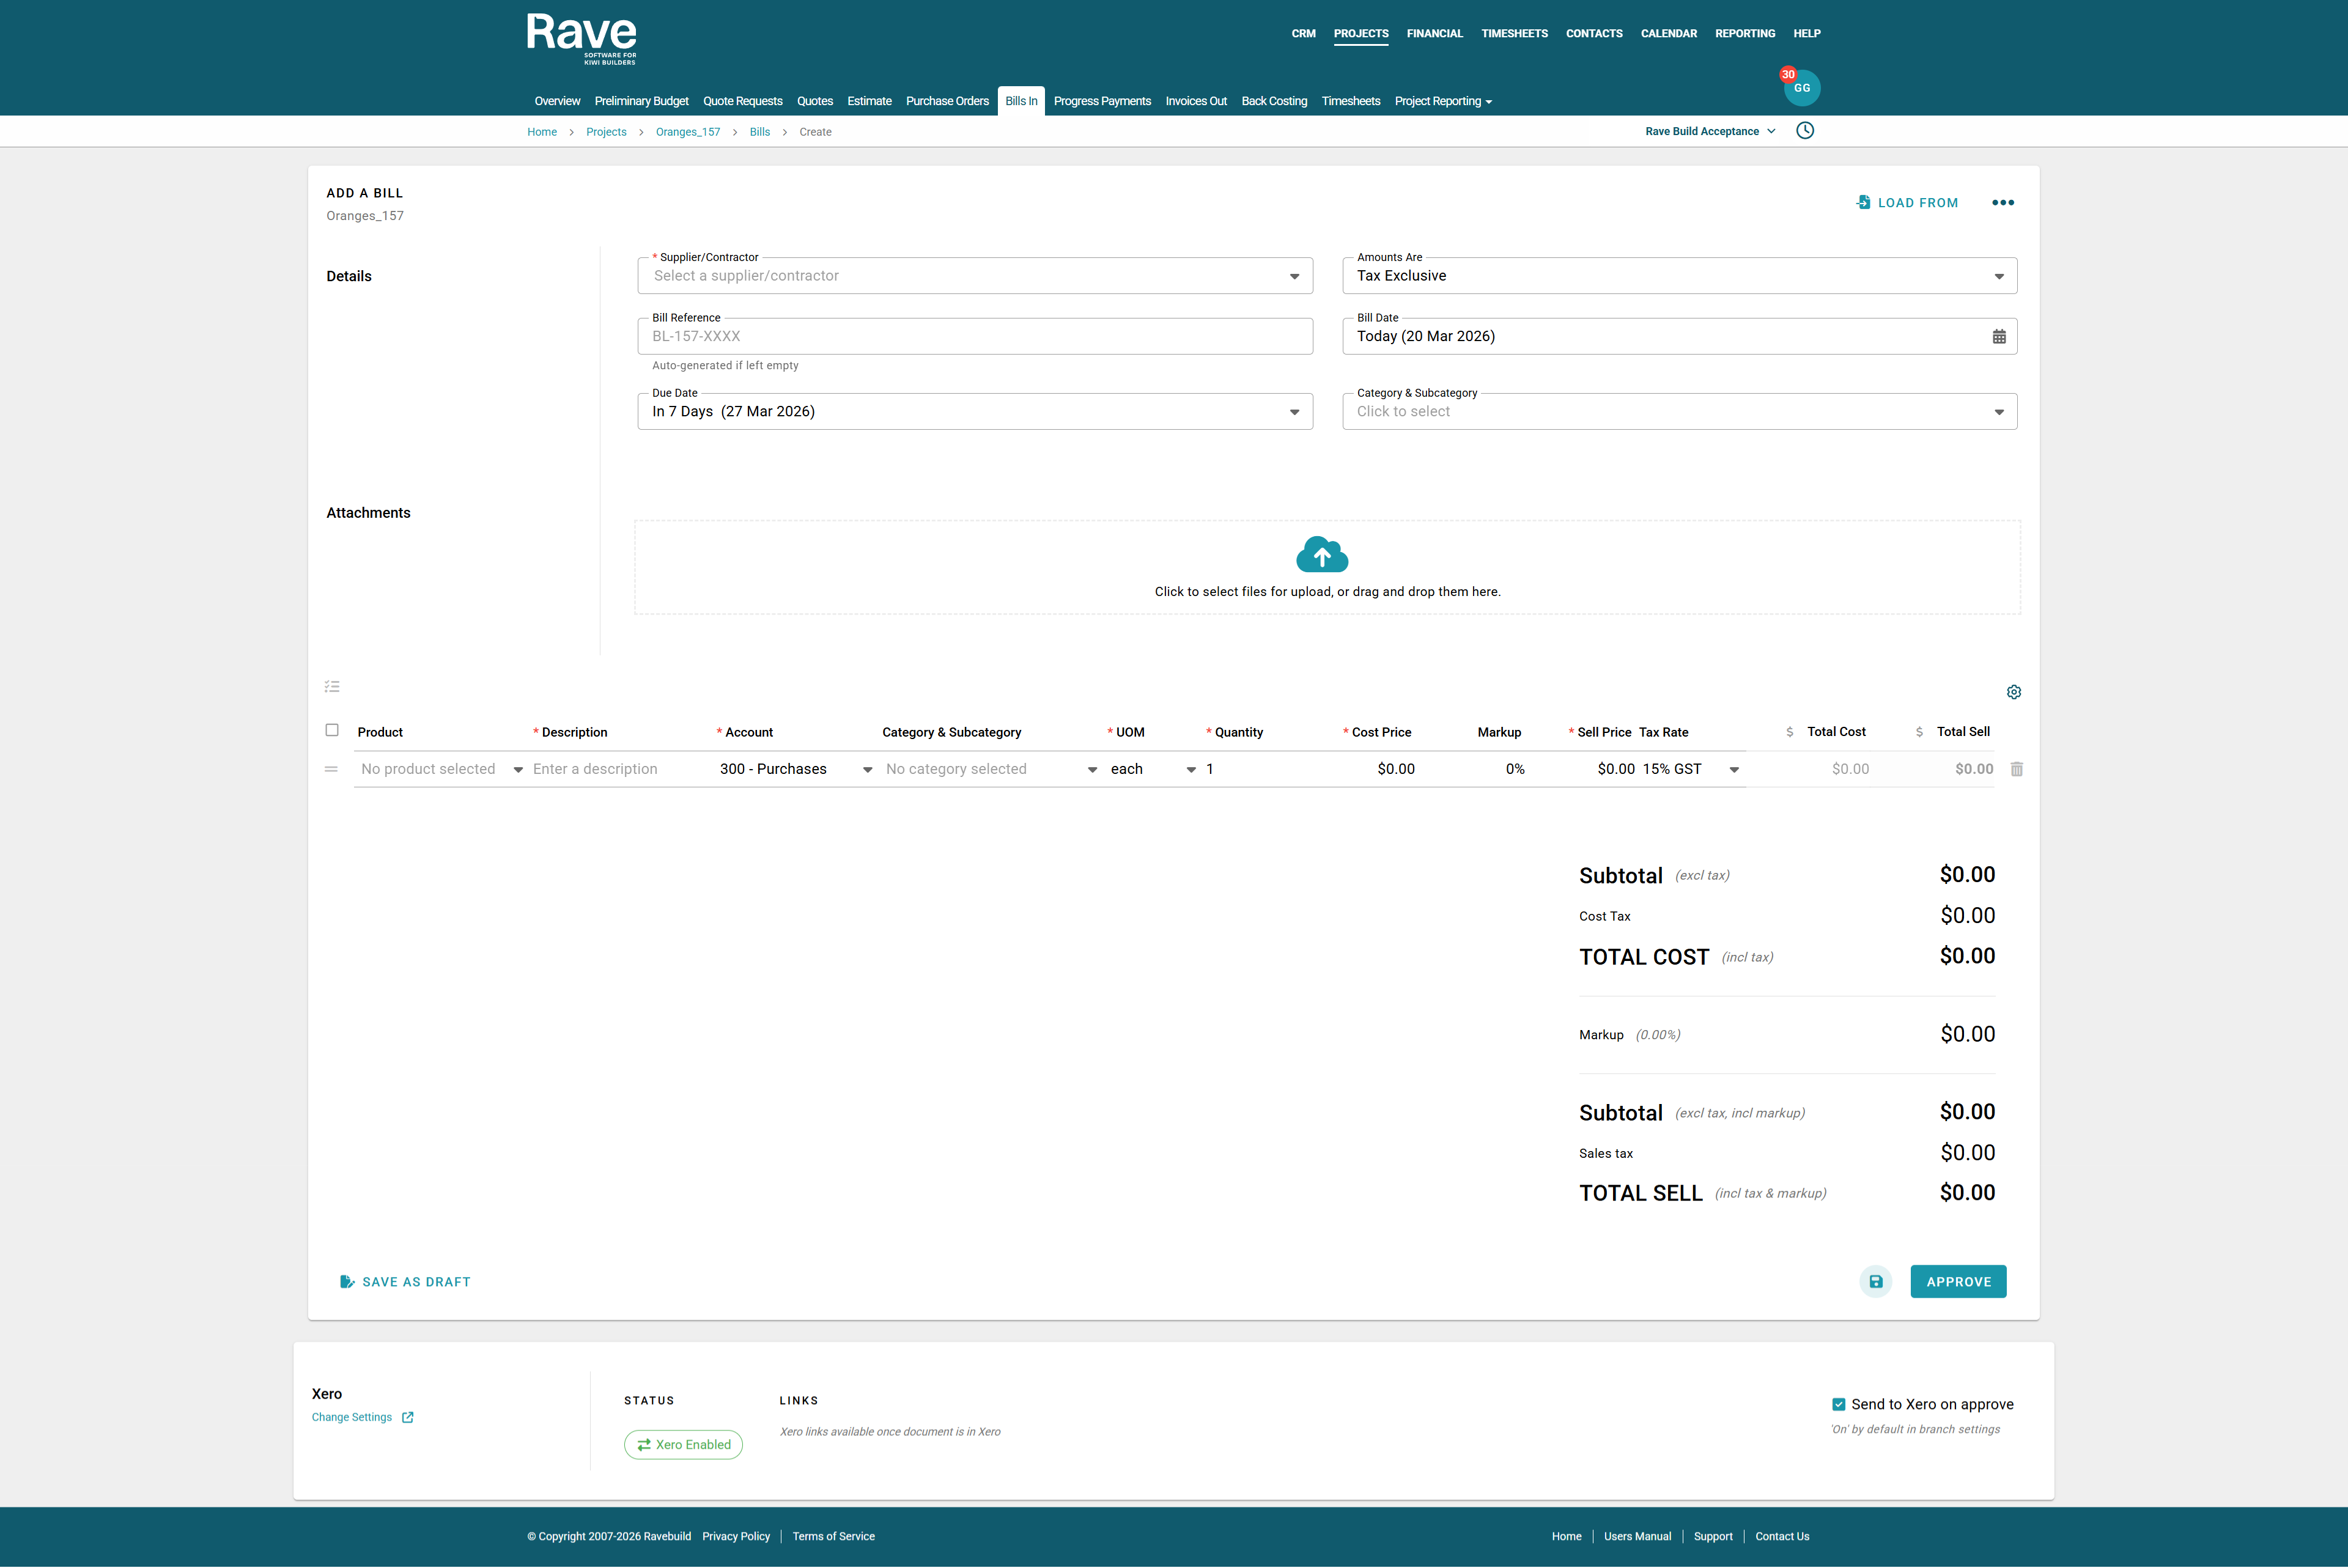
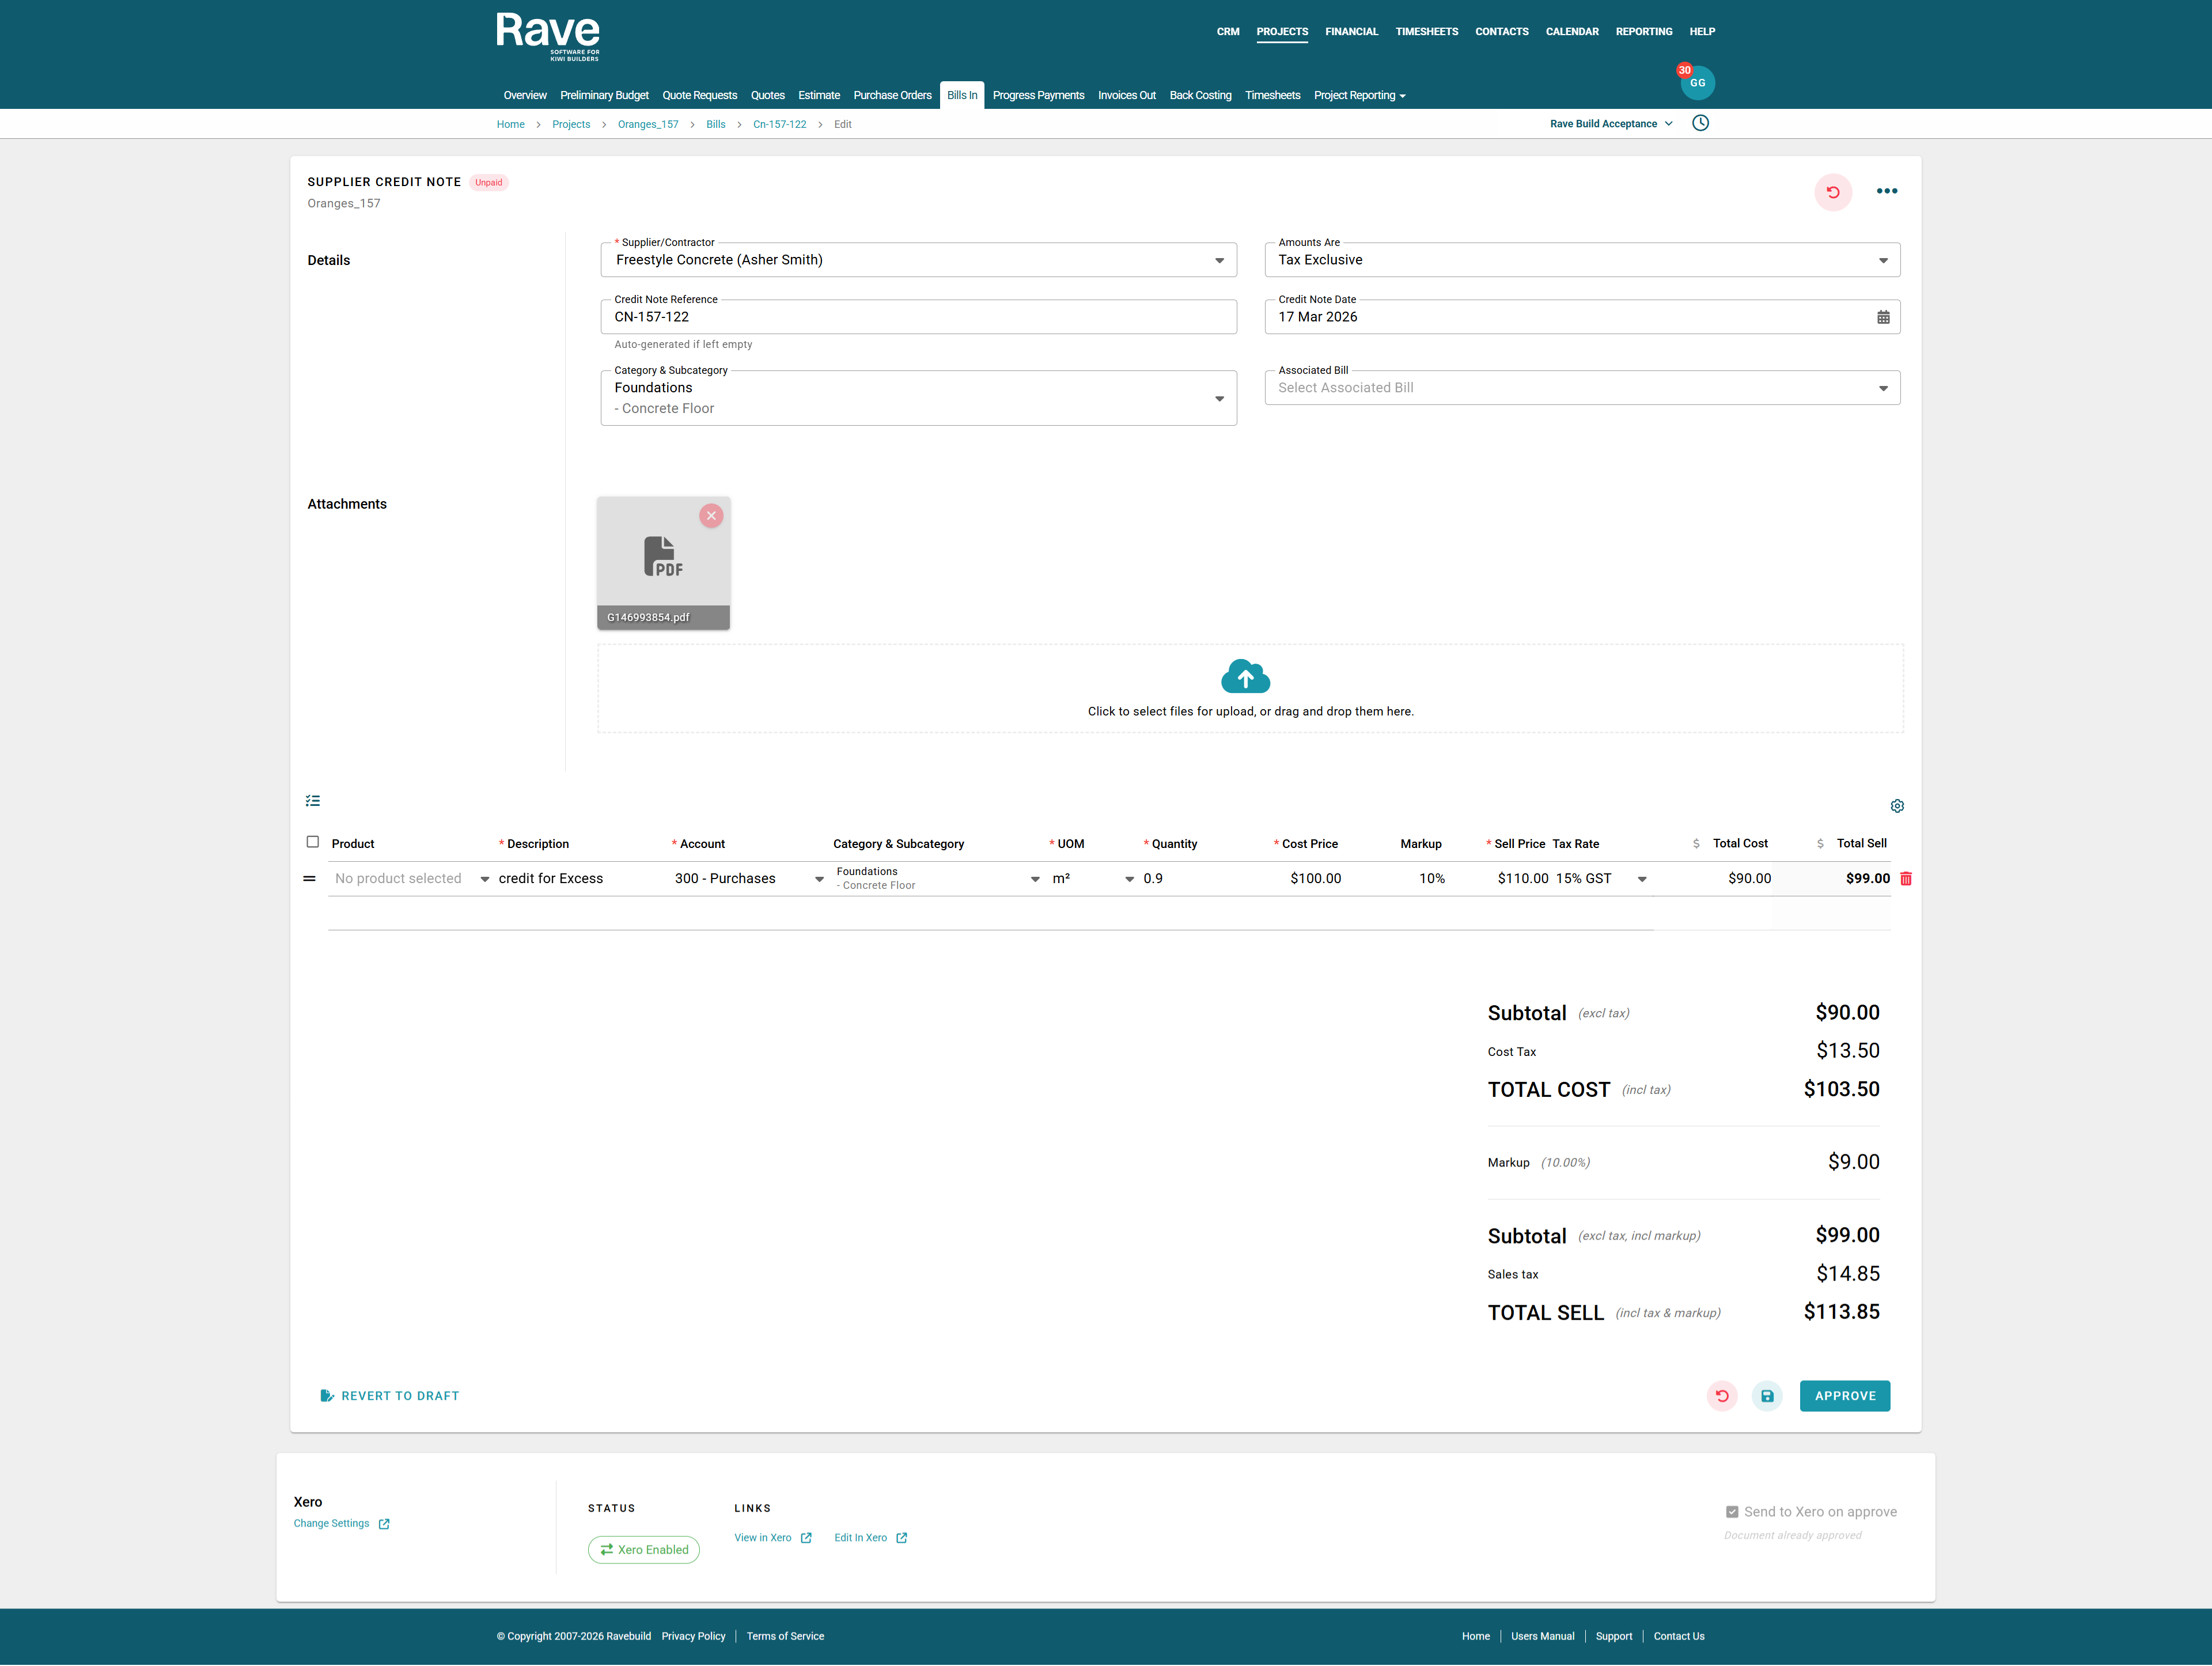
To load a Supplier Credit Note, click + Supplier Credit Note, and you would follow the same steps from above.
Do not enter the Credit amount as a negative value, as Rave already knows the item is a credit.
If you have a restocking fee on the credit note, enter it as a negative dollar amount, since you won't be getting that portion credited.
Credit Note Allocation with Xero Payment Syncing
When you allocate the credit note in Xero to the Supplier Bill, Rave will display the amount credited in the Paid/Credited box of both the Credit Note and the Bill.
If you provide the supplier with a 'cash refund' in Xero, it will also sync back to Rave and be displayed in the Paid/Credited box.
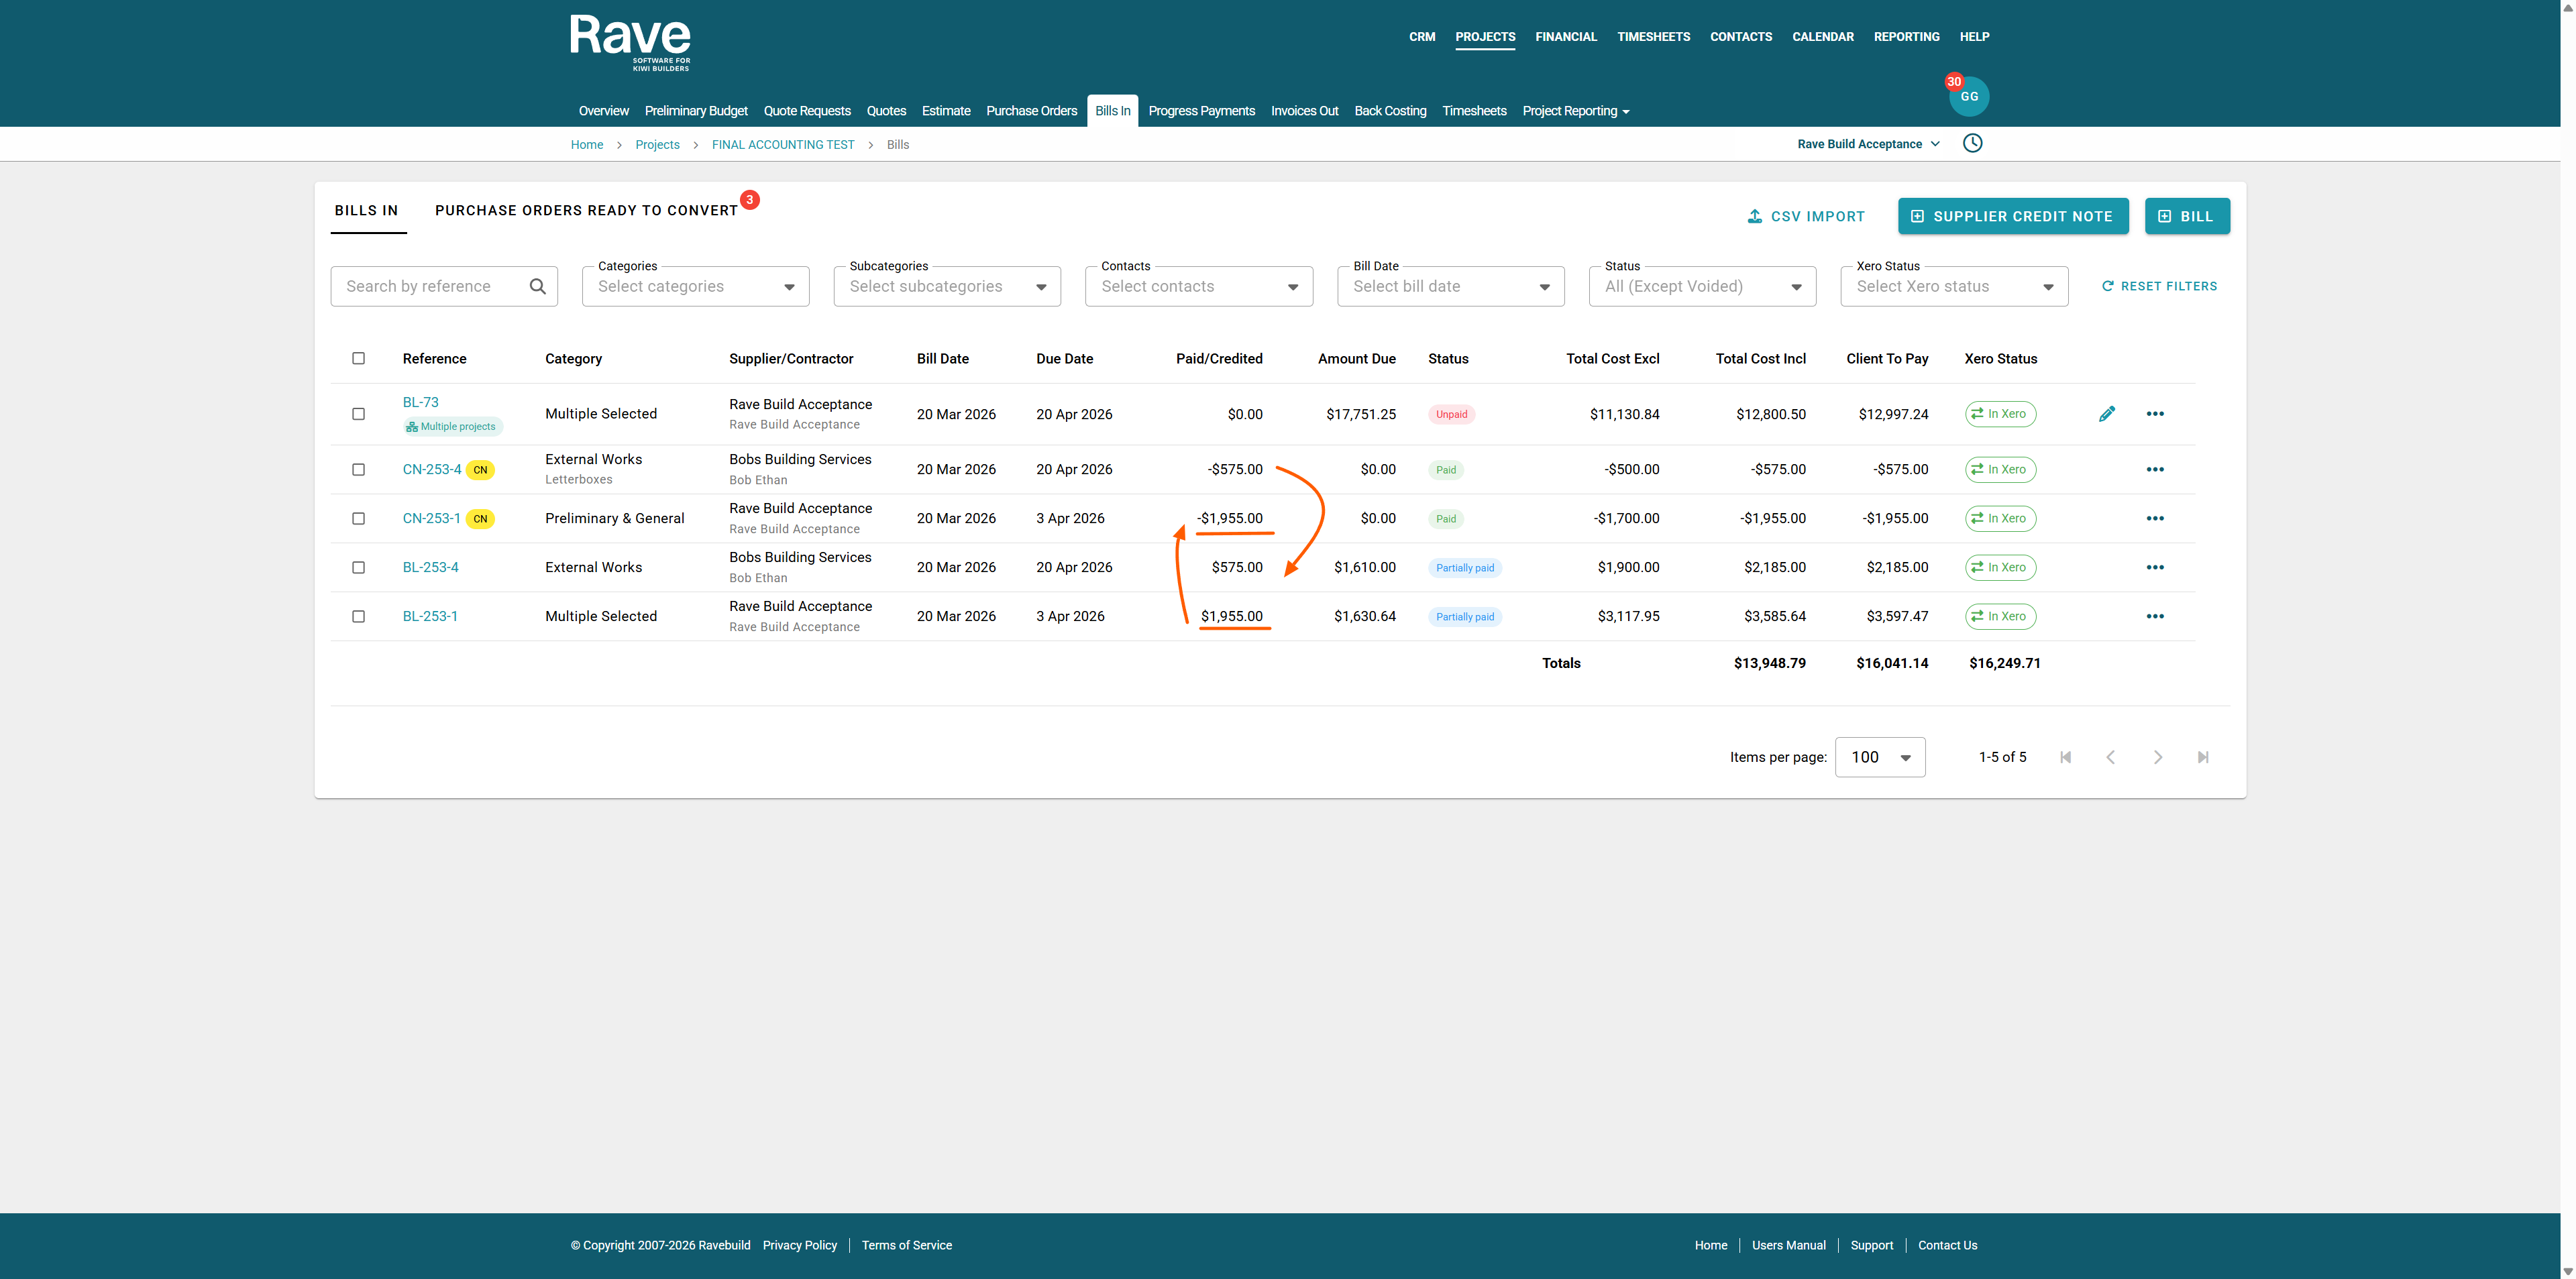
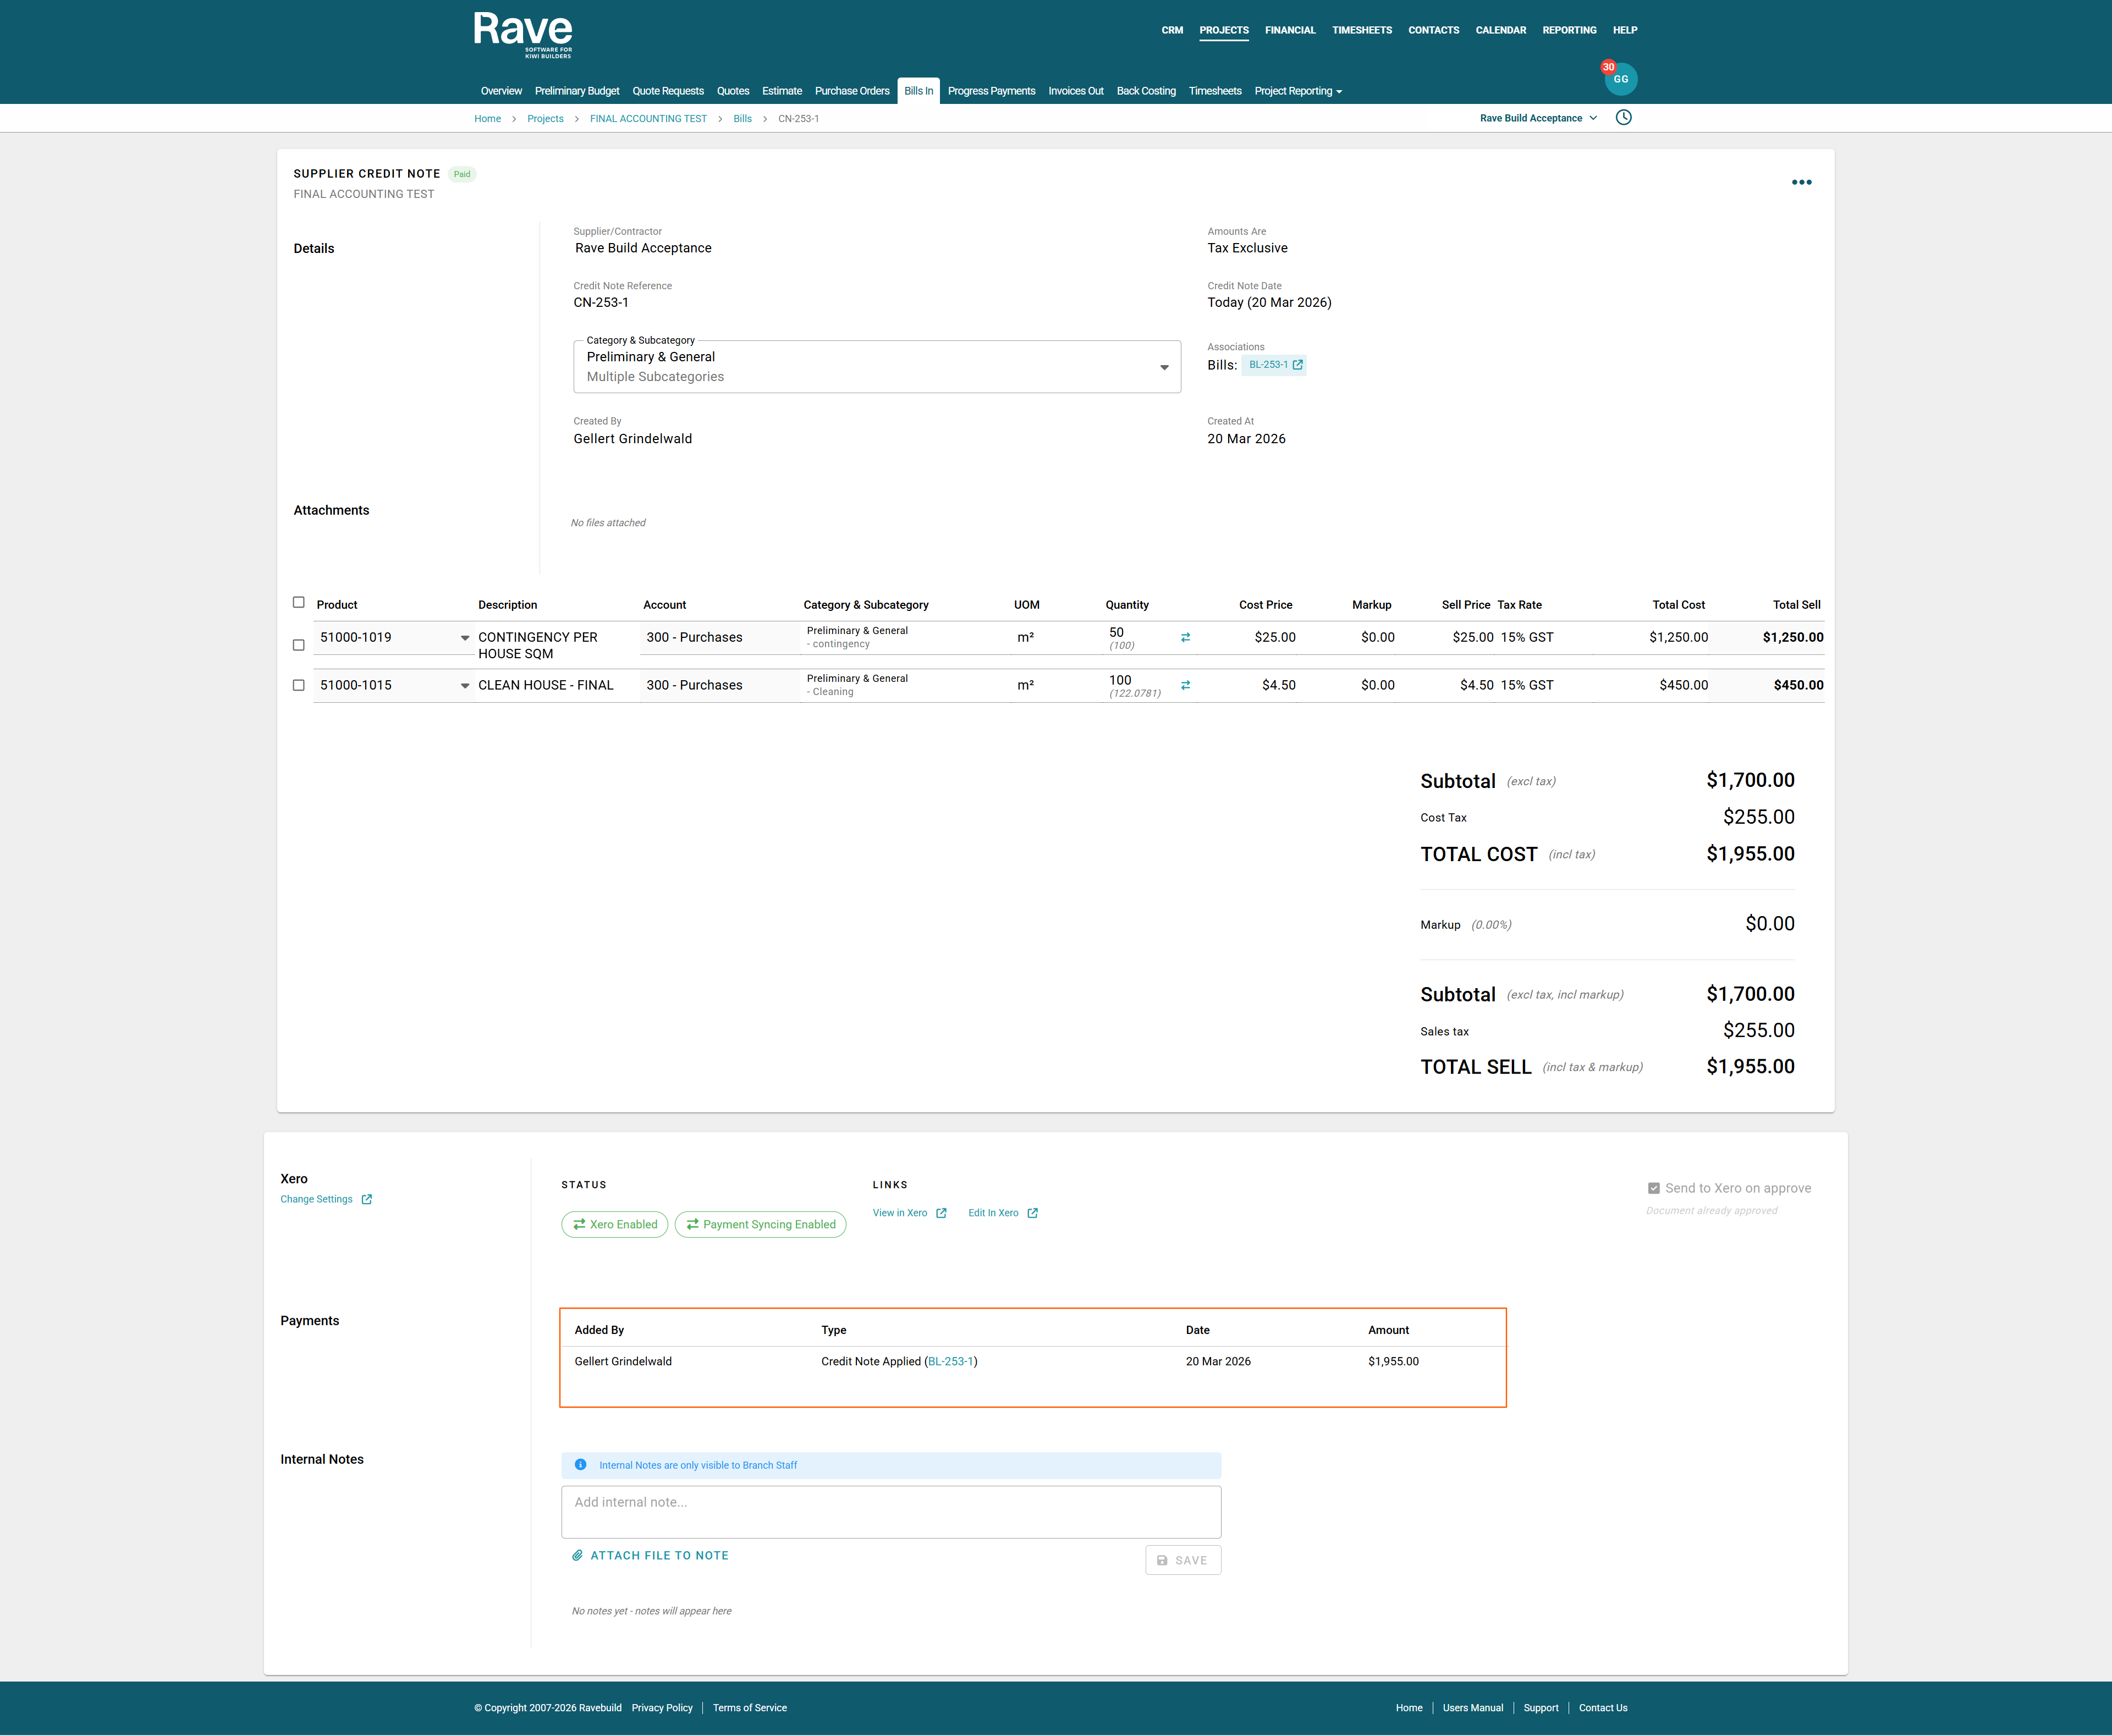
By clicking on the Credit note and scrolling to the bottom, you can view the Payments table to see Refunds and Credit allocations.
Credit Note Allocation withoout Xero Payment Syncing
If you are not using Xero payment Syncing you have the option to manually add a 'cash' refund or allocate the credit to an existing bill in rave
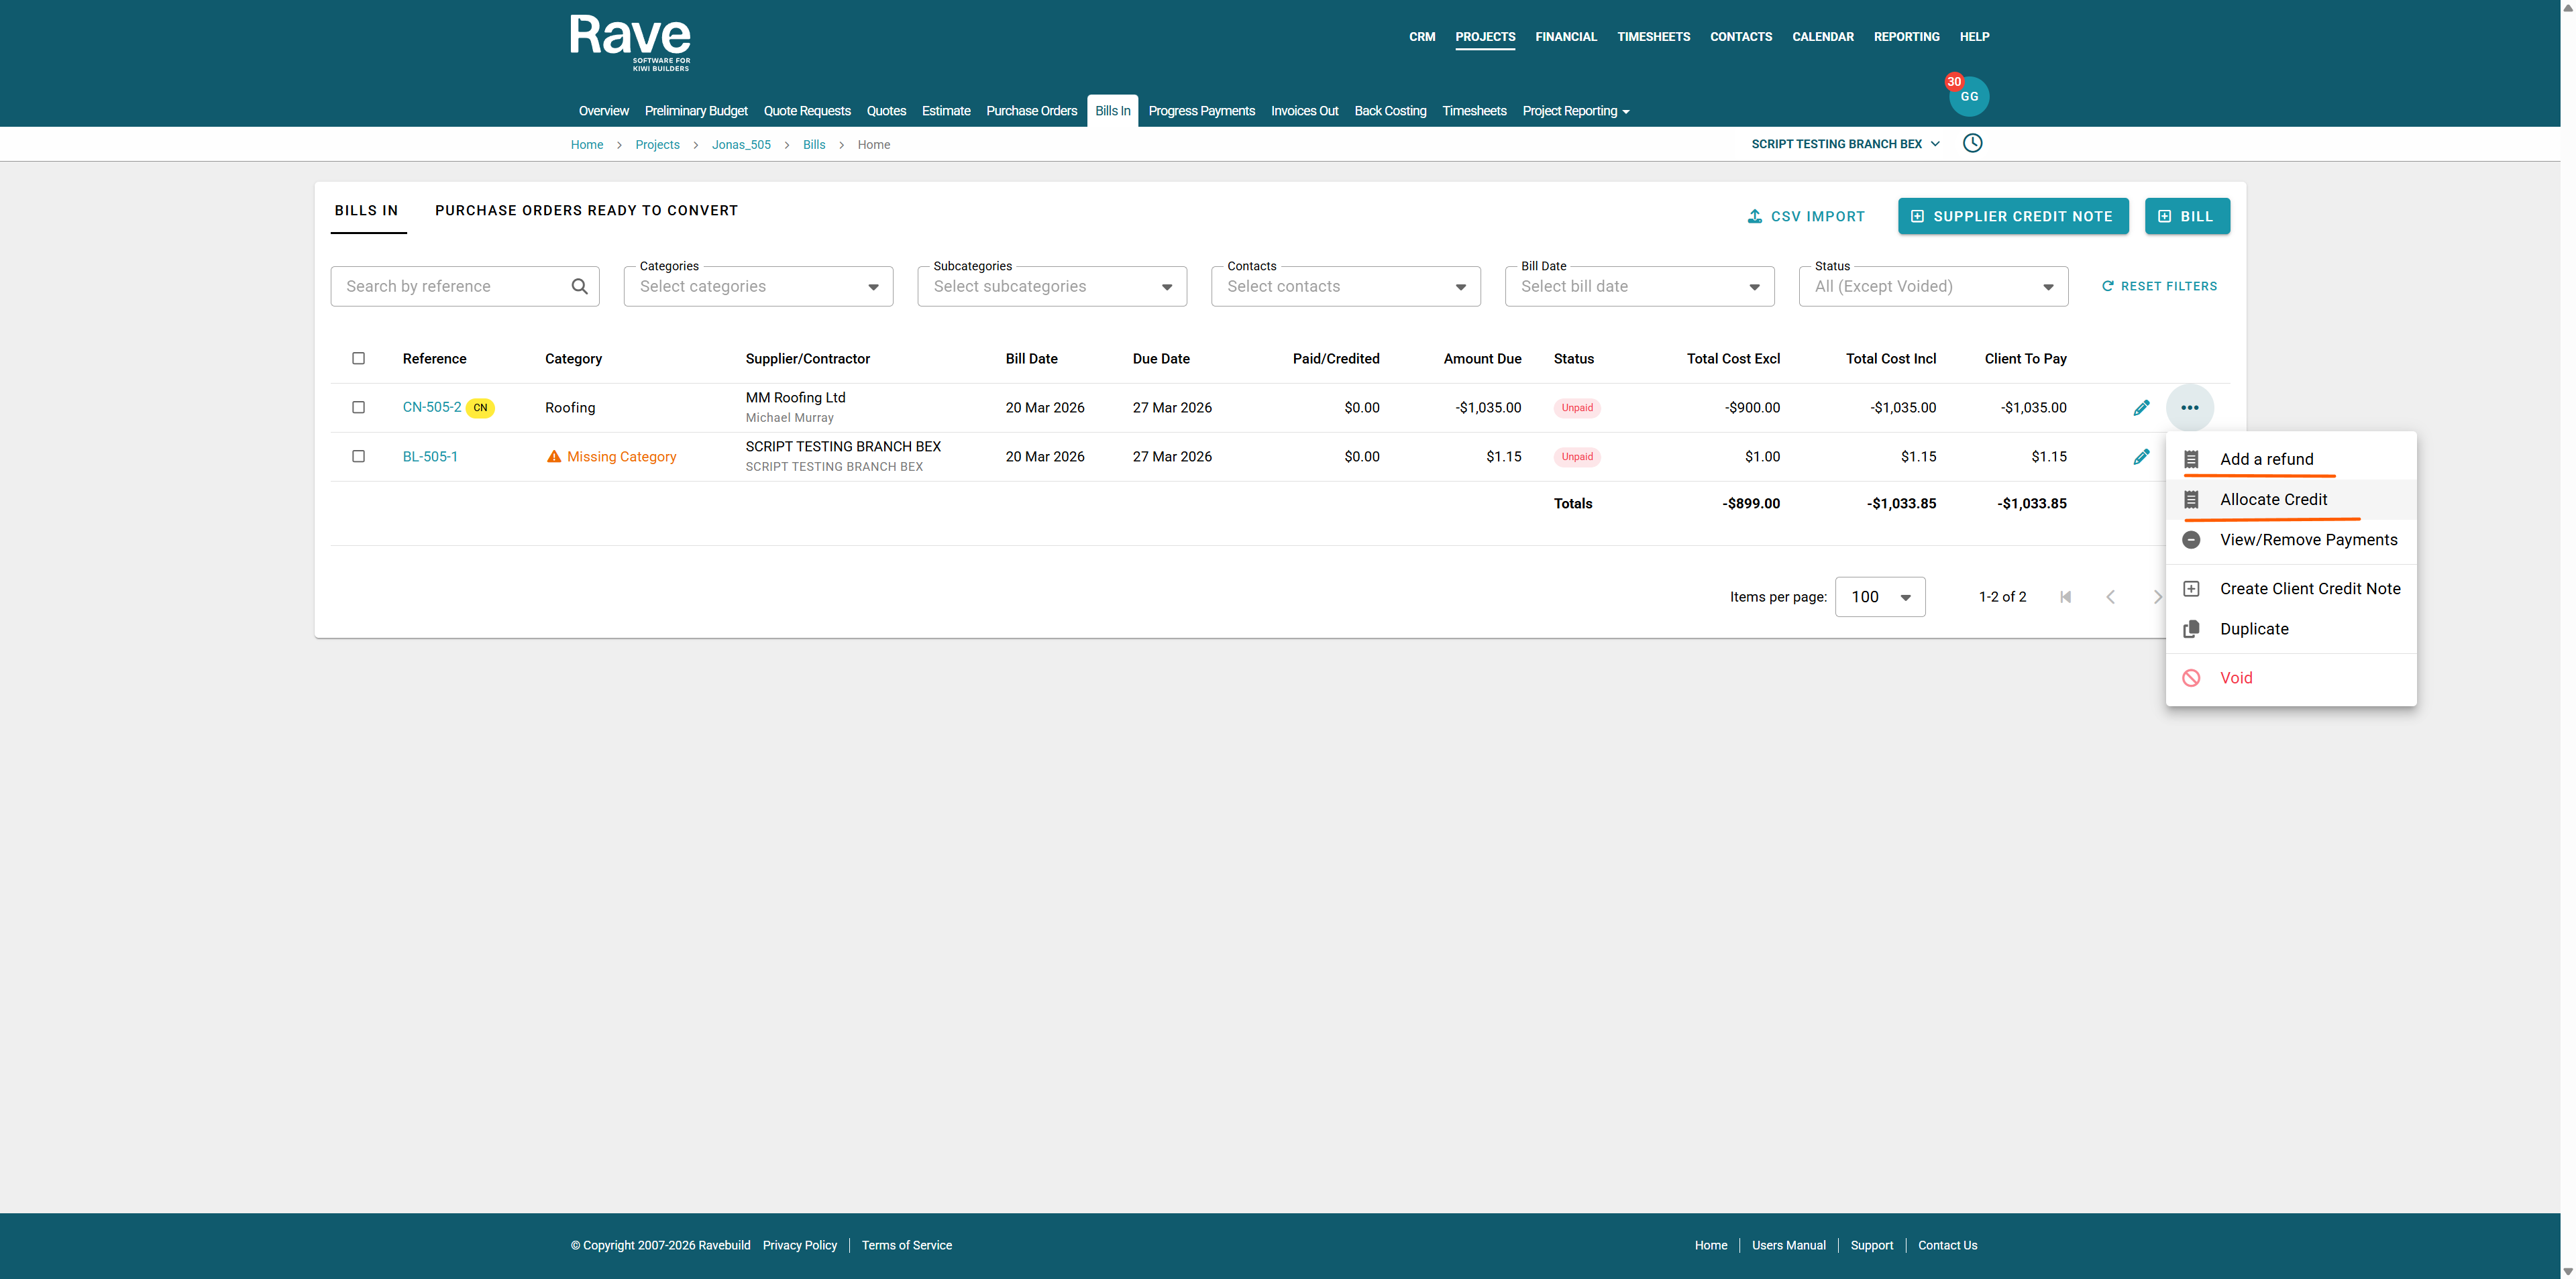
If you select Allocate Credit and there are no unpaid bills or the totals are less than the credit you will see this box and you must wait for a bill to be entered that you can credit. You can credit Bills from other projects to this supplier
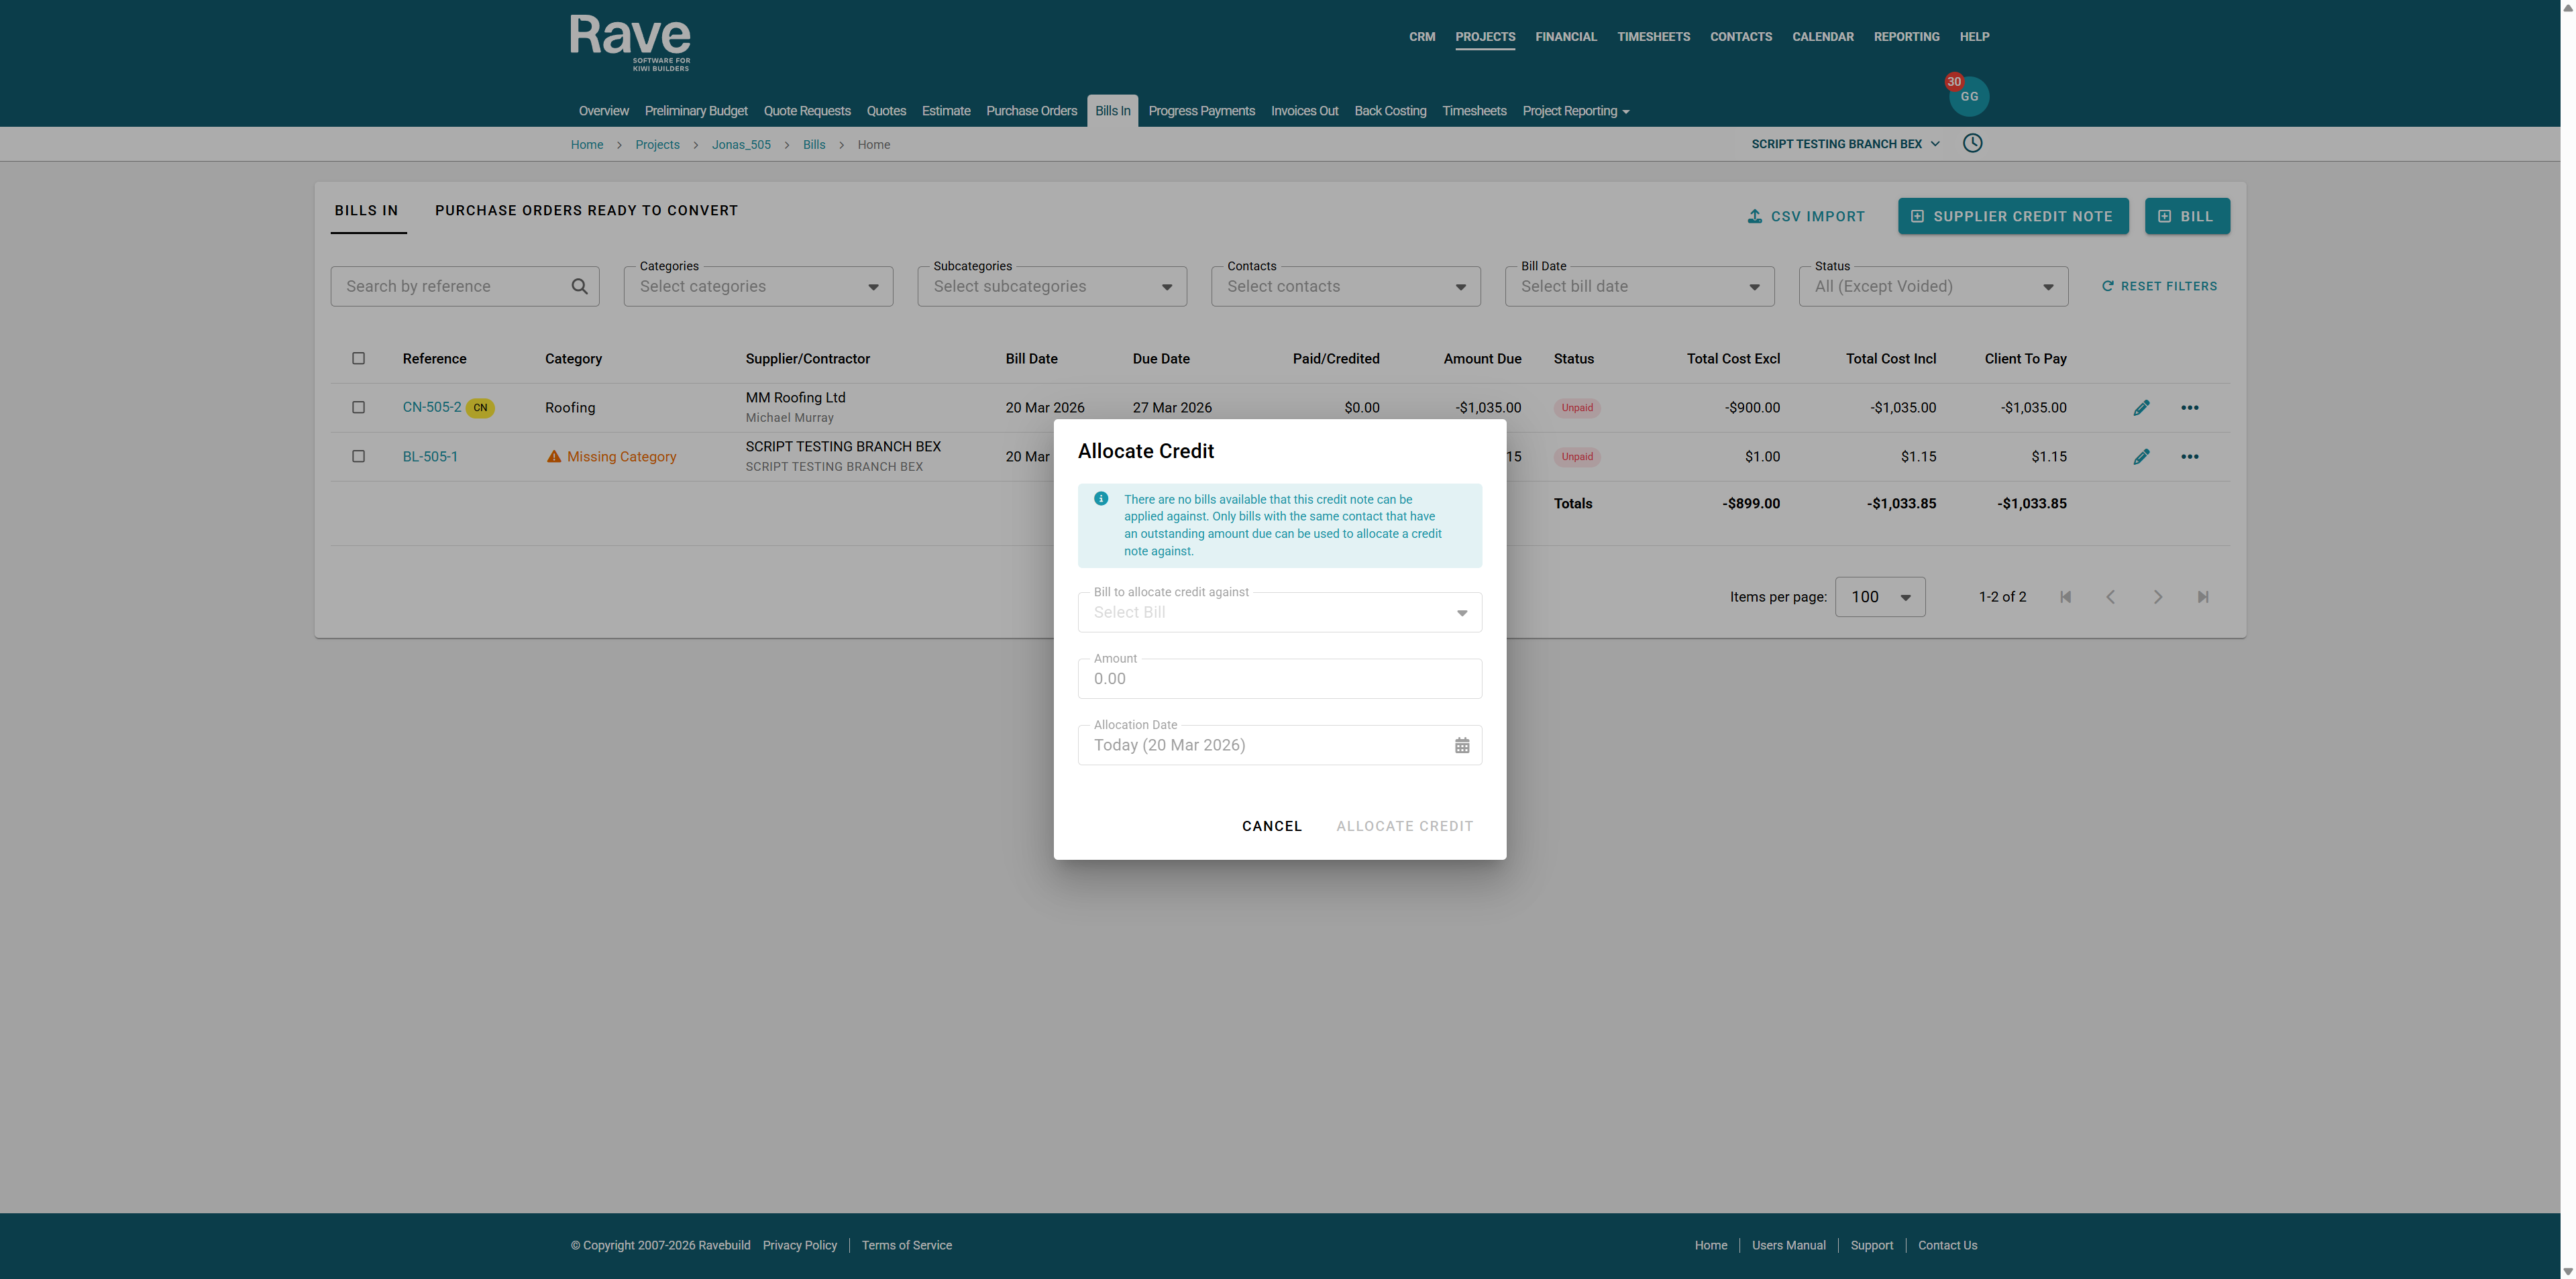
If you select Allocate credit and there is Bills avalaible you can select the Bill and Rave will give you the total you are allowed to allocate. Select the allocation date and press Allocate Credit.

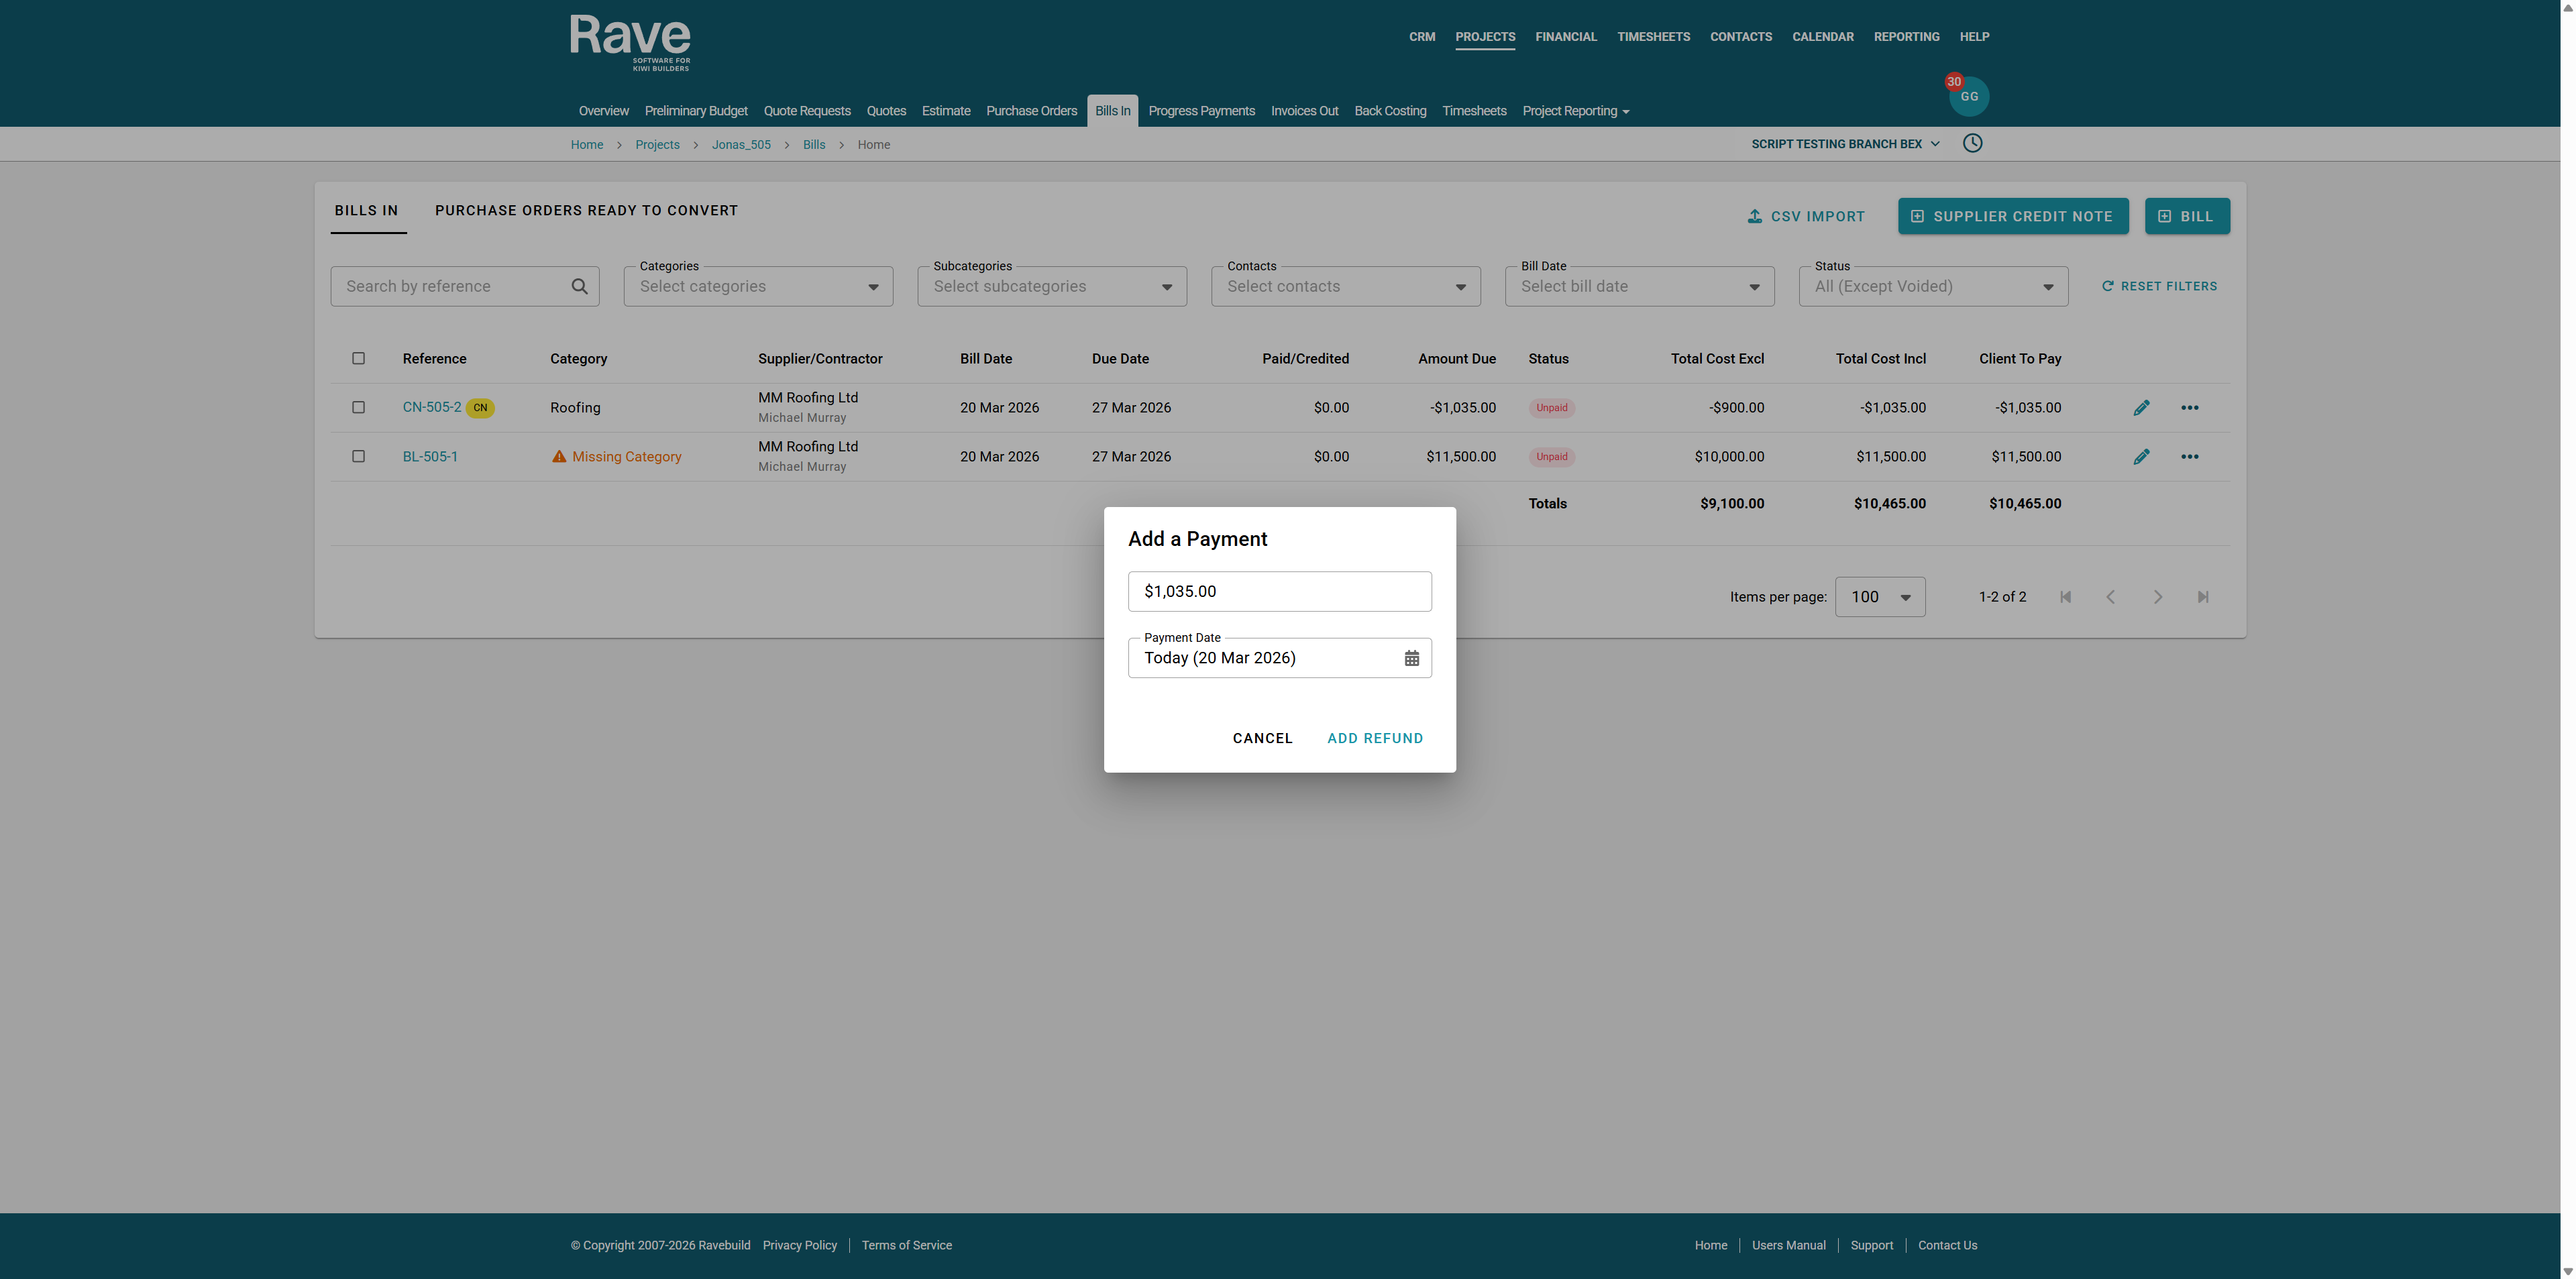
If you select add a refund you will be prompted to enter the value and date you processed the refund to the supplier.
Marking a bill as Non-Chargable
Under Branch Settings - Financial there is a slider to allow you to mark Supplier Bills as non chargable. This means they will be hidden from the Bills ready to convert table on the invoice out page and selecting them the Create Client invoice button will be disabeled.

When this slider is enabled a check box appears on the bill which you can select.
Once the bill is created it will have an icon with the words Non-Charfeable under the bill refefence.
If you select one of these bills the ability to create a client invoice is disabeled until you uncheck it.

Was this article helpful?
That’s Great!
Thank you for your feedback
Sorry! We couldn't be helpful
Thank you for your feedback
Feedback sent
We appreciate your effort and will try to fix the article