RAVE’s financial management system is designed to help you manage all the financial aspects of your projects, including budgeting, bills, and invoices, with ease.
The Bills In sub-tab is where you add and manage all your project supplier/contractor invoices, which RAVE refers to as Bills. As with our Purchase Order page, there are multiple options to add a supplier bill to a project. The most common way is via the Purchase Orders Ready to Convert option.
To learn about the Bills List page, click here.
To learn how to create a Bill or Credit Note manually, click here.
To learn how to create a Bill (s) from a CSV file, click here.
You can access your Project’s financial workflows from either the Financial button or the Project button's Project list, clicking on the project’s reference number, and finally selecting the Budget sub-tab, then Bills.
Receive Bills into RAVE via the Bills In - Purchase Orders Ready to Convert to Bills option
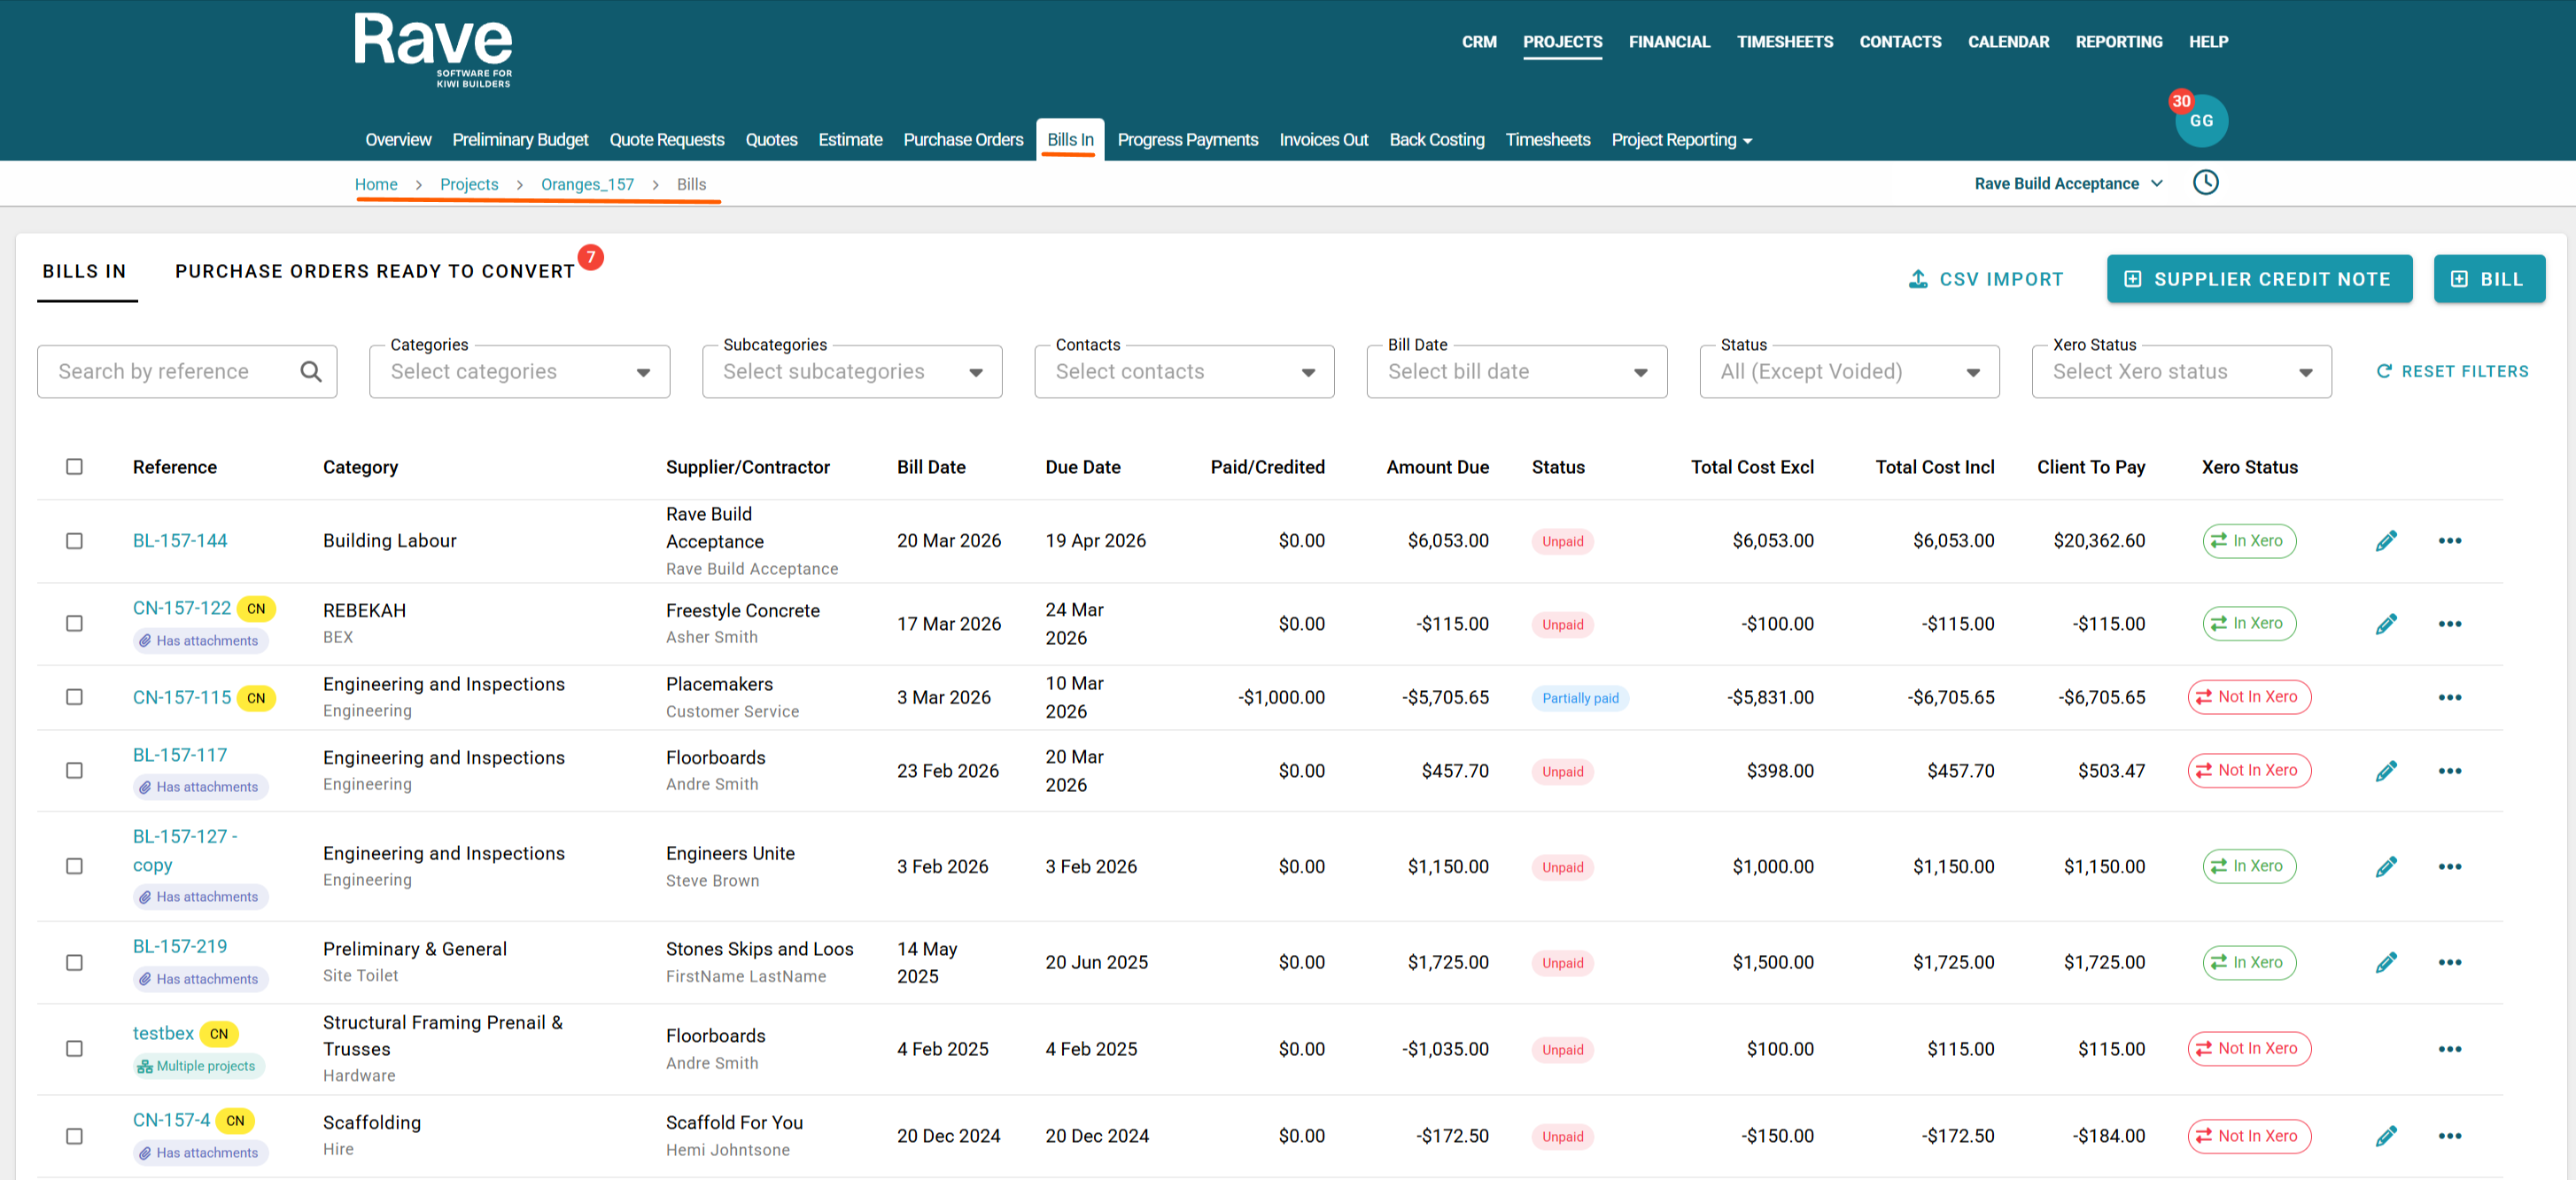
Click on the project's Bills In sub-tab
Click the Purchase orders ready to convert tab

Find the Purchase Order or orders you want to convert to a bill.
Note: You can multi-select more than one purchase order to create a single bill as long as it's from the same Supplier.

Click the +Create Bill button a model will pop up asking you to choose the Due Date and Destination tax mode which should be Auto. Click Convert.

The Supplier/Contractor name will populate automatically from the Purchase Order, along with all Line item information. From here, you can fill in the other fields and details to accept the bill.
Make sure to enter the Supplier's Bill/Reference number. If this is an internal bill, you can leave it blank, and Rave will auto-generate a Bill reference for you.
Add their bill attachment by clicking on the cloud icon and loading from your device, or by dragging and dropping the attachment into the cloud icon.
Check the Line Item pricing matches their bill. You can edit the line details one by one or use the bulk select icon to select many to either update or delete. 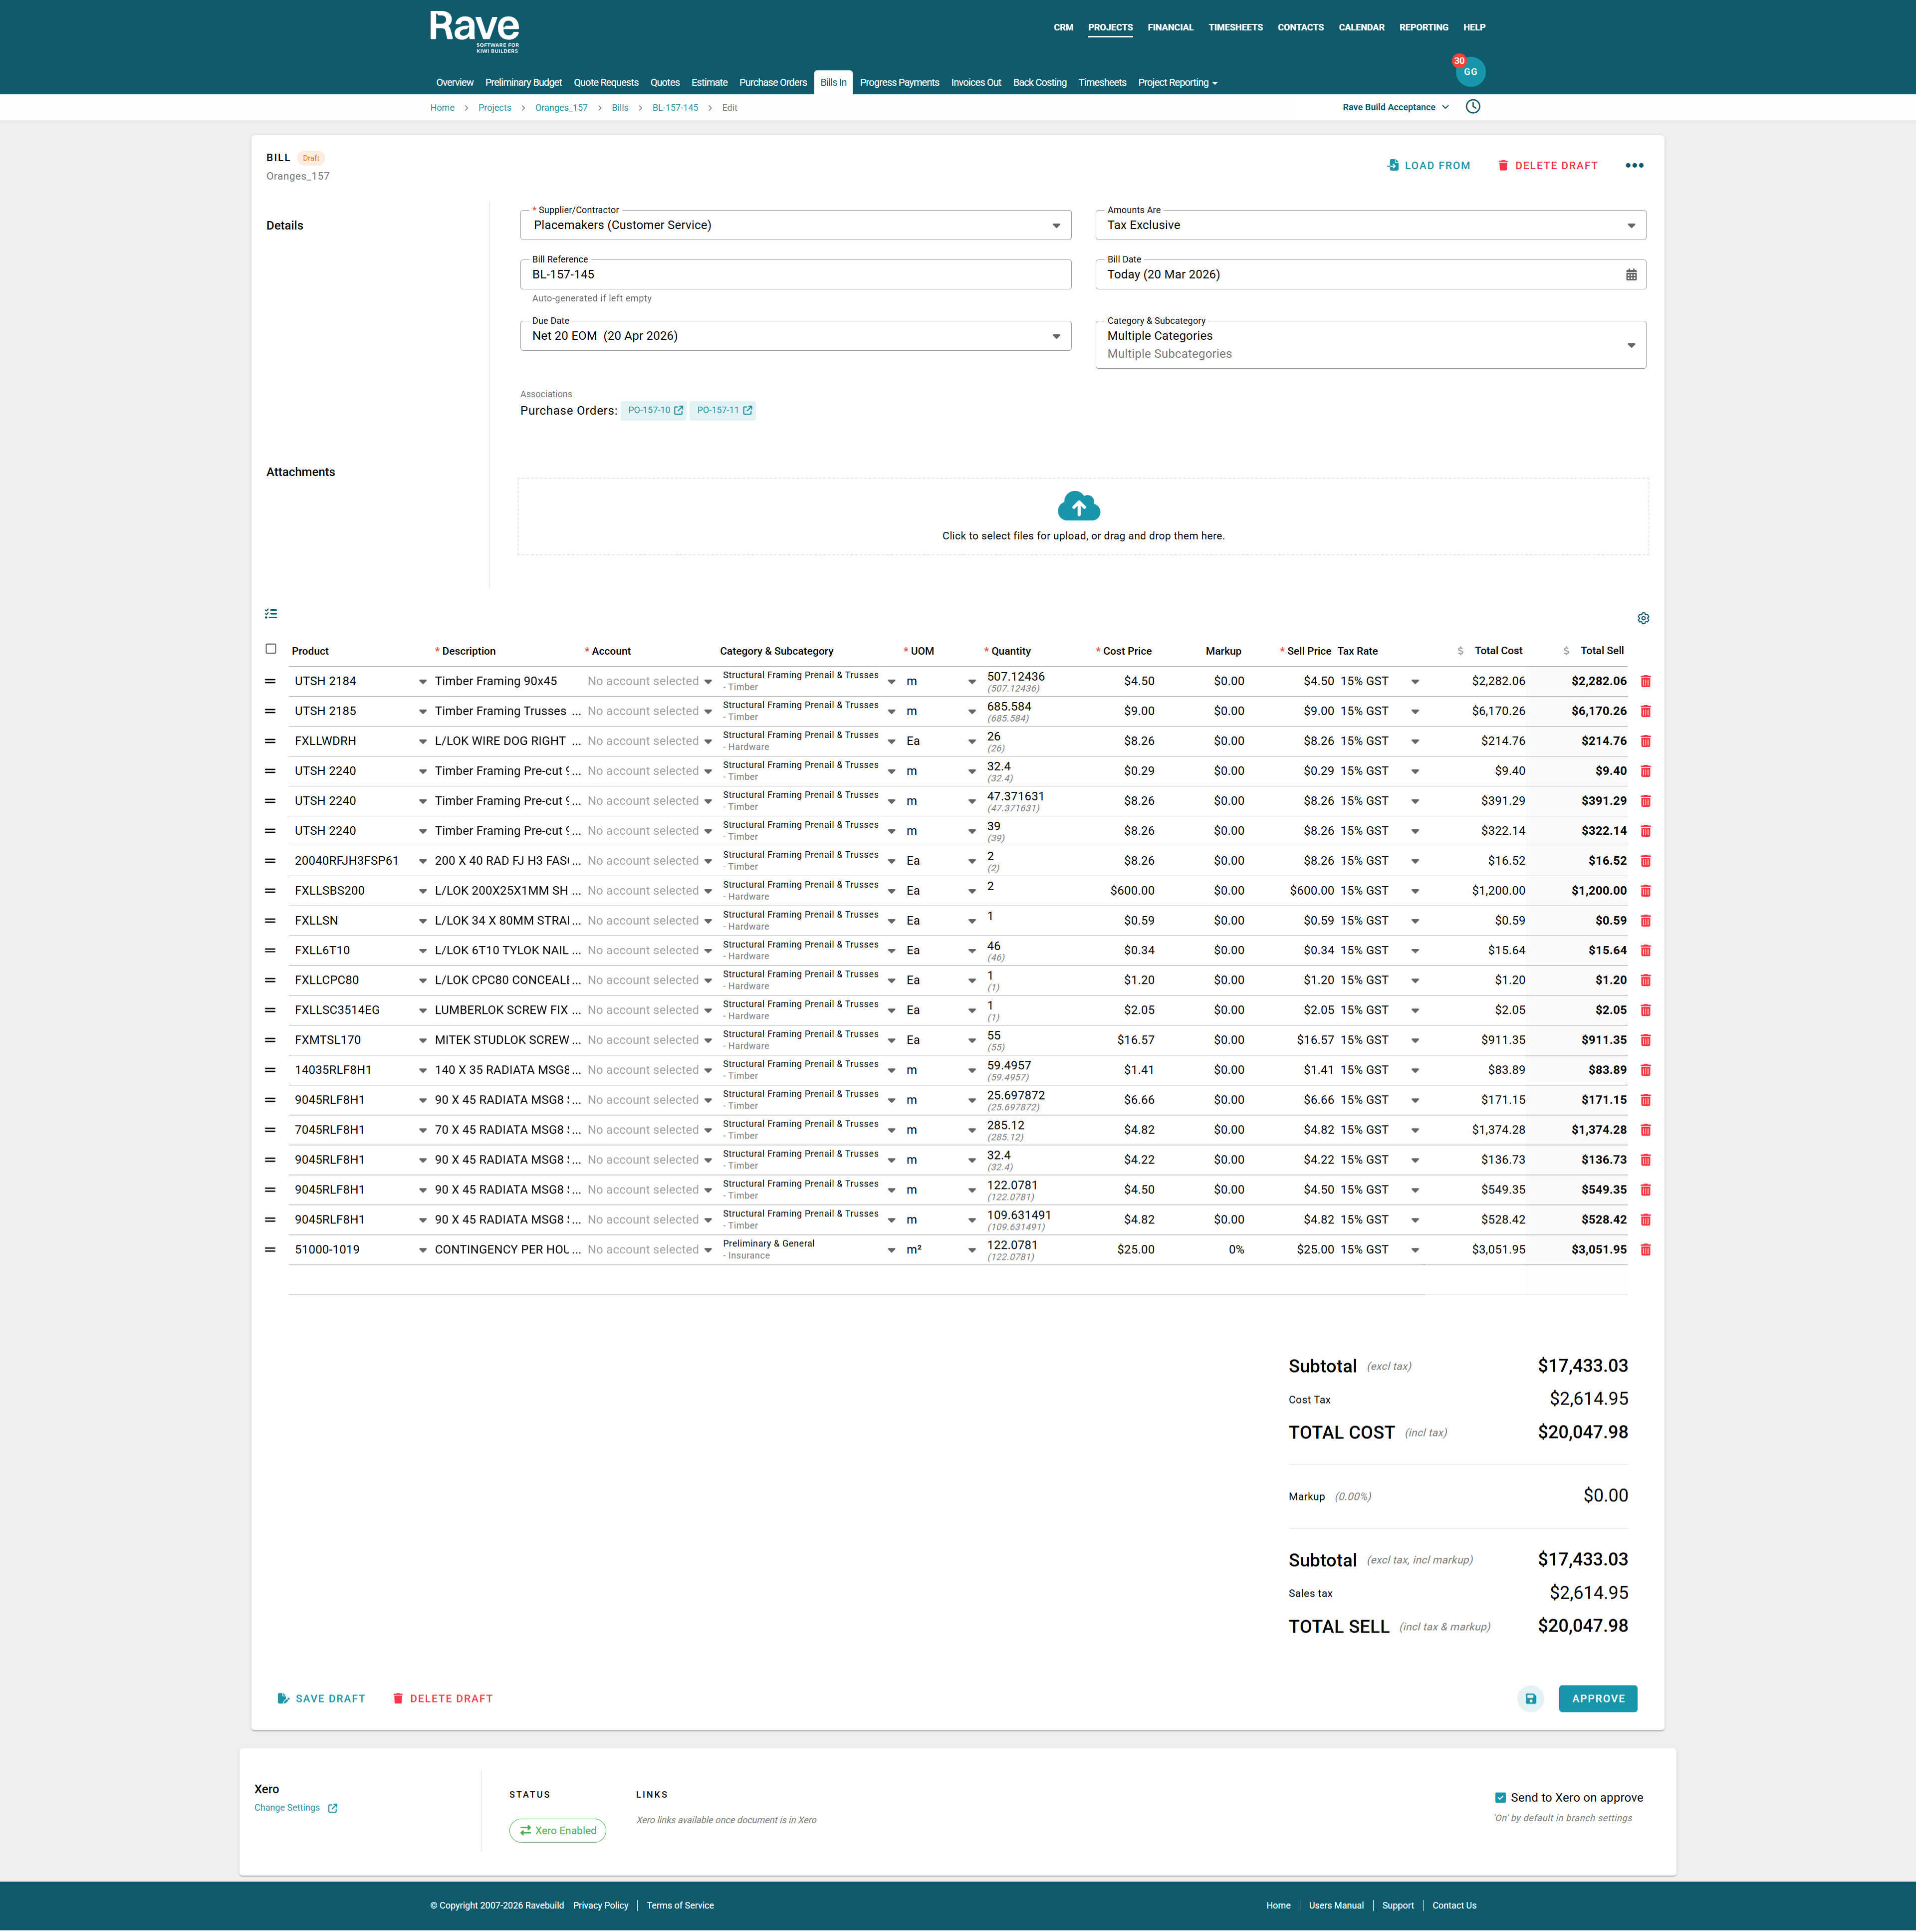
Once you're happy that the bill information is correct, you can save the Bill as a draft to come back to later or approve. If you are connected to Xero and press Approve, this will send your bill to Xero as a draft item. You will be returned to the Project Bill List page, where your new bill entry will be displayed.
Marking a bill as Non-Chargable
Under Branch Settings - Financial there is a slider to allow you to mark Supplier Bills as non chargable. This means they will be hidden from the Bills ready to convert table on the invoice out page and selecting them the Create Client invoice button will be disabeled.

When this slider is enabled a check box appears on the bill which you can select.
Once the bill is created it will have an icon with the words Non-Charfeable under the bill refefence.
If you select one of these bills the ability to create a client invoice is disabeled until you uncheck it.

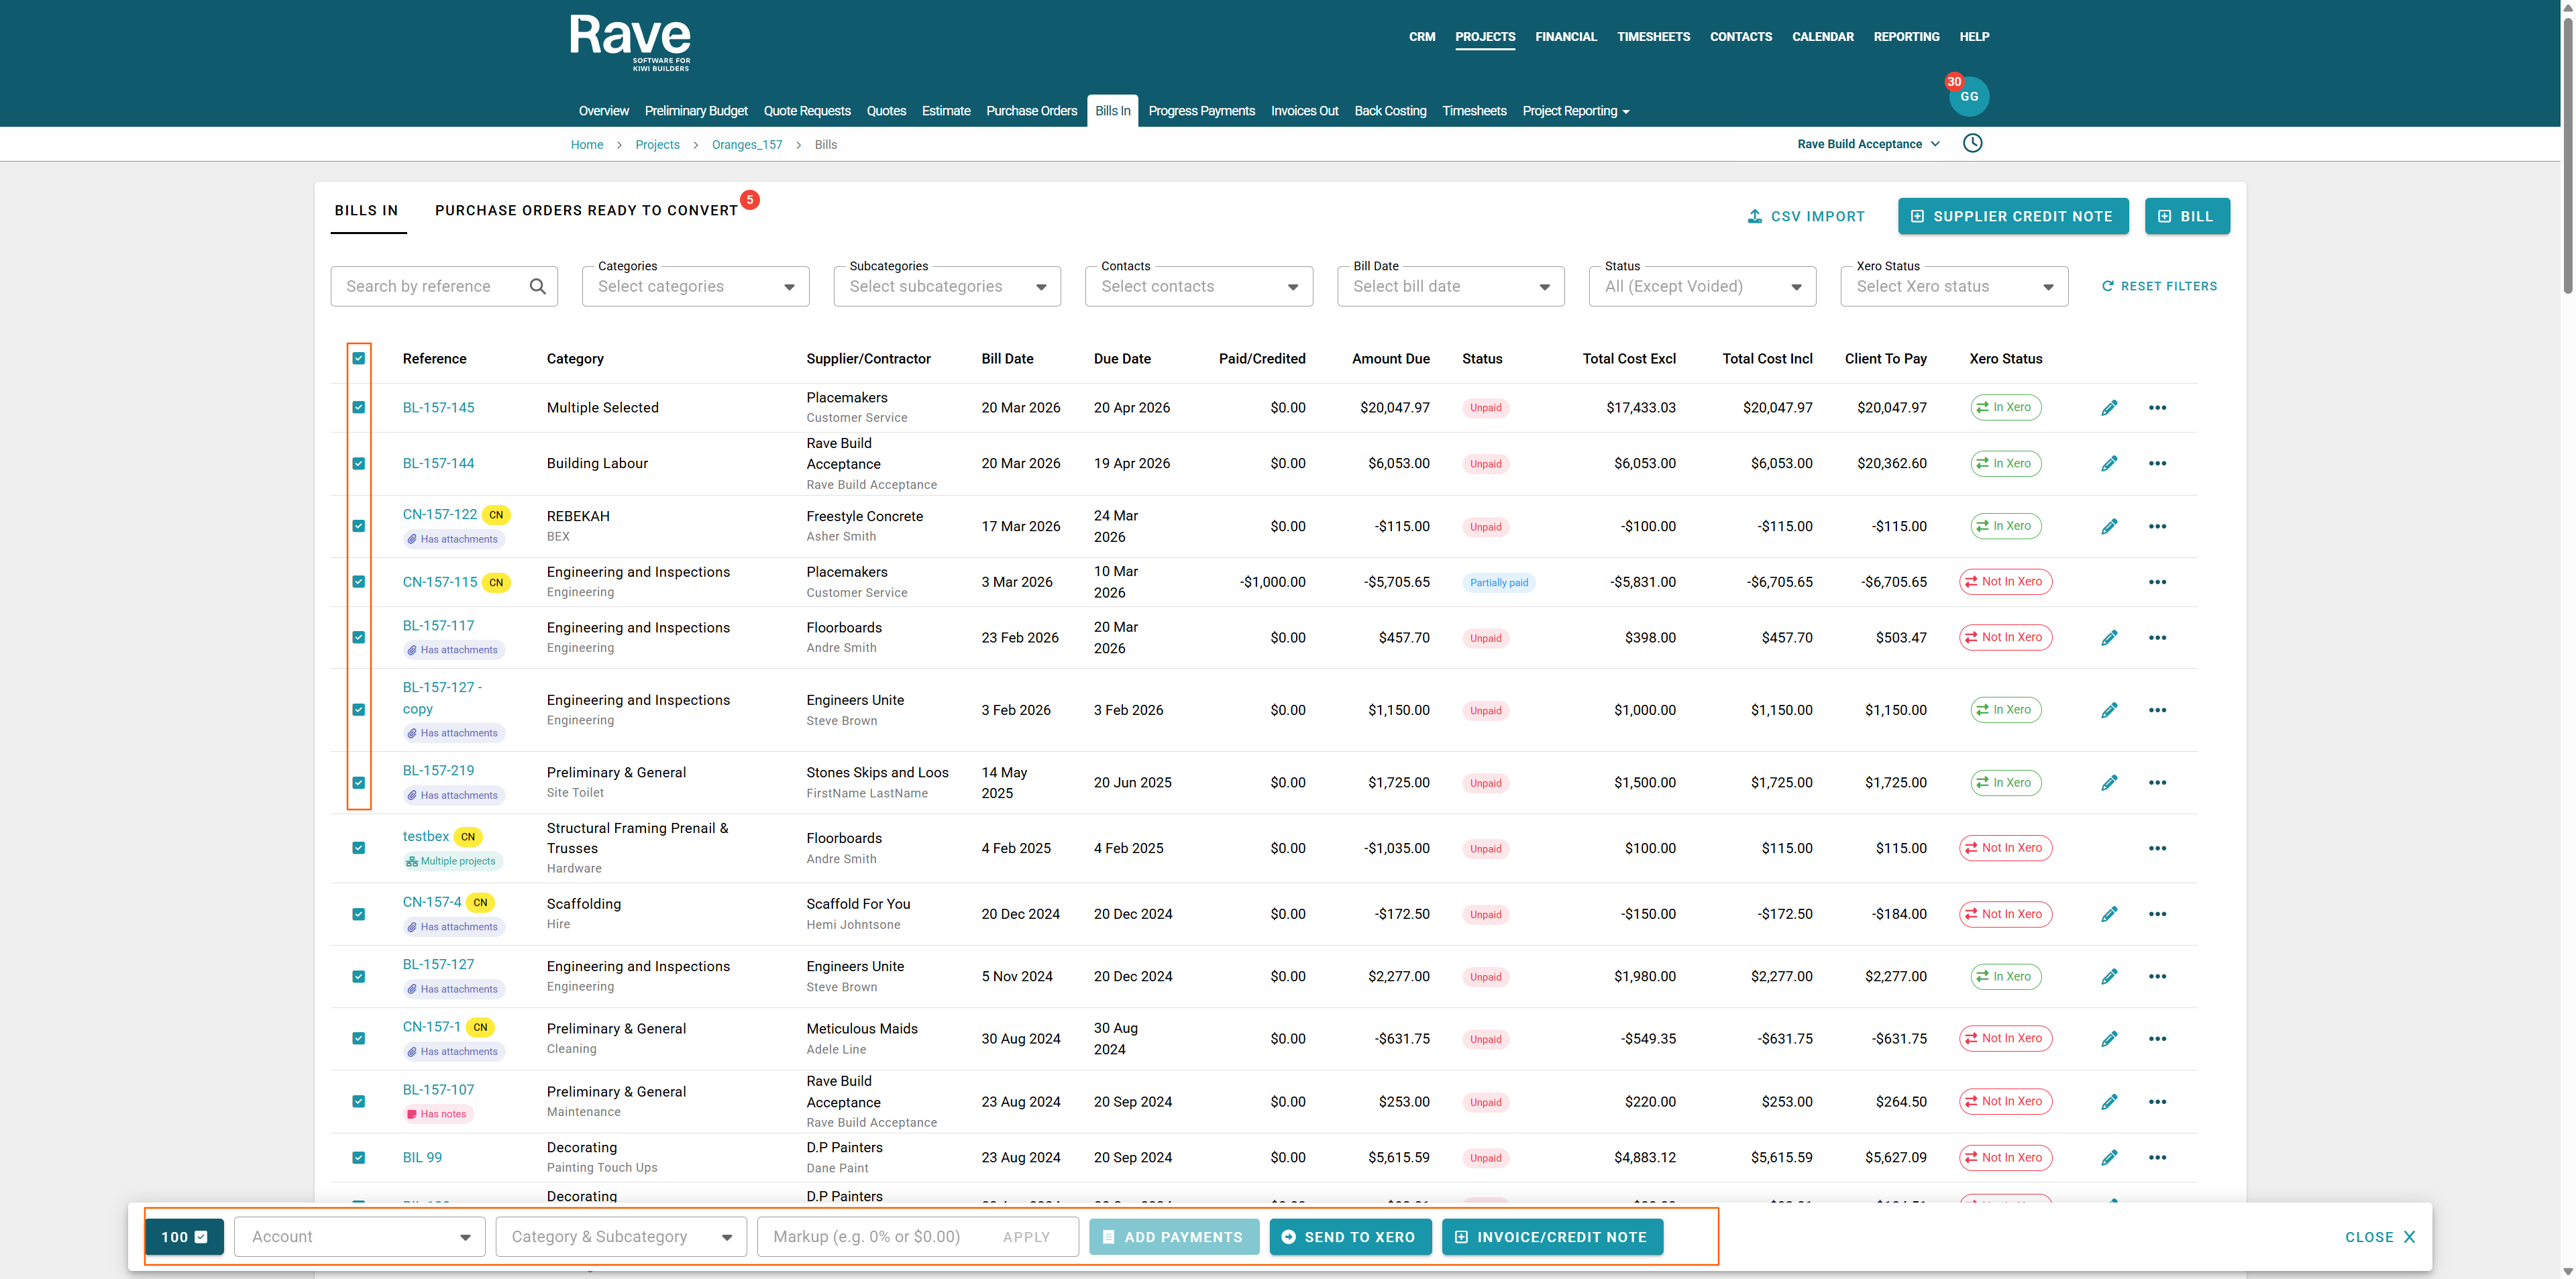
Bulk Action Items
- When bulk/Multi-selecting Bills in Draft status, you can Approve, Approve and Send to Xero or Delete from the bulk action bar.
- When bulk/Multi-selecting Bills in Approved Status with No payments, you can Send to Xero if not already sent, convert to Client Invoice, or Void. If not connected to Xero Payment Syncing, you can add a payment.
- When bulk/Multi-selecting Bills in Approved Status with payments, you can send to Xero if not already sent or convert to a Client Invoice. If not connected to Xero Payment Syncing, you can add/remove payments.
- When bulk/Multi-select any documents in any status, you can update the Account Code, Category and Subcategory or Markup
Note: To void a bill or credit note, you need to select void, type in void in the pop-up, and then press Void. This is to ensure that you are intentionally voiding the document and not 'accidentally' doing it. There is no option to bulk void as this is very risky and affects both Rave and Xero financials.
Was this article helpful?
That’s Great!
Thank you for your feedback
Sorry! We couldn't be helpful
Thank you for your feedback
Feedback sent
We appreciate your effort and will try to fix the article