The Branch Financial settings screen includes several sections where you can customise different aspects of your Invoice and Variation configuration.
To access your Branch Financial settings (with the appropriate permissions):
Click on your profile icon – the teal circle with your initials located at the top right of the page.
From the dropdown menu, scroll down and select Branch Settings | Financial settings
This will open the Branch Financial settings screen, which has three separate sub-tabs
This article will focus on Financial Defaults.
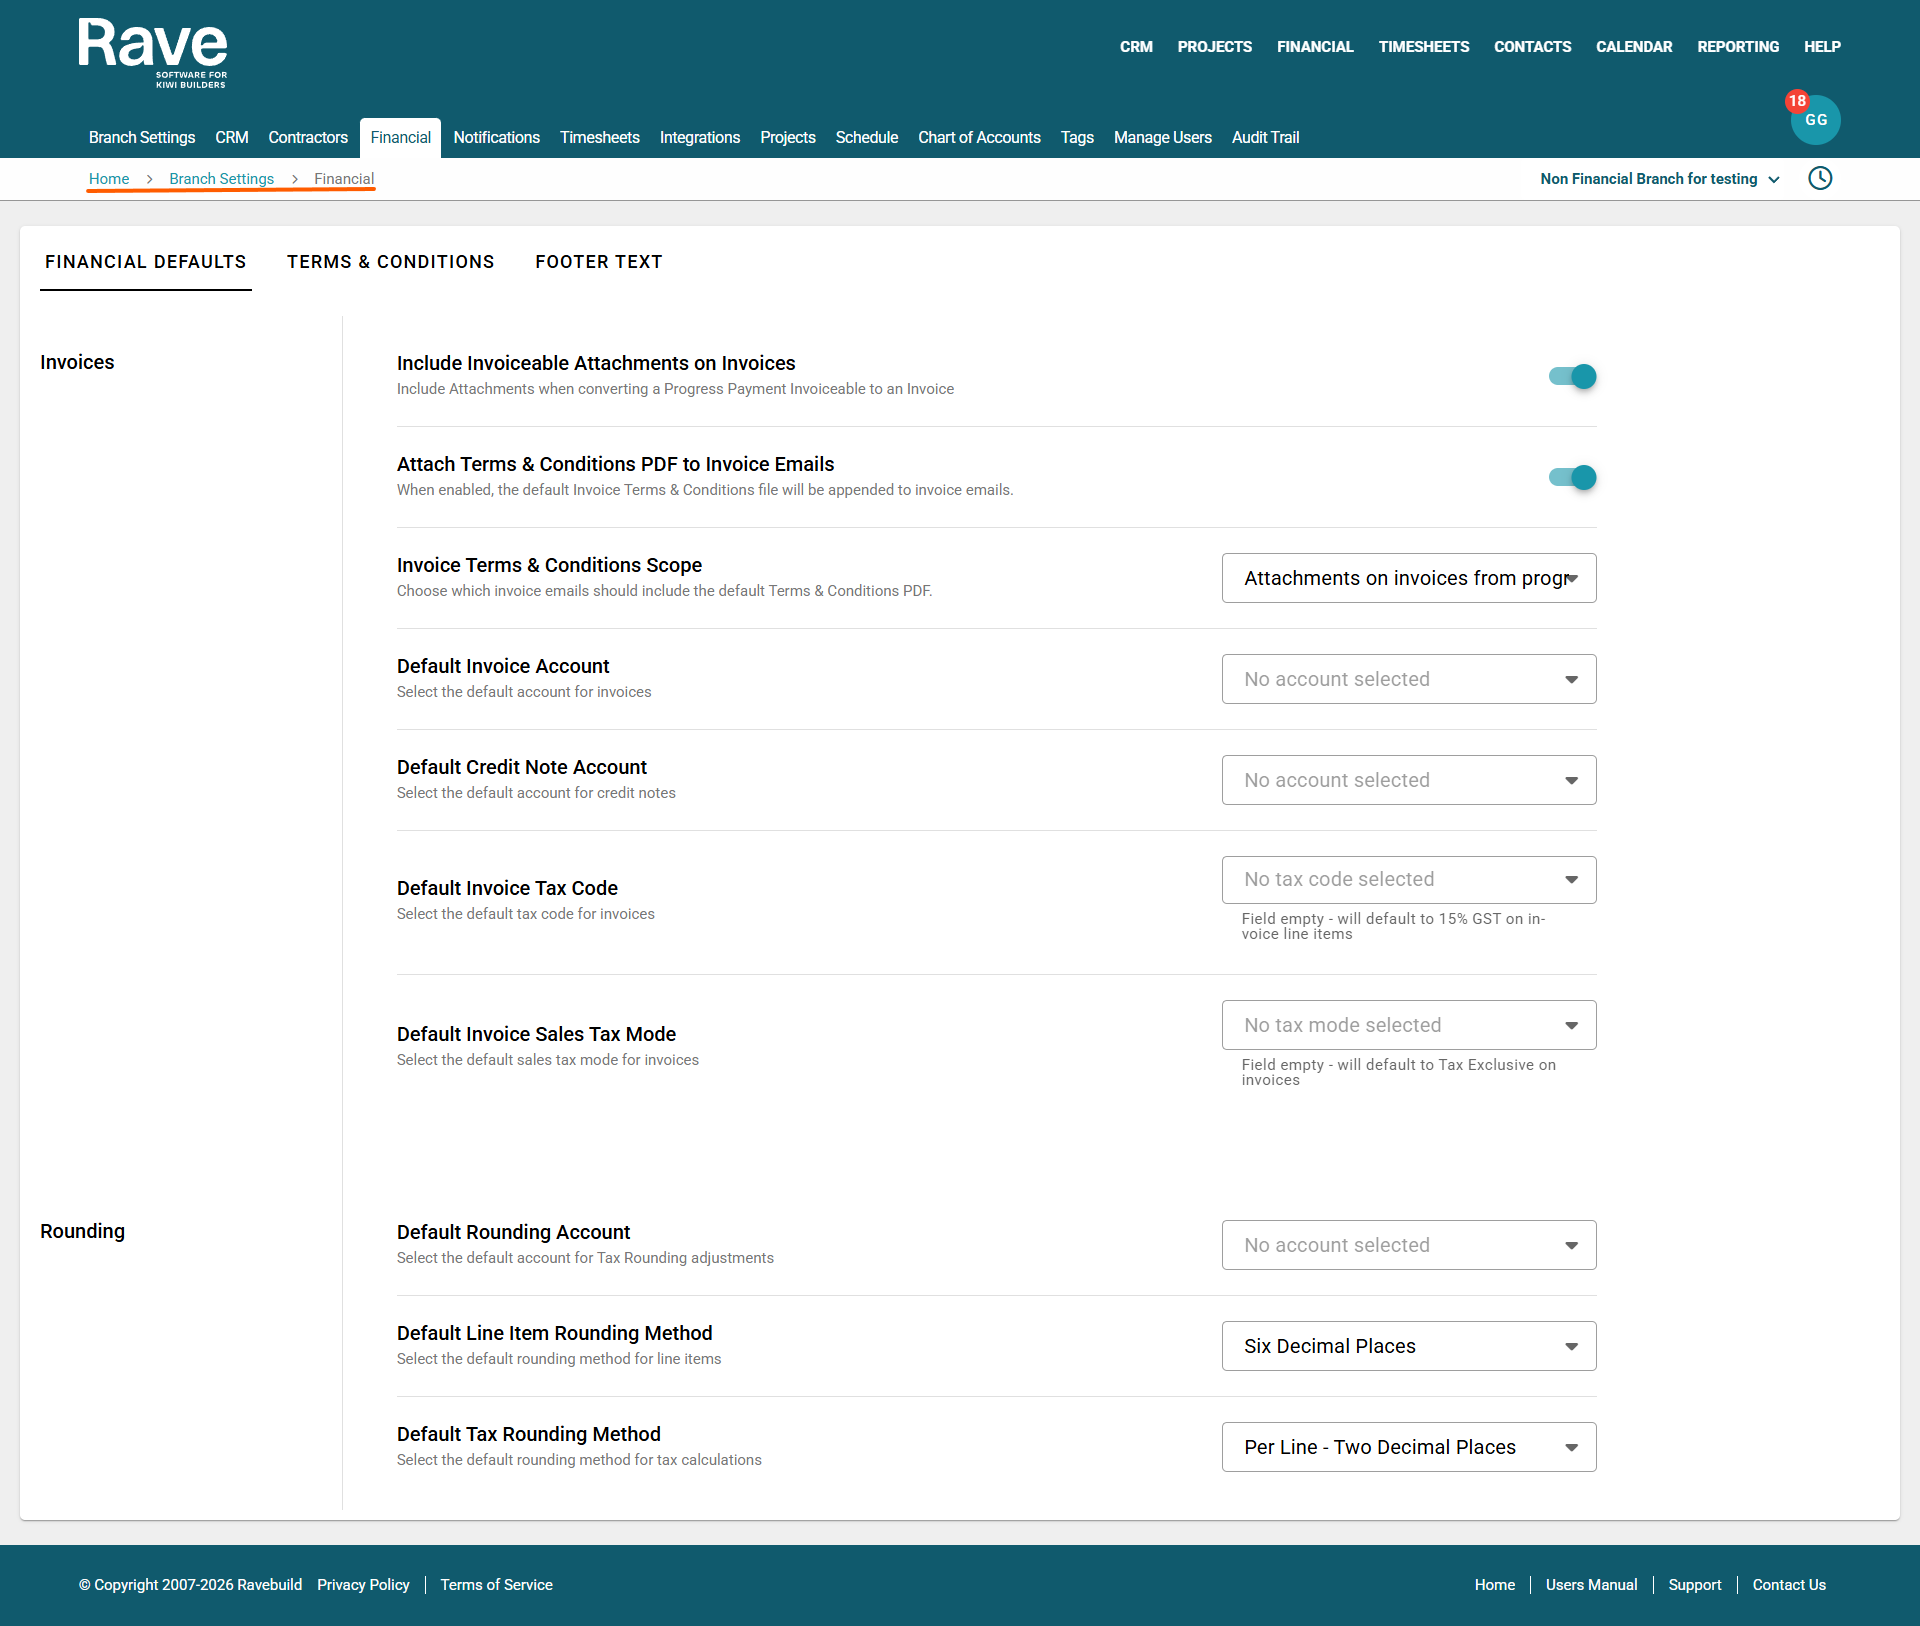
Include Invoiceable Attachments on Invoices
When enabled, Rave will include attachments when converting a Progress Payment Invoiceable to an Invoice, ensuring the documents flow through to Xero if connected.
Attach Terms & Conditions PDF to Invoice Emails
When enabled, the default Invoice Terms & Conditions file will be appended to invoice emails.
Invoice Terms & Conditions Scope
Choose which invoice emails should include the default Terms & Conditions PDF.
Default Invoice and Credit Note Accounts
When creating a financial document in Rave, if the account code is not entered, Rave will use the default branch code for that document.
Default Tax Codes
When creating a financial document in Rave, you can set the default tax type for each document type. The choice is No GST, 15% GST, Tax on Imports and Zero Rated
Default Tax Mode
When creating a financial document in Rave, you can set the default Document Tax type. The choice is Exclusive of Tax, Inclusive of Tax or No Tax.
Rounding
 Default Rounding Account
Select a default account code for code rounding to
Default Line Item Rounding Method
Select a default number of decimal places that your rounding will display (2, 4 or 6)
Default Tax Rounding Method
Select a default method: either Per Line - Two decimal places or Per document total
The Terms and Conditions sub-tab is where you can upload your Invoice Terms and Conditions, which can be attached to Client Invoices.
You can upload multiple versions of your Terms and Conditions, set one as your default, and delete any that are no longer needed.
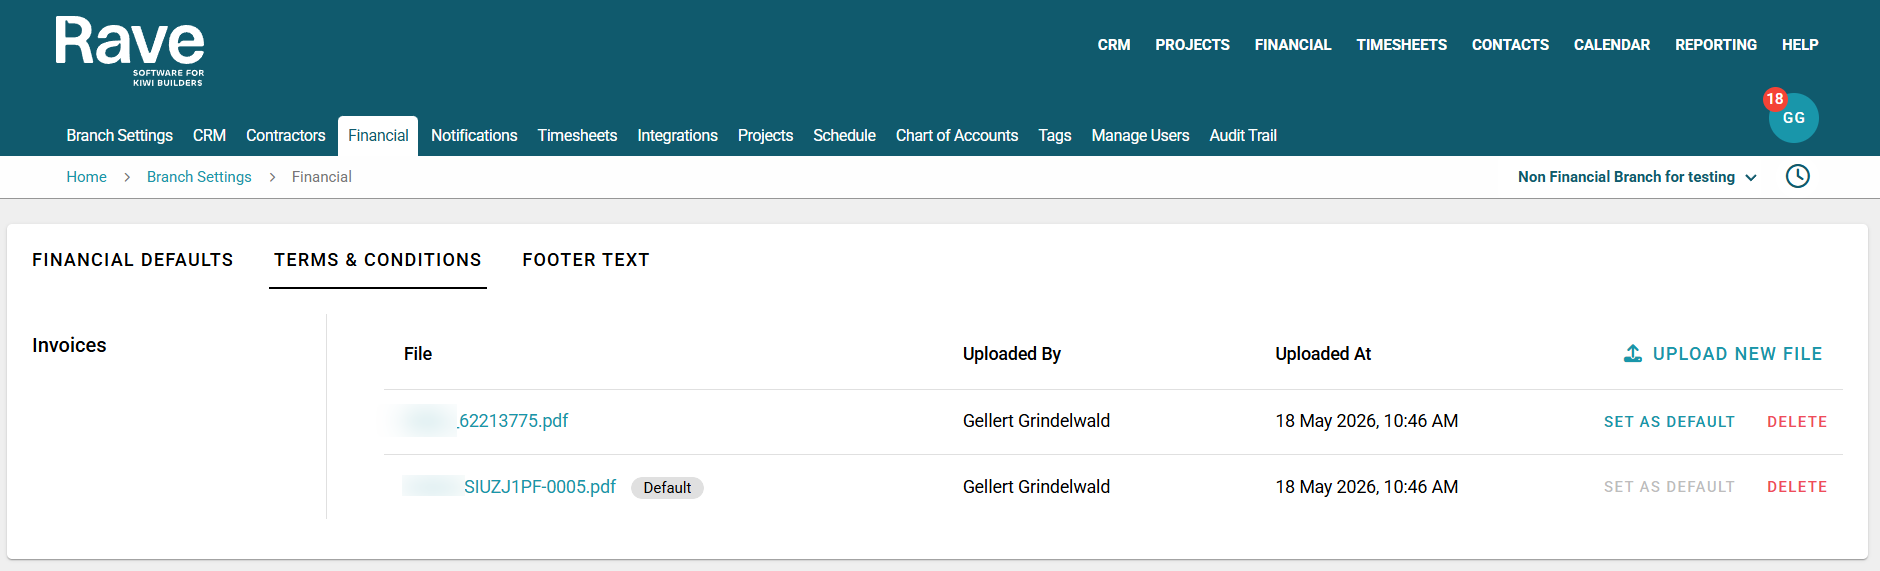
Uploading a New Document
To upload a new Terms and Conditions document:
Select Upload New File
Choose your document and click Open
Once uploaded, you can:
Set it as the default, or Delete
Managing Your Documents
Each uploaded file will display:
File name
Uploaded by
Date and time of upload
You can delete a document as long as it is not currently set as the default.
Note: Deleting a document here will not remove it from any previously created invoices. It will simply prevent it from being selected for future use.
Footer Text
The Footer Text setting allows you to enter custom text that will appear at the bottom of your Variation and Invoices documents.
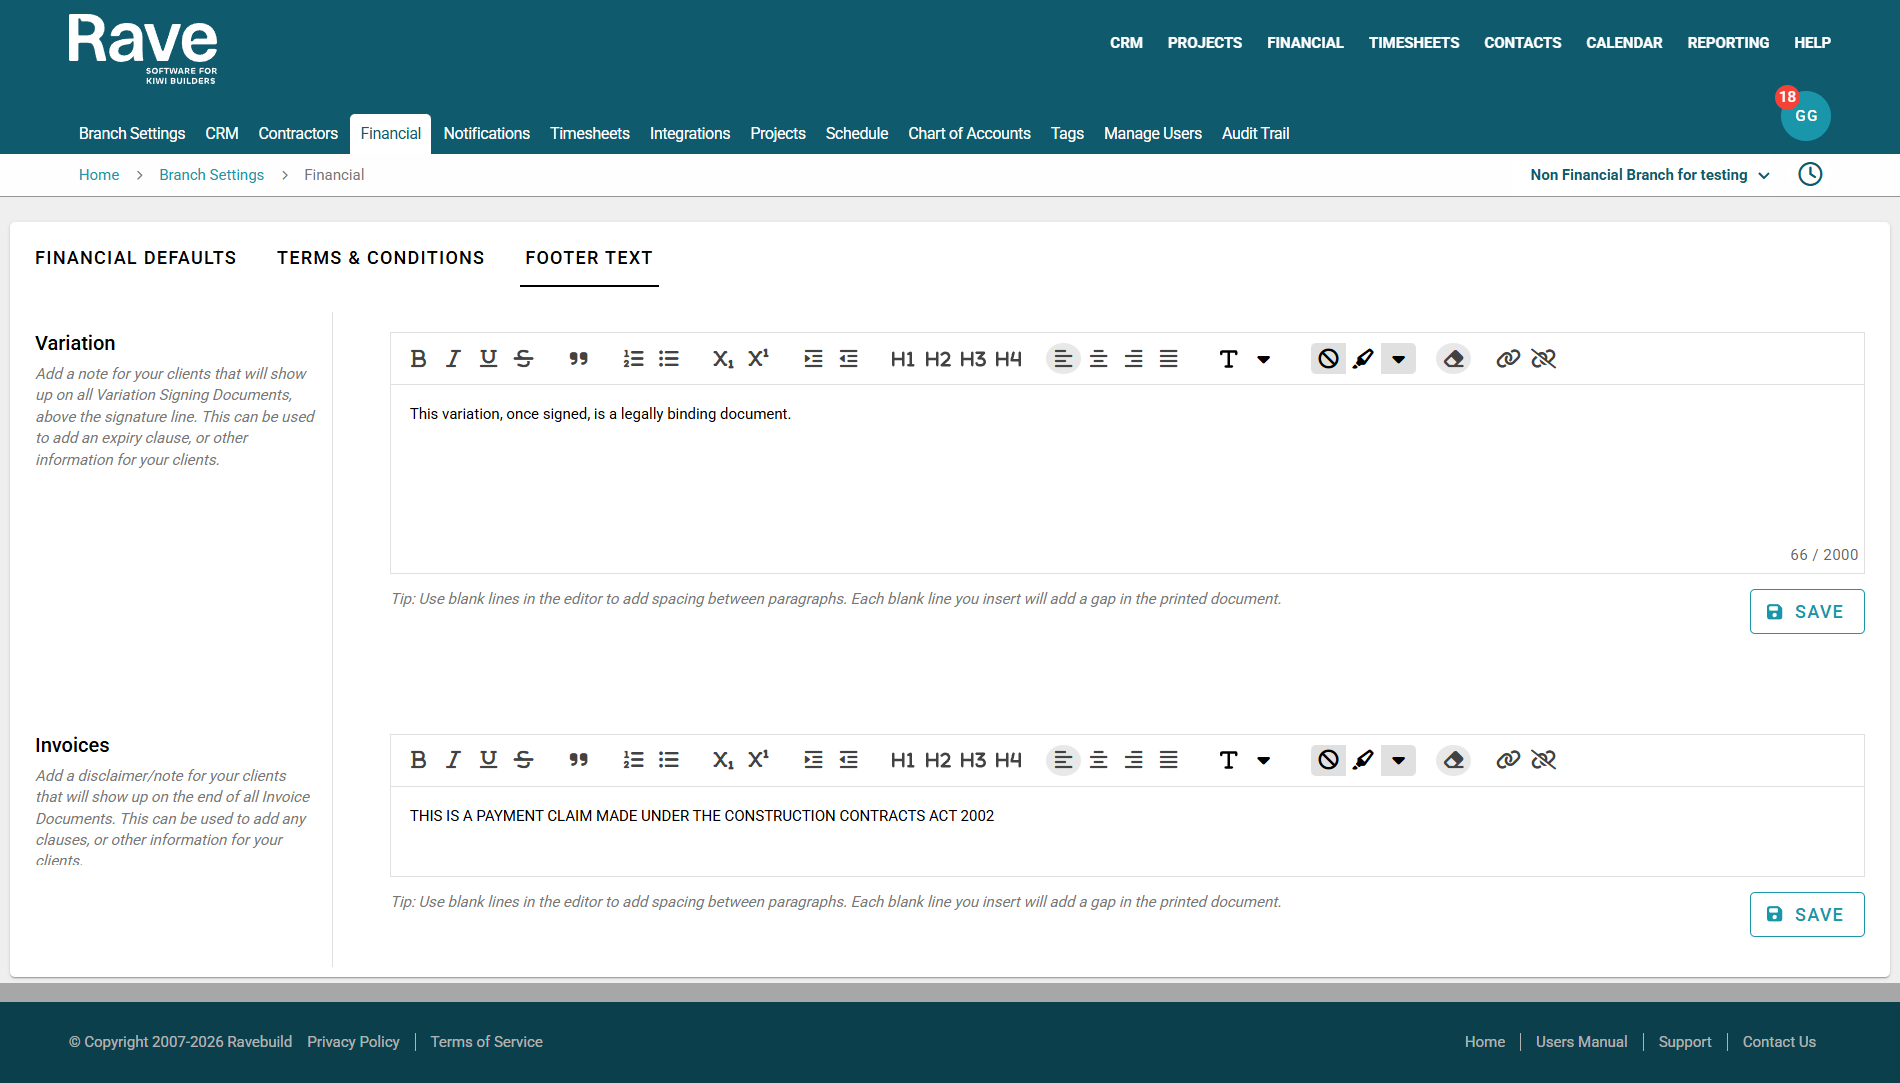
How to Use Footer Text
These fields can be used to add:
Disclaimers
Important notes
Additional information for your clients
This ensures clients see key information at the end of every document, helping to clarify expectations and reduce misunderstandings.
To Add/Edit one of your footer options.
- Choose which footer you wish to add/edit
- Type in the text and add any formatting,
- Press Save
Note: You cannot add images to the footer text.
Was this article helpful?
That’s Great!
Thank you for your feedback
Sorry! We couldn't be helpful
Thank you for your feedback
Feedback sent
We appreciate your effort and will try to fix the article