To set up Office 365 Email Integration, please click here to view the help article.
To read about My External Mail, please click here to view the help article.
To read about My Mail, please click here to view the help article.
To learn about General Mail templates, please click here to view the help article.
To learn about custom email signatures (including using images and hyperlinks), please click here to view the help article.
The Branch Mail feature allows users to manage and view all mail communications for their entire business across the entire Rave system from one central location.
Permissions
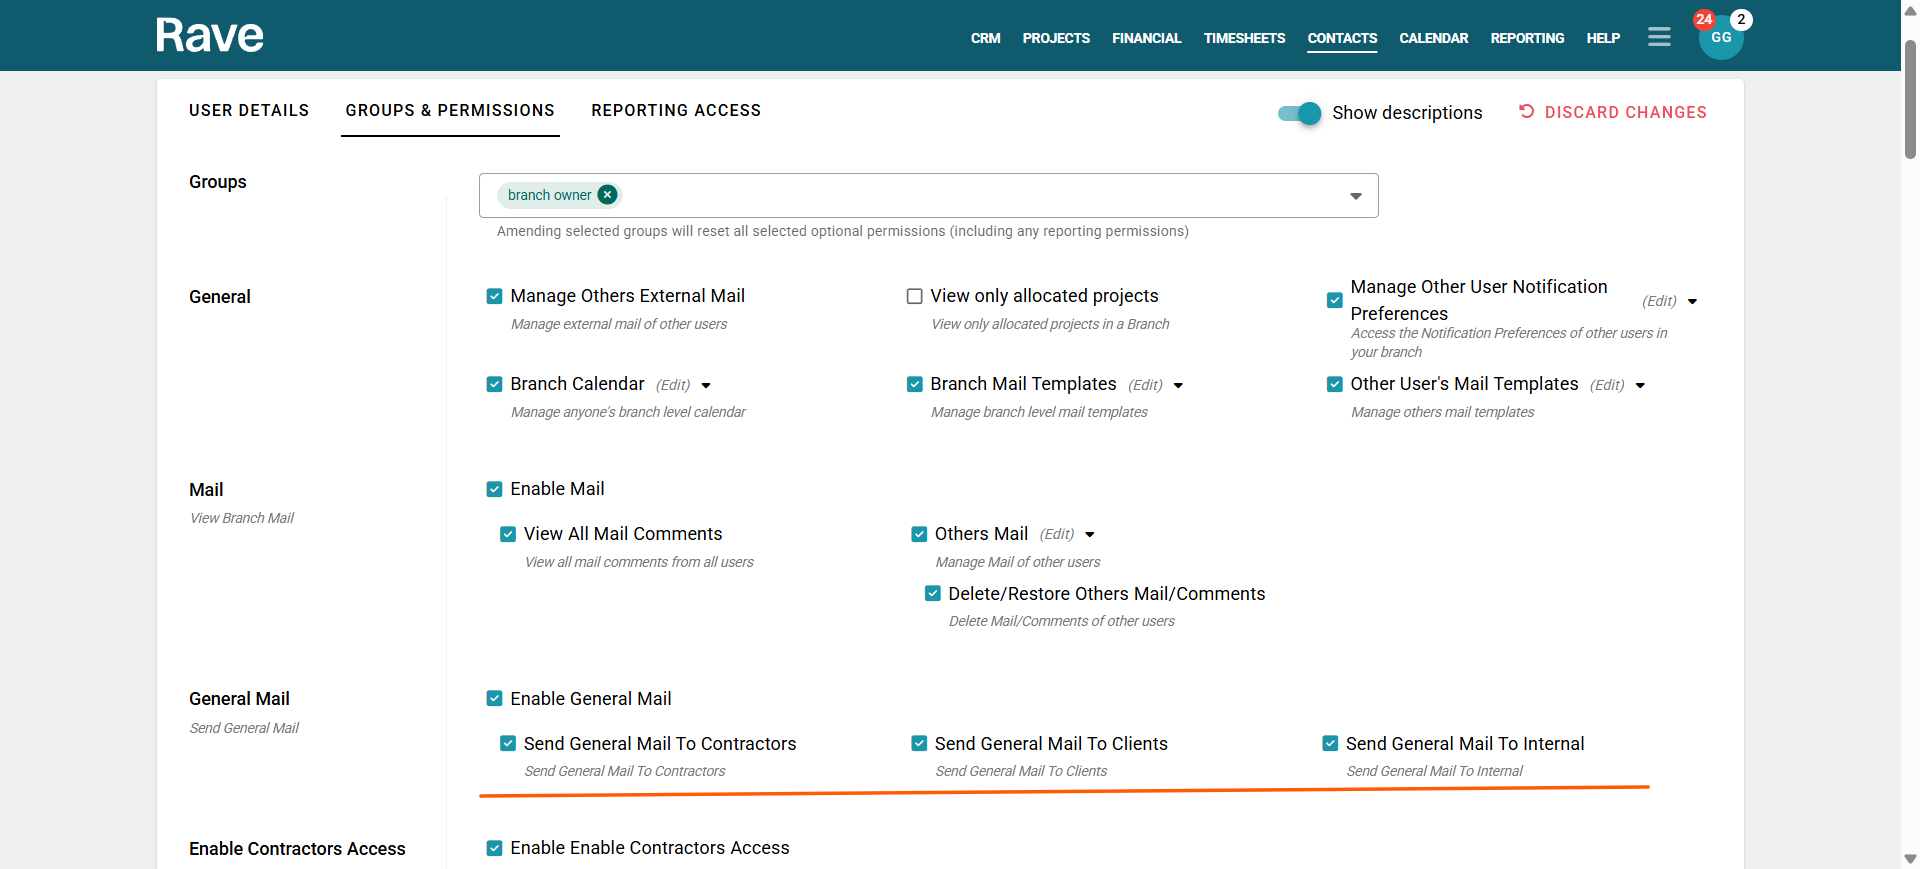
From the Manager Users setting there is now separate Mail permissions depending on the user group.

Branch Mail Permissions
The Branch Mail permissions sit under Branch Mail. This is a tab that shows ALL mail from CRM, project and General mail all in one place.
View All Mail Comments - View All mail comments in your branch associated to mail
Others Mail - View and Manage Mail of all users in your branch
Delete/Restore Others Mail/Comments - Delete/Restore Mail of all users in your branch

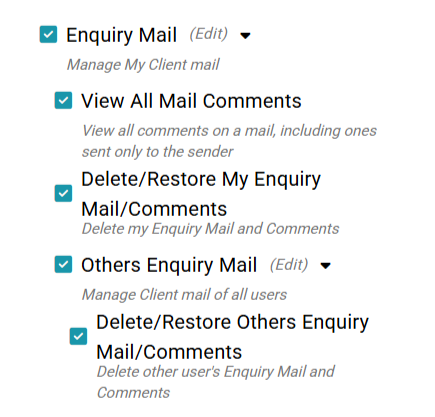
CRM Specific Mail Permissions
Enquiry Mail - Participate in and manage My own Enquiry Mail
View all Mail Comments - View all comments on a mail, including ones sent only to the sender
Delete / Restore My Enquiry/Mail Comments - Delete my Enquiry Mail and Comments
Others Enquiry Mail - Manage Client mail of all users
Delete / Restore Others Enquiry/Mail Comments - Delete other users Enquiry Mail and Comments
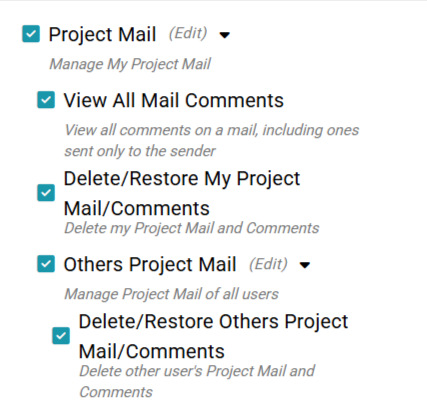
Project Specific Mail Permissions
Project Mail - Participate in and manage My own Project Mail
View all Mail Comments - View all comments on a mail, including ones sent only to the sender
Delete / Restore My Project/Mail Comments - Delete my Project Mail and Comments
Others Project Mail - Manage Project mail of all users
Delete / Restore Others Project/Mail Comments - Delete other users Project Mail and Comments
General Mail Permissions
Send General Mail To Contractors - Enabled the user is able to create general mail to all contractors in your branch
Send General Mail to Clients - Enabled the user is able to create general mail to all Clients in your branch
Send General Mail to Internal - Enabled the user is able to create general mail to all internal staff in your branch
By default, General mail is only enabled for Branch Owners, so that you can decide per person who is able to create General mail. We recommend allowing only specific users to bulk mail Clients and Contractors, as once sent, you cannot get the mail back. Site Staff and Timesheet users have no options to send general mail; all other users, including Site Managers, have a per-group option.
Note: Mail in trash will be permanantly deleted after 90 days
Accessing Branch Mail
Go to your User Profile.
On the Mail tab click the hyperlink icon to open the My Mail and Branch Mail tab
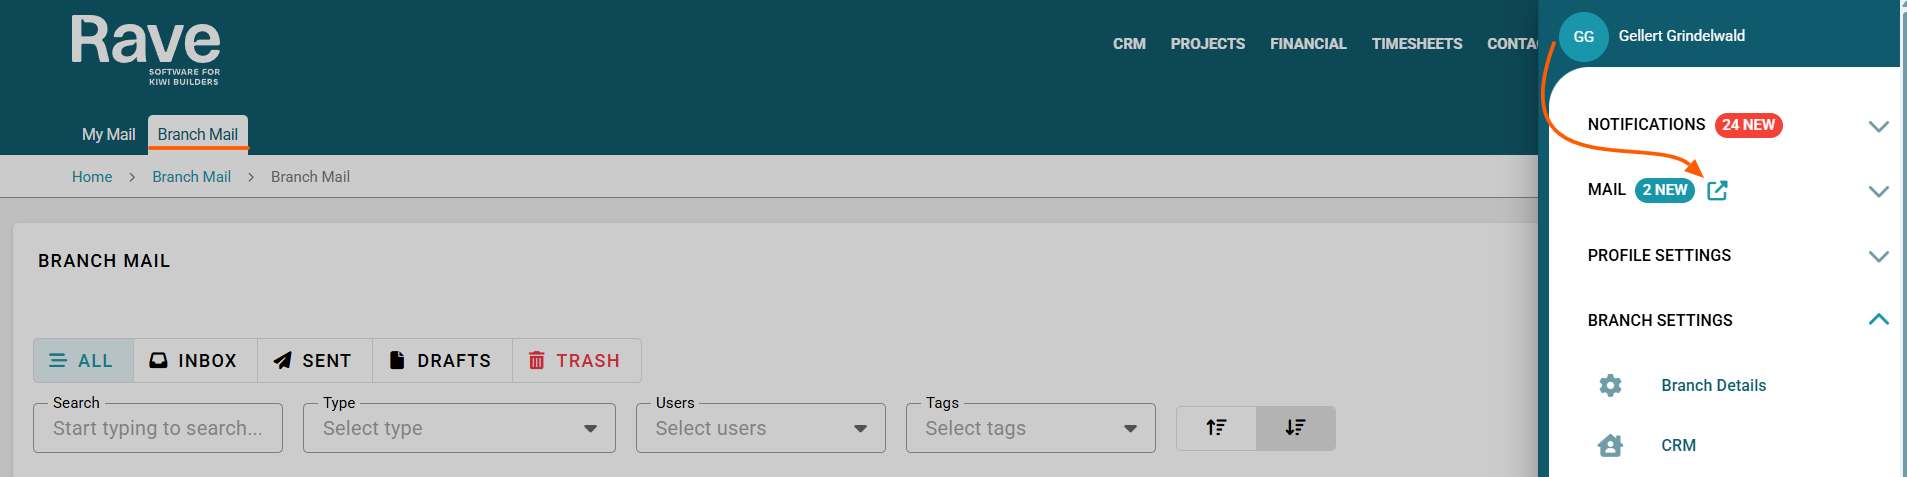
Select Branch Mail. From here you can view and manage all mail associated with your Rave Account.
Within Branch Mail, you can switch between different mail views:
All Mail – Displays Inbox, Sent, and Draft messages.
Inbox – Displays received mail only.
Sent – Displays mail you have sent.
Drafts – Displays saved draft emails.
Trash – Displays deleted mail (available with the correct permissions).
To the right of each mail you will see:
Envelope icon - This will show you the number of times the mail has been opened and the time stamp of the first open (This feature may not be enabled on some people devices due to add or pop upblockers so cannot be enforced by Rave)
Eyeball icon - By clicking the eyeball icon you can choose to make mail visible to you only or visible to all users with permission to view others mail. This does not hide mail from the recipients
Tag icon - The mail tag/s can be added or removed by clicking here
Trash can icon - With permission you can delete Mail

Using your new signatures
When creating Mail, there is now a Signature box for you to select a signature. By default, we will already insert your default signature when sending. However, if you wish to have a different one, simply choose it from the drop-down. If you click Preview, you can view the signature before you choose which one you wish to use.
Note: The signature will not show on the email it attaches as it's sent from Rave

Delay Sending/Schedule Mail
You can choose to delay or schedule sending an email within Rave. This feature is available in CRM Mail, Project Mail, My Mail or Branch Mail.
When creating a new email, you will see the Schedule Send option. Click this button.

Now choose the date and time you would like the email to be sent, and press Send.
Note: You cannot schedule a day or time that has already happened.

The email will then appear as scheduled until it is sent.

You can unschedule the email by clicking the X beside the scheduled icon.
This will revert the email to a draft, allowing you to reschedule it or send it immediately.
If you have connected Office 365 email syncing, you will see new filters for Linked and Unlinked Mail, and any external mail associated with you will display the purple “Linked” icon.
Users with permission to view other people’s public mail will be able to see emails that have been marked as Shared and linked to a Project or Enquiry.
External emails do not have a delete option. Instead, you can manage your own mail using the privacy (padlock) to mark them as shared or private.,You can also unlink using the chainlink icon, and tag mail using the tag icon.

Searching for Mail
At the top of the page, you will find a search bar.
You can use this to perform a keyword search to quickly locate specific emails within the system.
Bulk Action Bar
By selecting all mail (with or without filters applied), you can use the bulk action bar to:
- Update mail tags in bulk
- Delete mail (permission required)
You can also filter mail to quickly locate specific types of communication and users.
Available filters include:
Enquiry Mail - All Enquiry Mail
Project Mail - All project Mail
General Mail - All general mail
Select User - This filter allows you to view mail specific to a user (internal and external) in your branch
Mail Tag Filter
Filter emails by assigned mail tags.
Sorting Mail
Mail can be sorted to make reviewing messages easier.
Use the sorting arrows located in the top right corner of the page to organise mail:
Ascending – Oldest to newest
Descending – Newest to oldest
Creating New Mail
Select New Mail.
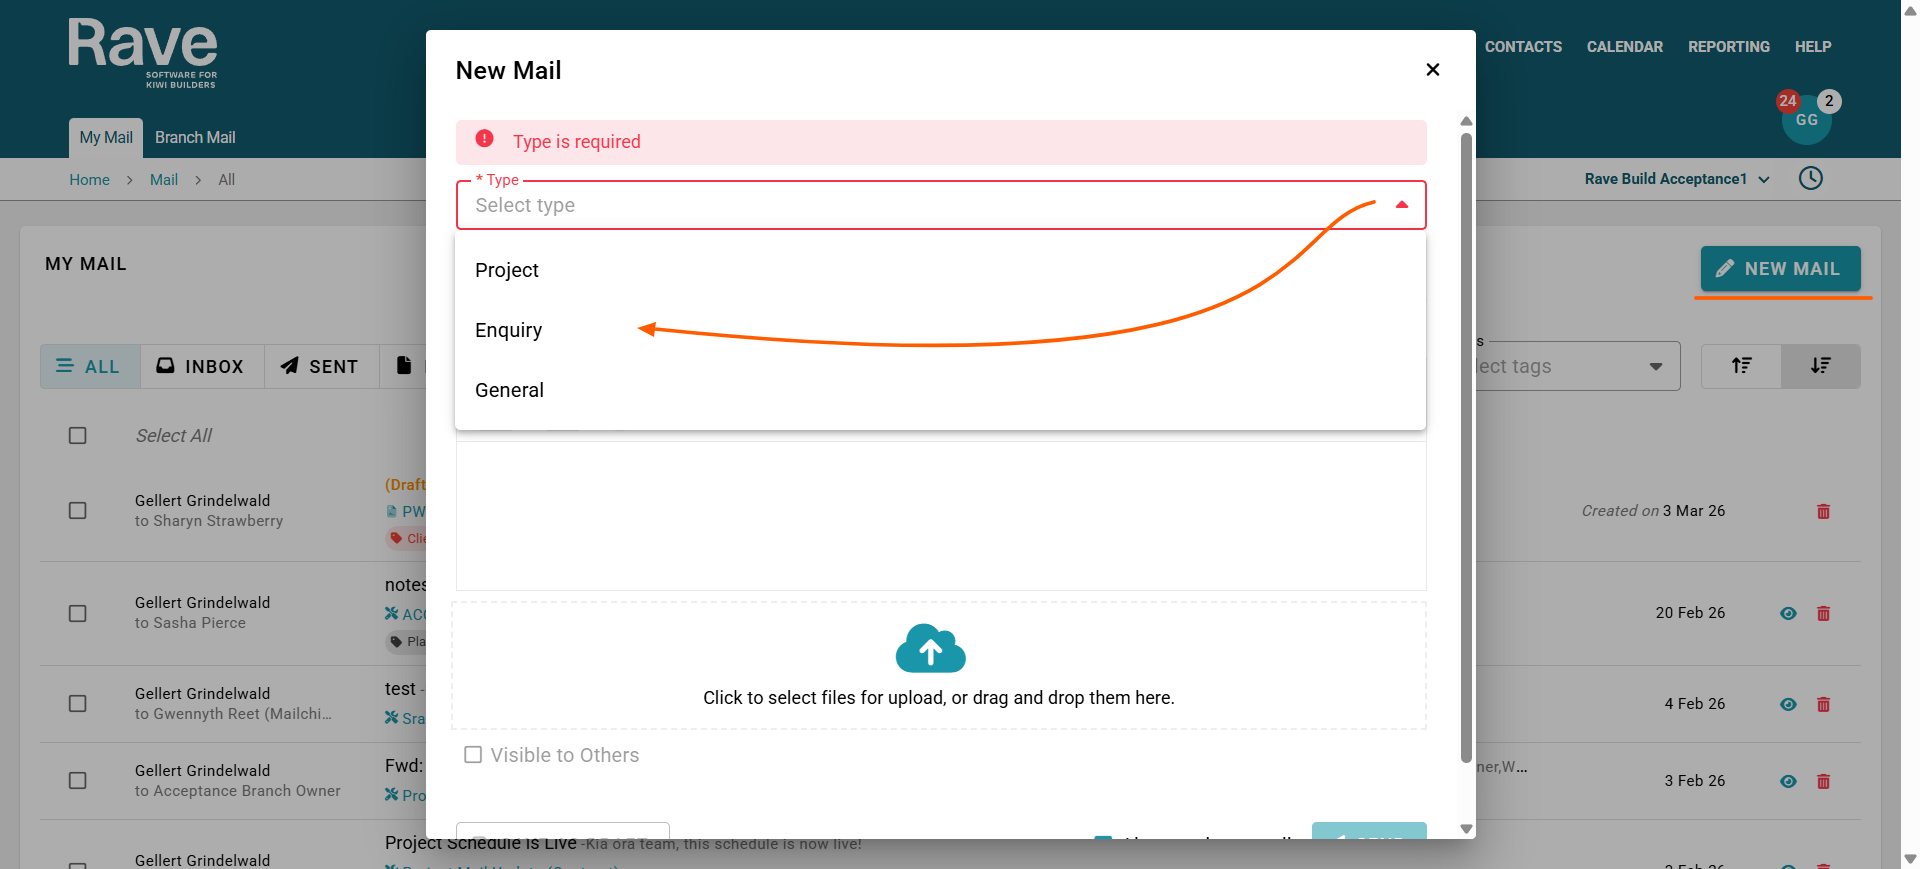
Choose the type of mail you would like to create (permissions required):
Project Mail – linked to a specific project
Enquiry Mail – linked to a specific enquiry
General Mail – general branch communication
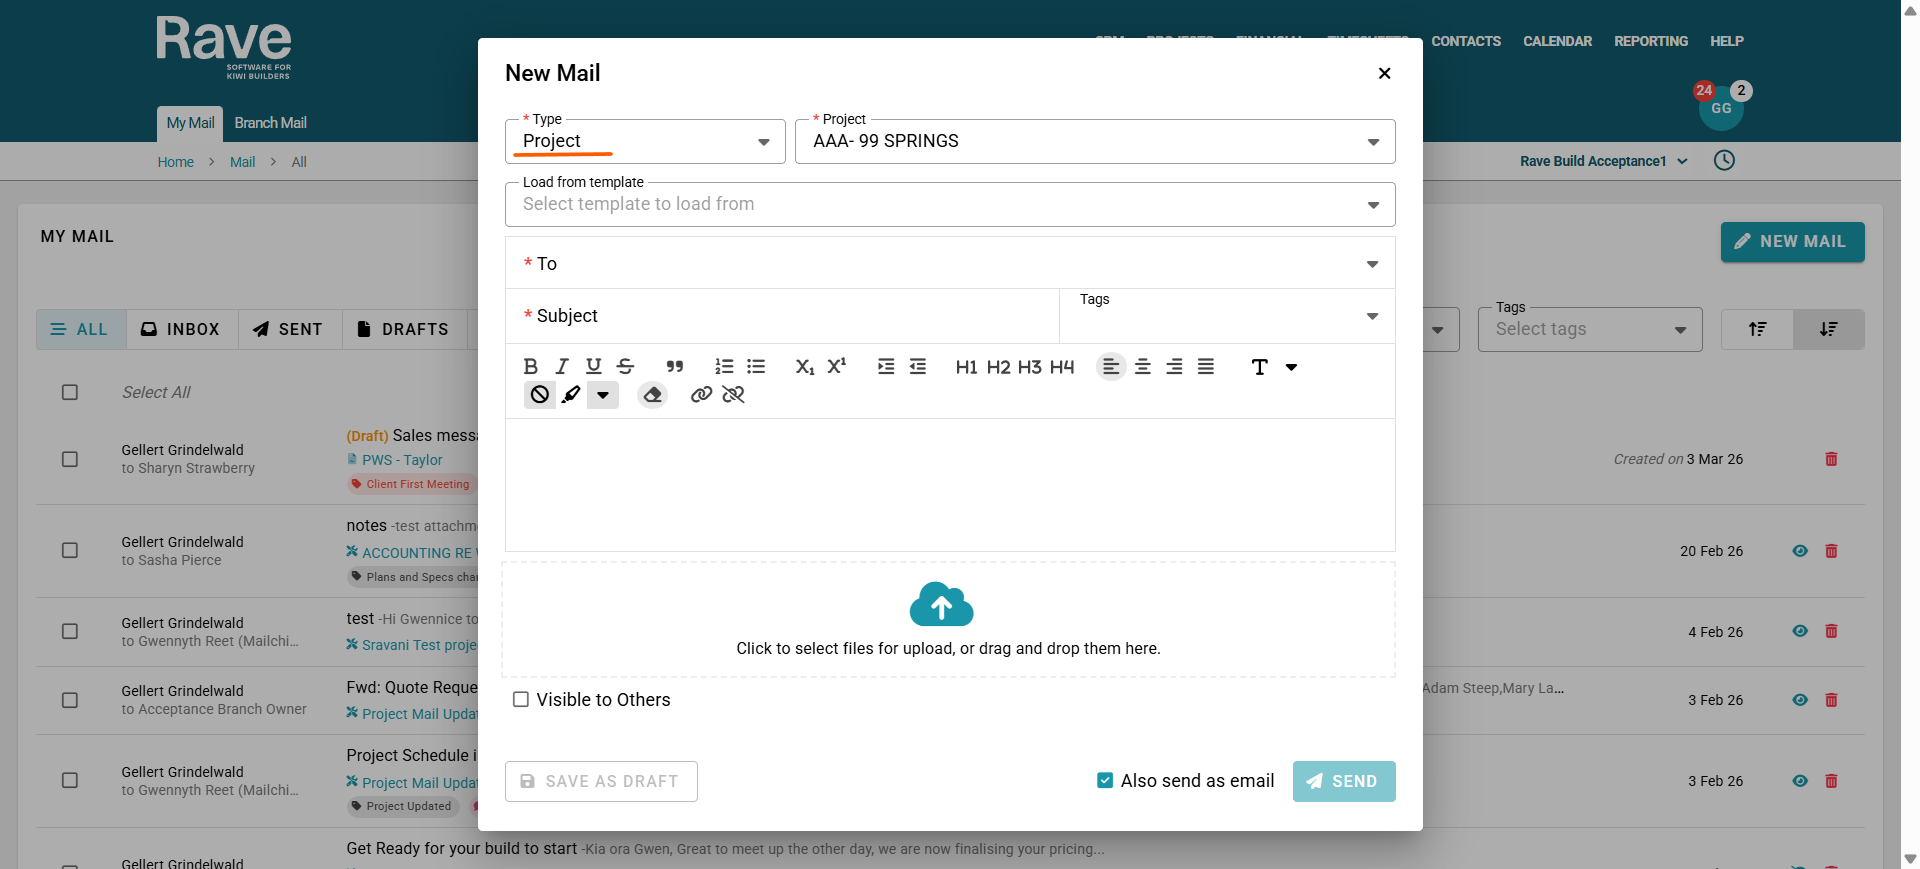
Creating Project or Enquiry Mail
When creating Project Mail or Enquiry Mail, you will be prompted to select the specific project or enquiry the email relates to.
Once selected, you will complete the following fields:
Template – Select a template to load (if applicable).
Recipients – Choose who the email will be sent to.
Subject – Enter the subject line for the email.
Tags – Apply relevant mail tags (if applicable).
Email Body – Write the content of the email.
Attachments – Add any relevant files.
You will also need to choose the visibility settings for the email:
Visible to all users who have permission to View Others Mail, or
Visible only to participants within the email thread.
Once the email has been sent, it will also appear in the Mail section of the associated Project or Enquiry, ensuring all related communication is stored in the correct location within the system.
Creating General Mail
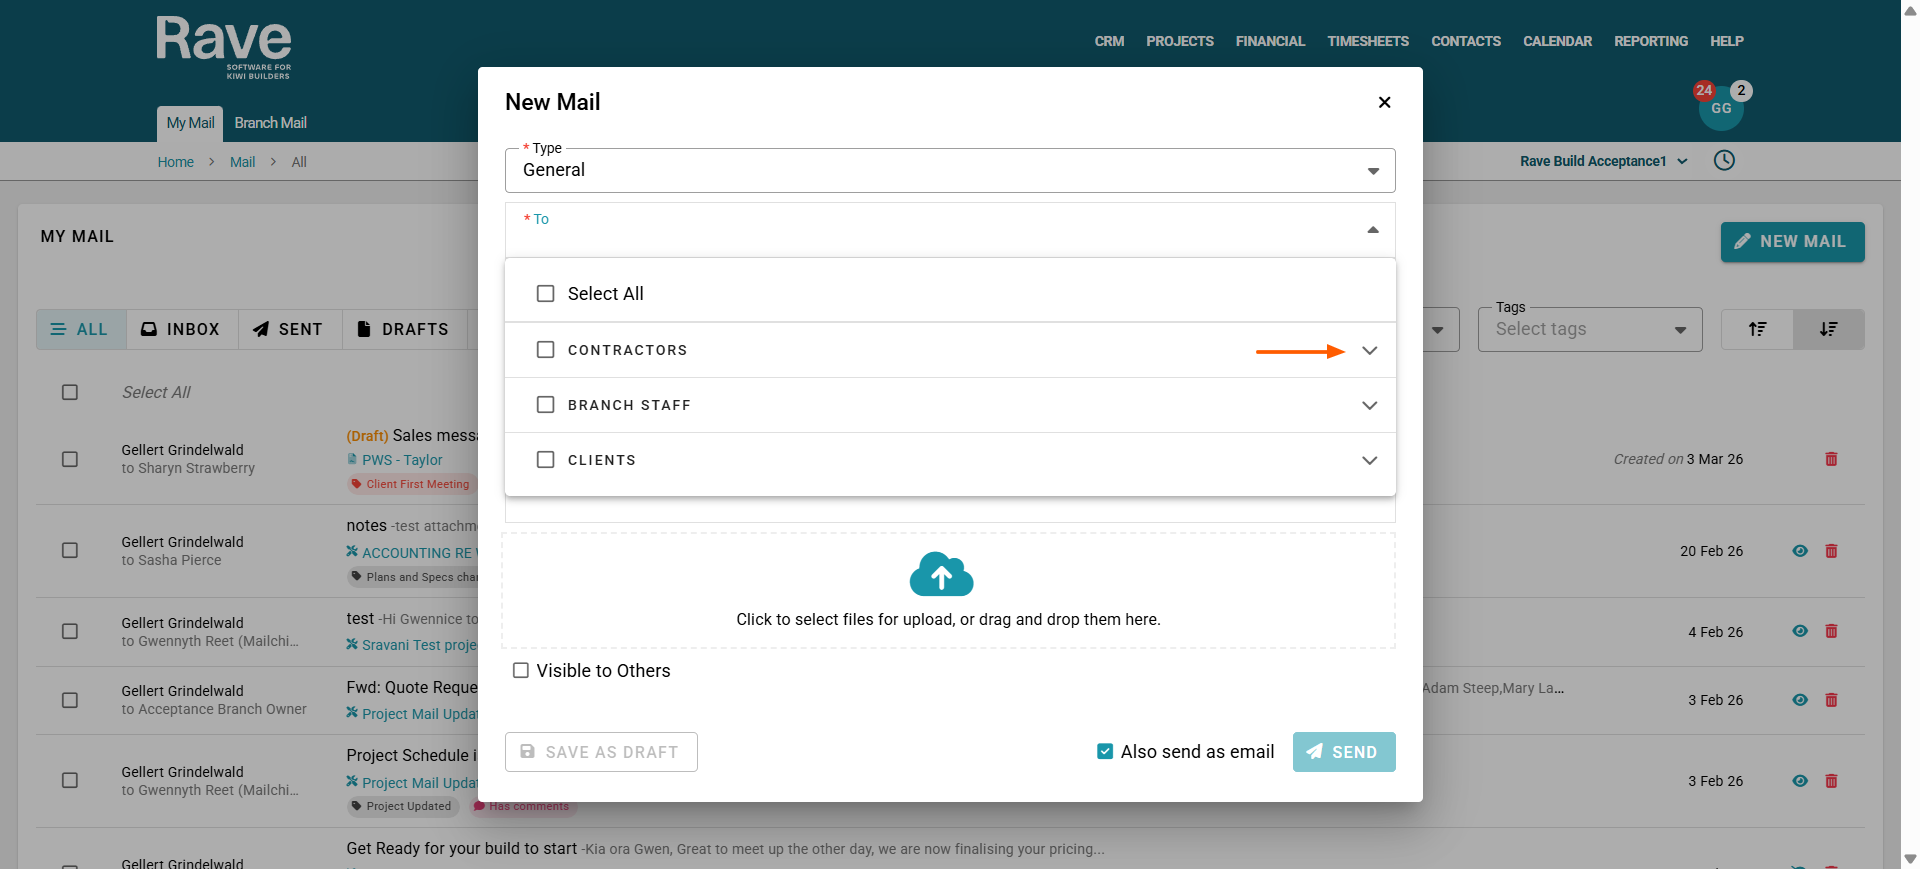
To create General Mail, which sits outside of a specific Project or Enquiry, you will first be prompted to select the recipients.
Because General Mail can be sent to Clients, Contractors, or Branch Users, you must first choose the correct group from the dropdown menu. This ensures you are selecting recipients from the appropriate category. Each group has a second drop down arrow for you to select who from the group you wish to include.
Once the recipients have been selected, complete the following fields:
Subject – Enter the subject line for the email.
Tags – Apply relevant mail tags.
Email Body – Write the content of the email.
Attachments – Add any relevant files.
You will also choose the visibility settings for the email:
Visible to all users who have permission to View Others Mail, or
Visible only to participants within the email thread.
Once sent, this email will not appear within any specific Project or Enquiry. Instead, it will only be visible within each recipient’s My Mail inbox in Rave.
Tip: Using the correct mail type ensures that communications are properly linked to projects or enquiries within the system.
Was this article helpful?
That’s Great!
Thank you for your feedback
Sorry! We couldn't be helpful
Thank you for your feedback
Feedback sent
We appreciate your effort and will try to fix the article