Getting Started: Creating a Bill or Client Invoice from Timesheets
To begin creating a Labour Bill or Client Invoice from timesheet entries, navigate to your project's Timesheets sub-tab. This will open to the Details tab by default.
Filtering Timesheet Entries
You can refine the list of entries using the available filters:
Date range
User group (e.g. timesheet users, site staff, or other roles)
Users
Task or Tags
Approval Status
Financial Status
Entry Types
Viewing Timesheet Details
The page will display each timesheet entry in date order, based on your selected filters. For each entry, the following details are shown:
Date and day of the entry
User name
Associated task or tag (if any)
Payroll entry type
Start and finish times
Total time logged
Break duration
Net time (excluding breaks)
Any timesheet notes (clickable for review)
This view gives you a complete breakdown of logged work, enabling accurate billing and invoicing directly from timesheet data.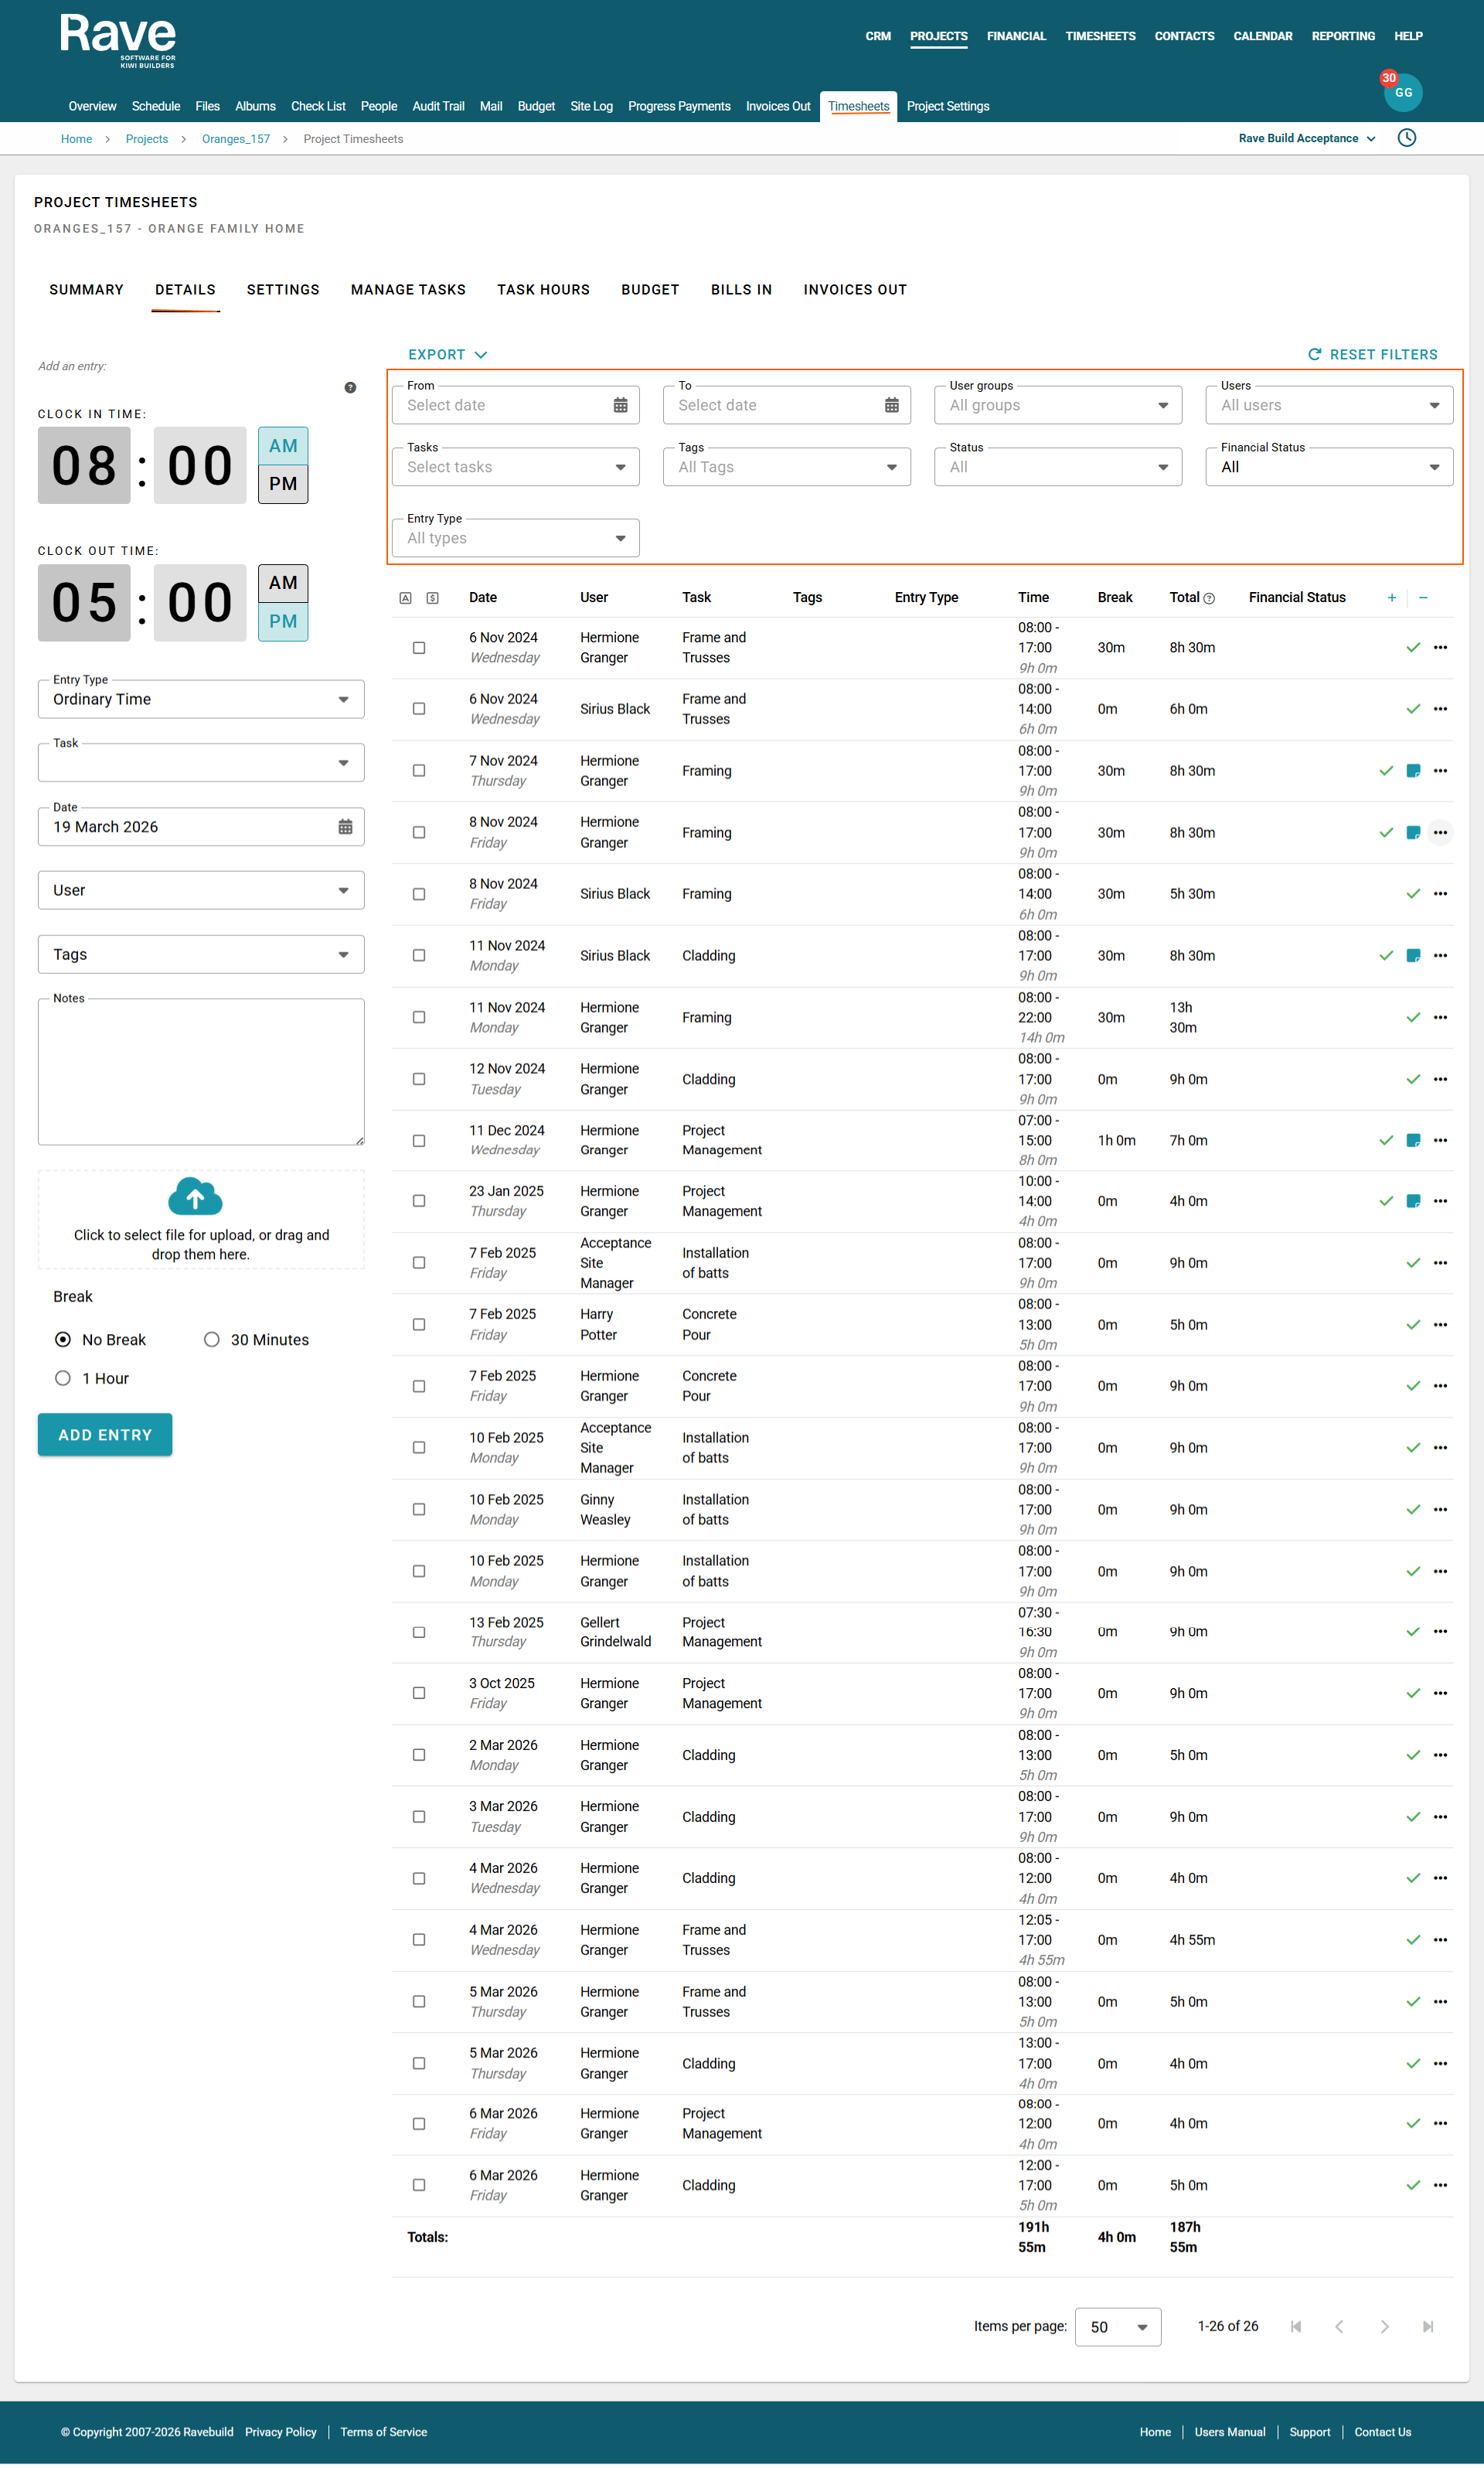
Note: When creating a bill from a timesheet entry, we automatically apply 15% tax to the selling price and No Tax to the cost price in order to ensure you are invoicing your clients GST on their invoice but not entering the cost to the business as GST inclusive, as it's labour.
Charging Timesheet Entries to Your Client
When you're ready to charge timesheet entries to your client, go to the Details page under your project's Timesheets sub-tab.
Select Approved Entries
Approved entries are marked with a green tick on the far right of each row.
To quickly select all billable (approved) entries, click the "Select Billable" dollar icon located to the left of the Date column header.Convert to Bill
After selecting your entries, a floating footer will appear. Click the "Convert to Bill" button in the footer.Choose Bill Format
A Convert to Bill pop-up will appear.
Use the "Create as*" drop-down to choose how you want the entries to be displayed in the Labour Bill (e.g. grouped by user, by task, as individual lines, etc.).Complete the Process
Once you’ve selected your preferred format, click "Convert to Bill" to generate the Labour Bill.

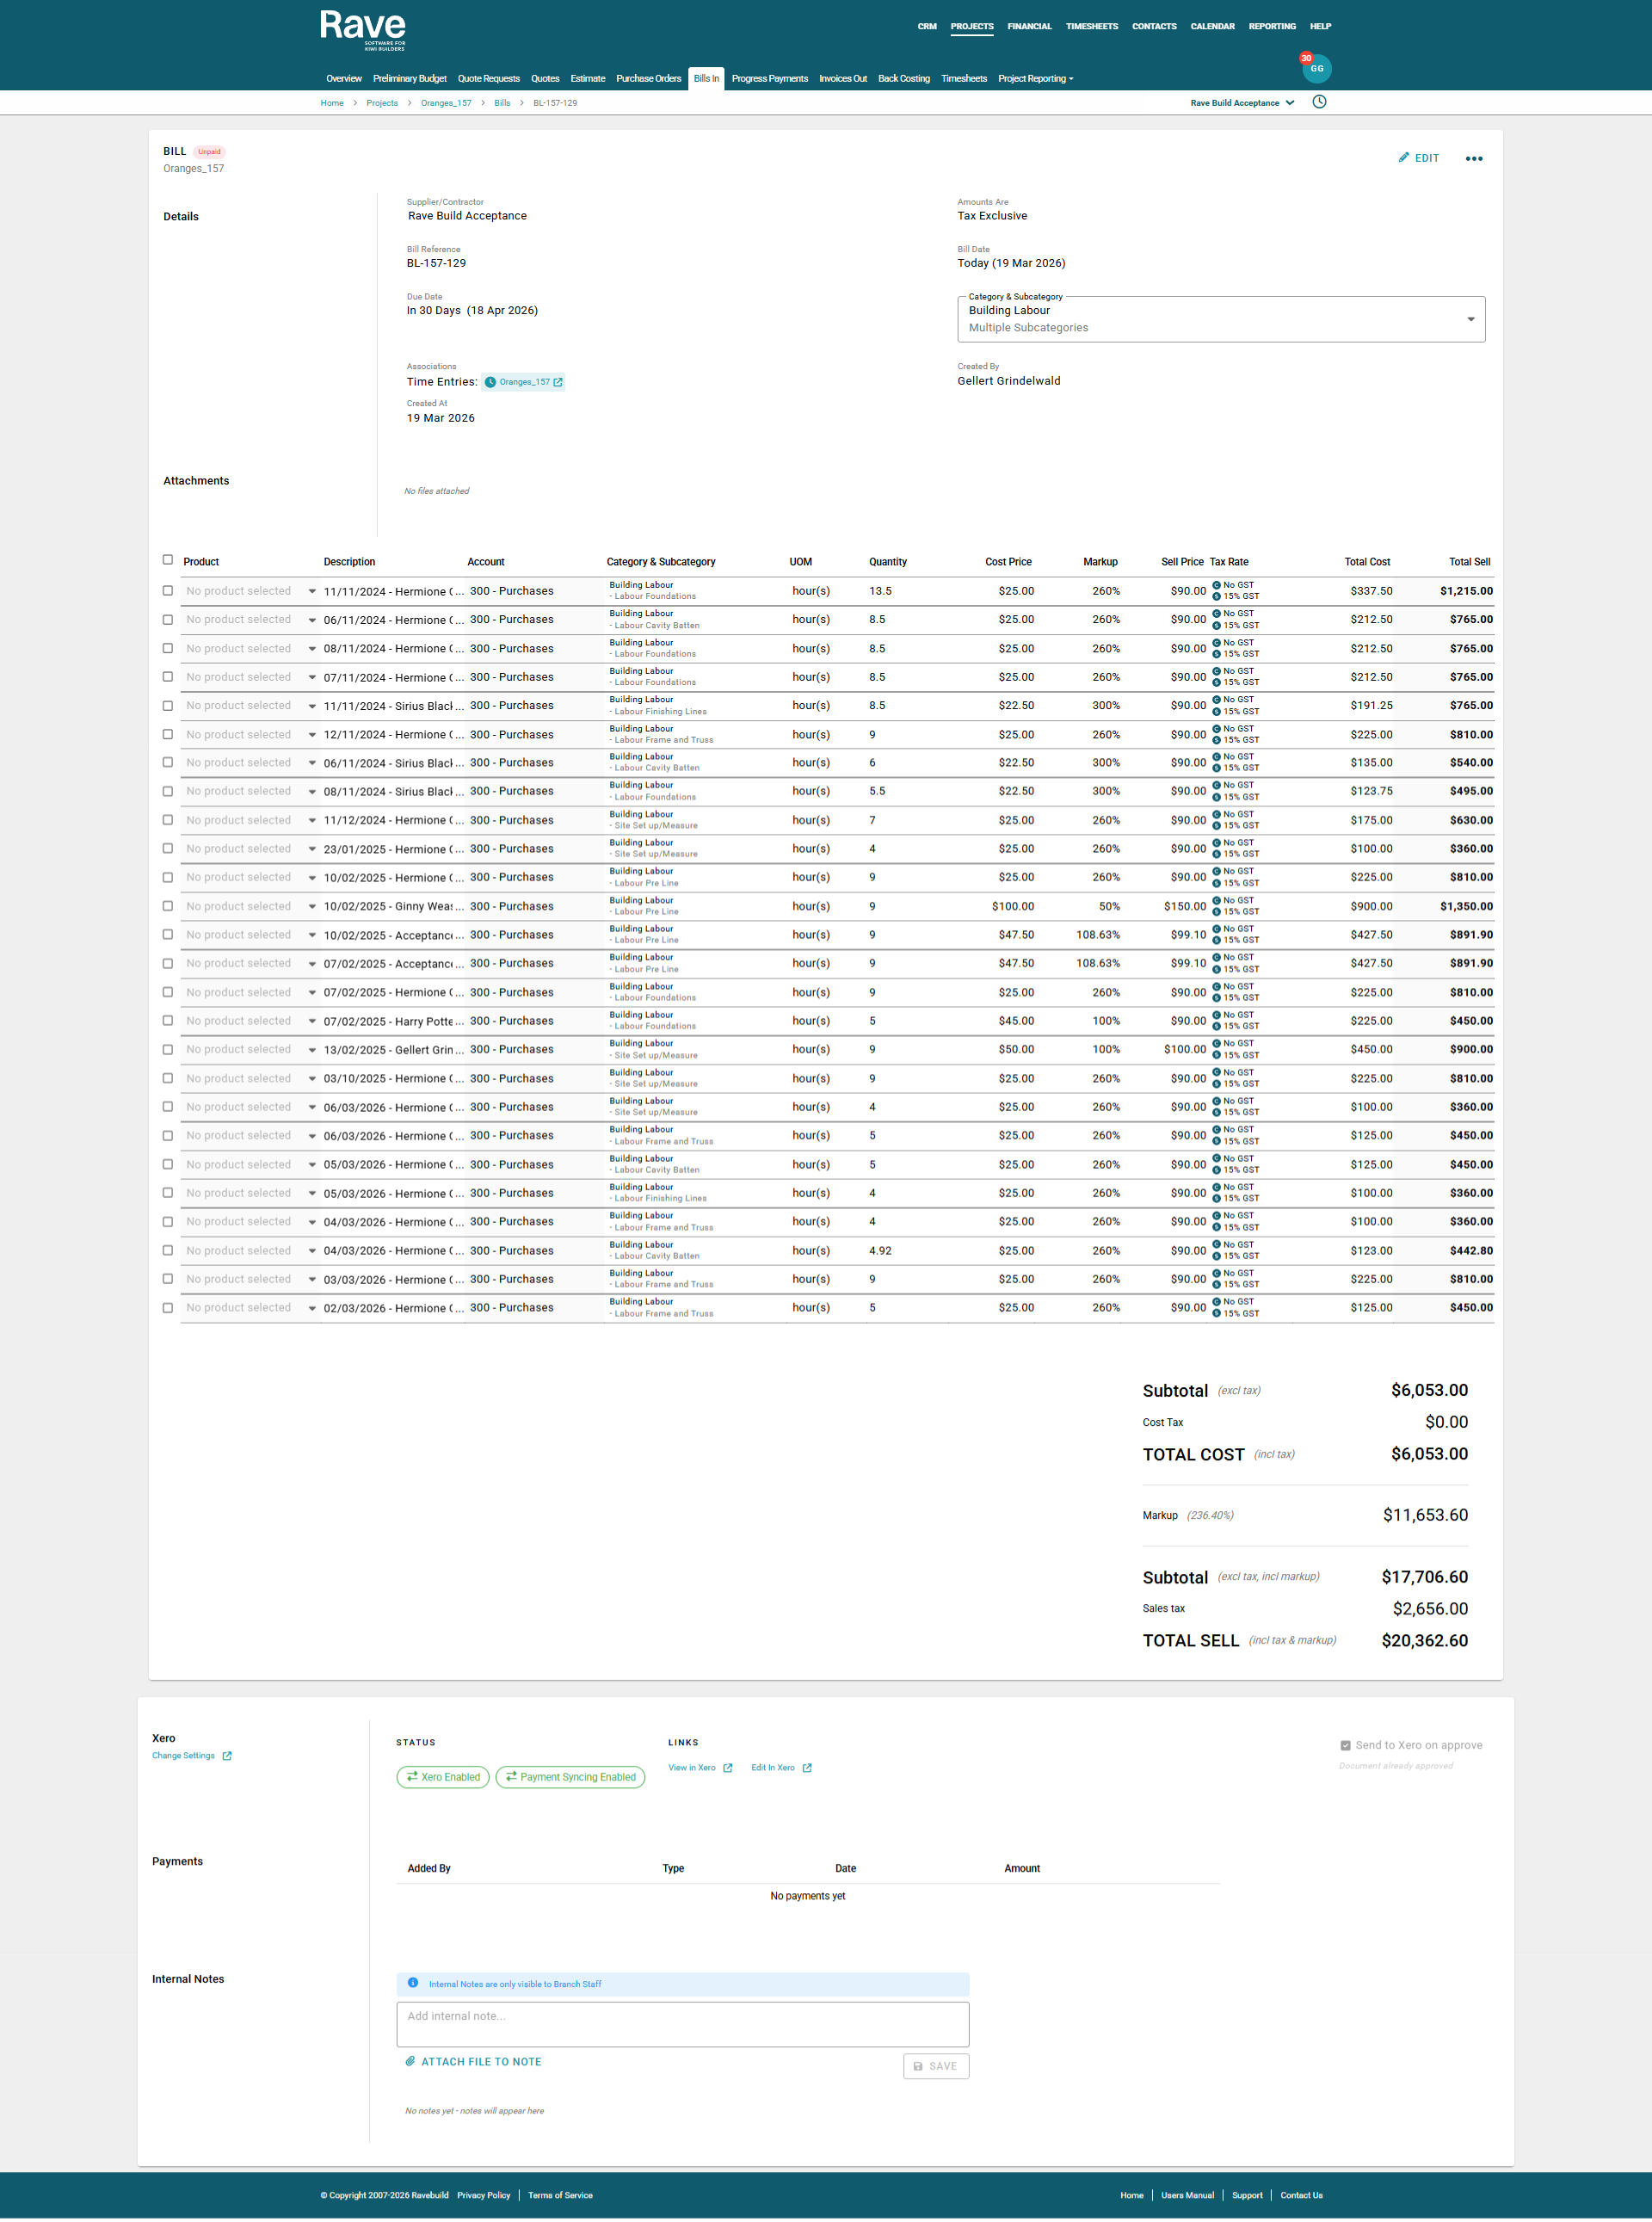
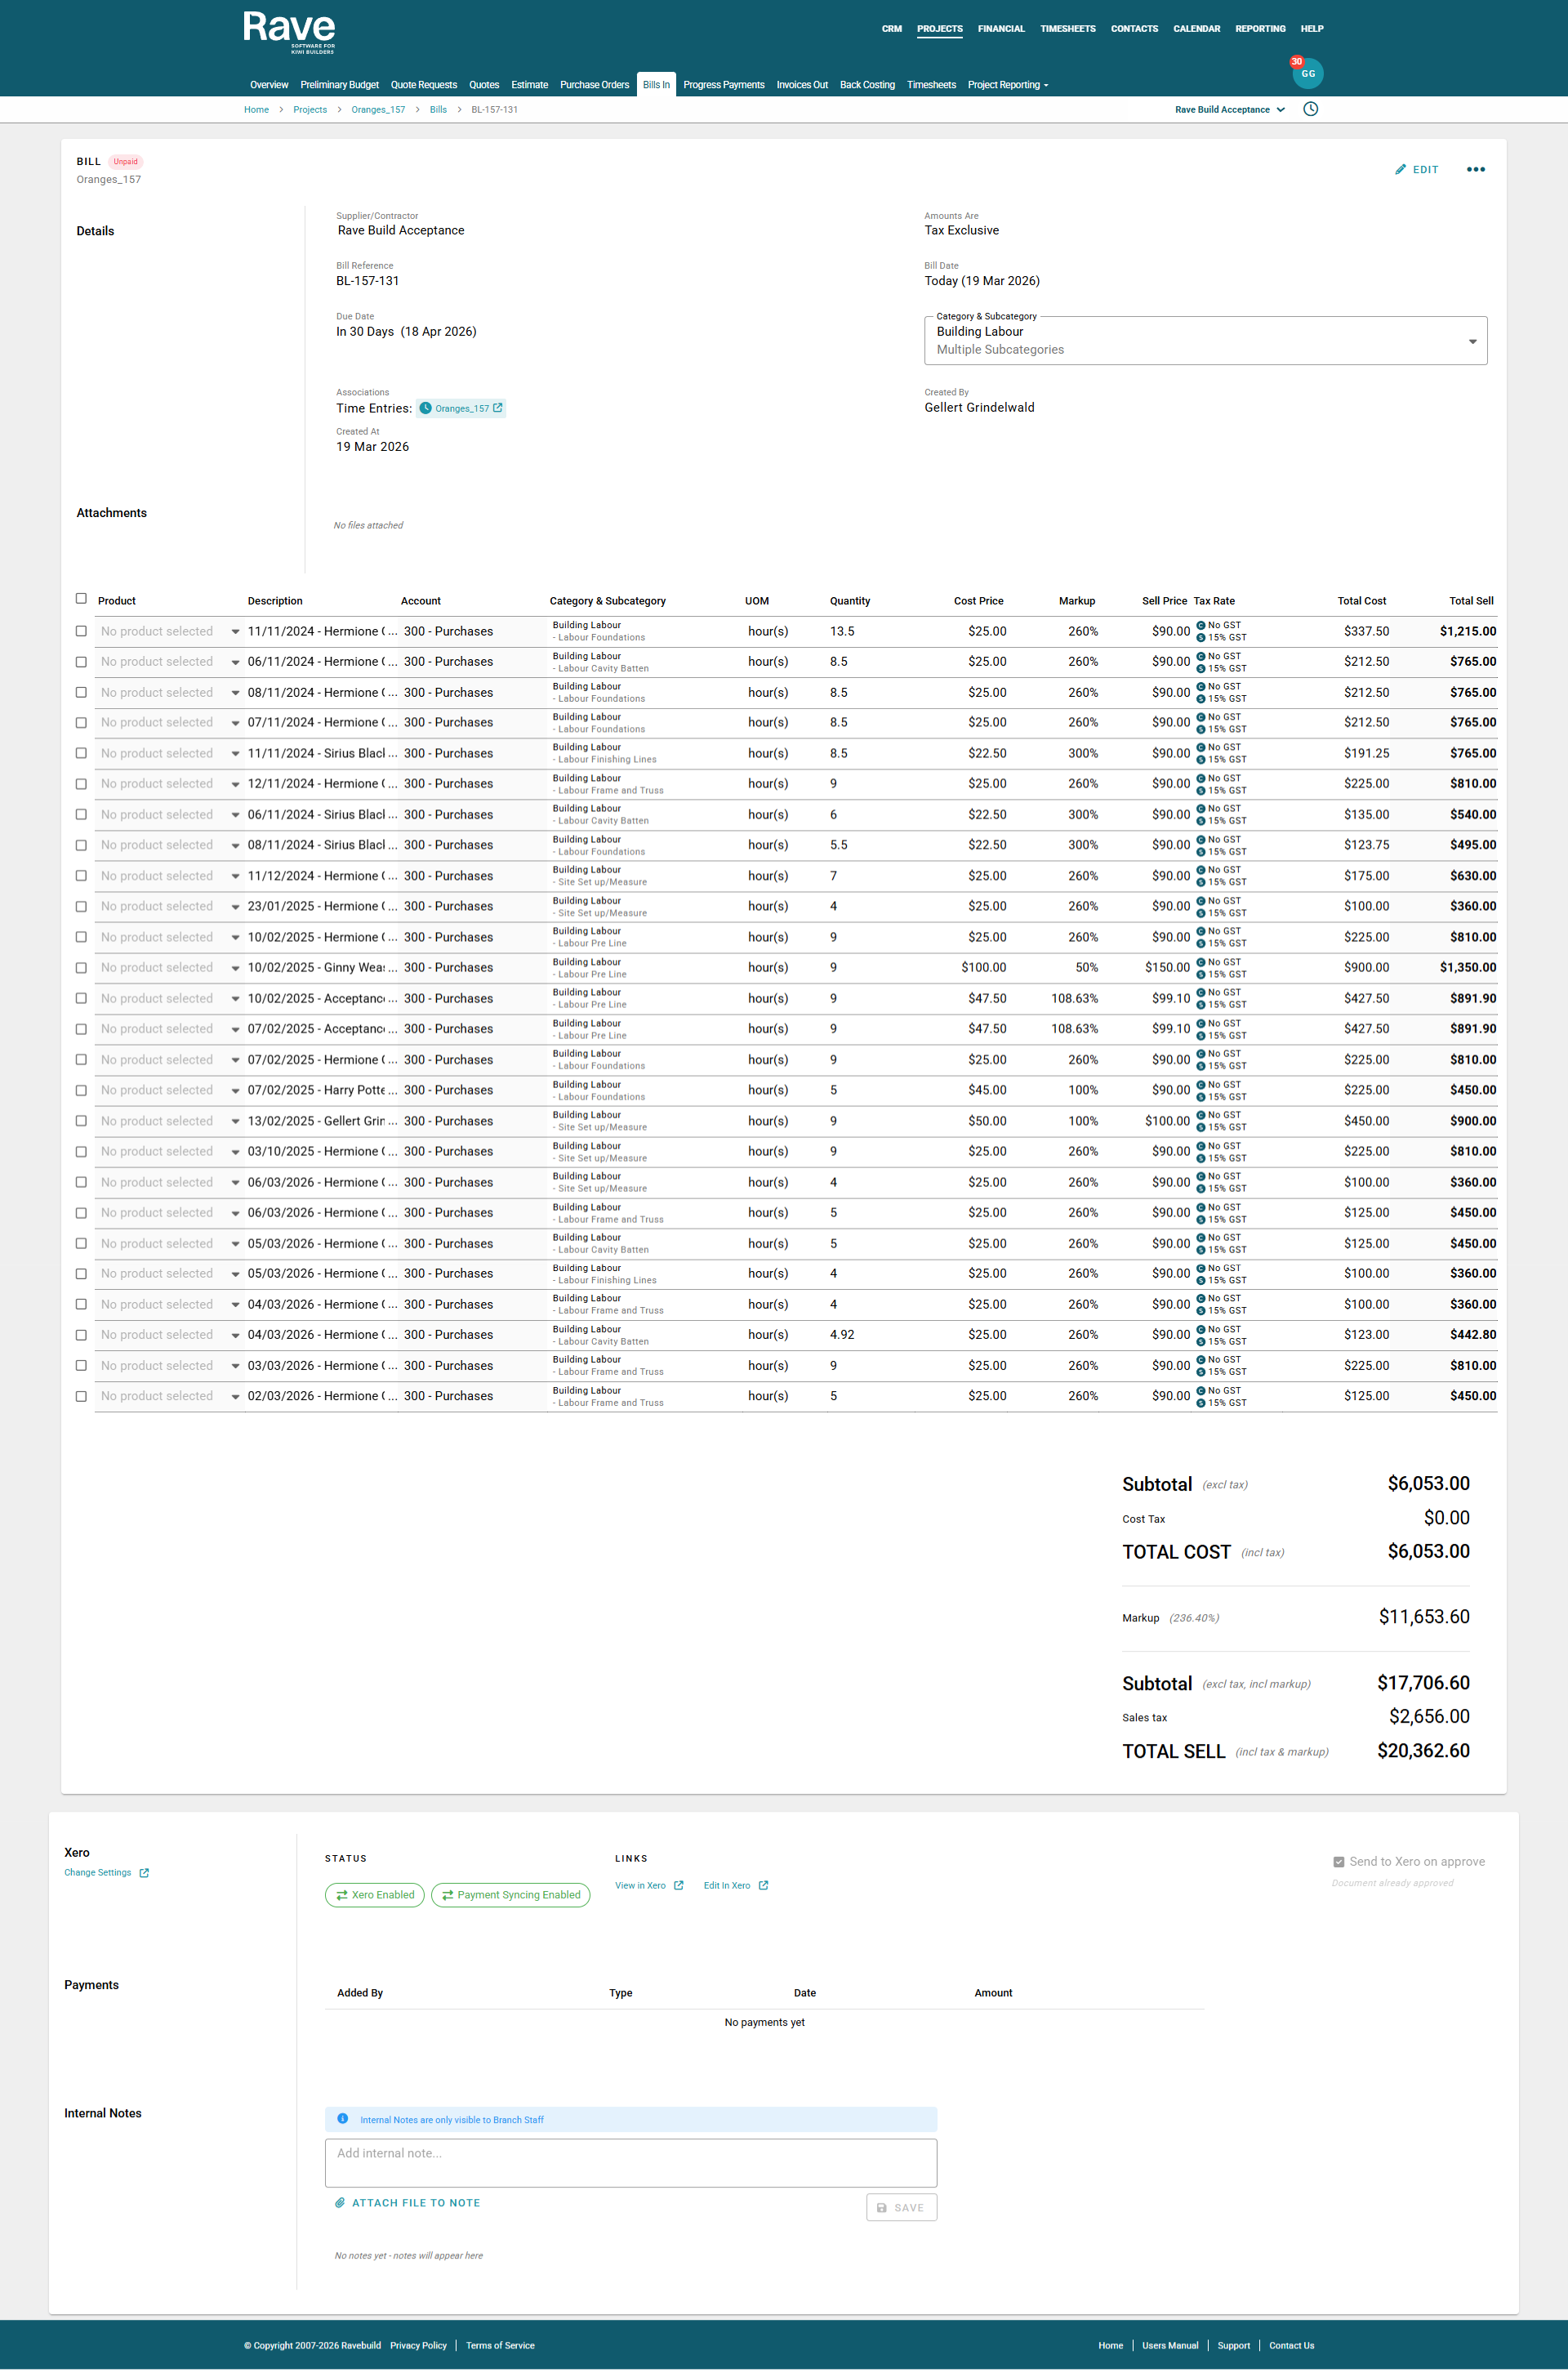
- Individual Items
Selecting Individual Items creates a separate line item on the Labour Bill for each timesheet entry. Each timesheet entry will be a separate line item on the bill.
Additional Options:
When using this format, you can also choose to:
Include Notes
Appends any timesheet notes to the end of the description on each line item.Include Timesheet Dates
Adds the timesheet date at the beginning of the description, before the user's name.
This option gives you the most detailed breakdown of time worked, ideal for clients who require full transparency or itemised reporting when converting to an invoice.
Consolidate – Single Line Item
Selecting Consolidate – Single Line Item will combine all selected timesheet entries into a single line item on the Labour Bill, labelled Labour.
This option totals all hours, costs, and sell prices across the selected entries, and calculates an average where necessary to create one clean, summarised bill line.

- Consolidate - Grouped by User
- This option groups timesheet entries by each user, adding up all their hours into a single line per user.
Additional Options:
When using this format, you can also choose to:
Sub Group Consolidate by:
None
Date
Date and Category
Date and Category and Sub Category
- Consolidate - Grouped by Tasks
- This option groups timesheet entries by task as single line items for each task on the bill.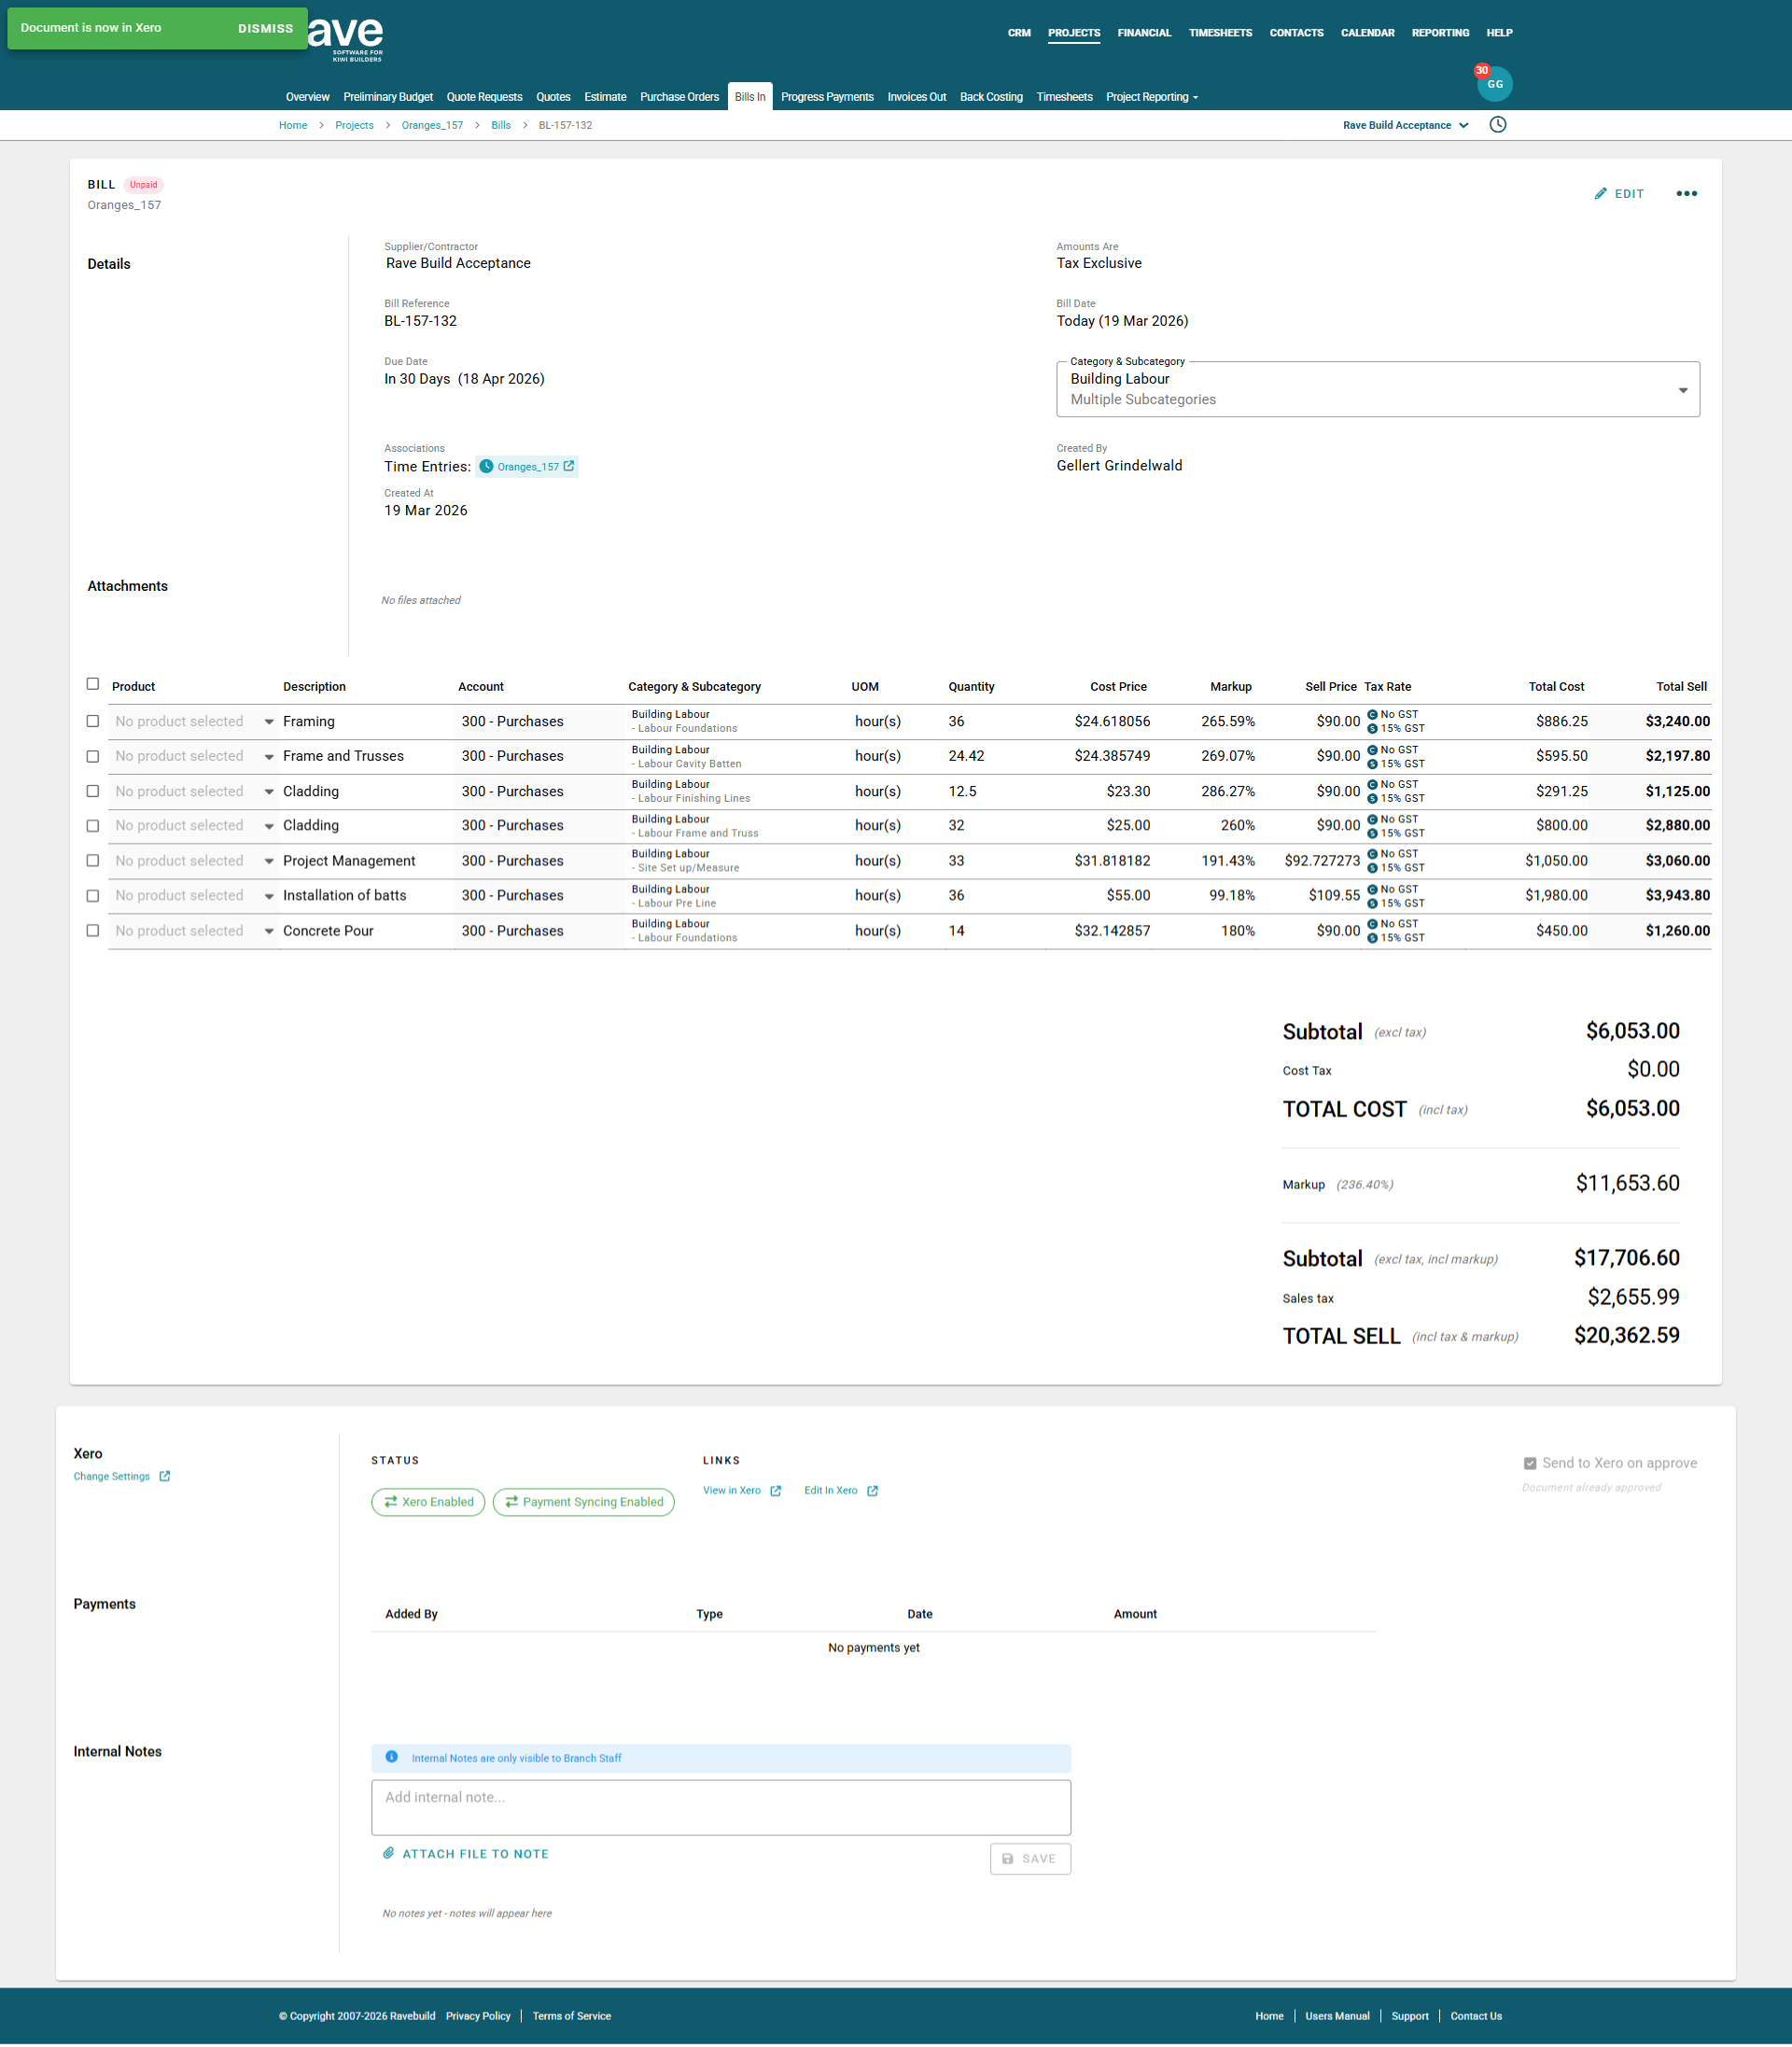
Note: Labour Bills created within the Timesheets feature are not sent to Xero by default. To send a Labour Bill to Xero, you must manually select the "Send to Xero" option. This will send the bill to Xero as a draft Bill.
Please also note that Credit Notes created from Bills will only be sent to Xero if the original Bill was enabled for sending.
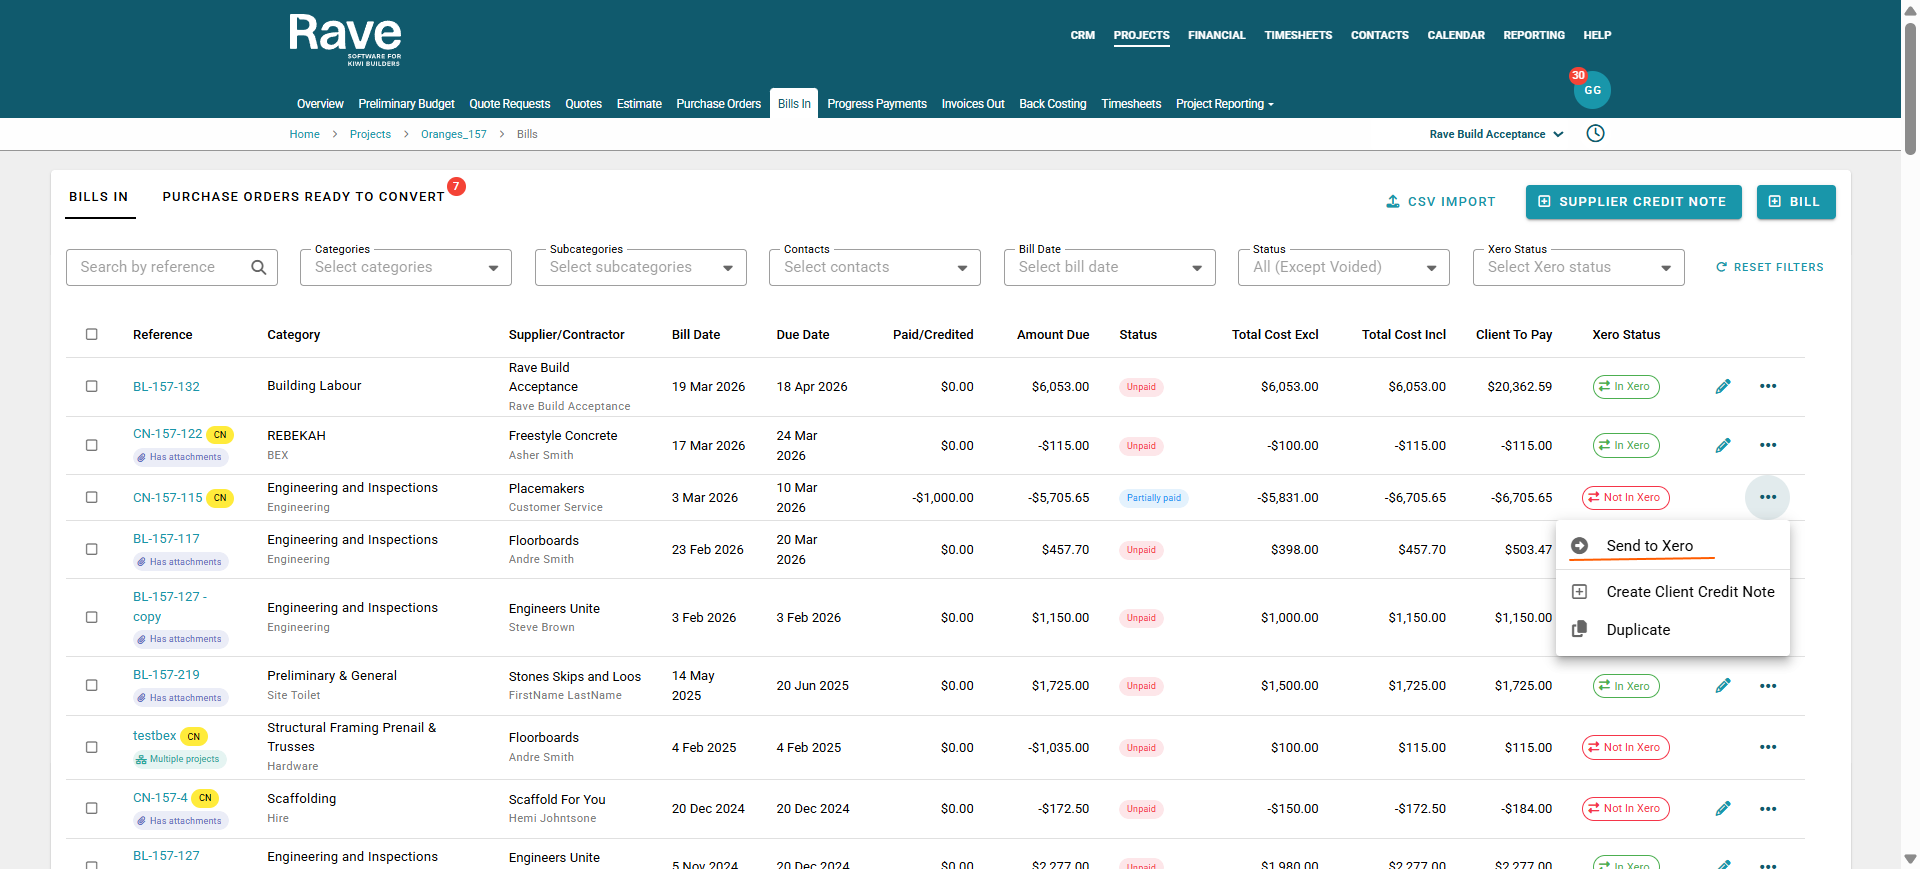
Creating a Client Invoice from a Labour Bill
Once you’ve billed the timesheet entries, you can generate a client invoice directly from the Labour Bill in the timesheets model.
Steps:
Navigate to the Bills In sub-tab inside the Timesheets Project Tab
Select the bill(s) you want to invoice via the check box to the left of the reference or single-select a bill from the 3-dot ellipses.
The "Convert to Invoice" bar will appear at the bottom of the screen if you use the bulk select.
The Model will pop up asking you to select a recipient if you have more than one client on the project. You can then select the invoice due date. You then need to decide how you want the client invoice to display.
Consolidate By allows you to choose:
None - This will create the invoice in the same format as the Bill
Supplier Name - This will merge all the Timesheet entries into a single line with the description being your Branch Name
Account Code - This will merge all the timesheet entries into chart of account codes
Category - This will merge all the timesheet entries into Category headers only
Category and Sub Category - This will merge all timesheet entries into Category- Subcategory headers
Inventory Code - If there is no codes used it will merge them all into a single line item.
Example of Category and Sub Category chosen
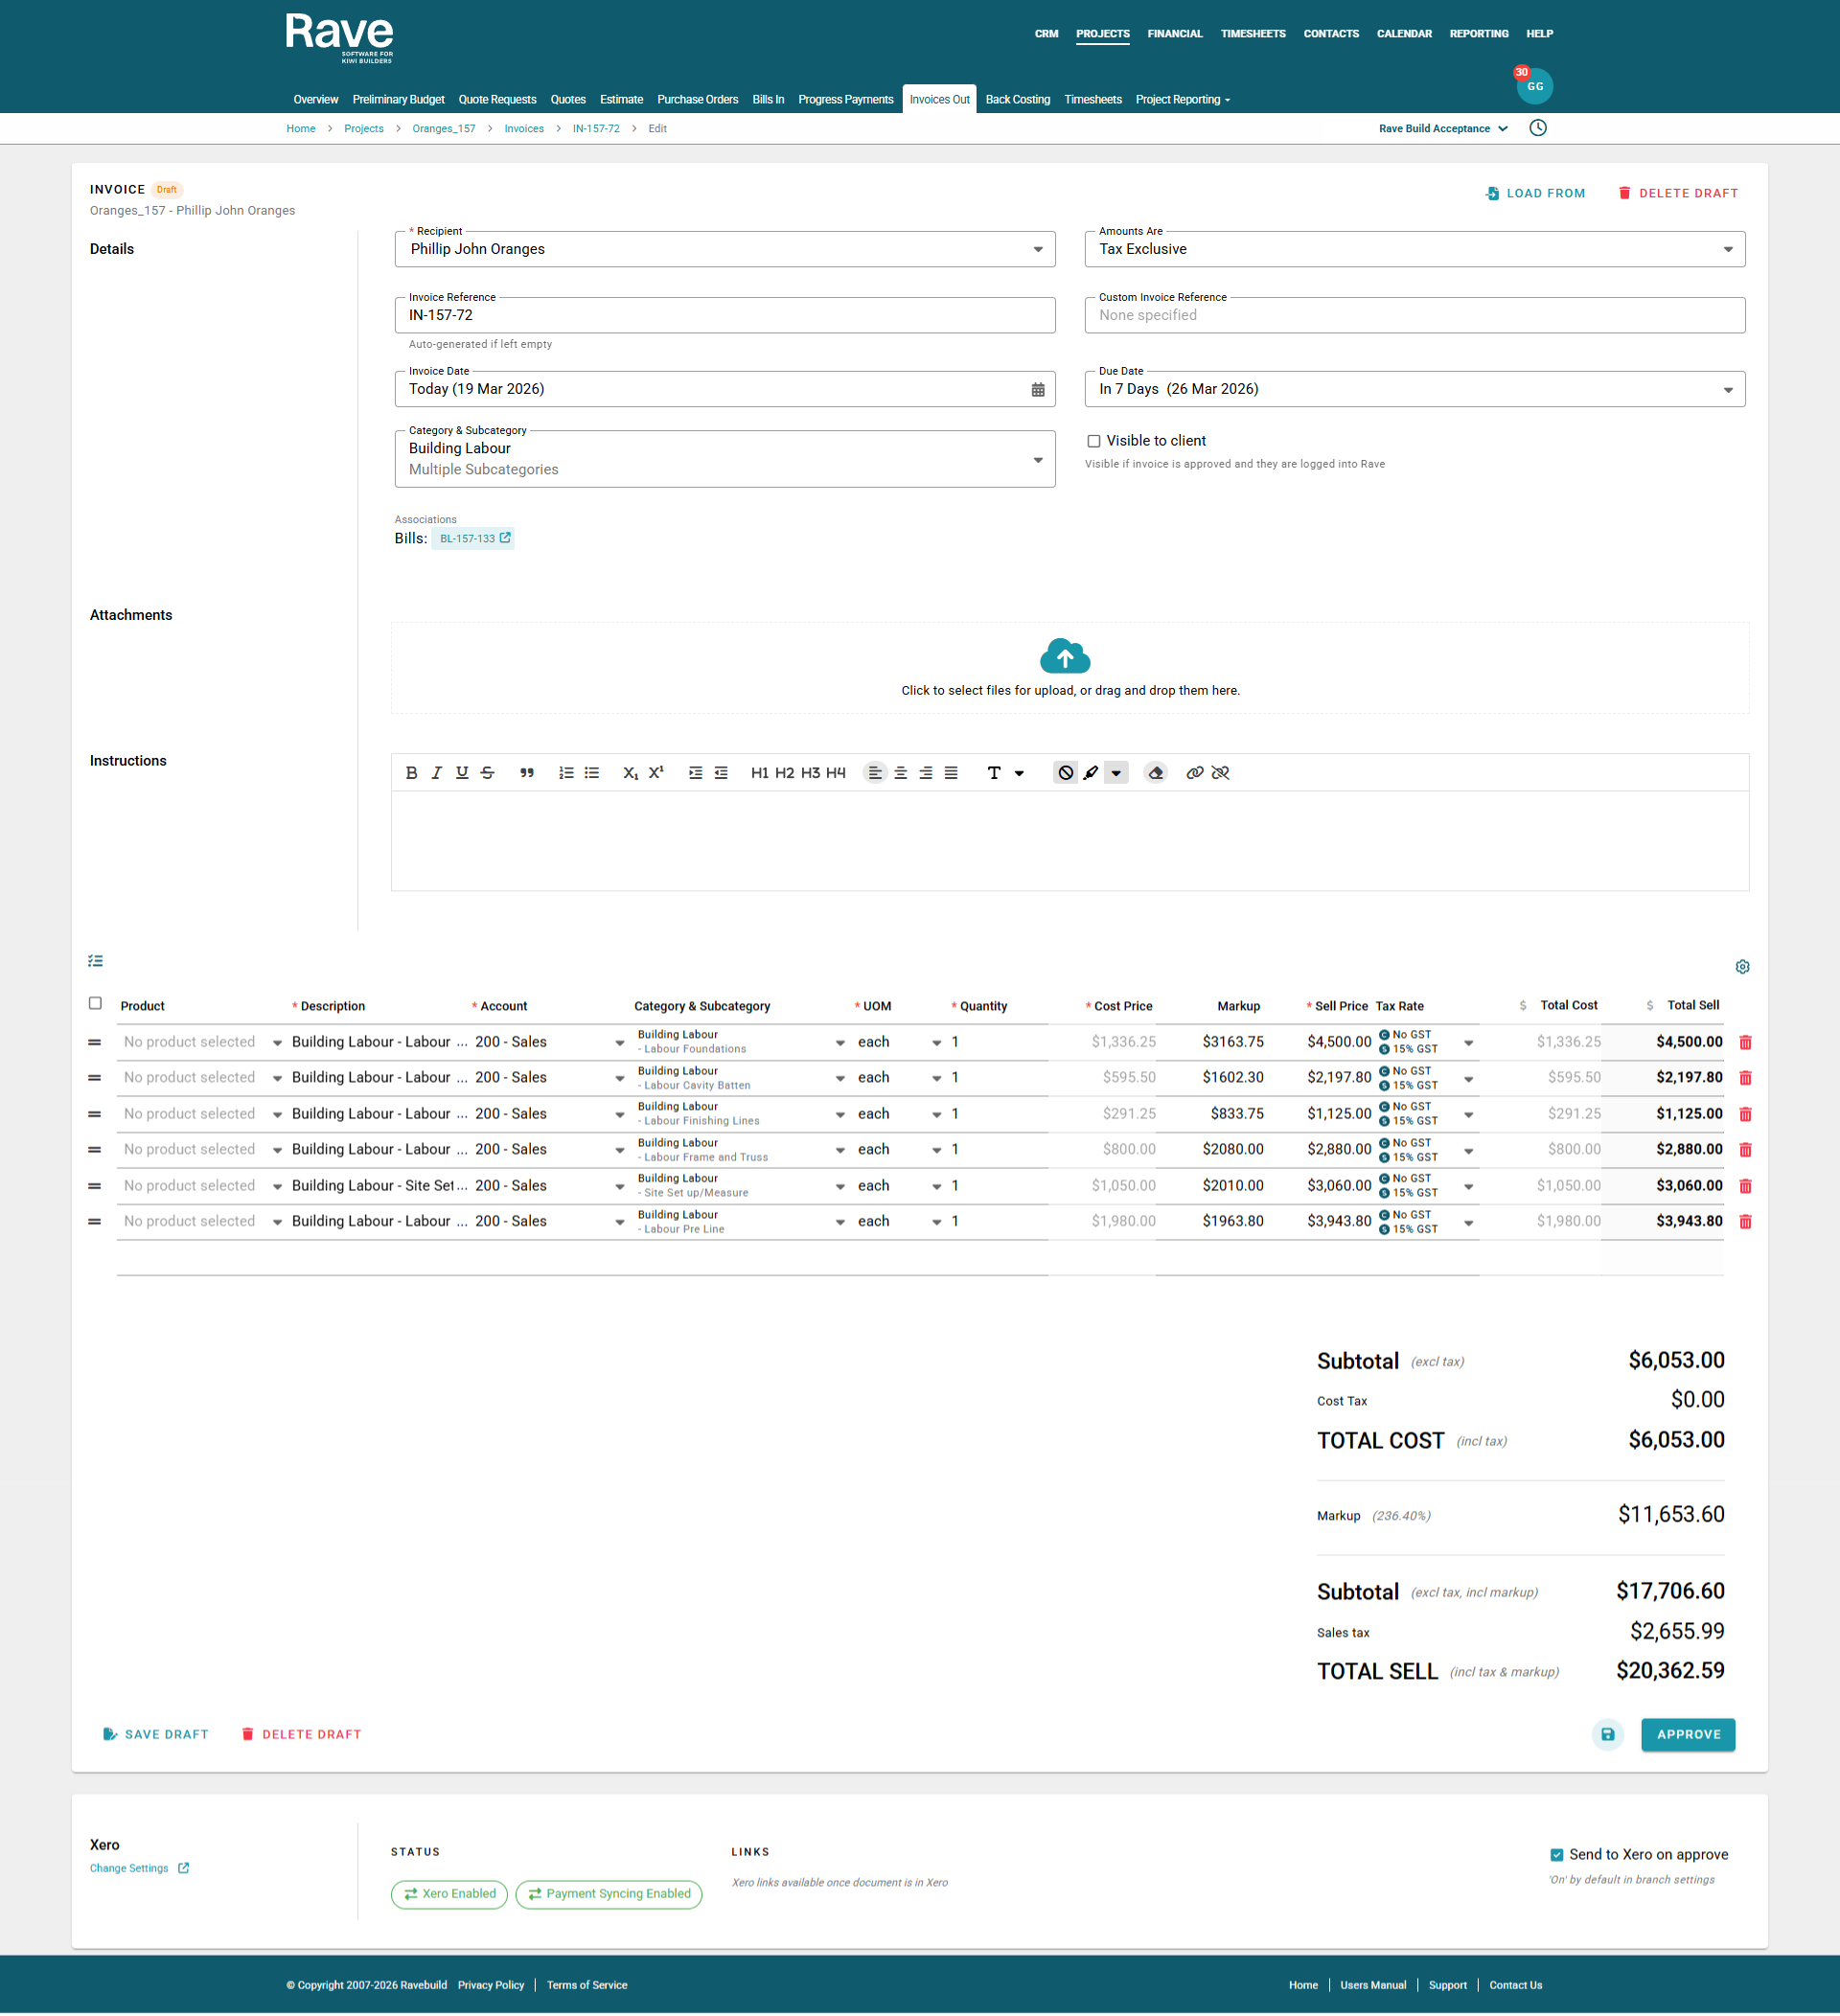
Review the details, make any necessary adjustments, and then create the invoice.
Once ready, you can Approve which will send the invocie to xero if connected.
Financial Status Column and Filter
On the Project Timesheets > Details page, the Financial Status column provides a quick view of the billing and invoicing state of each timesheet entry. It indicates whether entries are:
Not Billed
Billed
Billed but Not Invoiced
Invoiced
The Financial Status column indicates whether each timesheet entry has been Billed and/or Invoiced. An entry with neither is unbilled and uninvoiced.

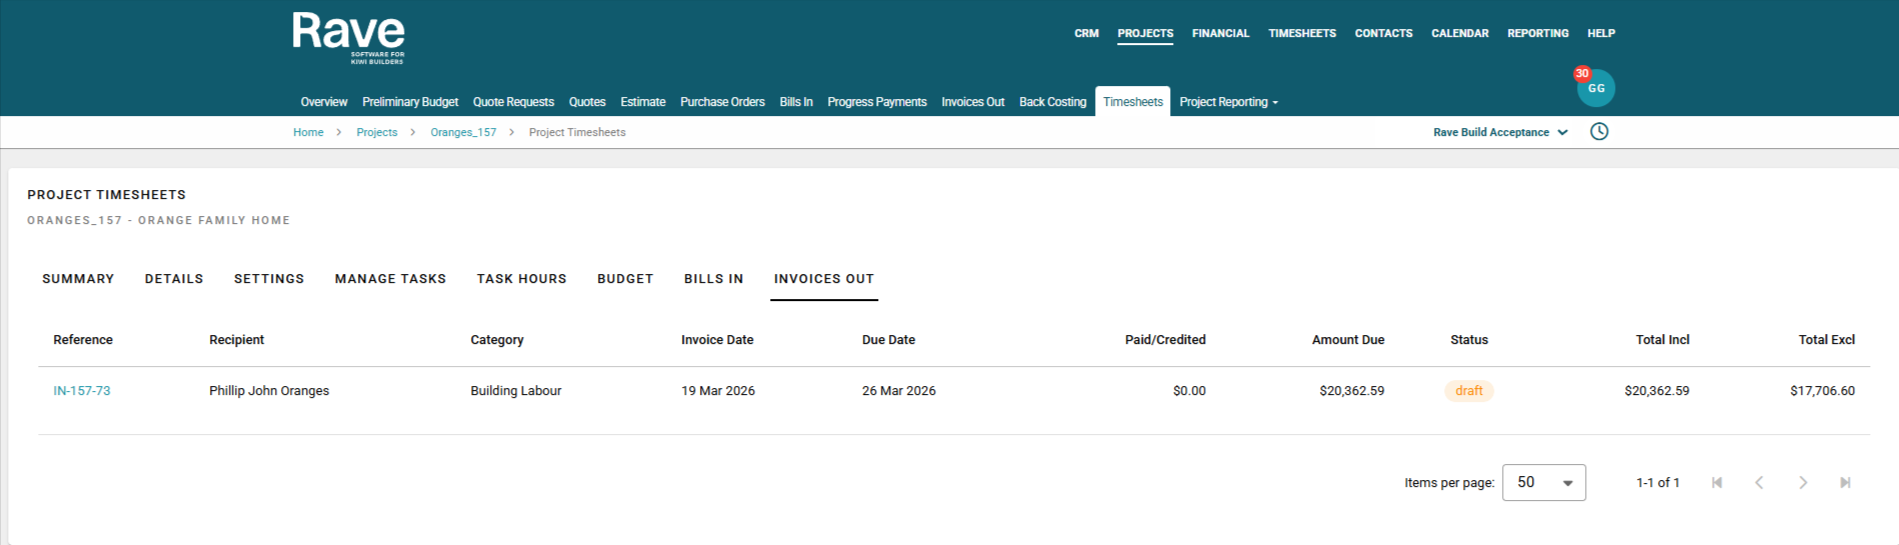
Bills In and Invoices Out Sub-Tabs
The Bills In and Invoices Out sub-tabs provide shortcuts to view Labour Bills, Invoices, and related Credit Notes that were created specifically via the Timesheets sub-tab.
Only documents generated through the Timesheets feature will appear in these views.

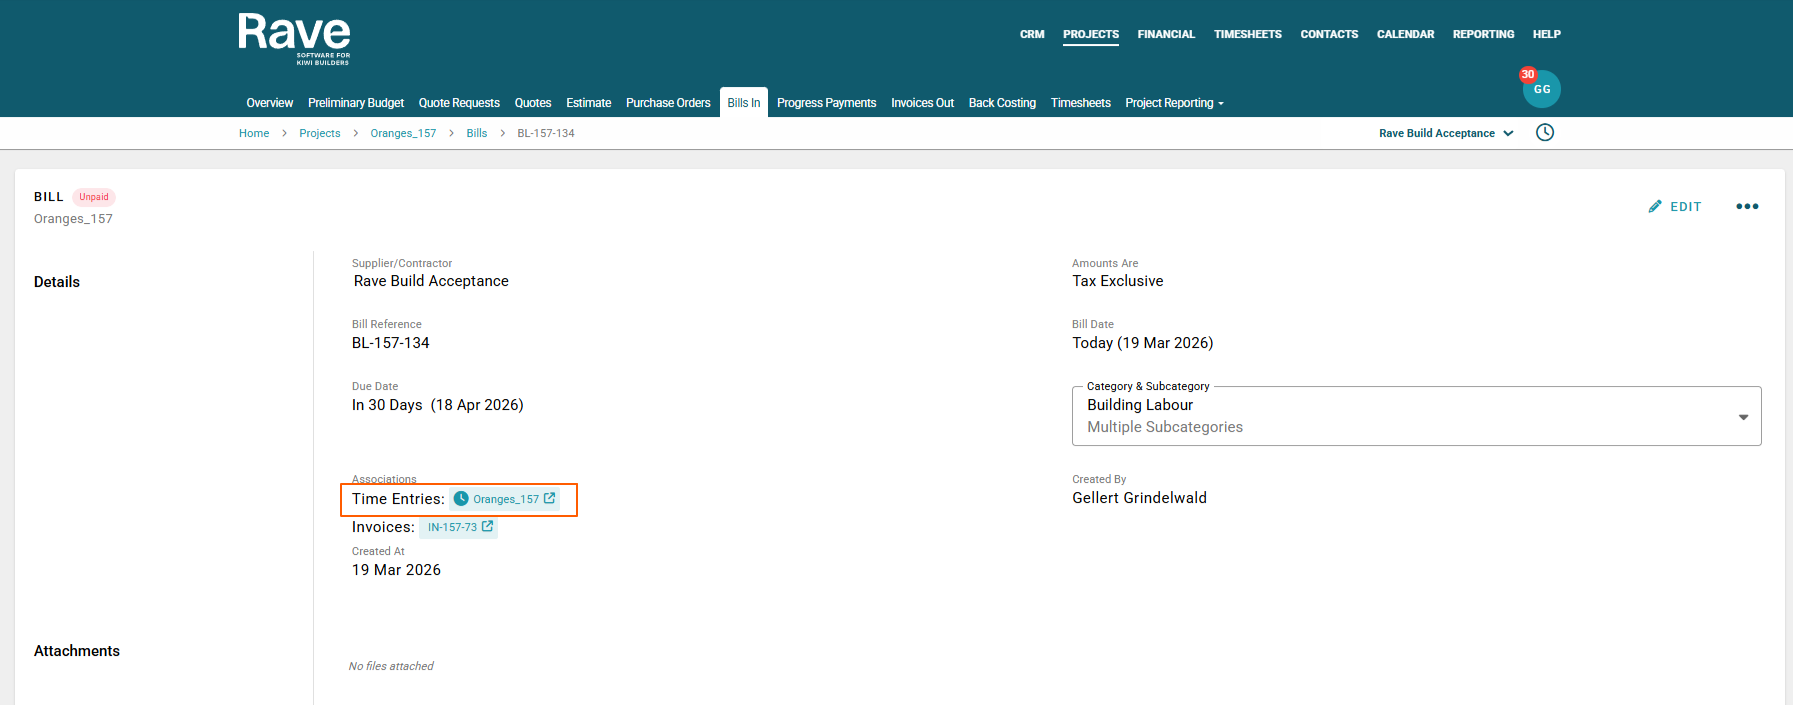
When viewing these sub-tabs within the FMS, any bill created via Timesheets will display a small Timesheets 'clock' icon under the associations with the word Time Entries beside it. Clicking this icon will take you directly back to the relevant project's Timesheets page, allowing for quick and easy navigation.
To go back to the overview for ALL Timesheets Advanced features, click here
Are you ready to use Rave's Advanced Timesheets?
If you would like to add the Advanced Timesheets module on to your Rave set-up, please contact us via help@ravebuild.co.nz
Was this article helpful?
That’s Great!
Thank you for your feedback
Sorry! We couldn't be helpful
Thank you for your feedback
Feedback sent
We appreciate your effort and will try to fix the article