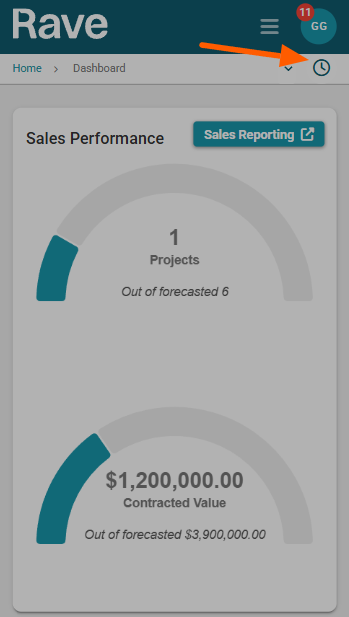
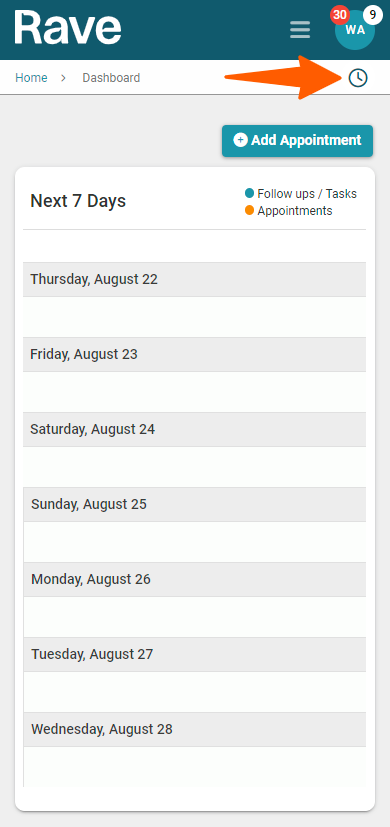
We’ve added a convenient ‘Add Timesheet Entry’ widget, located under your user dropdown on every page in RAVE.
This means you can now clock in, clock out, or add a timesheet entry from anywhere in the system—no need to navigate away from your current page!
In this article, we walk you through how to use the widget to add a timesheet entry, either by manually entering a start and finish time, or by starting a live running clock.
We also cover the My Timesheets page, where you can view all your entries and easily add, edit, or delete them as needed.
To Add a Timesheet Entry:
1. Click on the clock icon (widget) under your user dropdown - this will open your Timesheets pop-up, defaulting to today's date.
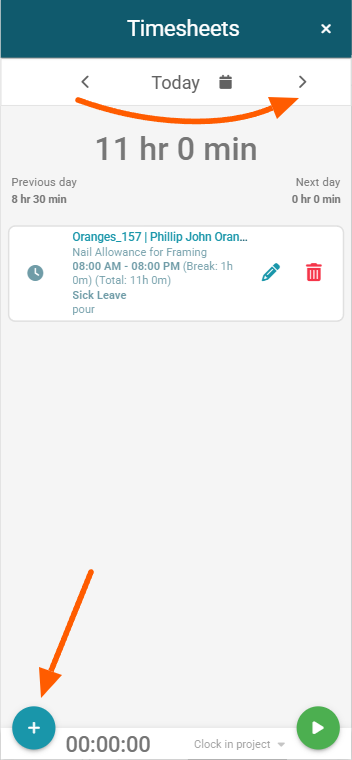
2. Click the + (plus) icon in the bottom left corner of the pop-up - this will take you to the 'Add an entry' screen.
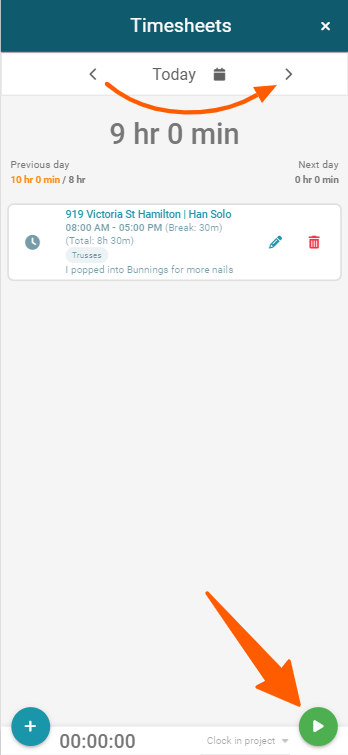
TIP: You can select previous or next days by clicking on the directional arrows on either side of the 'Today calendar icon'
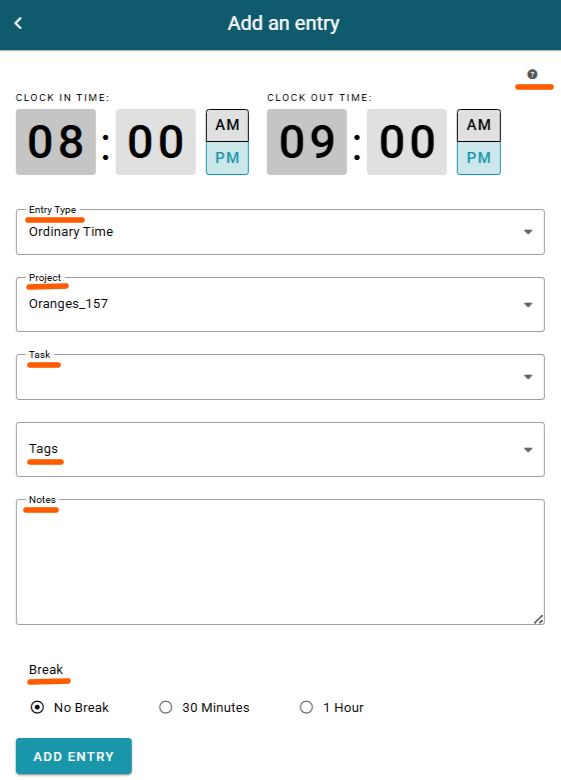
3. From here you can enter your clock in and/or clock out time, Select your Entry Type (If using this feature), select the project, add a tag and or Tasks, add any additional notes required, and select one of the 'Break' options. If you don't see all of the below options that means you have turned this on or your Branch doesn't subscribe to Timesheets Advanced.
TIP: For more tips/instructions on how to add an entry, hover over the question mark in the top right corner.
4. Then click on the 'ADD ENTRY' button to confirm.
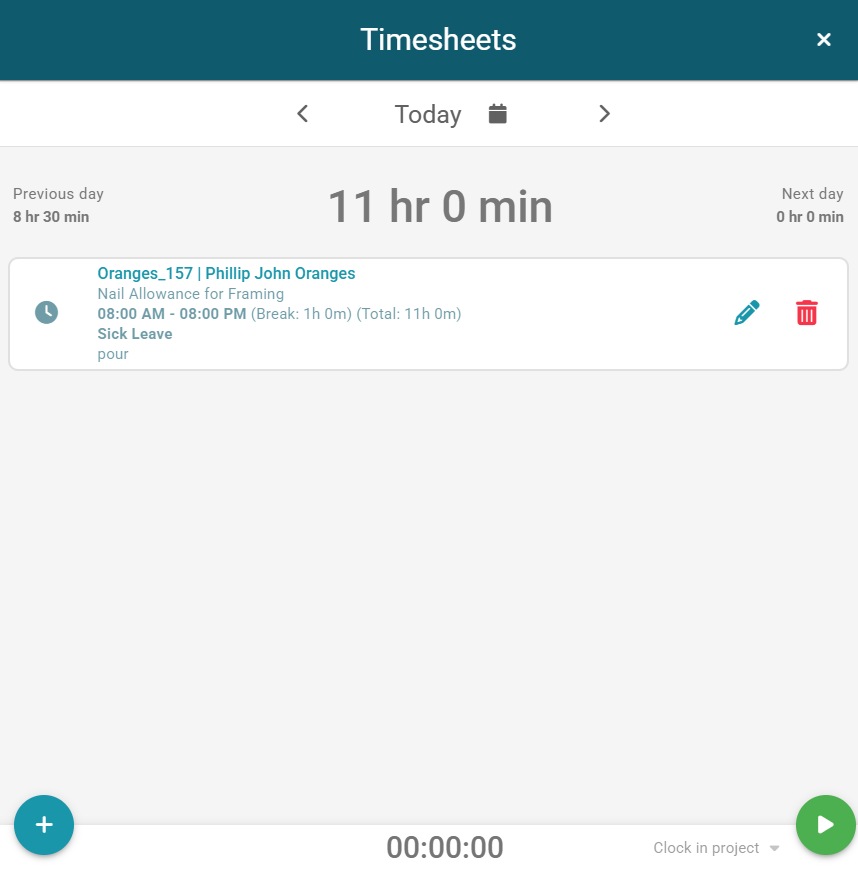
This will take you back to your Timesheets pop-up, defaulting to today's date. You'll see your entry displayed with the following details:
The Project Reference| Client's name
Timesheet Tag/s and/or Task Name
Clock in time - Clock out time (the selected break option) (Total time: less any break option selected)
Any notes added
With the option to edit or delete the entry via the pencil edit or trashcan delete icons.
To start a running clock:
1. Click on the clock icon (widget) under your user dropdown - this will open your Timesheets pop-up, defaulting to today's date.
TIP: You can select a previous or next day by clicking on the directional arrows on either side of the 'Today calendar icon'
2. Click on the 'play' icon (the white triangle in the green circle) at the bottom right of the screen to start the clock.
3. Once the clock starts, a 'Clocked In' message will display - next to the 'stop' icon (the white square in the red circle) at the bottom right of the screen.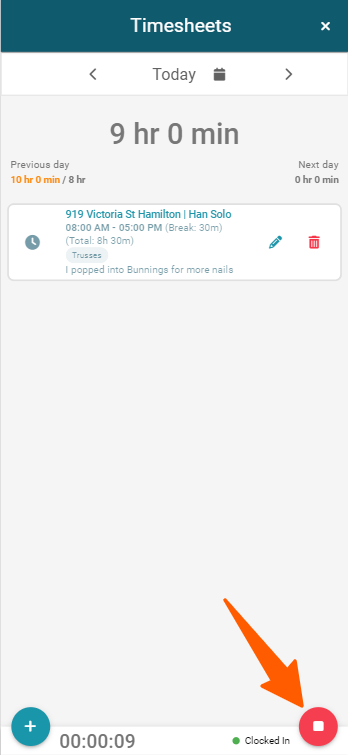
4. To clock out, click on the 'stop' icon (the red circle) at the bottom right of the screen - this will take you to the 'Clock out' screen.
TIP: For more tips/instructions on how to add an entry, hover over the question mark in the top right corner.
5. From here you can edit your clock in time, add your clock out time, select the project, add a tag, add any additional notes required, and select one of the 'Break' options - No Break, 30 Minutes, or 1 Hour
6. Then click on the 'CLOCK OUT' button to confirm.
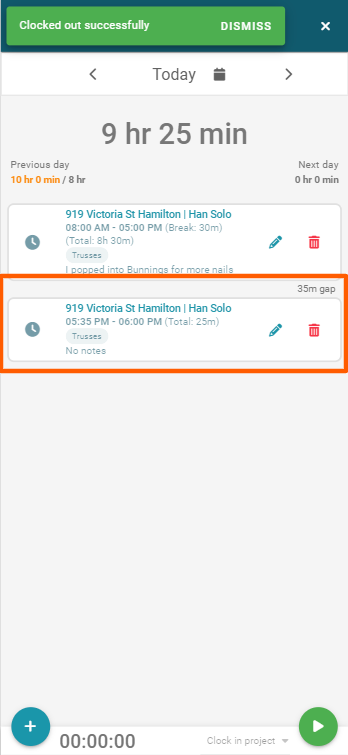
This will take you back to your Timesheets pop-up, defaulting to today's date. You'll see your entry displayed with the following details:
The Project Reference| Client's name
Timesheet Tag/s and/or Task Name
Clock in time - Clock out time (the selected break option) (Total time: less any break option selected)
Any notes added
With the option to edit or delete the entry via the pencil edit or trashcan delete icons.
Was this article helpful?
That’s Great!
Thank you for your feedback
Sorry! We couldn't be helpful
Thank you for your feedback
Feedback sent
We appreciate your effort and will try to fix the article