We are going to add a basic 'Non Contract' invoiceable and convert it to an invoice to notify accounts that they can request payment, and to also push a draft invoice to Xero (if connected)
How to Add a Basic Invoiceable
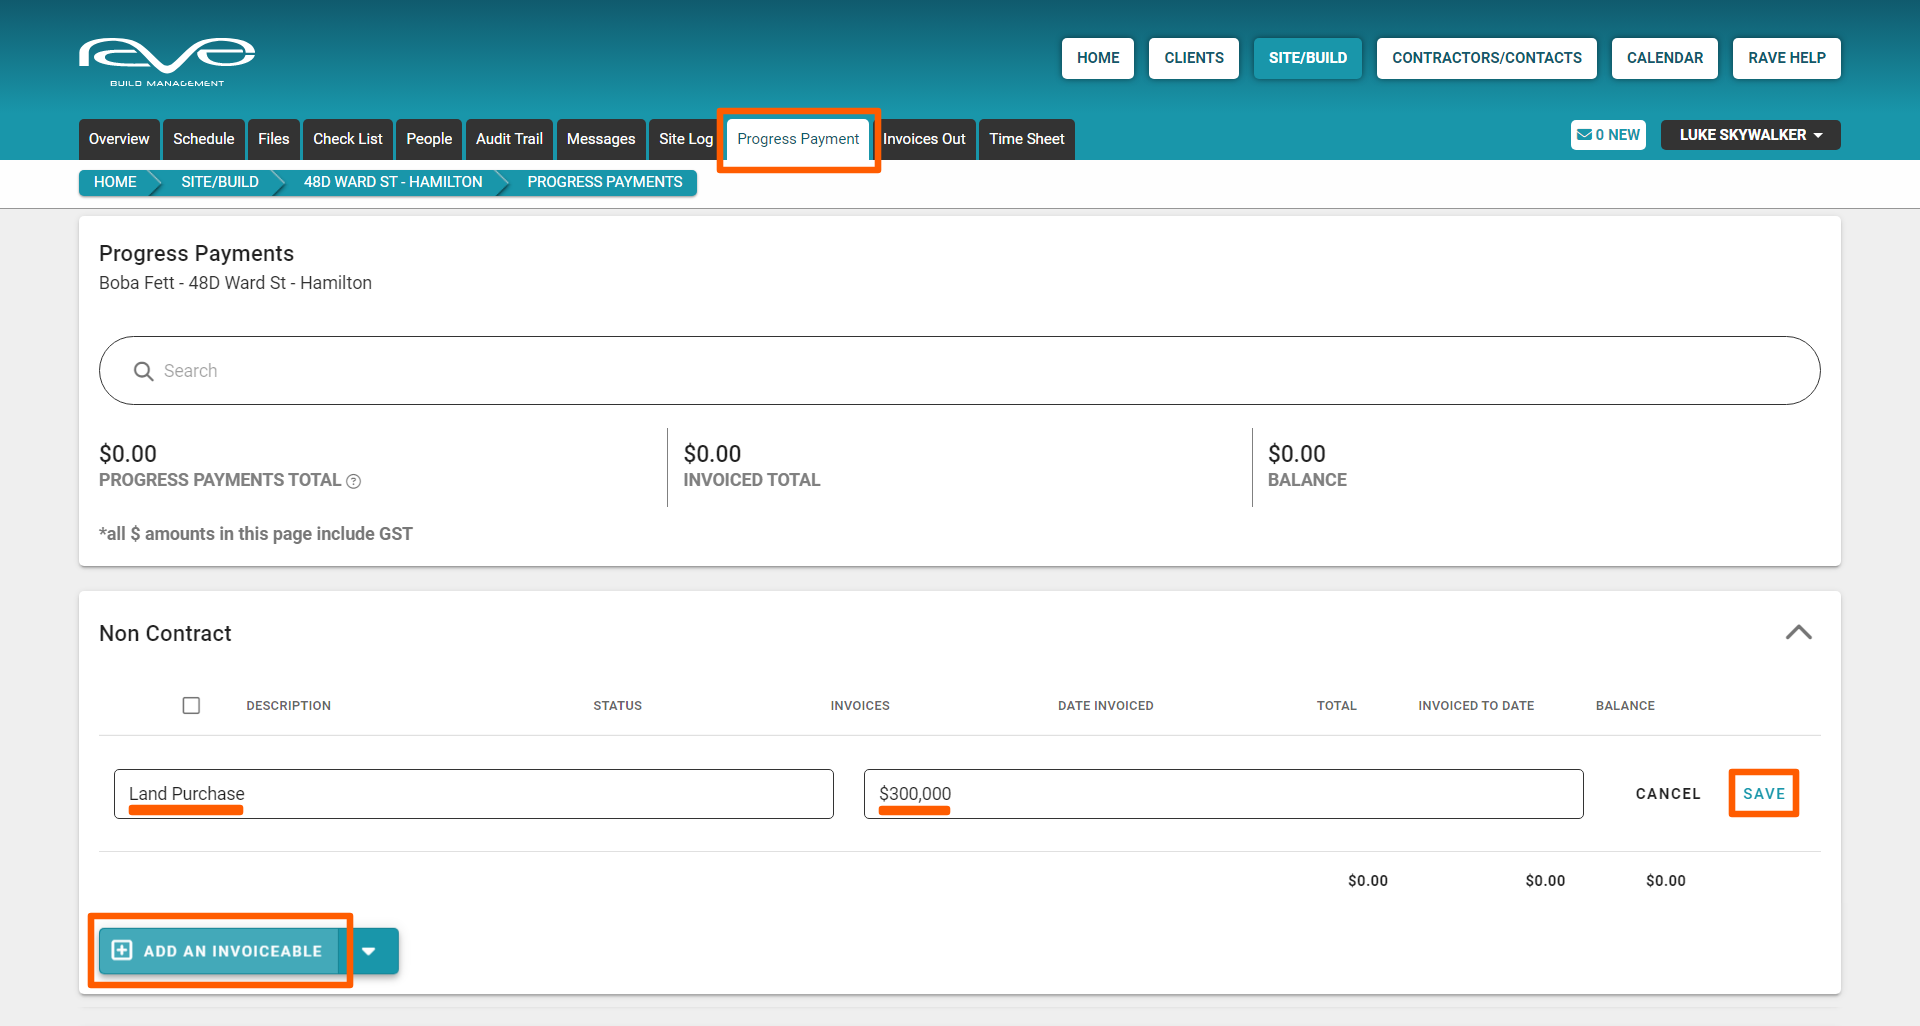
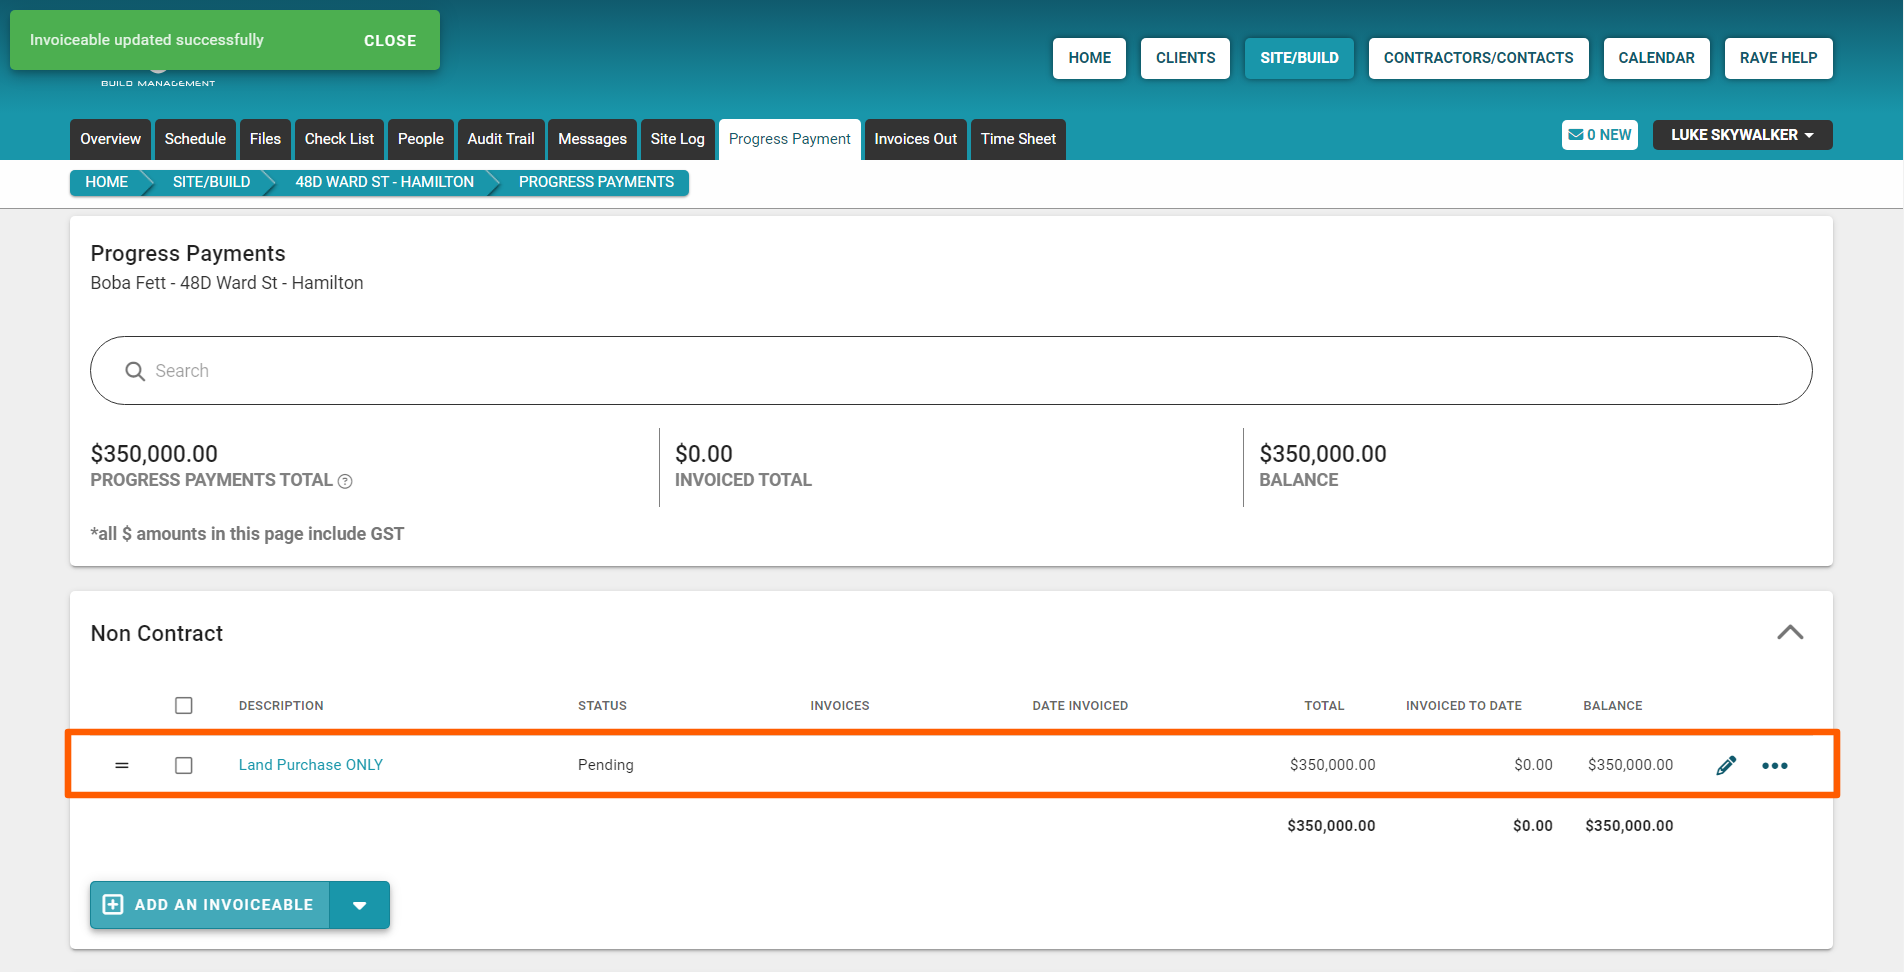
To add a new (non-detailed) invoiceable line to any payment sections of the progress payment (payment schedule) sub-tab we:
- Click the ‘Add an Invoiceable’ button
- Type in the description of the charge + the value (including GST)
- And click ‘Save’ to load that charge
How to Edit a Basic Invoiceable
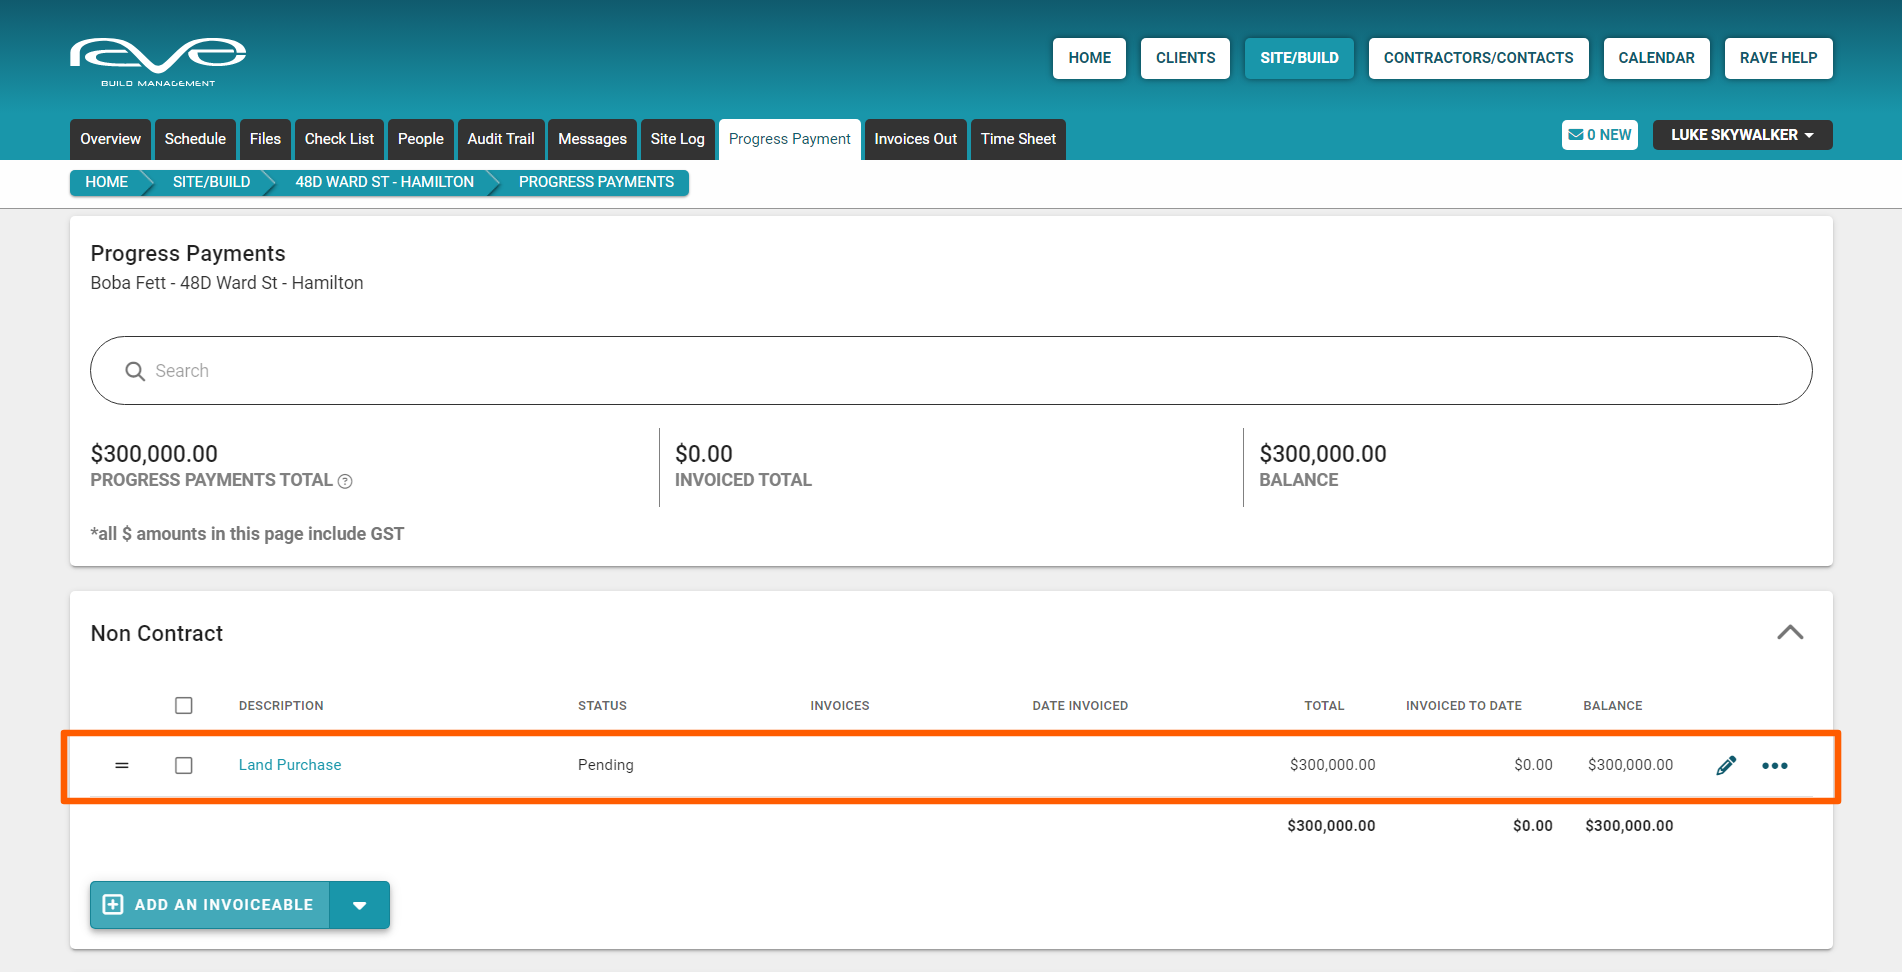
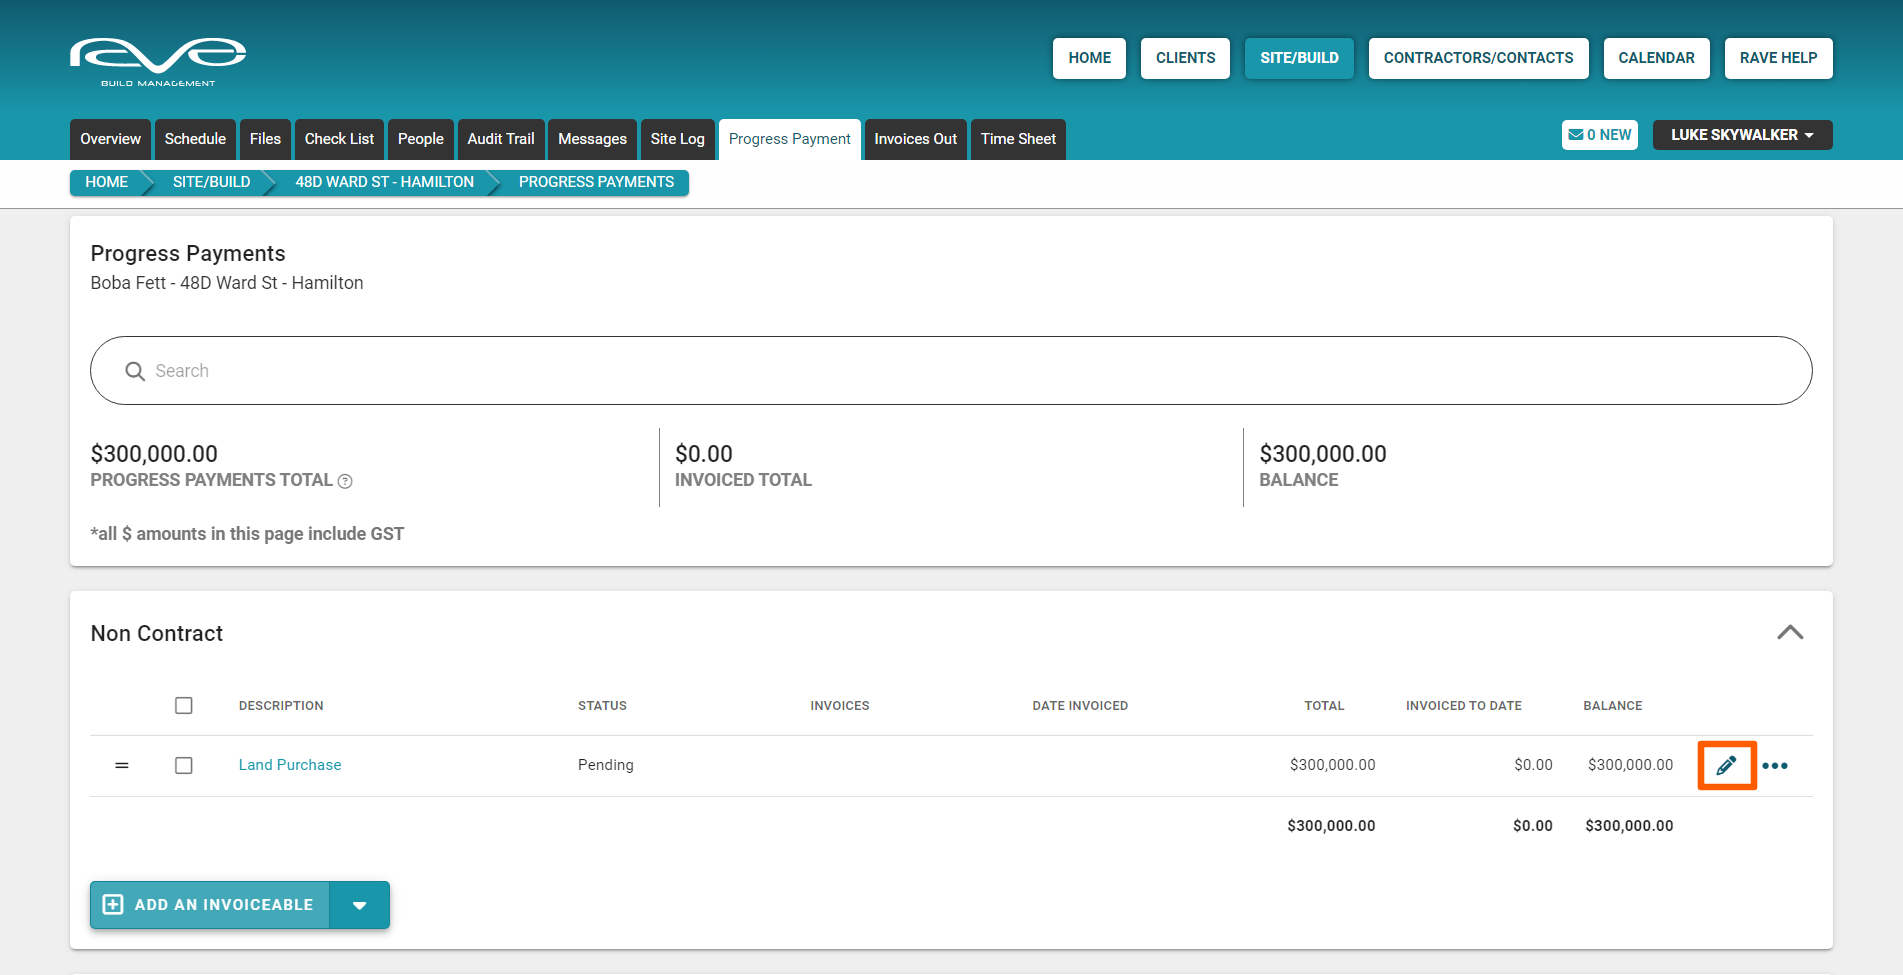
To edit an existing basic invoiceable we:
- Click the ‘Pencil' (edit) icon
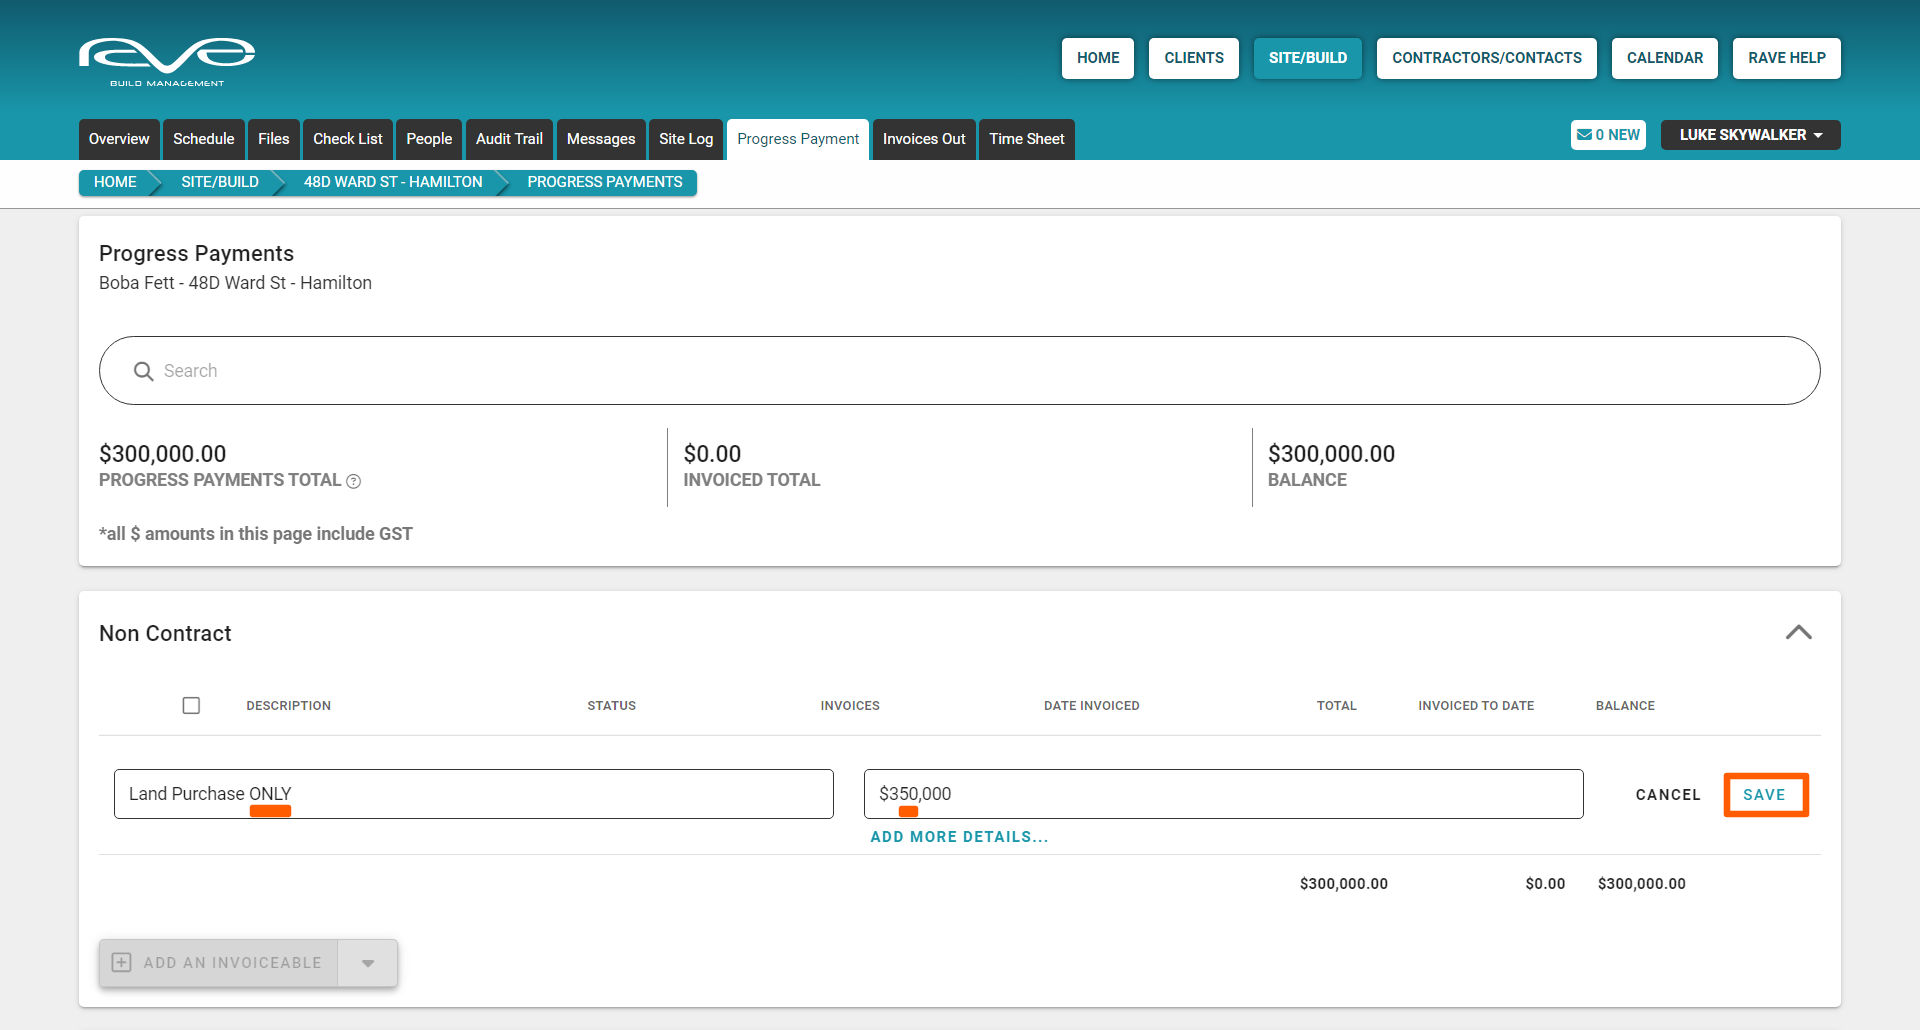
- Change the description or the value (including GST) of the charge
Note: At this point, you will have the ability to;
- Convert to a Detailed Invoiceable by adding pricing details i.e. clicking on the 'Add More Details...' link (below the value field), and then click the line pencil (edit) icon
- Add an additional line by clicking on the 'Add a Line Item' button
NOTE: We cover Detailed Invoiceables in this FAQ. - Once your updates have been made, click the line item's ‘Save’ button to confirm that change
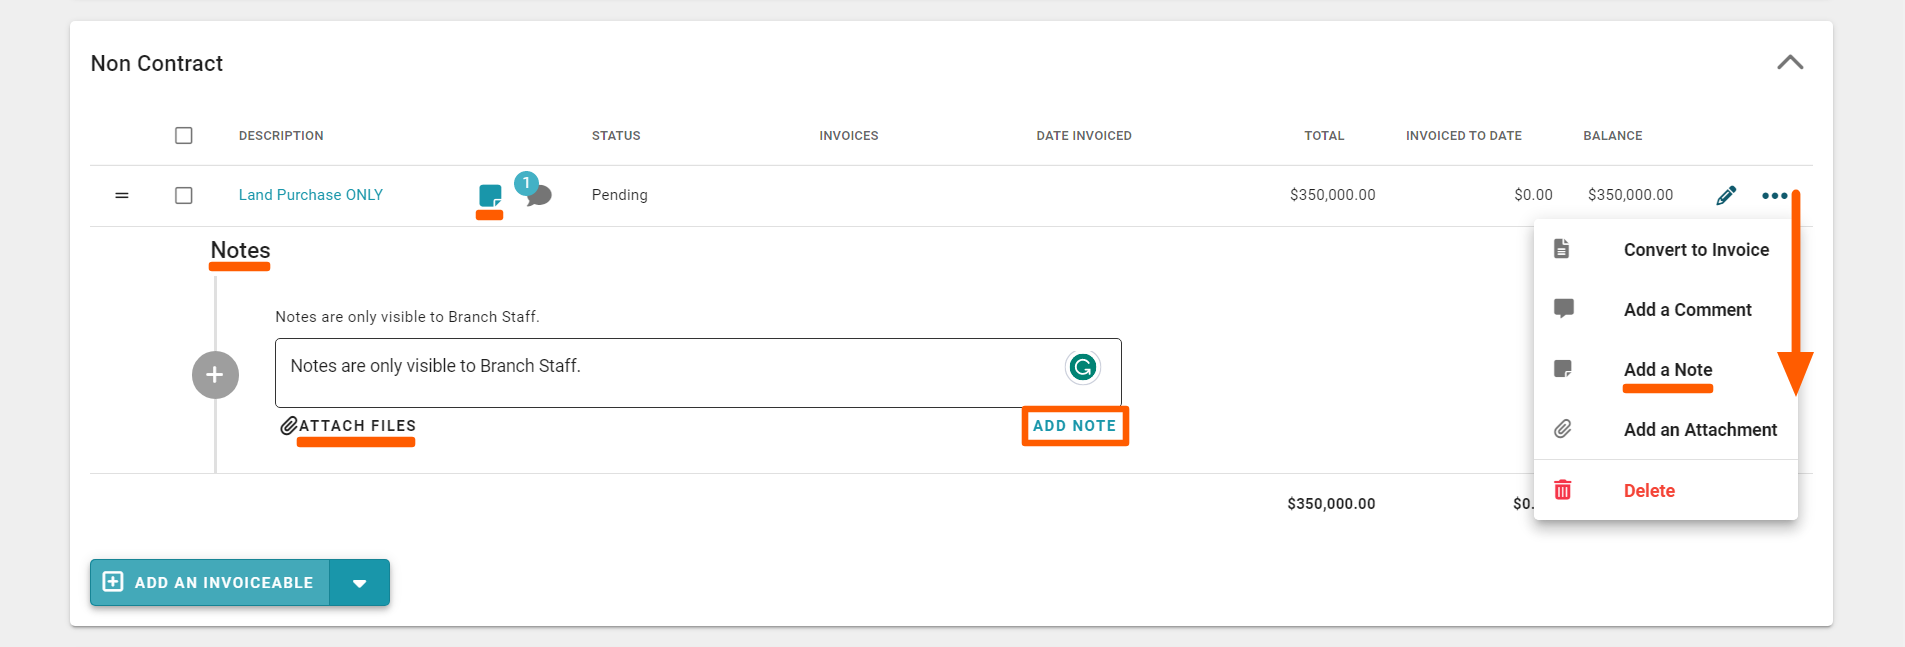
How to Add a Comment or Note to an Invoiceable/Invoice
You can easily add comments, and/or notes to invoiceables and invoices - each of which has its own access permissions:
- Comments - are viewable to branch users and the client (if they've been given access)
- Notes - are viewable by branch users only
To add a comment or note to an invoiceable/invoice we:
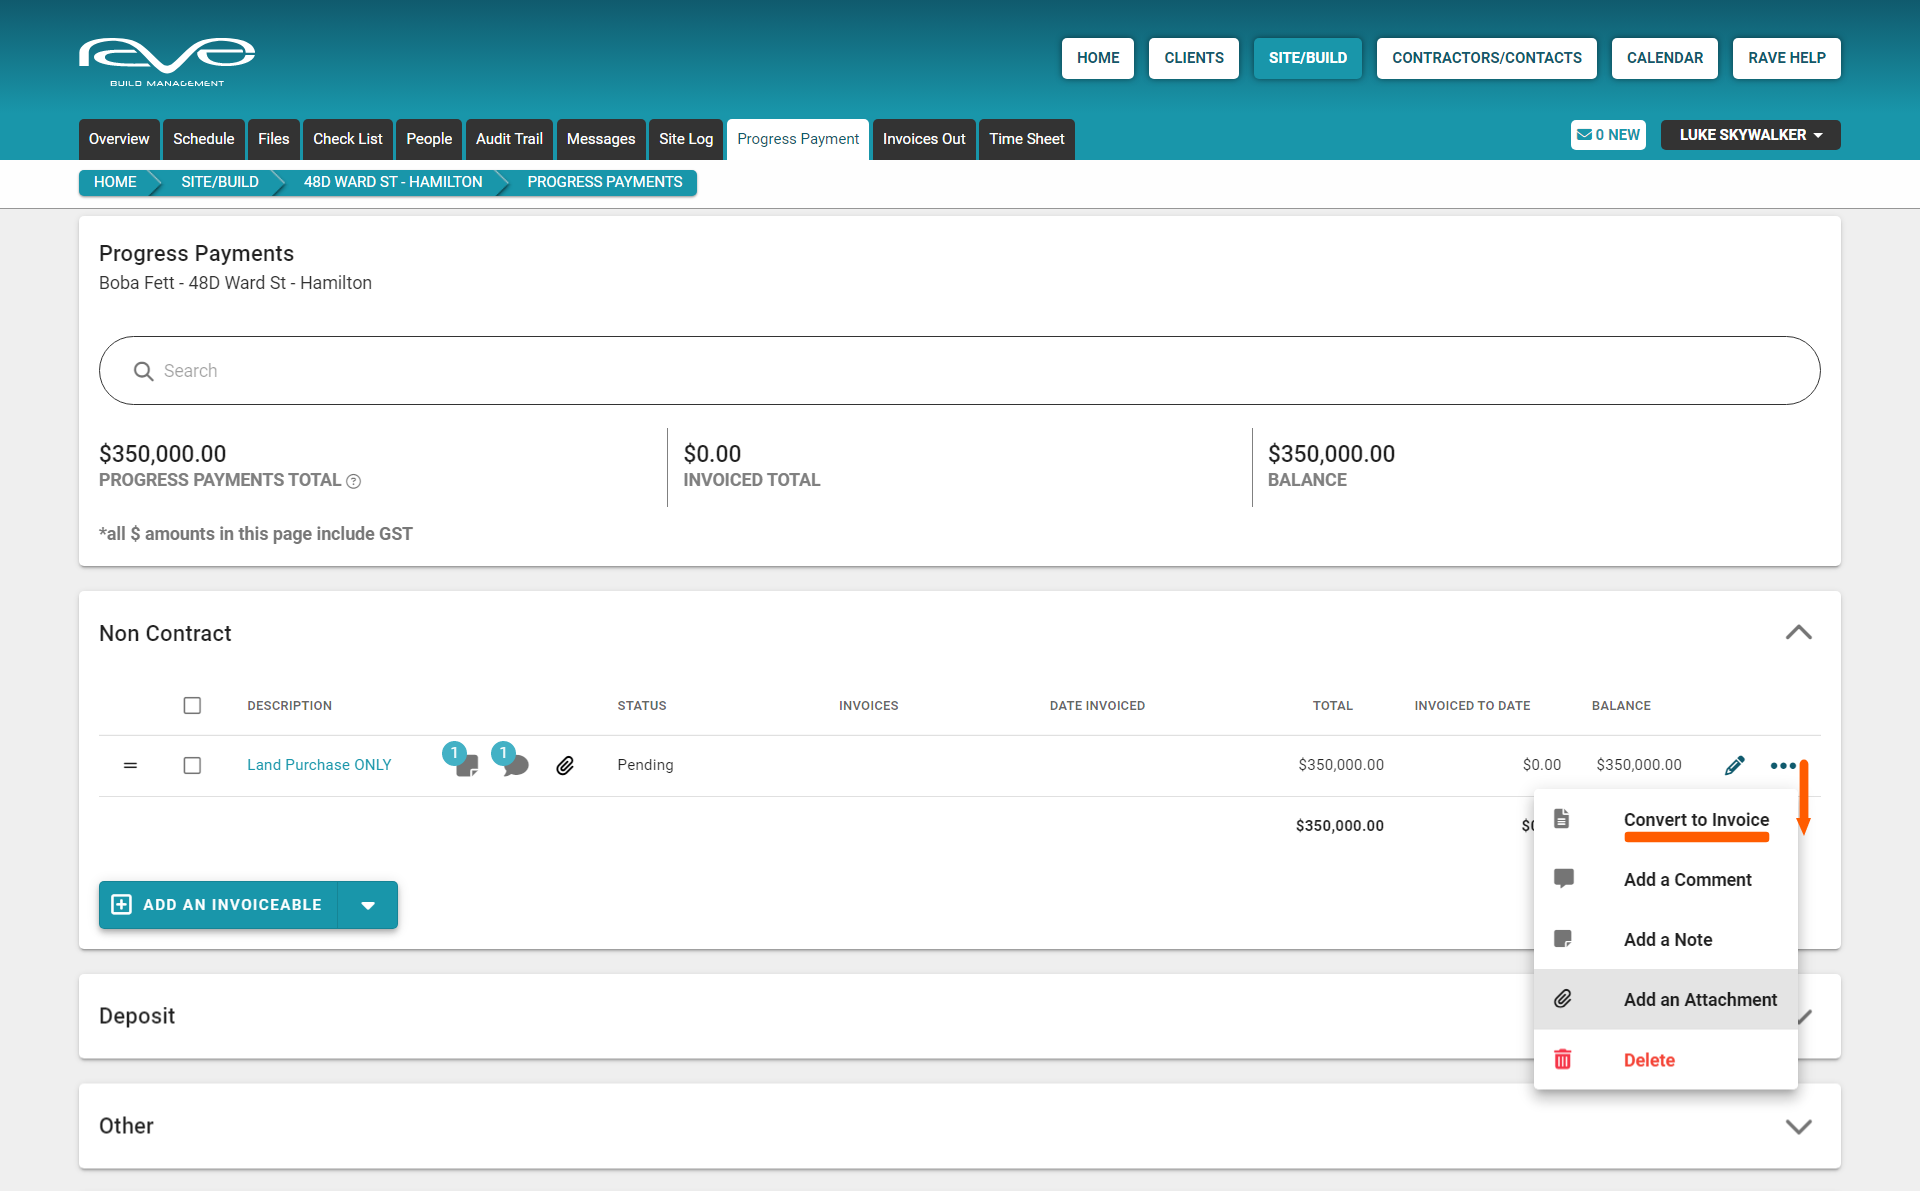
- Click the meatball icon (3 dot menu dropdown) to the right of the invoiceable/invoice
- And select either the 'Add a Comment', or 'Add a Note' option
This will create space to add the comment or note - with the option to add an attachment also. - Once you've added your comment or note, click the 'Add Comment/Note' button to save
This will add a comment speech bubble, or notepad icon to the invoiceable line.
NOTE: The speech bubble or notepad icons can be clicked on to view, edit or delete the comment/note as required.

How to Add an Attachment to an Invoiceable/Invoice
You can easily add an Attachment to invoiceables and invoices - which are viewable to branch users and the client (if they've been given access)
To add an attachment to an invoiceable/invoice we:
- Click the meatball icon (3 dot menu dropdown) to the right of the invoiceable/invoice
- And select the 'Add an Attachment' option
This will create a block for you to:
- Click on, opening up your file browser to select the attachment
- Drag and drop files to - Once you've added your attachments, a paper clip icon will appear next to the invoiceable description - click this icon to file the attachments
NOTE: The paperclip icon can be clicked to view or delete the attachment as required.

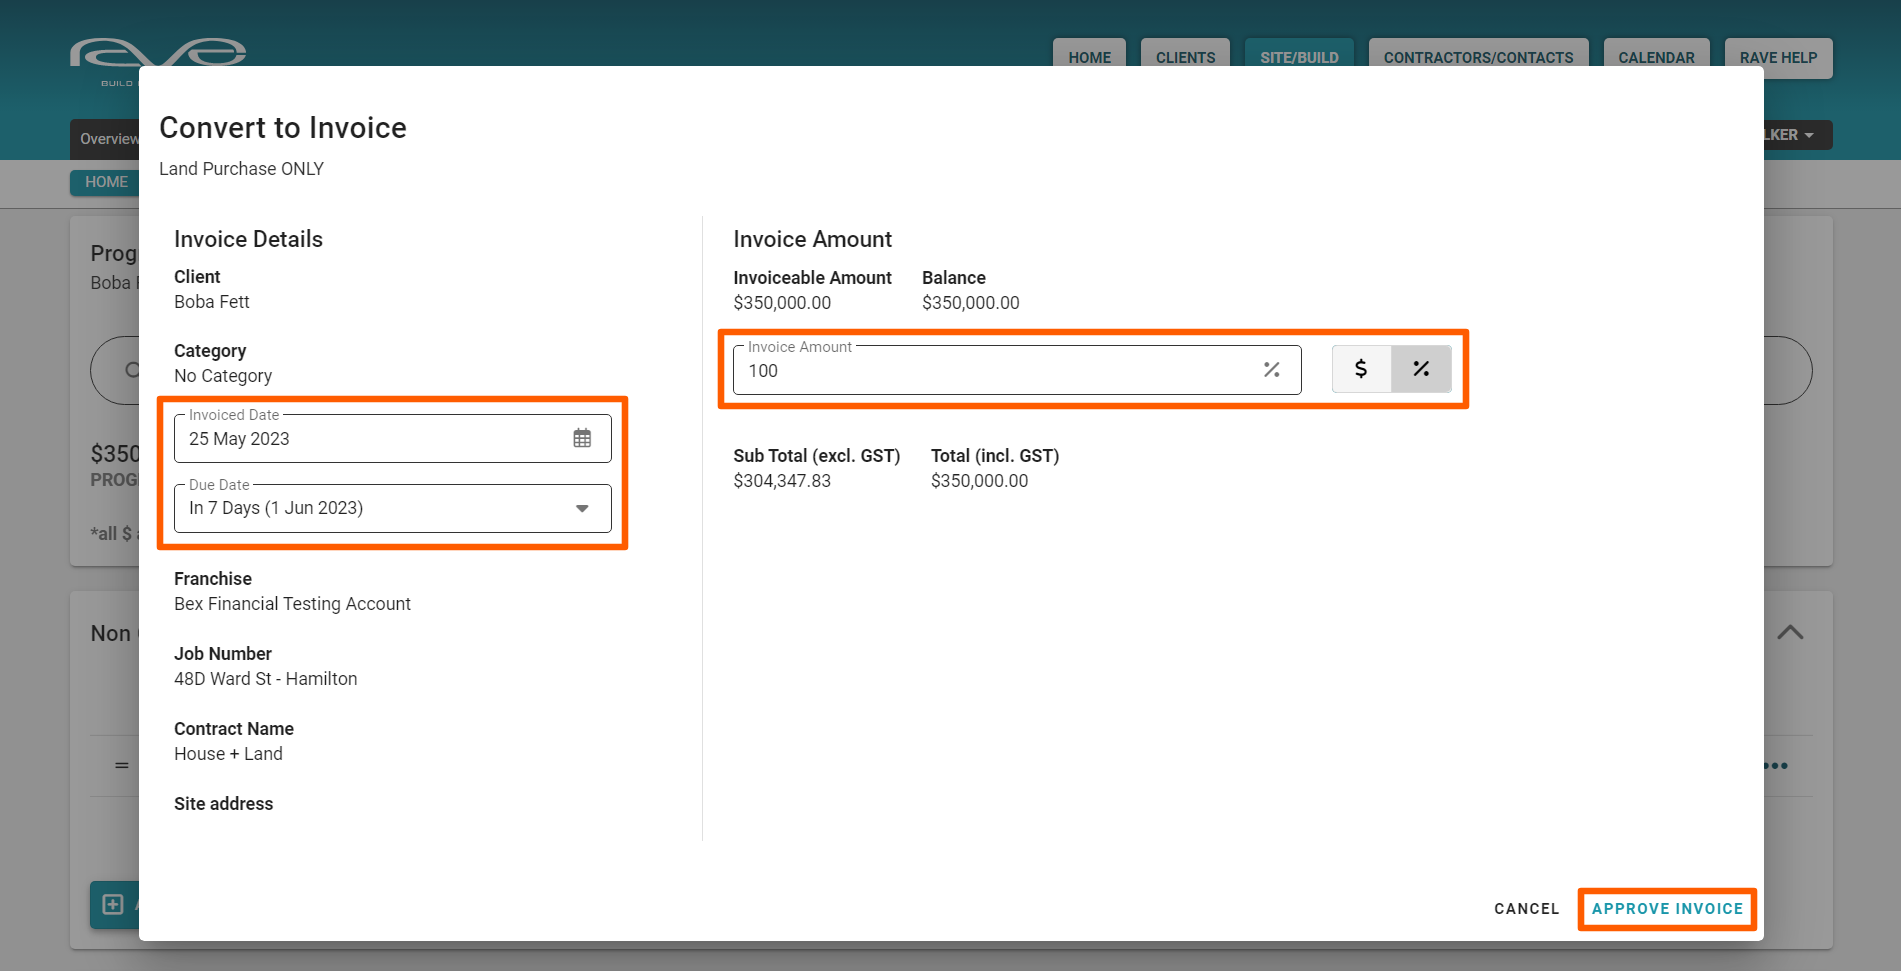
How to Convert an Invoiceable to an Invoice (Request a Payment)
> Sending a payment request notification to your Accounts team, and pushing a draft invoice to Xero (if connected)
Next up is to notify the accounts team that they can request the payment from your client - this process will mark the invoiceable as 'Invoiced' in RAVE, trigger an email notification to the accounts team, and push a draft invoice to Xero (if connected)
To convert an invoiceable to an invoice we:
- Click the meatball icon (3 dot menu dropdown) to the right of the invoiceable/invoice
- And select the 'Convert to Invoice' option
This will open the Convert to Invoice pop-up screen, allowing you to set the Date Invoiced, and Due Date for
payment. And also whether this is to be for the full amount (100%), a lower %, or a specific dollar value. - Once you've made your selection, click the 'Approve Invoice' button to confirm
This will change the invoiceable's status to 'Invoiced', add an invoice link (allowing you to click, to view the invoice), display the date invoiced, set the invoiced to date amount, and update the payment sections to be paid amount too.
As mentioned previously, this will also send a notification email to your accounts person, and push a draft invoice to Xero (if connected)
You'll also notice the table summary at the top of the page, has updated the invoiced total amount too.

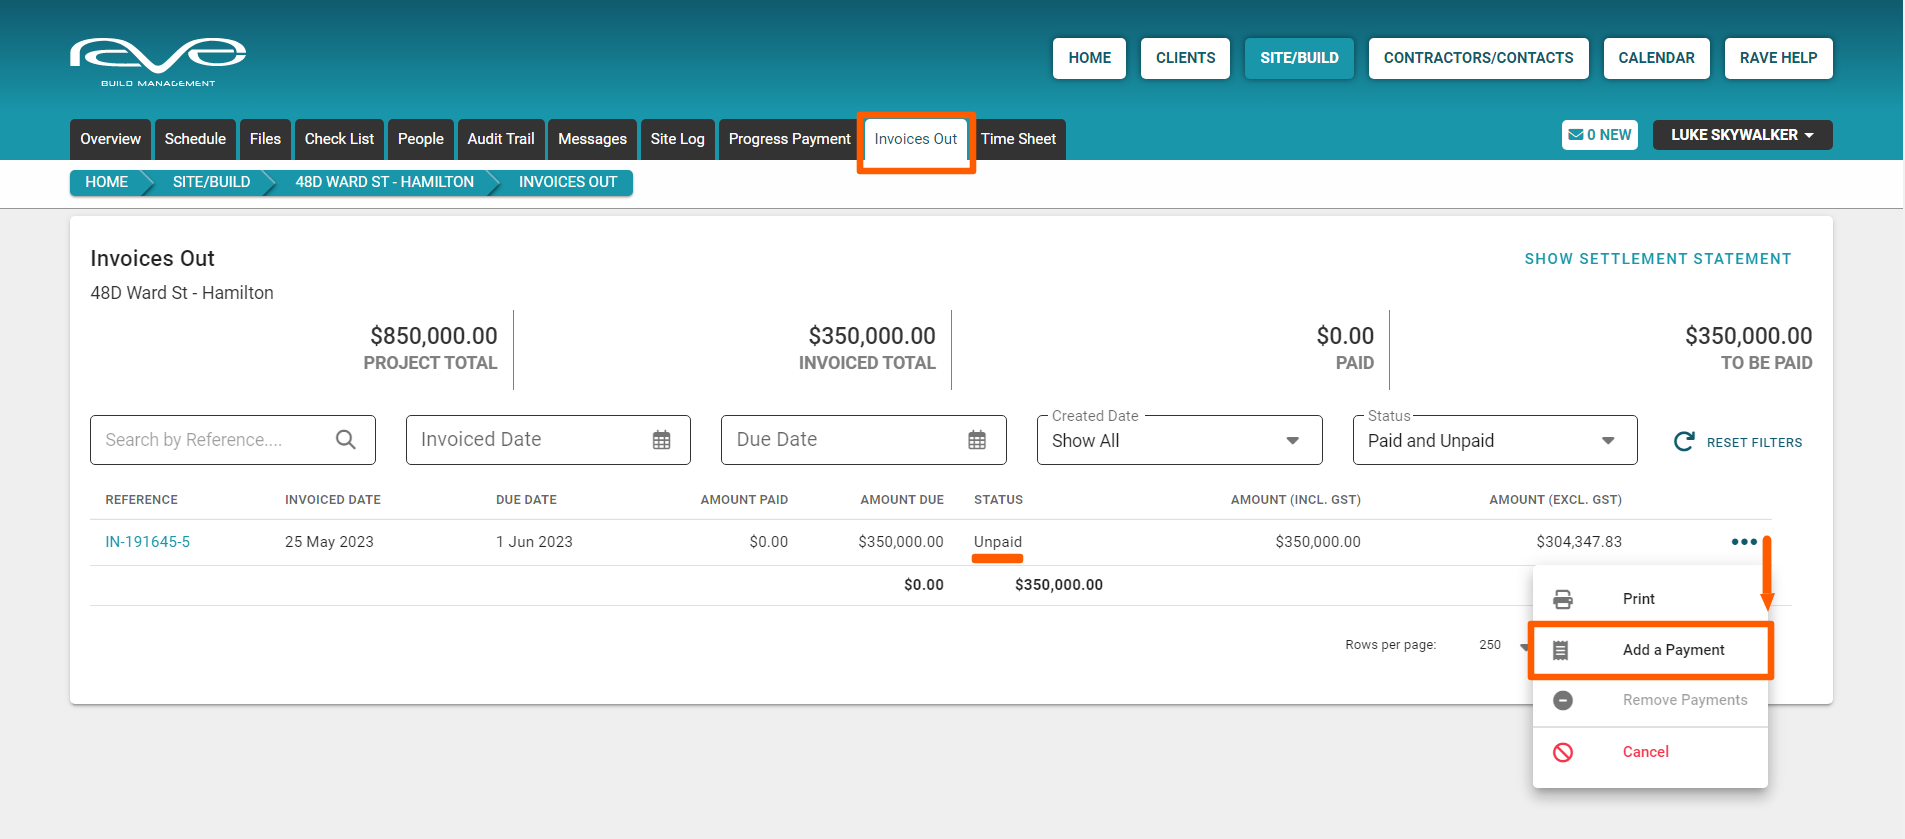
How to Add a Payment to an Invoiceable - via the Invoices Out sub-tab
Access the demo here.
Once the client has made payment (or partial payment) to their invoice, all branches without the FMS module, must record this via the project's Invoices Out sub-tab.
To add a payment to an invoice we:
- Click on the 'Invoices Out' sub-tab
This will display all of the Invoices created for this project so far - Click on the action dropdown (3 dot meatball icon) of the invoice you want to add a payment to
- And select the 'Add a Payment' option
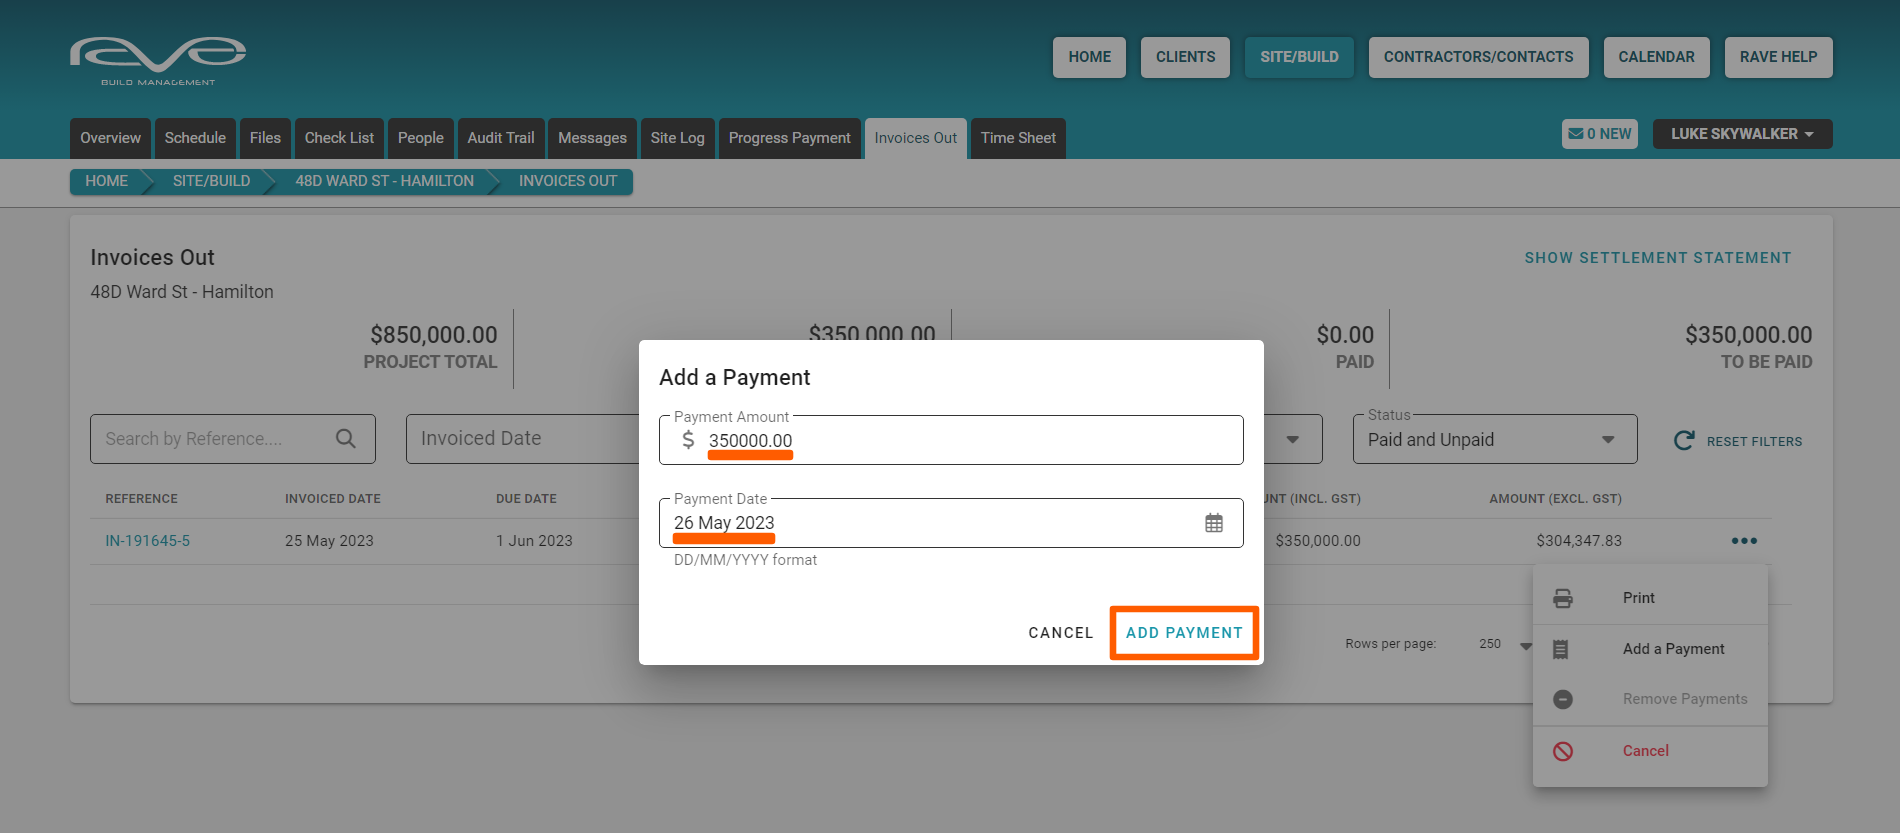
This will open the Add a Payment pop-up screen, allowing you to set the Payment Amount (a partial payment), and the Date Paid.
NOTE: You can add as many partial payments as you need to
NOTE: If your branch has the FMS module, and Xero syncing is turned on, the 'Add a Payment' option is disabled as Xero's reconciliation of the payments will already auto-update RAVE - Once you've made your selections, click the 'Add Payment' button to confirm
This will change the amount paid figure for that invoice, change the status to paid, and also update the paid and to-be-paid figures in the table summary at the top of the page.
Going back to the Progress Payment sub-tab, you'll see that the invoice status has changed to 'Paid', and the date paid has also been recorded.
You'll also notice the table summary at the top of the page has been updated too - that is the paid and the to-be-paid amounts. As has the summary at the bottom of the screen.


Automatic Payment Summary Updates
Each time you convert an invoiceable to an invoice, the Payment Summary (to the bottom right of the page) will update accordingly.