The Site|Build / My Tasks sub-tab gives you the ability to display your assigned tasks across ALL of your build projects either via a Task List or Task Gantt view.
My Tasks – Task List View
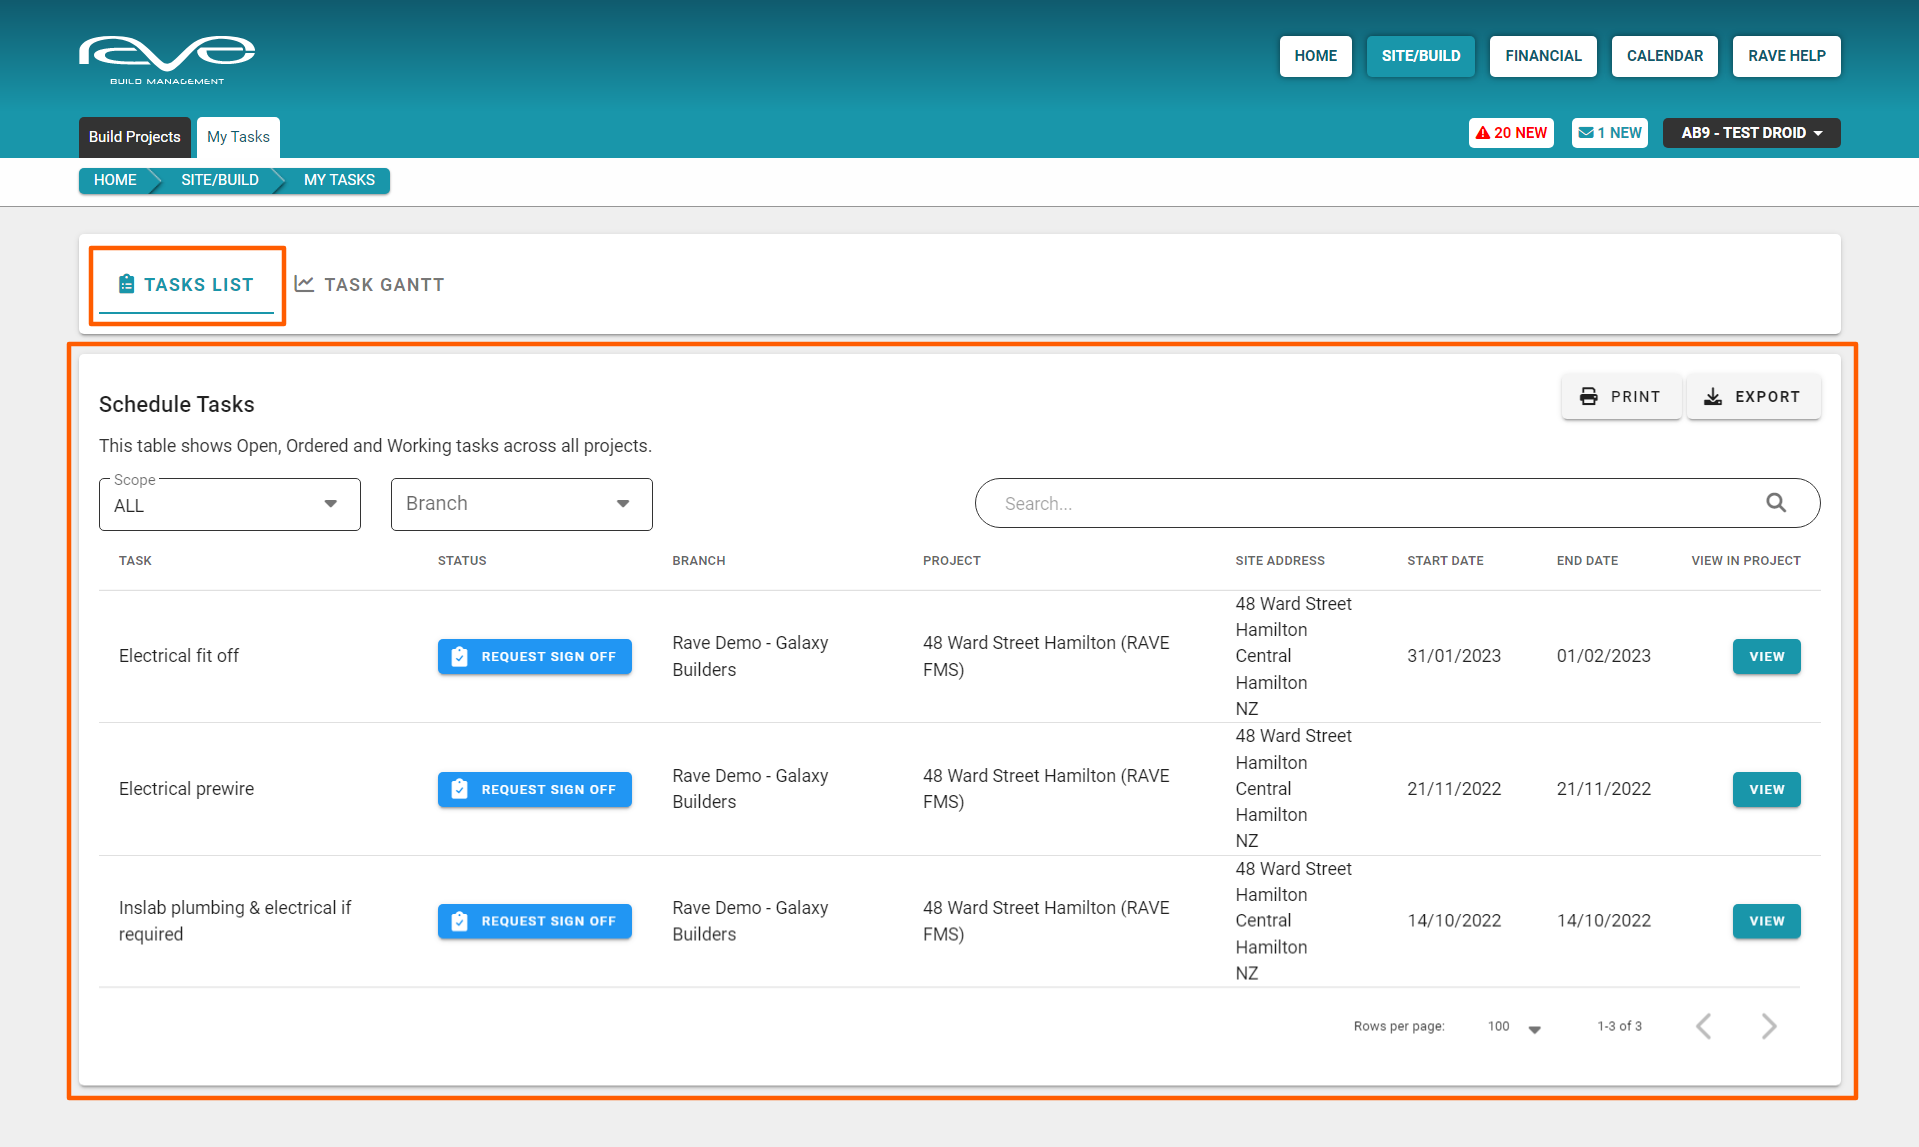
By default the Site|Build / My Tasks sub-tab will open to the Task List view, listing all Schedule Tasks not yet completed in a start date order i.e. in order of the latest start date first, then working backward down the page.
This Schedule Tasks list displays, for each assigned task, the:
- Task description
- Status – Request Sign off / Awaiting sign off
- Branch – being the building company
- Project (job number)
- Site address
- The task’s Start and End dates
To the right is a view button, which opens the task, to access the task comments and any files loaded. This page also has some handy filters:
- The Scope filter allows you select all tasks, upcoming tasks only, upcoming tasks in the next 7 or 14 days. RAVE also allows you to create your own date range.
- The Branch filter allows you to view assigned tasks from a selected number of branches.
You also have the ability to search for a specific task via the Search field. And the ability to Print or Export (as a CSV file) your list as required.
My Tasks – Task Gantt View
The My Tasks – Task Gantt view, shows you assigned tasks in a graphical gantt display. By default the Task Gantt view shows future tasks from today’s date onwards, though you can use the calendar filter to select a specific date range. Other available filters include
- Task Status – Open, Ordered, Working
- Task External Status – Accepted, Assigned, Awaiting Sign Off, Completed and Rejected
- Branches – again allowing you filter assigned tasks from a selected number of branches
The View By dropdown, gives you the ability to zoom the task gantt scale in and out.
The Today button repositions the gantt to display today’s date (if it’s within the selected date range)
The Task Status is colour coded – as per the top right of the screen
- Open (grey) meaning the task hasn't started yet
- Ordered (purple) meaning we are awaiting materials to arrive before the task can start
- Working (green) meaning that the task has started but is not yet complete
- Completed (blue) meaning that the task has been completed to the project managers satisfaction
If there are a number of tasks displayed and/or the date range is wide enough – you have the ability to scroll the gantt chart sideways, and up and down.
The gantt chart is able to be printed via the print icon - this is to the top left of the page, following the Schedule Task Gantt header.

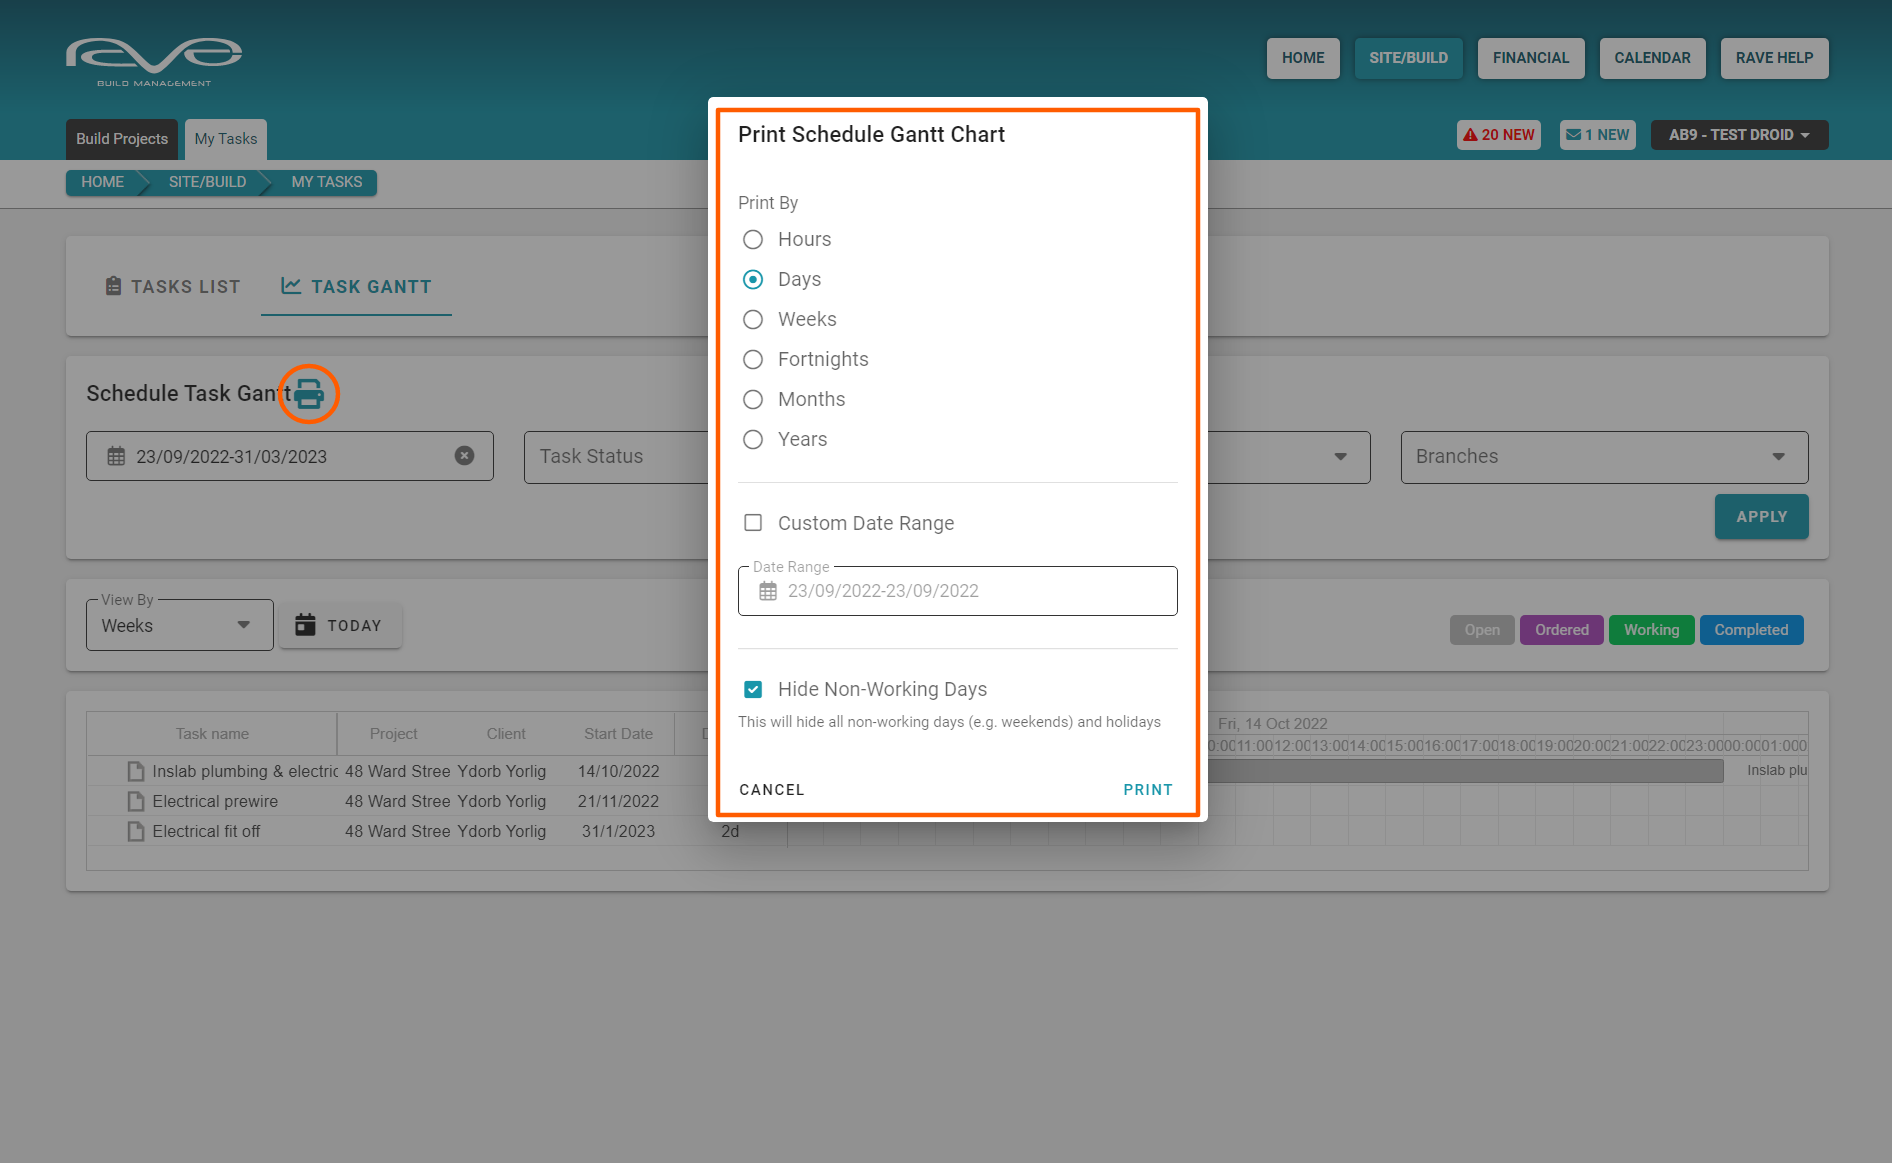
Printing the Task Gantt view
You have the ability to print your My Task Gantt Chart on to a single page (A4, A3, A2 etc) or across multiple pages – though this is heavily printer dependent i.e. the ability to print to one page, or multiple pages as a tile/mosaic/poster print option (x pages wide by y pages high).
Steps to print your My Tasks Task Gantt
- Click on the printer icon to the top left of the page
- On the Print Schedule Gantt Chart pop-up
- Select the view by timeframe (hours, days, weeks, fortnight, months, years)
- Set the date range of the gantt chart to be printed - by clicking on the date range (defaults to today) and click the start date and click again for the end date
- Decide whether you want to include non-work days in the print out (weekends and non work block out periods)
- Click print
- This will create a webpage of the task gantt view, now right click to ‘Save image as…’
- Give the .png image a file name i.e. My Task Gant and save this png file
- Open up the saved PNG file, and click on your print icon
From here you will be able to print to whatever paper size, and scale you want i.e. fit to a page or your own scale option. If your printer supports ’tile’ / ‘mosaic’ / ‘poster’ printing, you can blow the Gantt chart up over 2 or more pages, allowing you print an enlarged version of your gantt timelines.
NOTE: If you require a PDF copy of your gantt chart, after step 5 above, select the 'Print to PDF' option instead of an actual printer, this will prompt you to select a file name and saving location for a PDF version of your gantt chart.