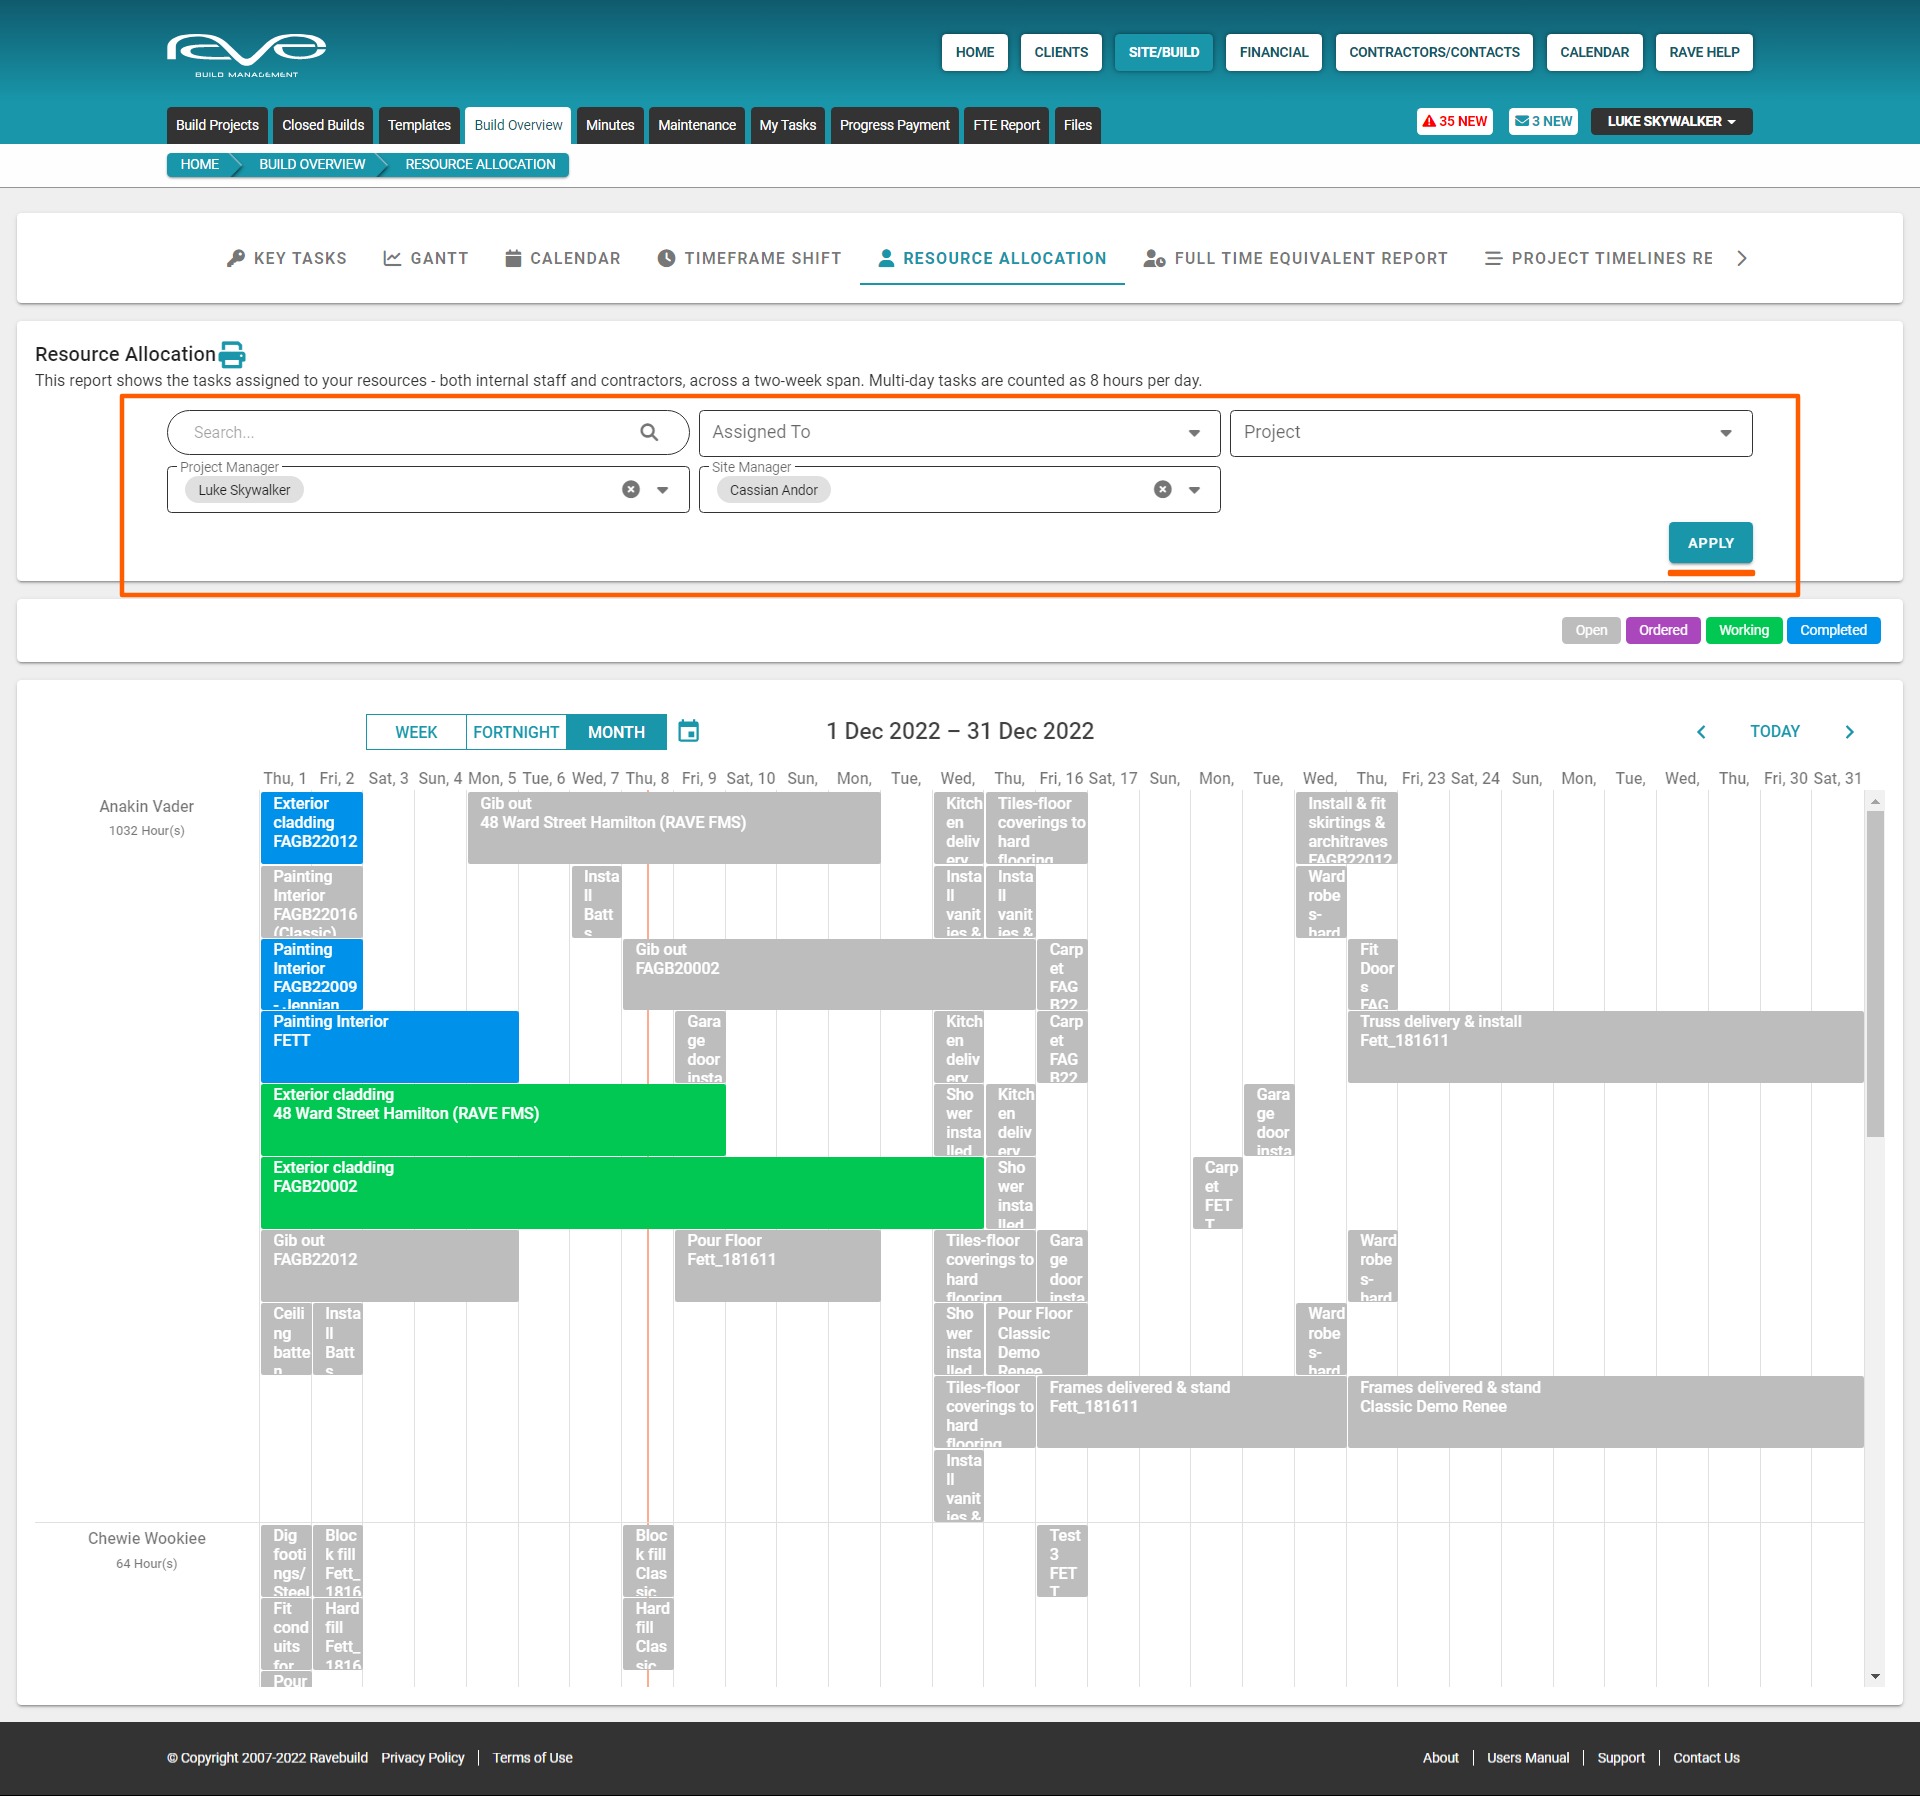
The Resource Allocation build overview, available via Site|Build / Build Overview / Resource Allocation, relies on your tasks being assigned out to staff and contractors – and once done, allows you to see task progress, and how busy your team and trades are via a month, fortnight or week view.
This very popular report displays:
- Your Staff Members and Tradees in first name alphabetical order
- With individual tasks displayed across their date range columns – each task displaying it’s
- Task description
- Job number
- Hovering over a task will pop-up a display of it’s:
- Task description
- Job number
- Start and Finish dates
- Duration
- Each task block is clickable – taking you to the Task List view of that project for quick editing
- This report includes today’s date line (assuming today’s date falls into the range of the report), allowing you to instantly view tasks falling behind – via our gantt colour coding (displayed to the top right) i.e. any tasks in an open (grey) or ordered (purple) state to the left of the date line may be something for the project manager to chase up.
- To the top left, we have the ‘View By’ selector allowing you to zoom in/out by day, week, fortnight, month and year.
- With two calendar scrolling options
- The calendar icon to the top left – by the Day/Week/Month filter
- And the ‘< Today >’ link to the top right

Running a Resource Allocation Build Overview Report using the Build Overview Filters
At the top of the ‘Resource Allocation’ build overview page, are a number of reporting filter options – these are available for most of the Build Overview reports, and allow you to create your own customised reports – these are:
- The Search field – allows you to search/filter tasks by their Task Description
- Assigned To – allows you to view tasks assigned to specific task assignee(s)
- Project – allows you to view tasks across a selection of specific jobs
- Project Manager – project managers can view just their projects, a selection of project managers projects, or ALL projects
- Site Managers – allows you to view jobs managed by specific Site Manager(s)
Once you have set your filter options, click ‘Apply’ at the bottom right of the filters, to apply your selections to the report.
Printing your Resource Allocation report
Once you have applied your filters, you have the ability to export your Resource Allocation report for printing. This is via the printer icon to the right of the job number – above and to the left of the Resource Allocation filters.
To print your Resource Allocation report:
- Click the printer icon (to the right of you job number) – this will open the ‘Export Current Resource Allocation View’ pop-up
- From here you just select
- The size of paper you are going to print to i.e. A4, A3, A2 etc
- The orientation of the print out i.e. Landscape or Portrait
- And then click ‘Export’ to print – this will open a new tab previewing your Resource Allocation report
- From here we ‘right click’ on the web page, and select ‘Save Image As’
- This will open your file browser pop-up giving you the chance to save this as a picture file and where to save it to
- Click ‘Save’ to save it
- Then open your saved image file of the Resource Allocation report to print.


---