The ‘Messages’ sub-tab is your gateway to RAVE’s internal ‘email’ system. It is just like your normal email set-up, but it is internal to RAVE and allows you to keep all of your project-related emails in one place - the messages sub-tab of your project.
To access the messages side of a project in RAVE, we open our target project, and then click on the ‘Messages’ sub-tab.

Viewing and Opening a Message
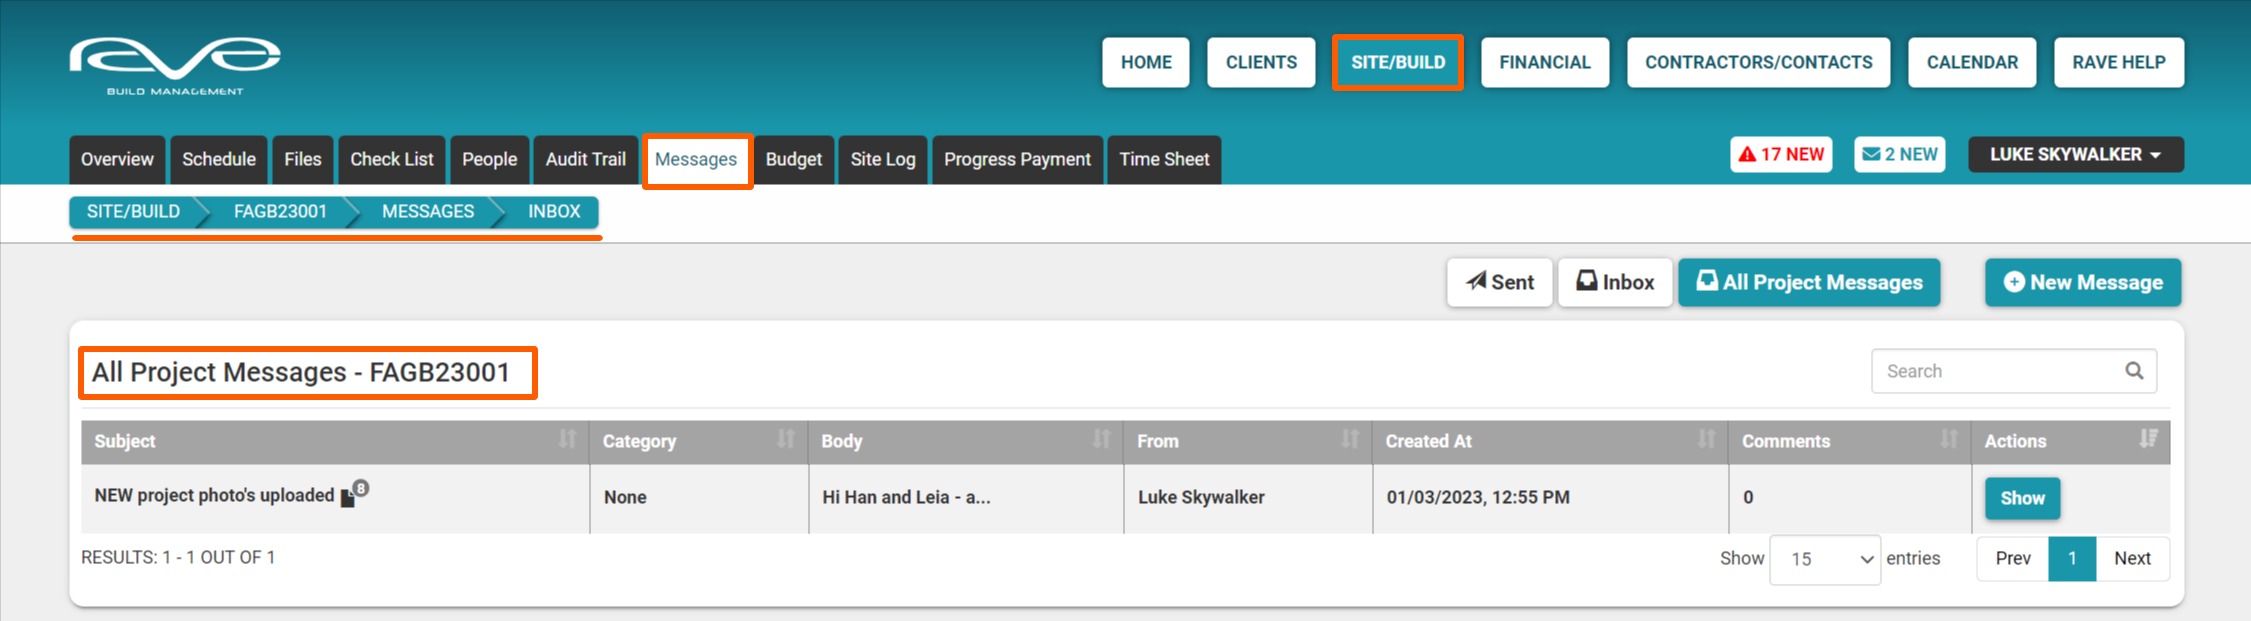
You'll see that the 'Messages' view defaults to 'All project messages - combining both your 'Sent' and 'inbox' messages. Though you can easily click the ‘Sent’ and ‘Inbox’ buttons to view your outbound and inbound messages just like regular email - but we'll show you both as the default.
To view an email or message in either your inbox or outbox, click the 'Show' button (to the far right) of the message you wish to view.
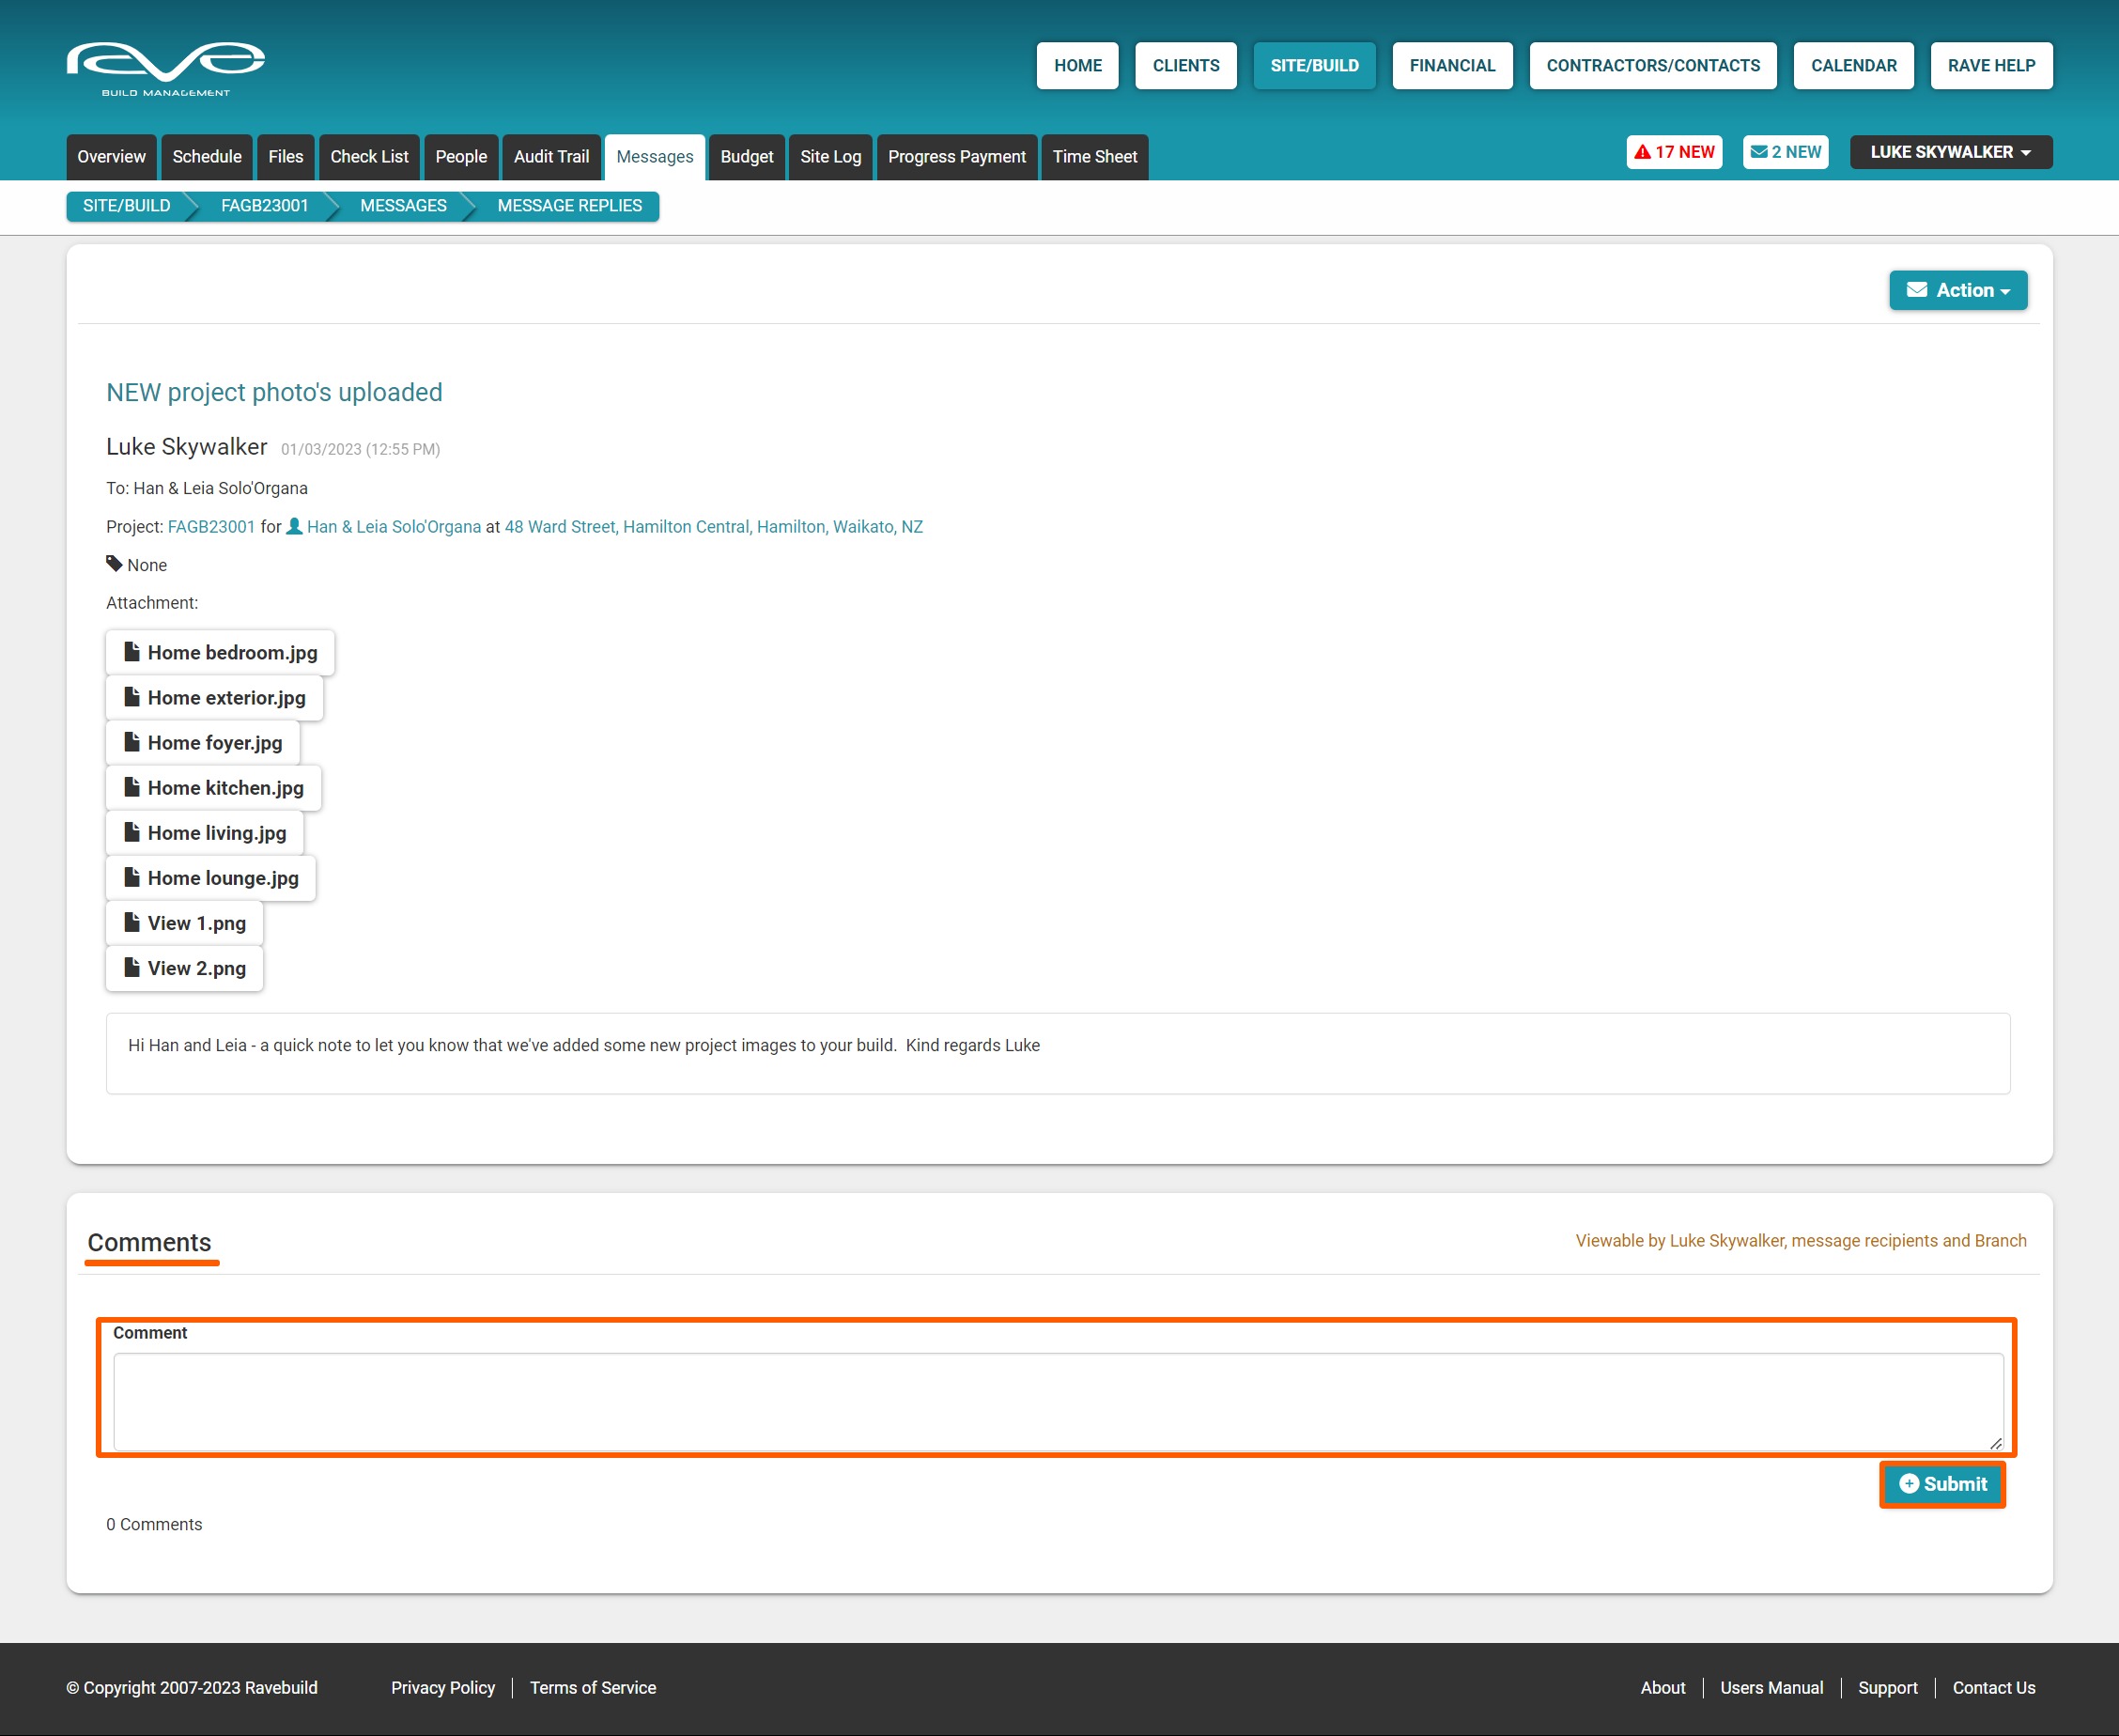
With your message open you have the opportunity to add a comment, clicking 'Submit' to confirm and send it. Any comments added are available to everyone who was included on the original message list.
NOTE: RAVE is not currently connected to Google Business Suite or Office 365 for calendar or email but that is an upcoming update that we are working on in the New Year.


Sending a New Message
To create a new message we just click on the ‘New Message’ button. And just like an email, we can select who we want to send this message to, add a subject line, write a message and add attachments, etc.
- The ‘To’ list populates from the projects ‘People’ tab
i.e. any contractors, staff, and site staff that you have not given access to your job via the project’s ‘People’ tab will not appear on your 'to' list. You can select recipients one at a time, or use the ‘Select All’ button to add all of your contractors, project/site staff, and the client – then unticking anyone you don’t want to include. - The 'Subject' line is just like a normal email subject line i.e. project delays.
- The 'Category' field allows you to set a category for your email, allowing you to filter your messages later if required.
You have the option of selecting none (no category), a number of preset categories (to track all of your messages about variations, the plans and specs change, updates, maintenance issues) or you can create your own category by selecting 'Other'.
NOTE: If you select the ‘Other’ category, you do need to type in a Category description to send your message. - Clicking on the attachments section will open up your file browser, you can then select any attachment(s) you need to add.
- And finally, you can type in your actual message, with a number of message formatting options to get your message looking just right.
- Click 'Send' to send
NOTE: You will notice that there are a number of required fields (To, Subject, Category, and Message Body). These all need to be filled in, otherwise the ‘Send’ button down to the bottom right of the page, will remain shaded out i.e. you are not able to send this message until we complete all of the required fields.

'Also send as emails' explanation
After writing your message, with all of the required fields filled in, the send button will be unlocked, and we can send the message away. At this point, you may notice that the ‘Also send as emails’ check box is ticked.
Also sending it as an email can be really helpful if your contractors are new to RAVE, and are not yet logging into RAVE daily i.e. there's the potential that they won't see the message. When this check box is ticked, RAVE sends the message not only within RAVE, but also externally as an outbound email - giving your contractors a better chance of seeing it. Although this is ticked by default, you can untick it if you do not want to also send an external email, though we generally recommend that you leave it ticked.
Again, once you have filled in all of the fields for your new message, you can just click 'Send', to send your message out to everyone in your ‘To’ list.
You’ll then be taken back to your All Project Messages page, containing both your inbound and sent messages - your sent message will be listed here.
Saving and Loading a message template
If you have a project-related email that you frequently send, you can save that as a message template, ready for you to select and load up in the future.
You can save/create a new message template by:
- Starting a new message - using the 'New Message' button and process
- You can then copy and paste your email into the message body section - also formatting it as required
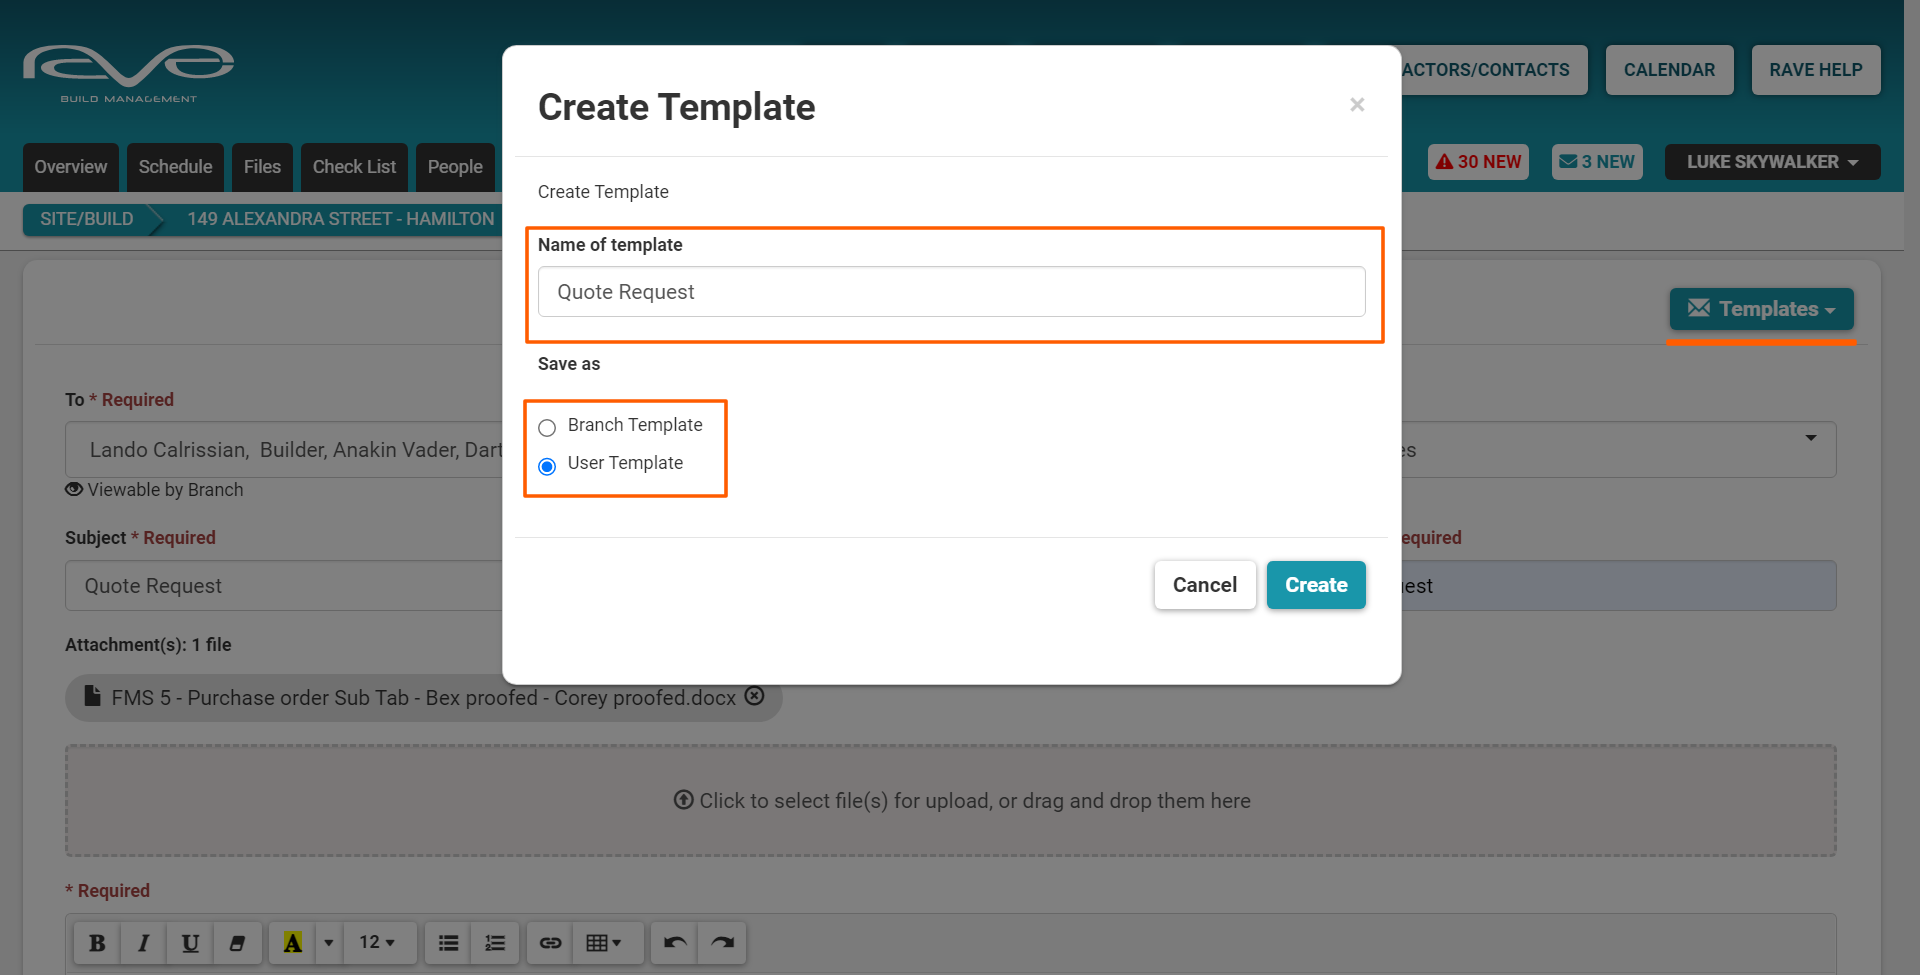
- Then, before hitting the 'Send' button, move up to the top right of your new message page, click the 'Templates' dropdown, and select ‘Save as Template’
- Give your message template a name
- Decide if this template is to be accessible to all branch users, or just yourself
- And click 'Create' to save
Your new message template has been saved for future use, you can now complete your message and send it as normal.
In a similar fashion, you load a message template by:
- Starting a new message - using the 'New Message' button
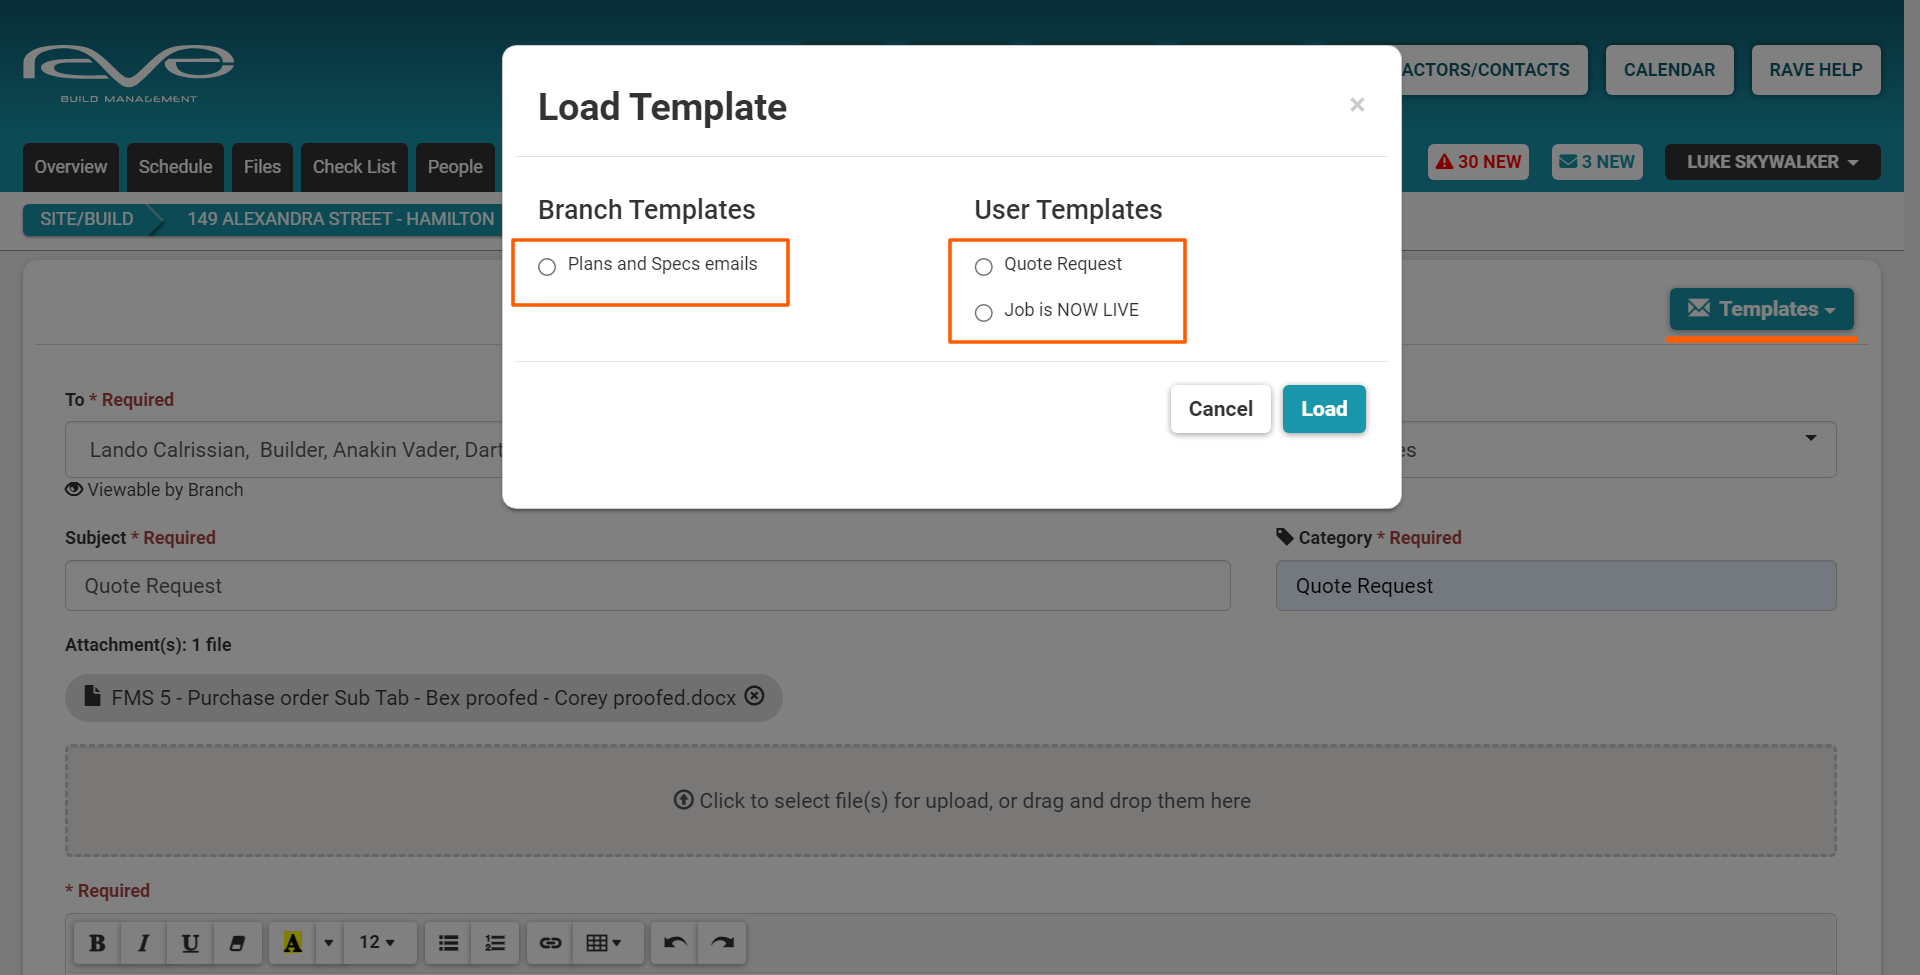
- Move up to the top right of your new message page, click the 'Templates' dropdown, and select ‘Load Template’
- Tick the message template you would like to load
- And click 'Load' to load
Your message template will be loaded - you can now edit the copy, complete all of the required fields, and send it off as normal.
Receiving a Message, a Comment, and Adding a Comment to a message
If a NEW project MESSAGE is sent to you, it will appear in your project’s 'Inbox' - also available via your 'All Project Messages' folder. To open any messages, sent or received, we just click on the ‘Show’ button over to the right of the message you want to open.
If a NEW COMMENT has been added to a project message, it will be flagged via the 'Comments' column of your 'All Project Messages' folder - also displayed in your 'Sent' and 'Inbox' pages.
To add a comment, you simply click ‘Show’ (to the right of the message you want to open), add your comment and click your message in, and click ‘Submit’ to add it.

