RAVE is designed to help you save time on your jobs by providing quick access to projects and documentation, and to help you complete your work with fewer headaches.
This contractor and supplier training takes you through the process of getting yourself set up for RAVE's desktop portal - RAVE's FREE to download RAVEBUILD app`has similar functionality, but with a slightly different layout optimised for smaller smartphone screens.
Getting Set Up in RAVE
You can set up your RAVE account by using the login credentials that you received via your RAVE invitation email. The invite includes your username (generally your email address) and a temporary password. Your invitation to RAVE will be similar to the image below.
NOTE: If you're already an user of RAVE then the invite will simply let you know that you can now access RAVE builds for your new building company with your existing RAVE login. But, if the username and password displayed in the invite email are NOT the RAVE login details you are already using with your other building companies - let this new building company know what your current login email is, and ask them to re-add you to their system with your existing login profile.

In addition to your login information, your invite email includes a few resources to help you get up and running with RAVE. This invitation includes links to two of our contractor/supplier training tutorials:
Getting set up in RAVE Build - In this training, we'll show you how to quickly get SET UP with RAVE Build - so your building company(s) can start sending you work!
Using RAVE Build - In this training, we'll show you how to use RAVE Build to access the job information you need to get your work done quickly!
And if you need any further support, you can reach out to us via help@ravebuild.co.nz or 07 210 2228
Checking your RAVE user details are correct
To get started with the RAVE set-up process, click on your invite email’s “Get Set-Up!” link, to take you through to the RAVE login portal.
Accessing RAVE
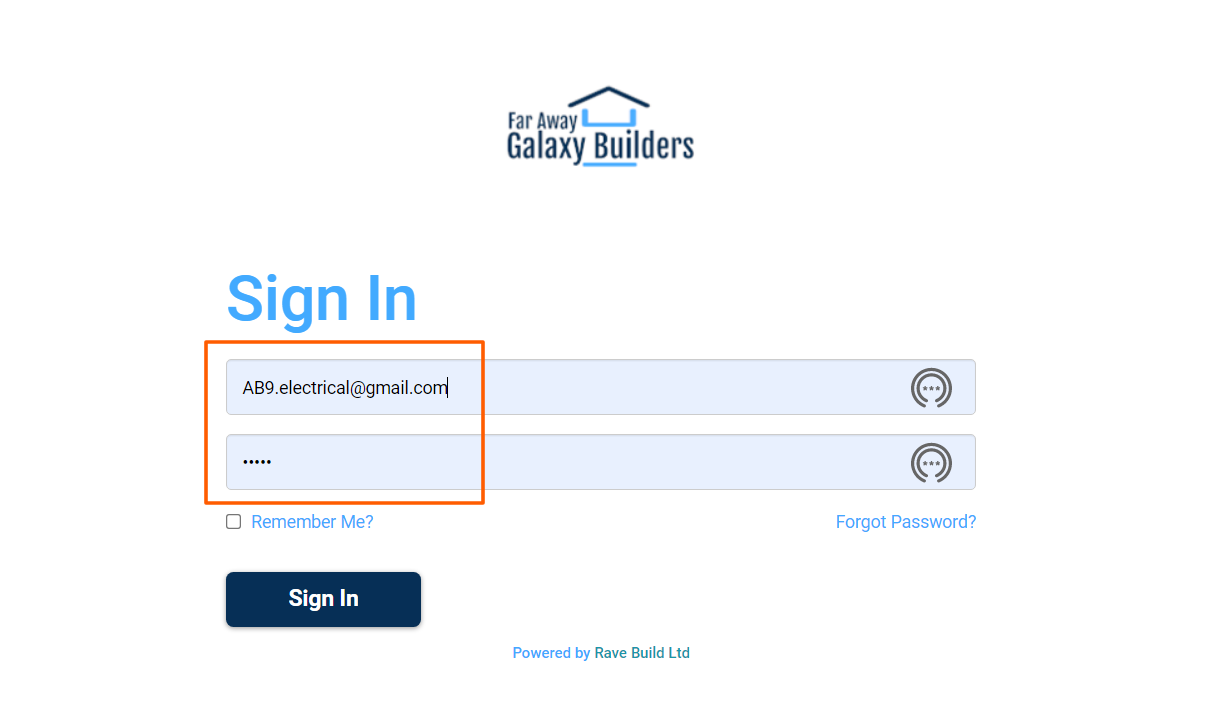
From the RAVE login portal, enter the login email address and temporary password that you've been provided from the invitation.
RAVE’s login portal is available through your desktop/laptop and is also available on your internet-compatible device - smartphone or tablet. The free-to-download RAVE Build app is tailored specifically for smaller smartphone screens
NOTE: Generally the temporary password will last for up to 48 hours, if the password no longer works, or if you’ve forgotten your password, click on the ‘Need Help/Forgot Password’ link to the bottom right of the login screen (or click on this link: https://pro.ravebuild.com/s/password/reset) and type in your login email address to be emailed instructions to reset your password.
The Edit Profile Details page
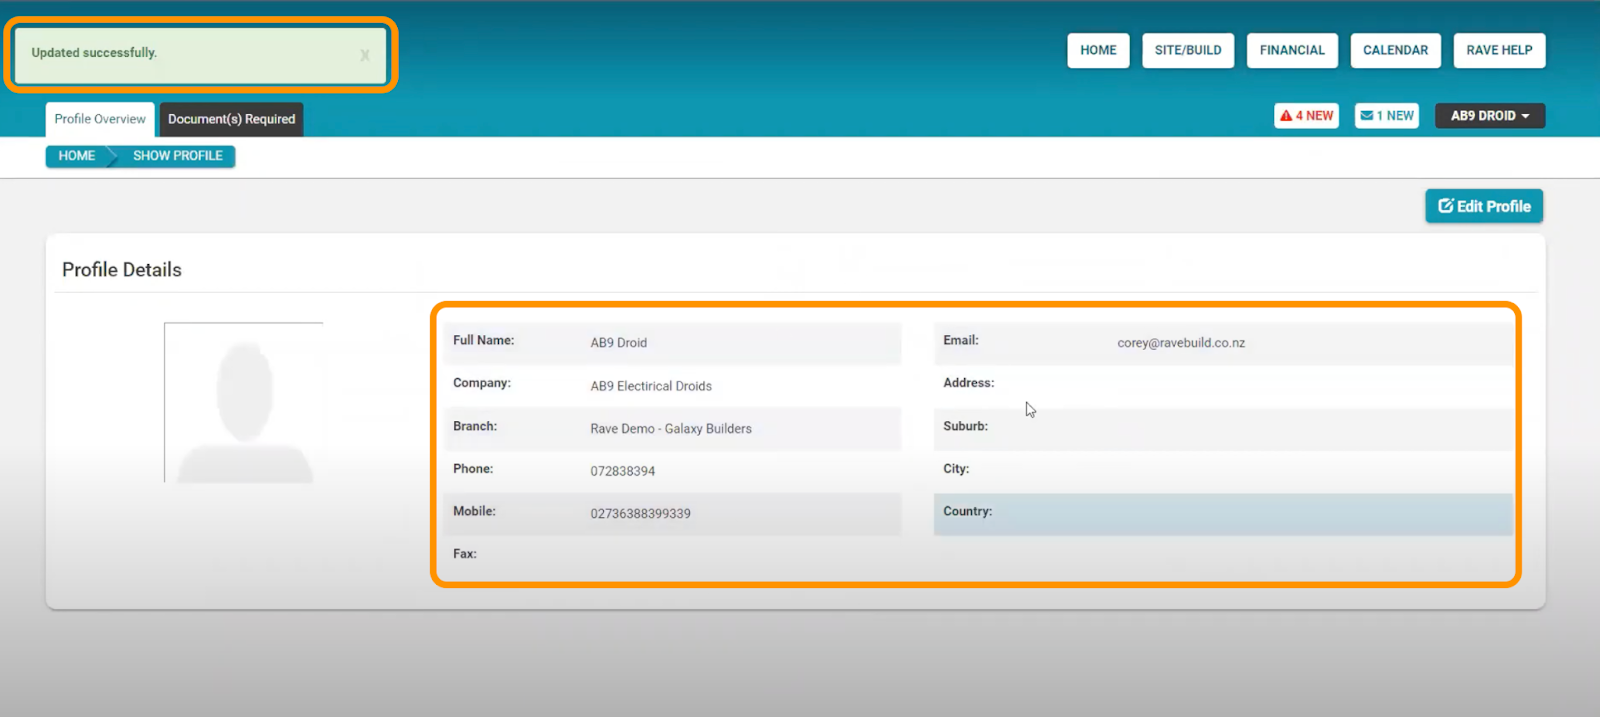
The first time you, as a new contractor/supplier, access RAVE, you will be taken to the contractor/supplier Edit Profile Details page - to review your profile information, and if necessary, update your profile and contact details. You’ll note a number of required fields to be completed/checked including your company name, your first and last names, your mobile number, and your contact email address – it is helpful to check/select your trade type also. Once you’ve made any necessary changes click “Update” to save.
Your checked/updated details will be displayed on the Profile Details screen. Any future changes can be made here by clicking on the ‘Edit Profile button to the top right of the page.

Updating your password
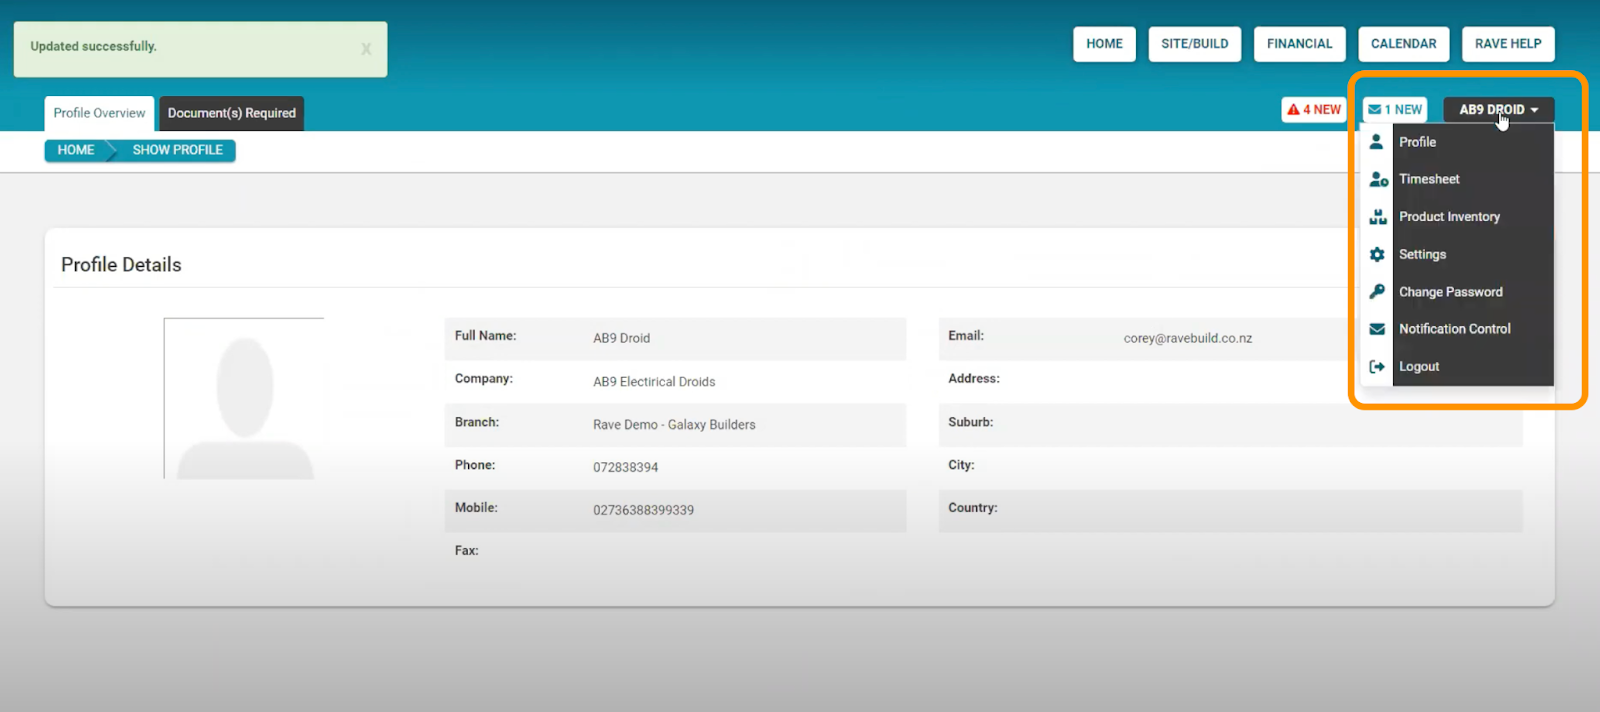
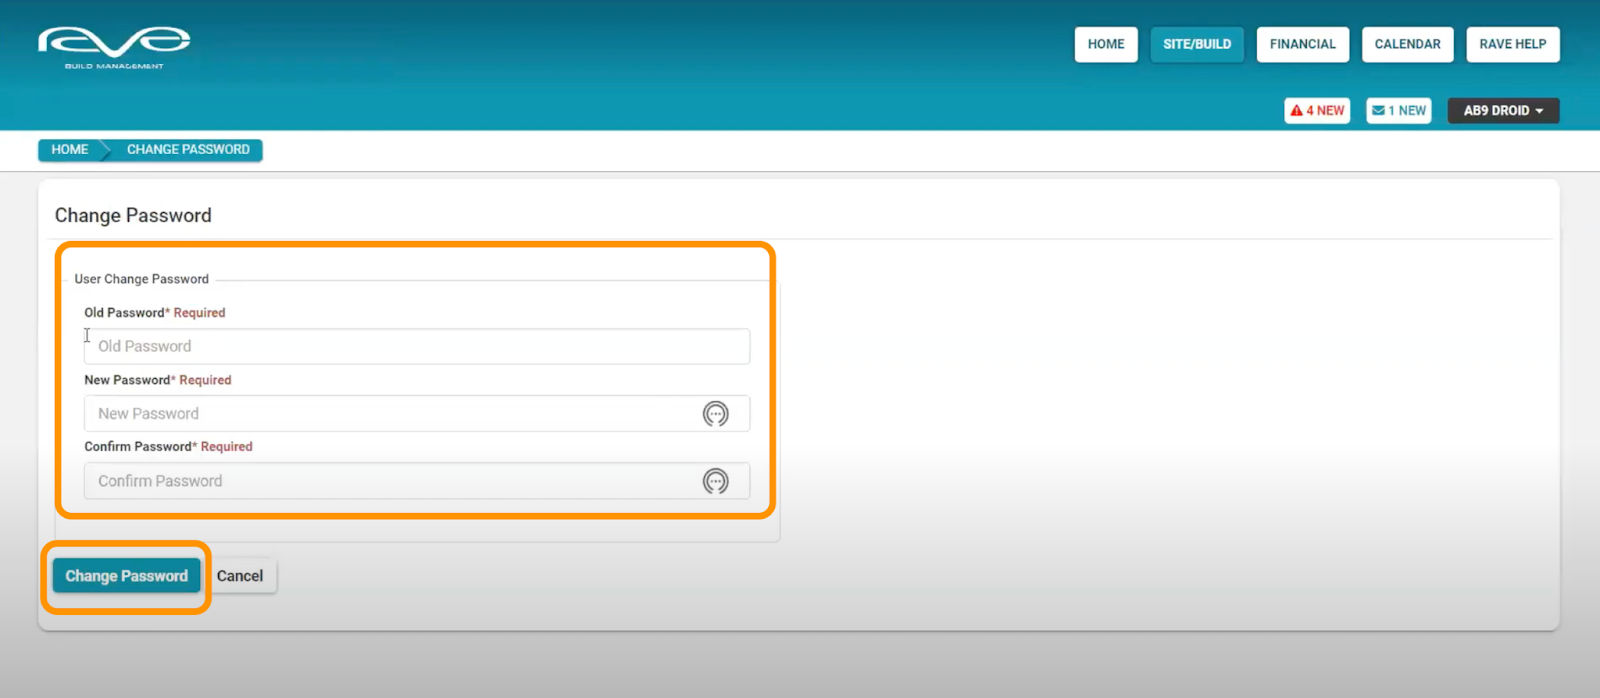
Next up is changing your temporary password for a new one, that you’ll use to log into RAVE moving forward. We can change this by going to your profile dropdown (your name in black to the top right of the screen) and selecting the “Change Password” option near the bottom of the dropdown menu.
You can then change your password by adding your current/temporary (old) password, then your new password, and finally reconfirming your new password and clicking ‘Change Password’
Resetting your password
If you have forgotten your password, or your password is not working, you can request a password reset via the RAVE login portal - by clicking on the ‘Need assistance’ or ’Forgot Password’ link to the bottom right of the login screen. Or click on this link: https://pro.ravebuild.com/s/password/reset

This will take you through to RAVE’s ‘Reset Password’ page. From here you just add your login email address and click the “Send Password Reset Link”. The RAVE system will send you a password reset email, with instructions to reset your password.
NOTE: If you do not receive an email within 60 seconds, check your junk/spam mail folder, and if it is not there either, contact us on 07 210 2228.

Uploading documents to your RAVE Profile
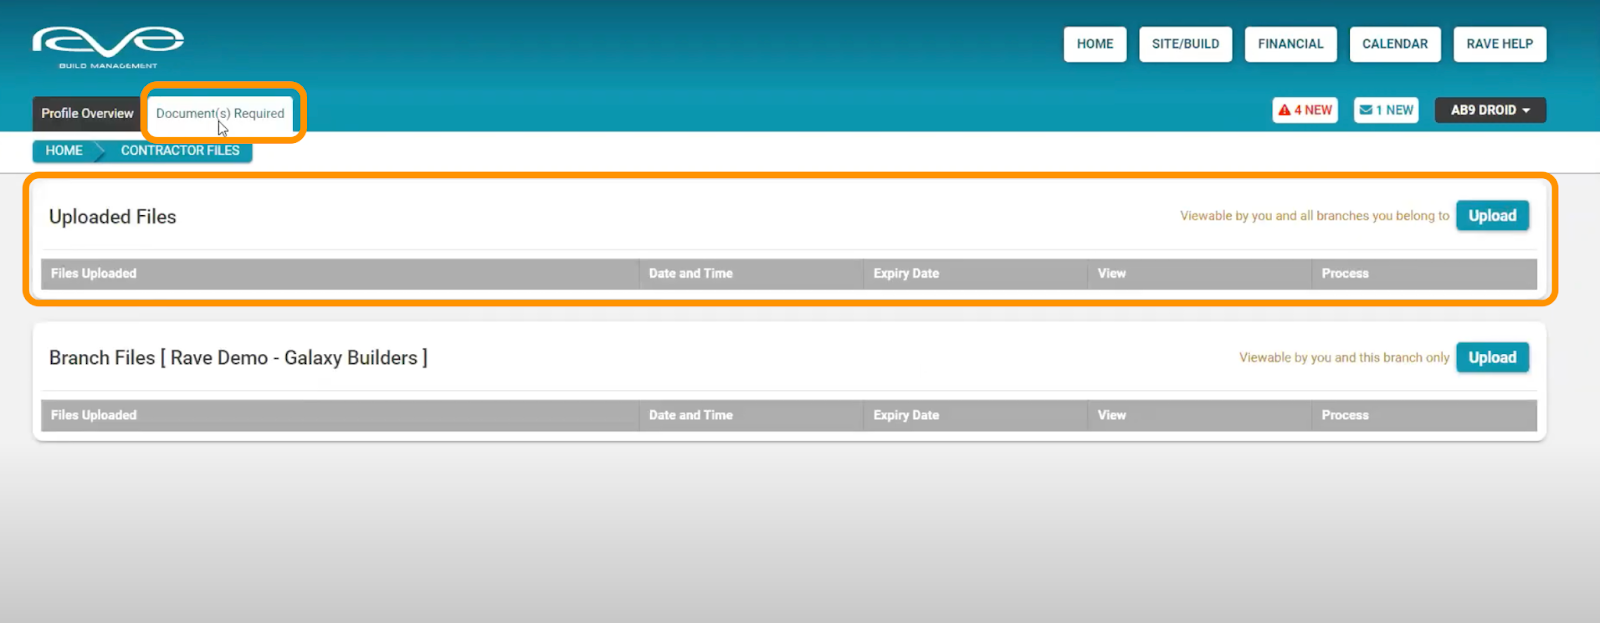
Once you have checked over your contact details and changed your temporary password, you can then load any documentation that you would like to add in, or that your building company has asked for. We do this by clicking on the ‘Documents Required’ sub-tab. Here you will find two, or more, sections each with their own upload button and viewing/access permissions.
The first ‘Upload Files’ section is viewable by you (the contractor/supplier) and ALL of the building companies that you will work with via RAVE. If you upload a document here, it will be viewable by all of your building companies that use RAVE.
Uploading files to any subsequent/additional ‘Branch Files’ sections will only be viewable by you and that particular building company.
NOTE: It's up to you where you'd like to load your documentation. If the file is of use to all of your building clients, add your document here. But, if it is only suitable for a specific building company, use the upload button for that building company only.
Once you’ve clicked an upload button, you’ll see via the ‘File Upload’ pop-up, that you have a few sections to complete. Firstly there are a number of document categories available from a dropdown list. Just select the most relevant category for the type of document you want to upload.
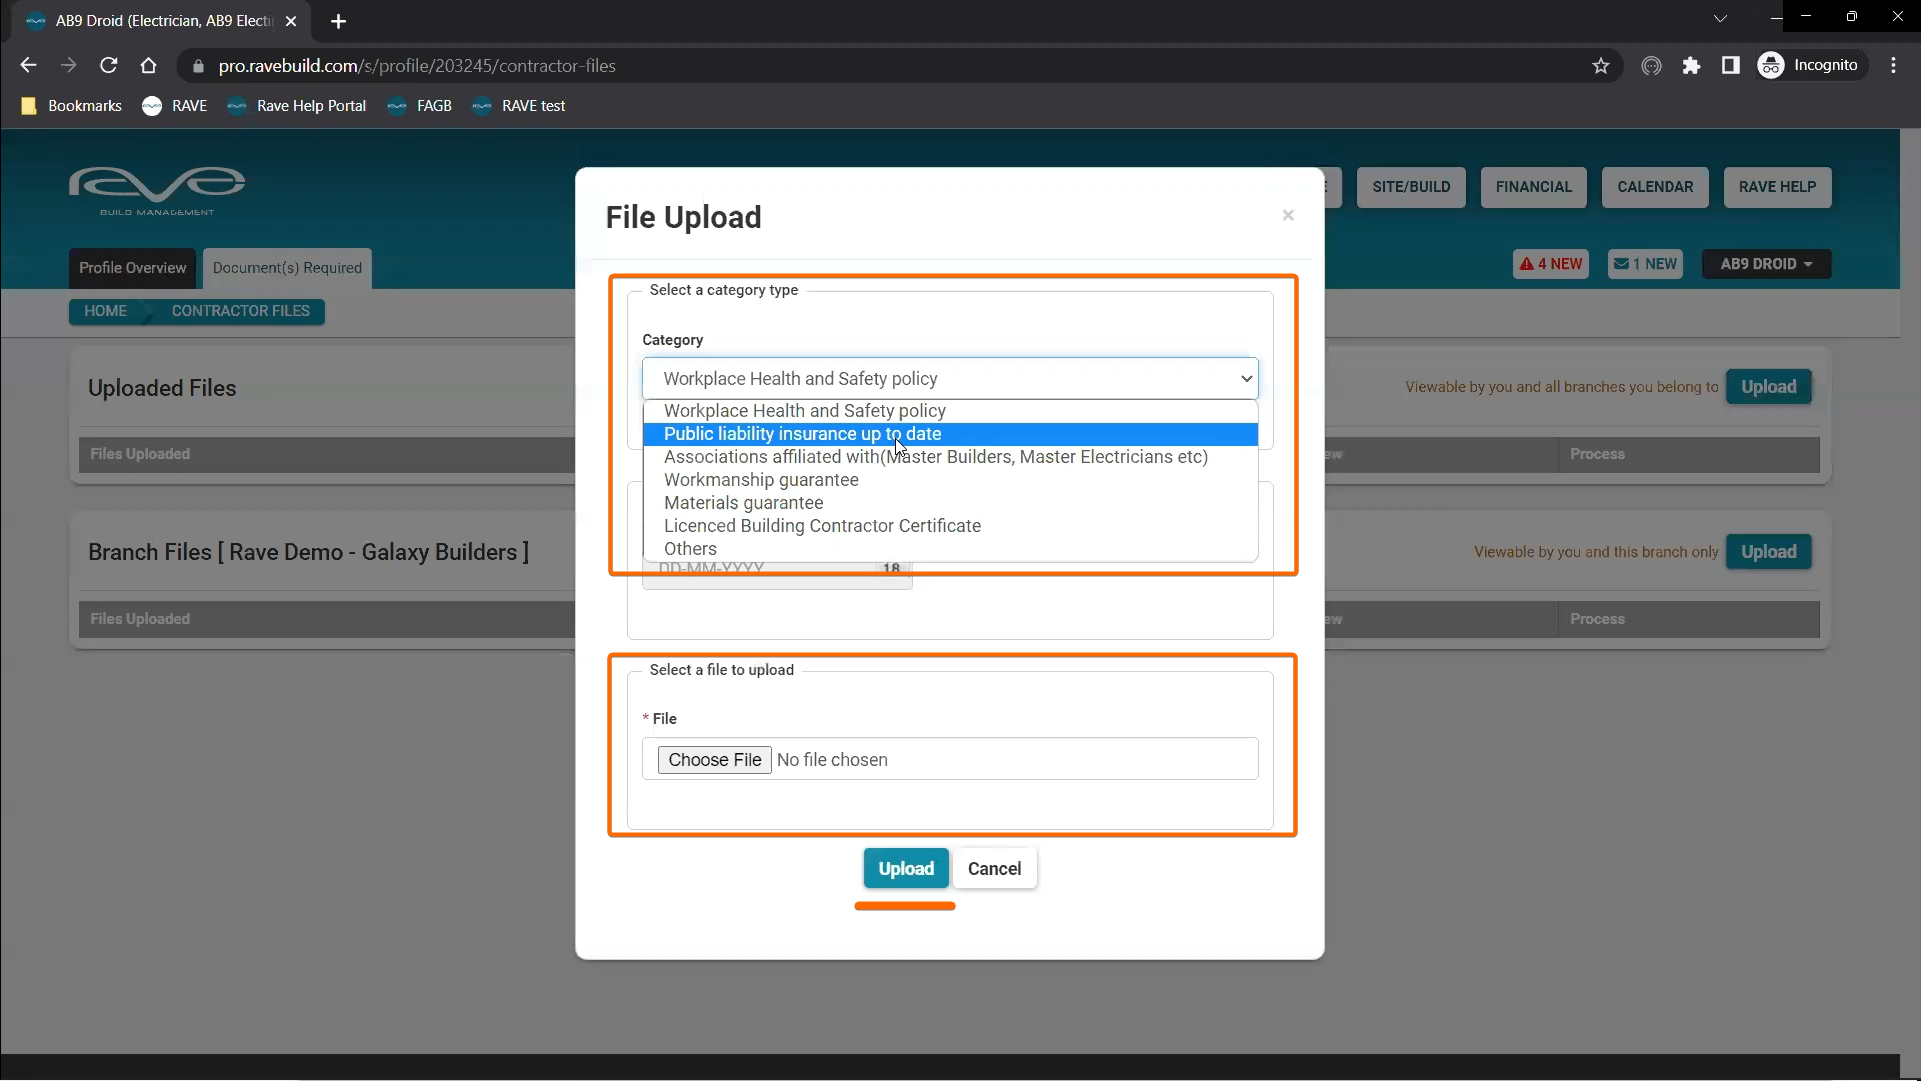
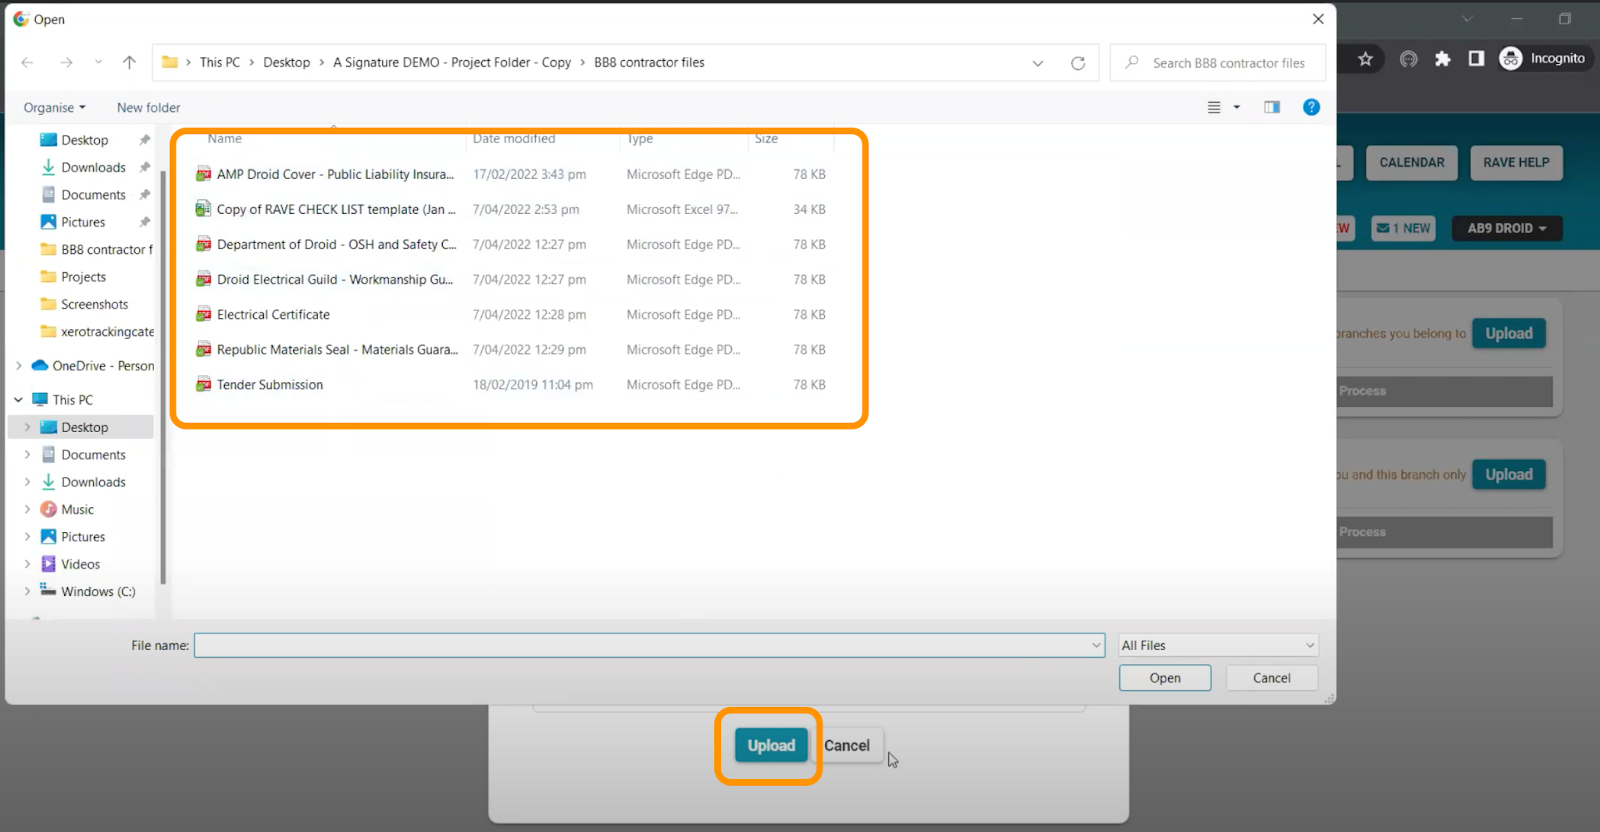
Next set the expiry date for the document. Then click on the ‘Choose File’ button, to open your file browser, find and select the document you want to add, and then click “Upload”.
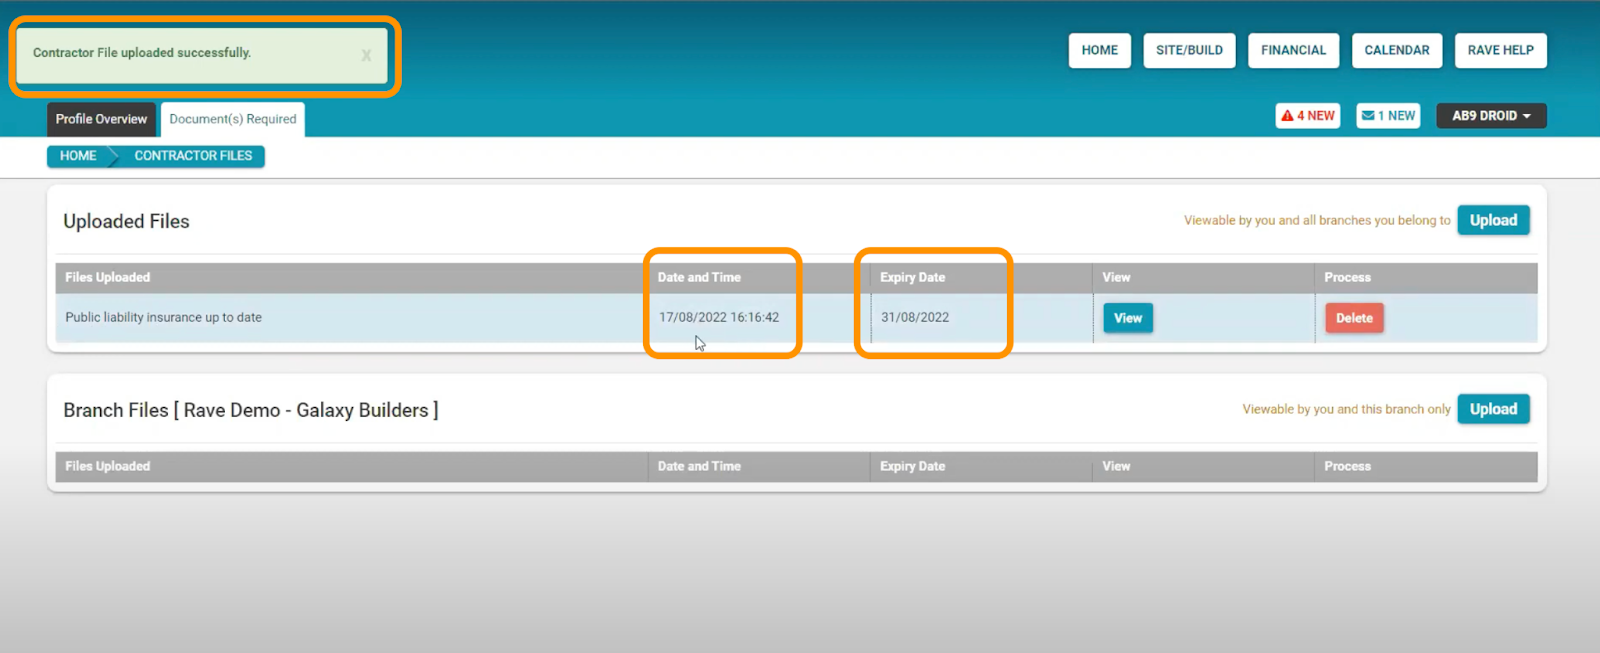
Once loaded, the document will be listed under the Document(s) Required sub-tab, with the document type, the upload day and time, and your document's expiry date. The view button will open up the document for view. If you’ve loaded the wrong file, you can simply delete the file, and reload the right one as needed.
NOTE: If a policy/document has expired then an alert will be sent to you as the contractor/supplier and your building company(s) are notified as well.