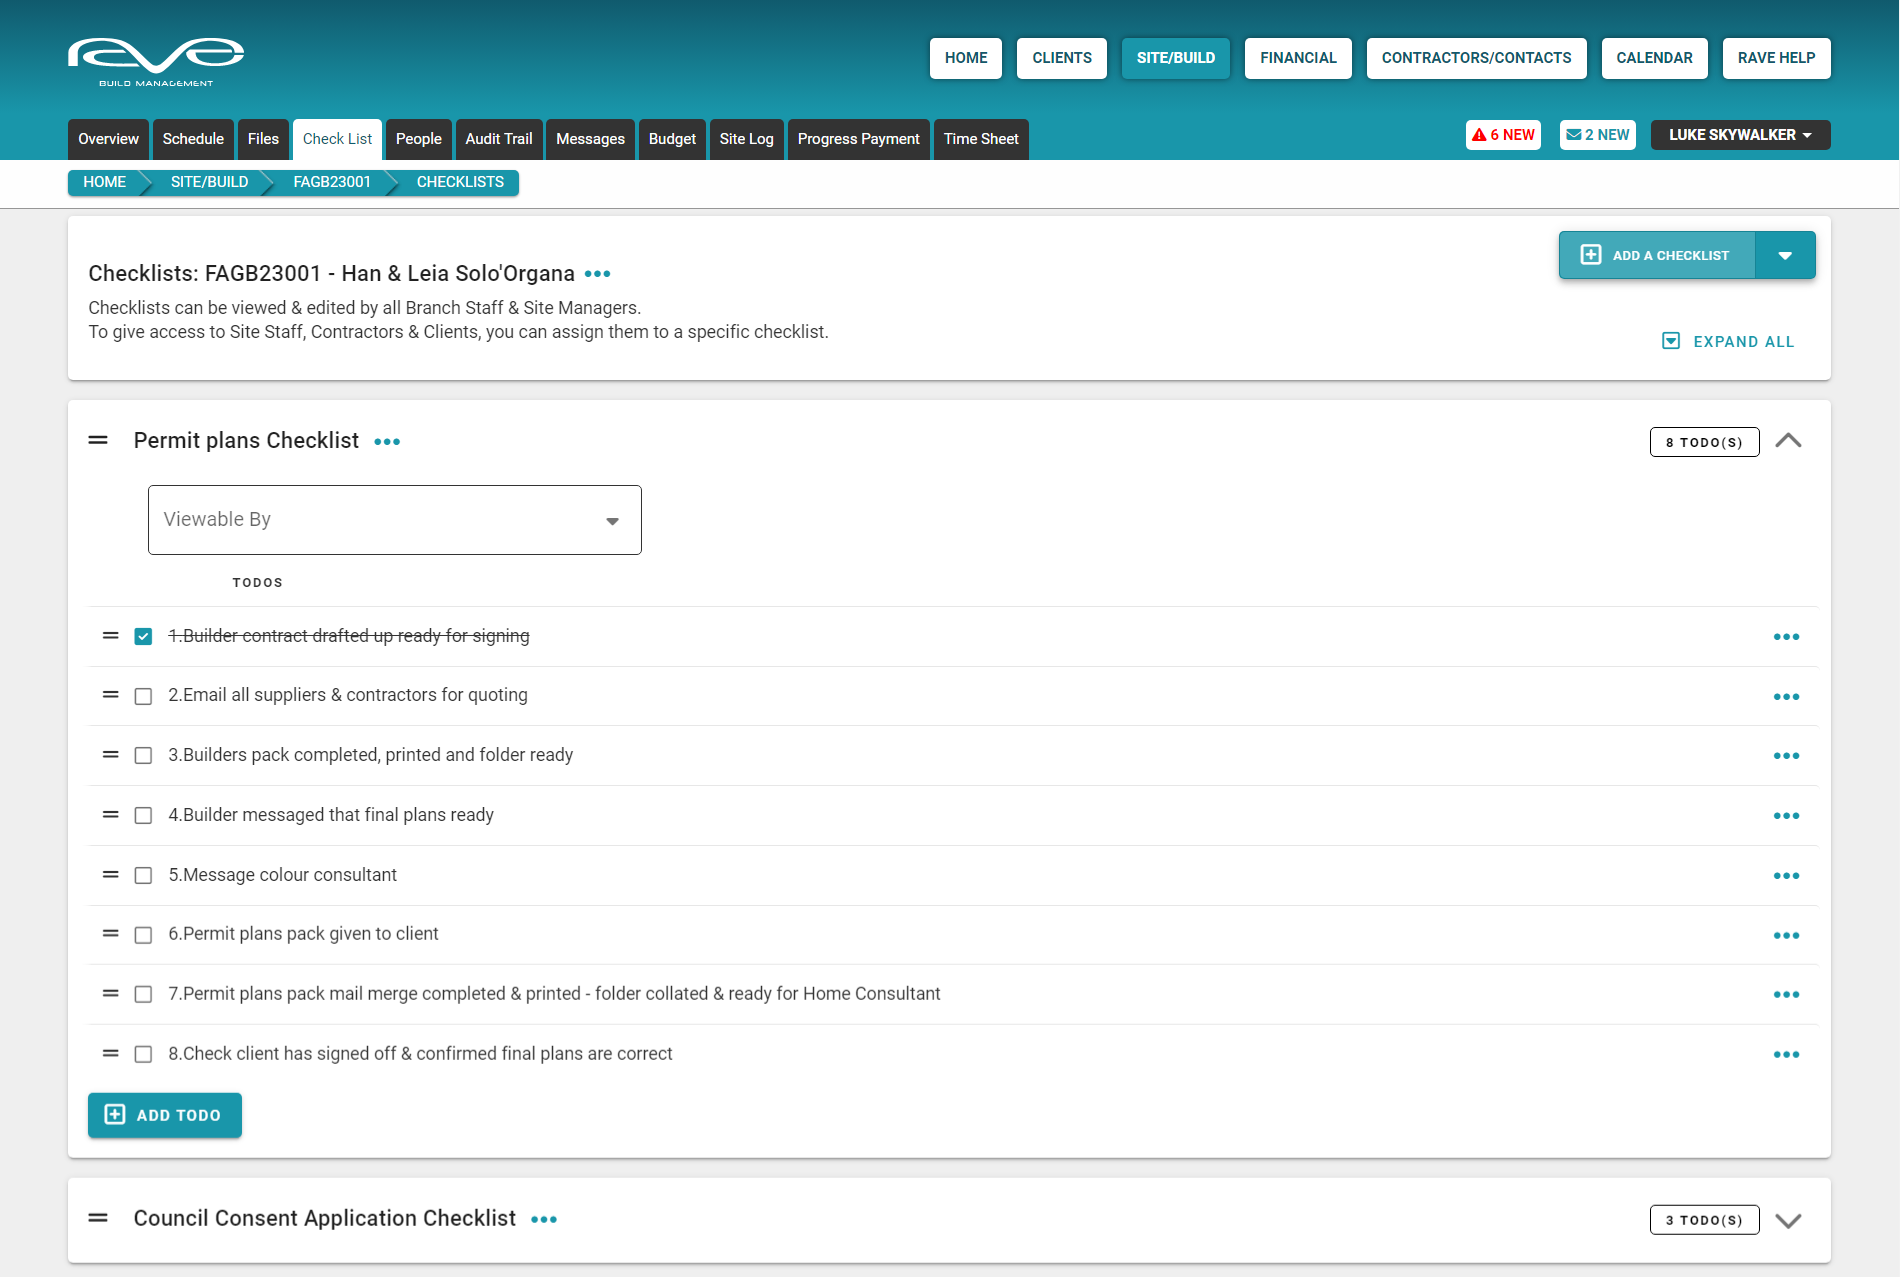
Where scheduled tasks are time-sensitive activities with set start and finish days and/or times, project checklists are useful for process-driven tasks. If you have a specific way you'd like a contractor to complete a task, a site staff member to follow a specific process, or you have tasks that need to be done but are flexible regarding when they happen – checklists are ideal for that.
Adding checklists to a job
Once you have opened the job and entered the Check List sub-tab, there are two different ways of adding a new checklist to your job.
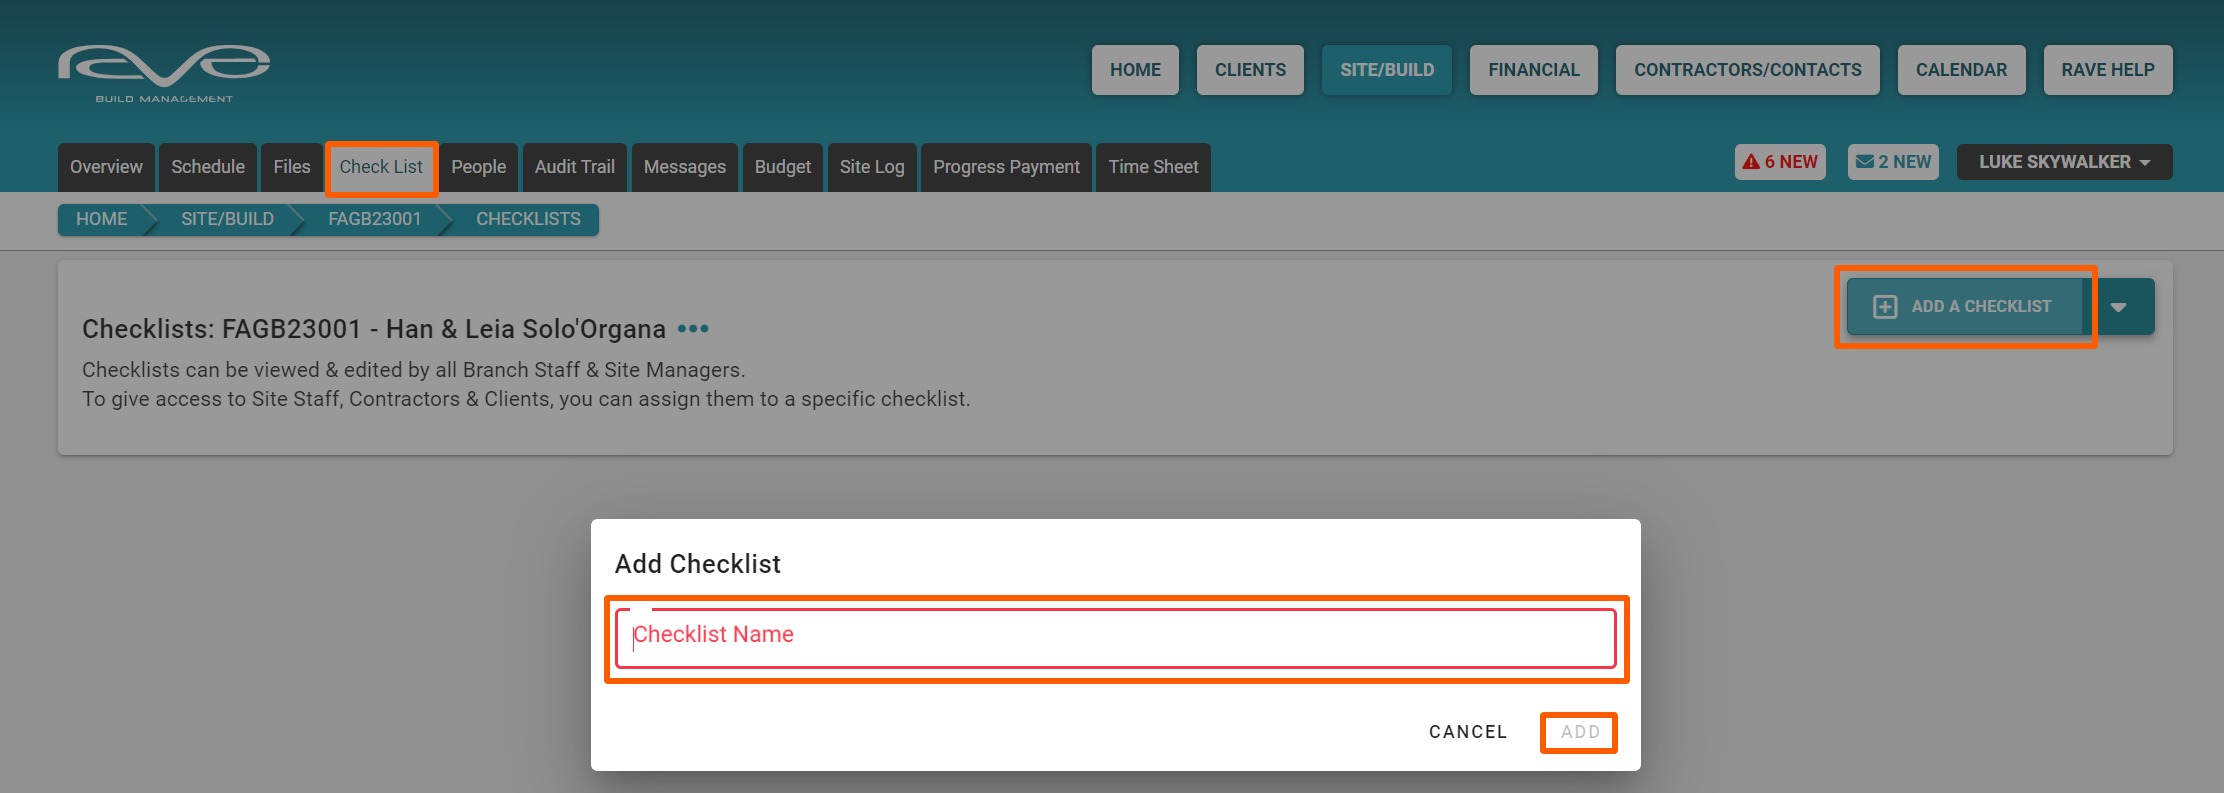
Creating a new checklist via the 'Add Checklist' action
You can build a new checklist manually by clicking on the ‘Add Checklist’ button, typing in a checklist name, and clicking ‘Add’.
You can then add in the checklist tasks by the ‘Add ToDo’ button.
NOTE: Do not forget to click on ‘Save Changes’ on your added ToDos.

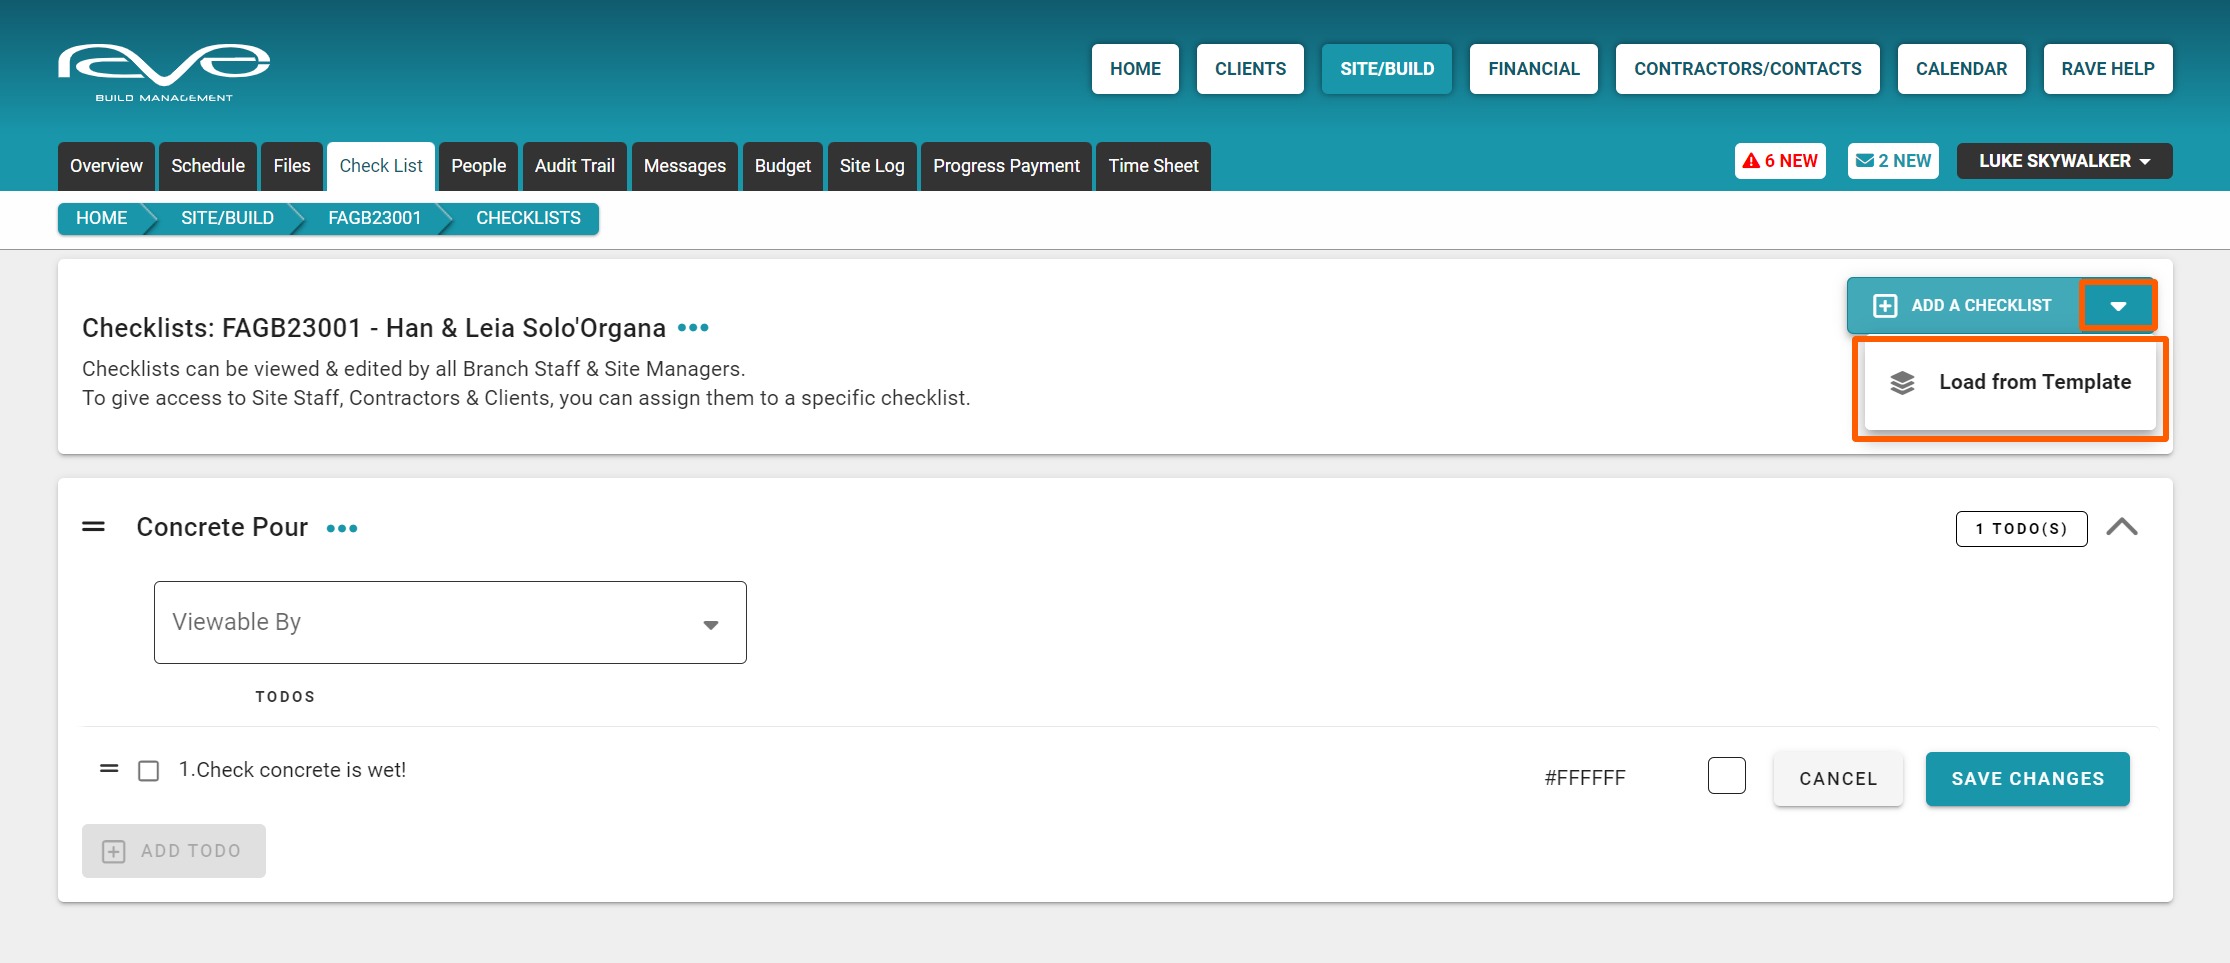
Load a new checklist using a Template
Another option is to load an existing checklist template by going to the checklist action drop-down and clicking on ‘Load a Template’. Then select the template to be loaded and click ‘Load’.

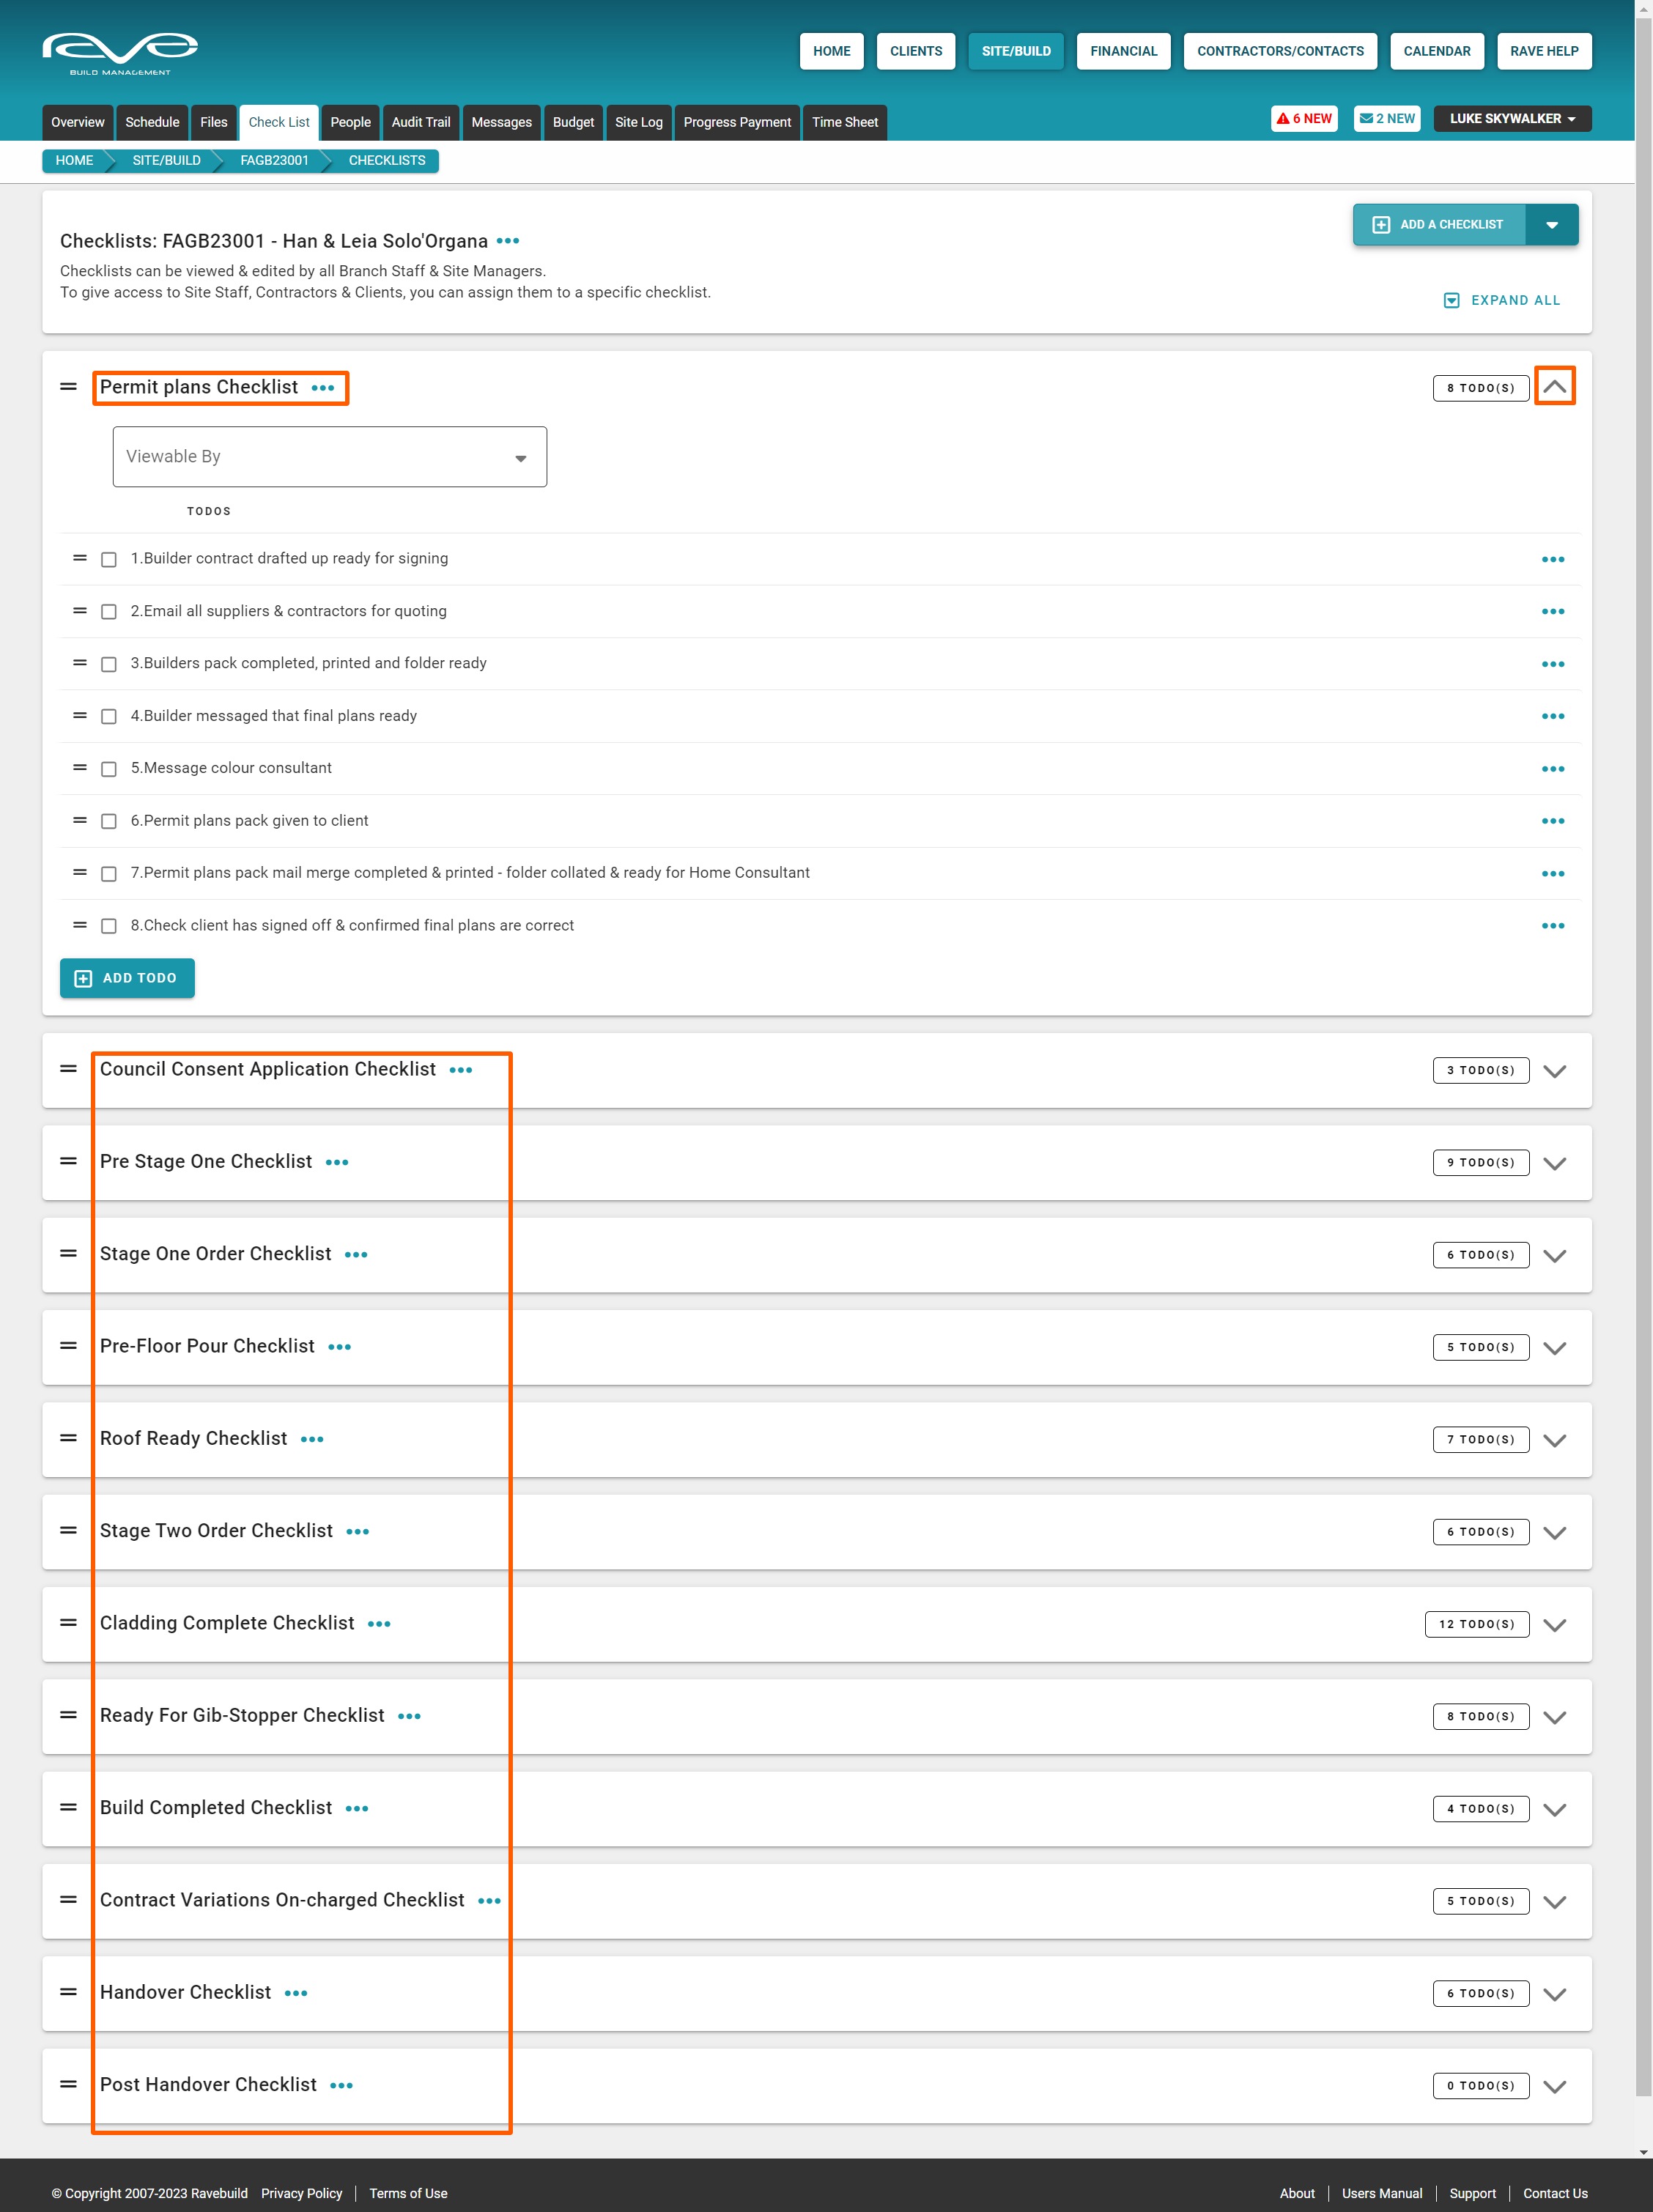
The ‘RAVE Build Master Checklist’ template is a compilation of 13 different checklists that we have created to give you a good starting point for creating your own checklist. Once you are familiar with how the checklists function you will be able to create and save your own checklists or your own master checklist template.
NOTE: Use the arrows on the right-hand side of each checklist to collapse and expand the to-dos within each individual list.
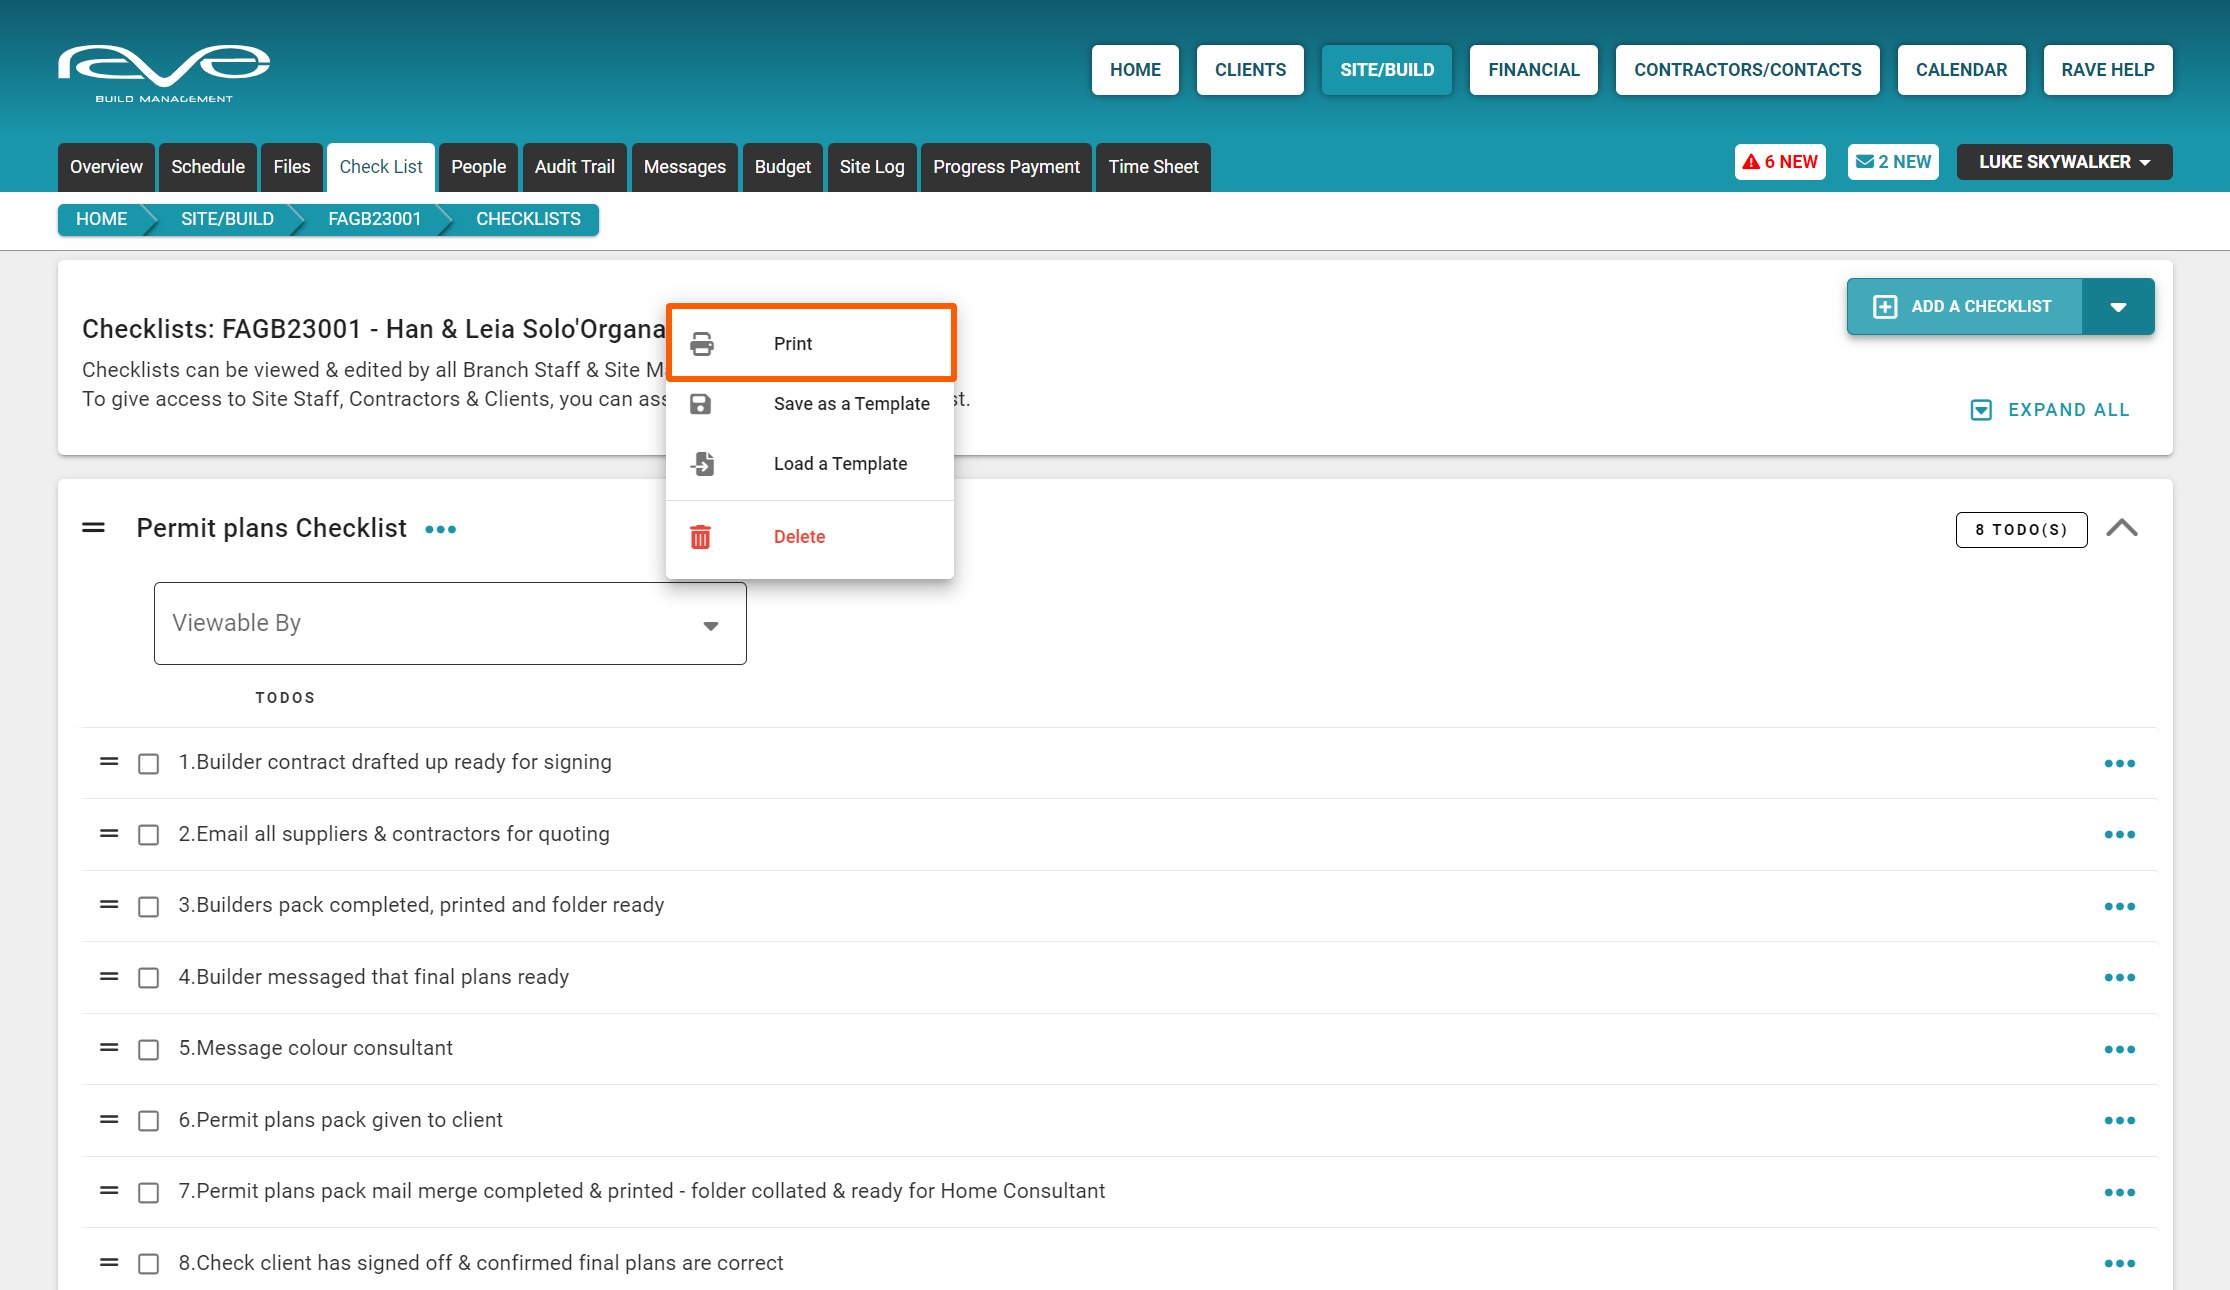
If you are thinking of using our checklist as a starting point to create your own checklist and templates, we recommend going back up to the checklist action button and printing a copy of all these checklists for you to review and make notes regarding any changes you are considering.
How to use and edit checklists
How do our checklists work and how do you edit them?
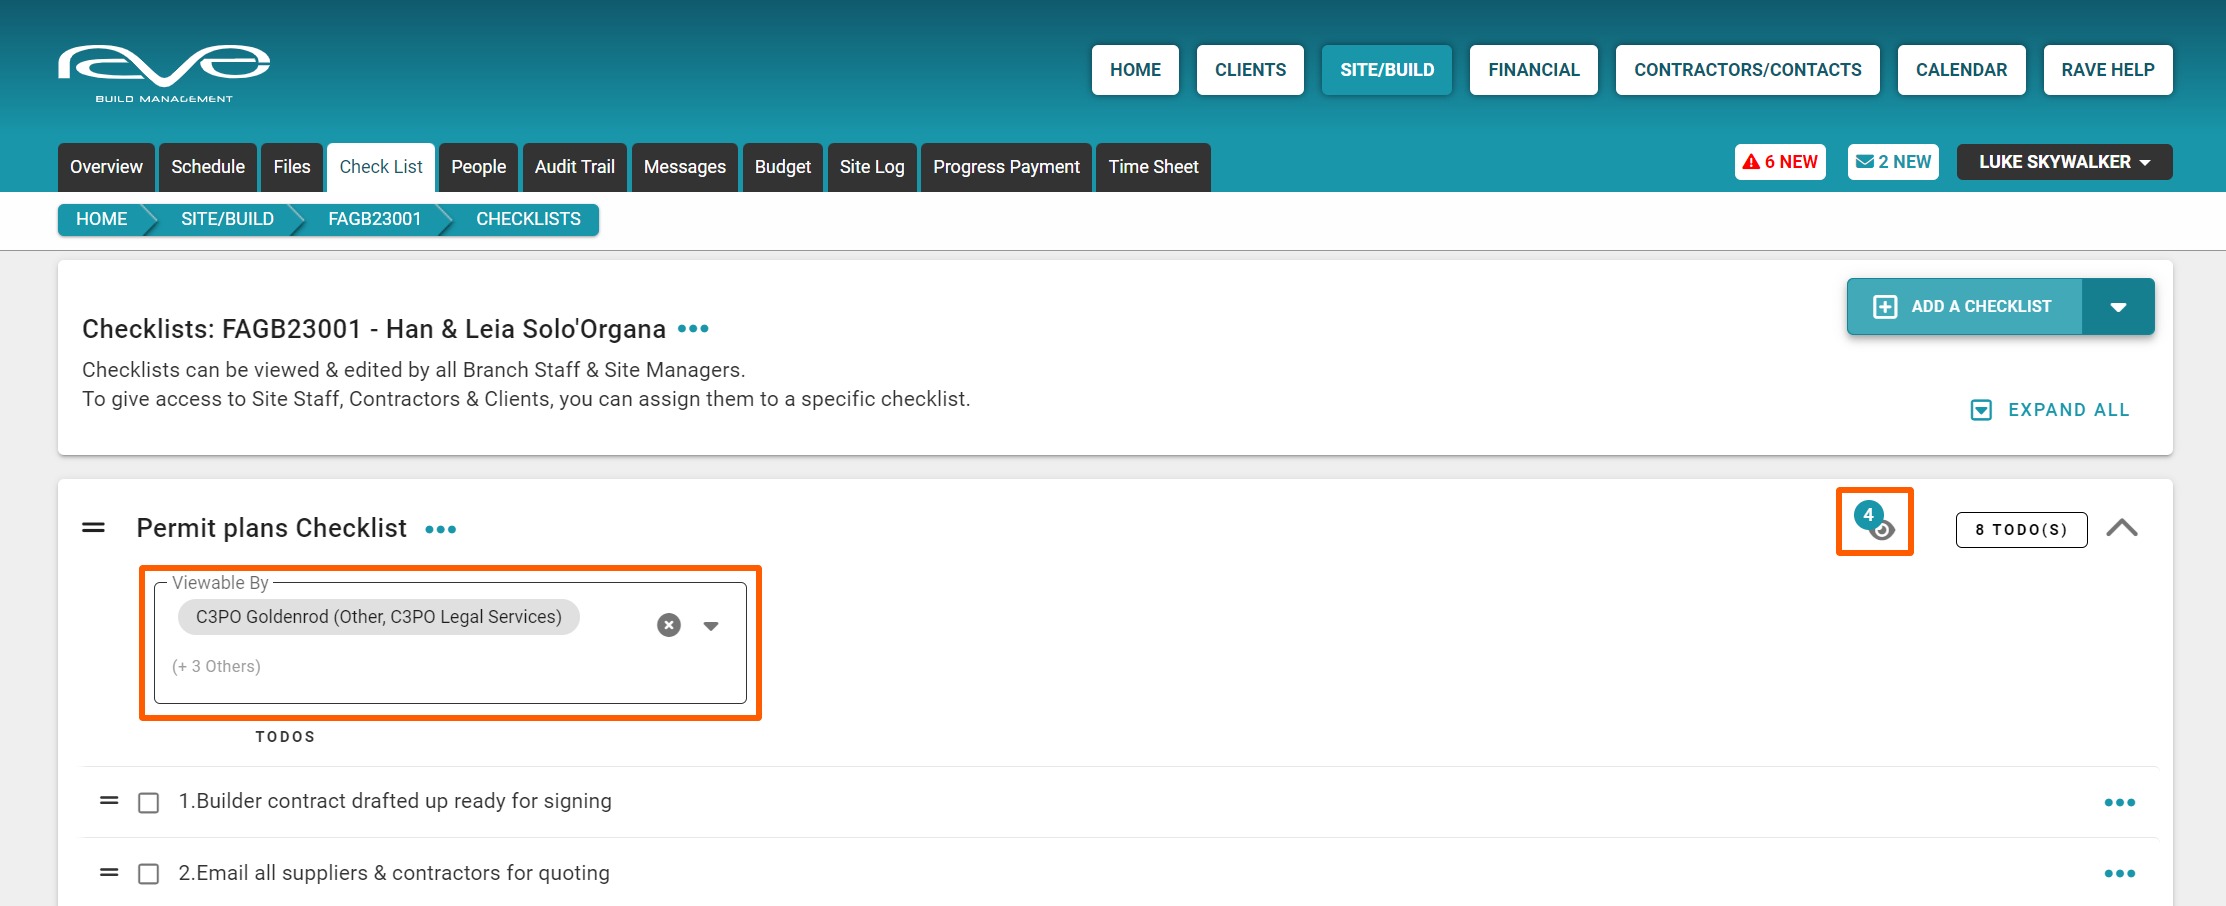
Firstly, checklists are only accessible by branch users by default. If you want to share a checklist with a site staff member, a contractor, or your client, you need to give them access to the project first by the ‘People’ tab, then they'll appear in your checklist viewable by drop down.

Once any non-branch users have been selected, you'll see their name in the ‘Viewable By’ box and a ‘Viewable By’ icon will also appear up to the top right of the checklist. Anyone with access to a checklist can then check items off, add notes and attach files too.
Edit an existing checklist
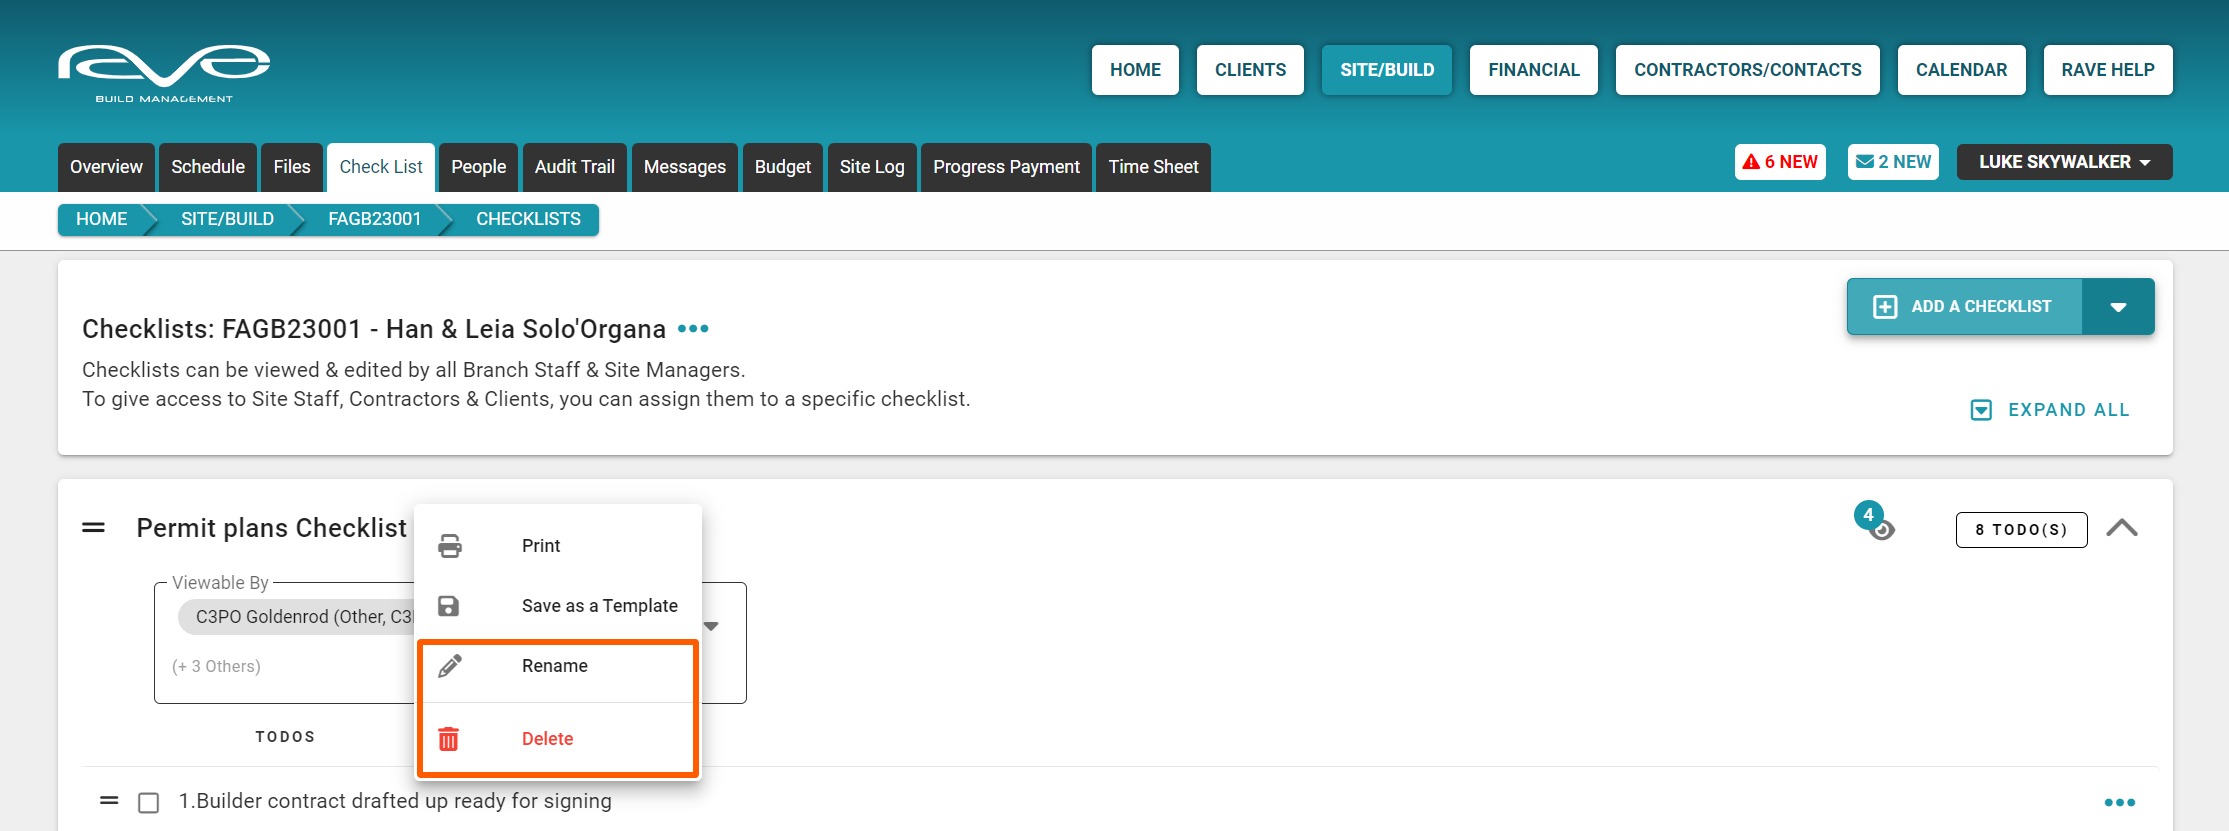
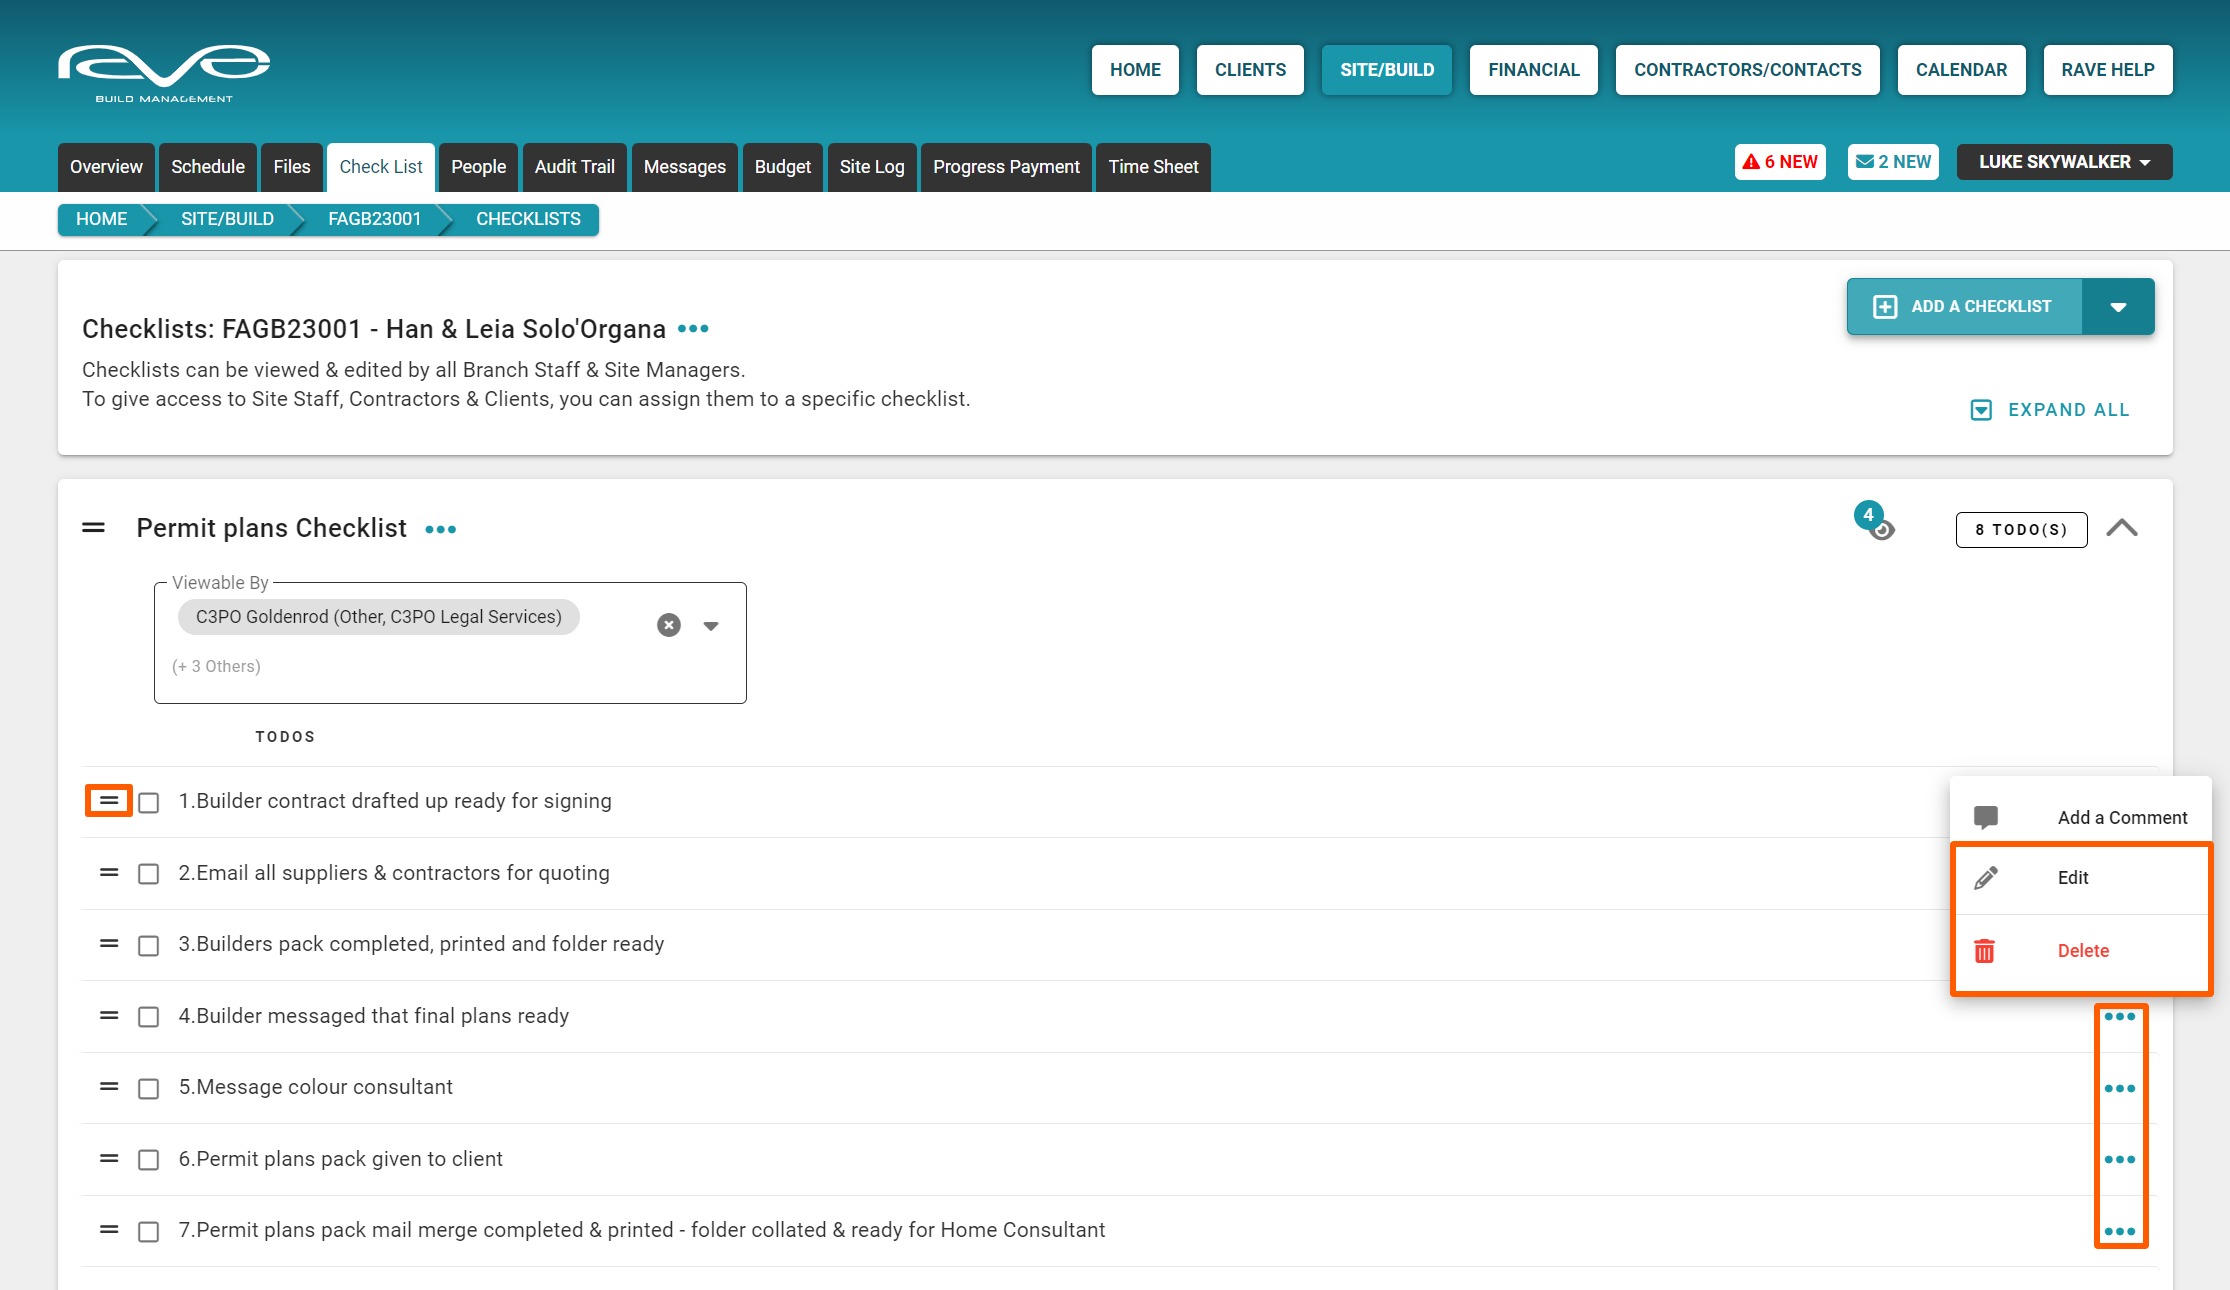
You can edit a checklist by clicking on the three dots next to the title. This drop-down gives you the editing options to rename or delete the checklist.
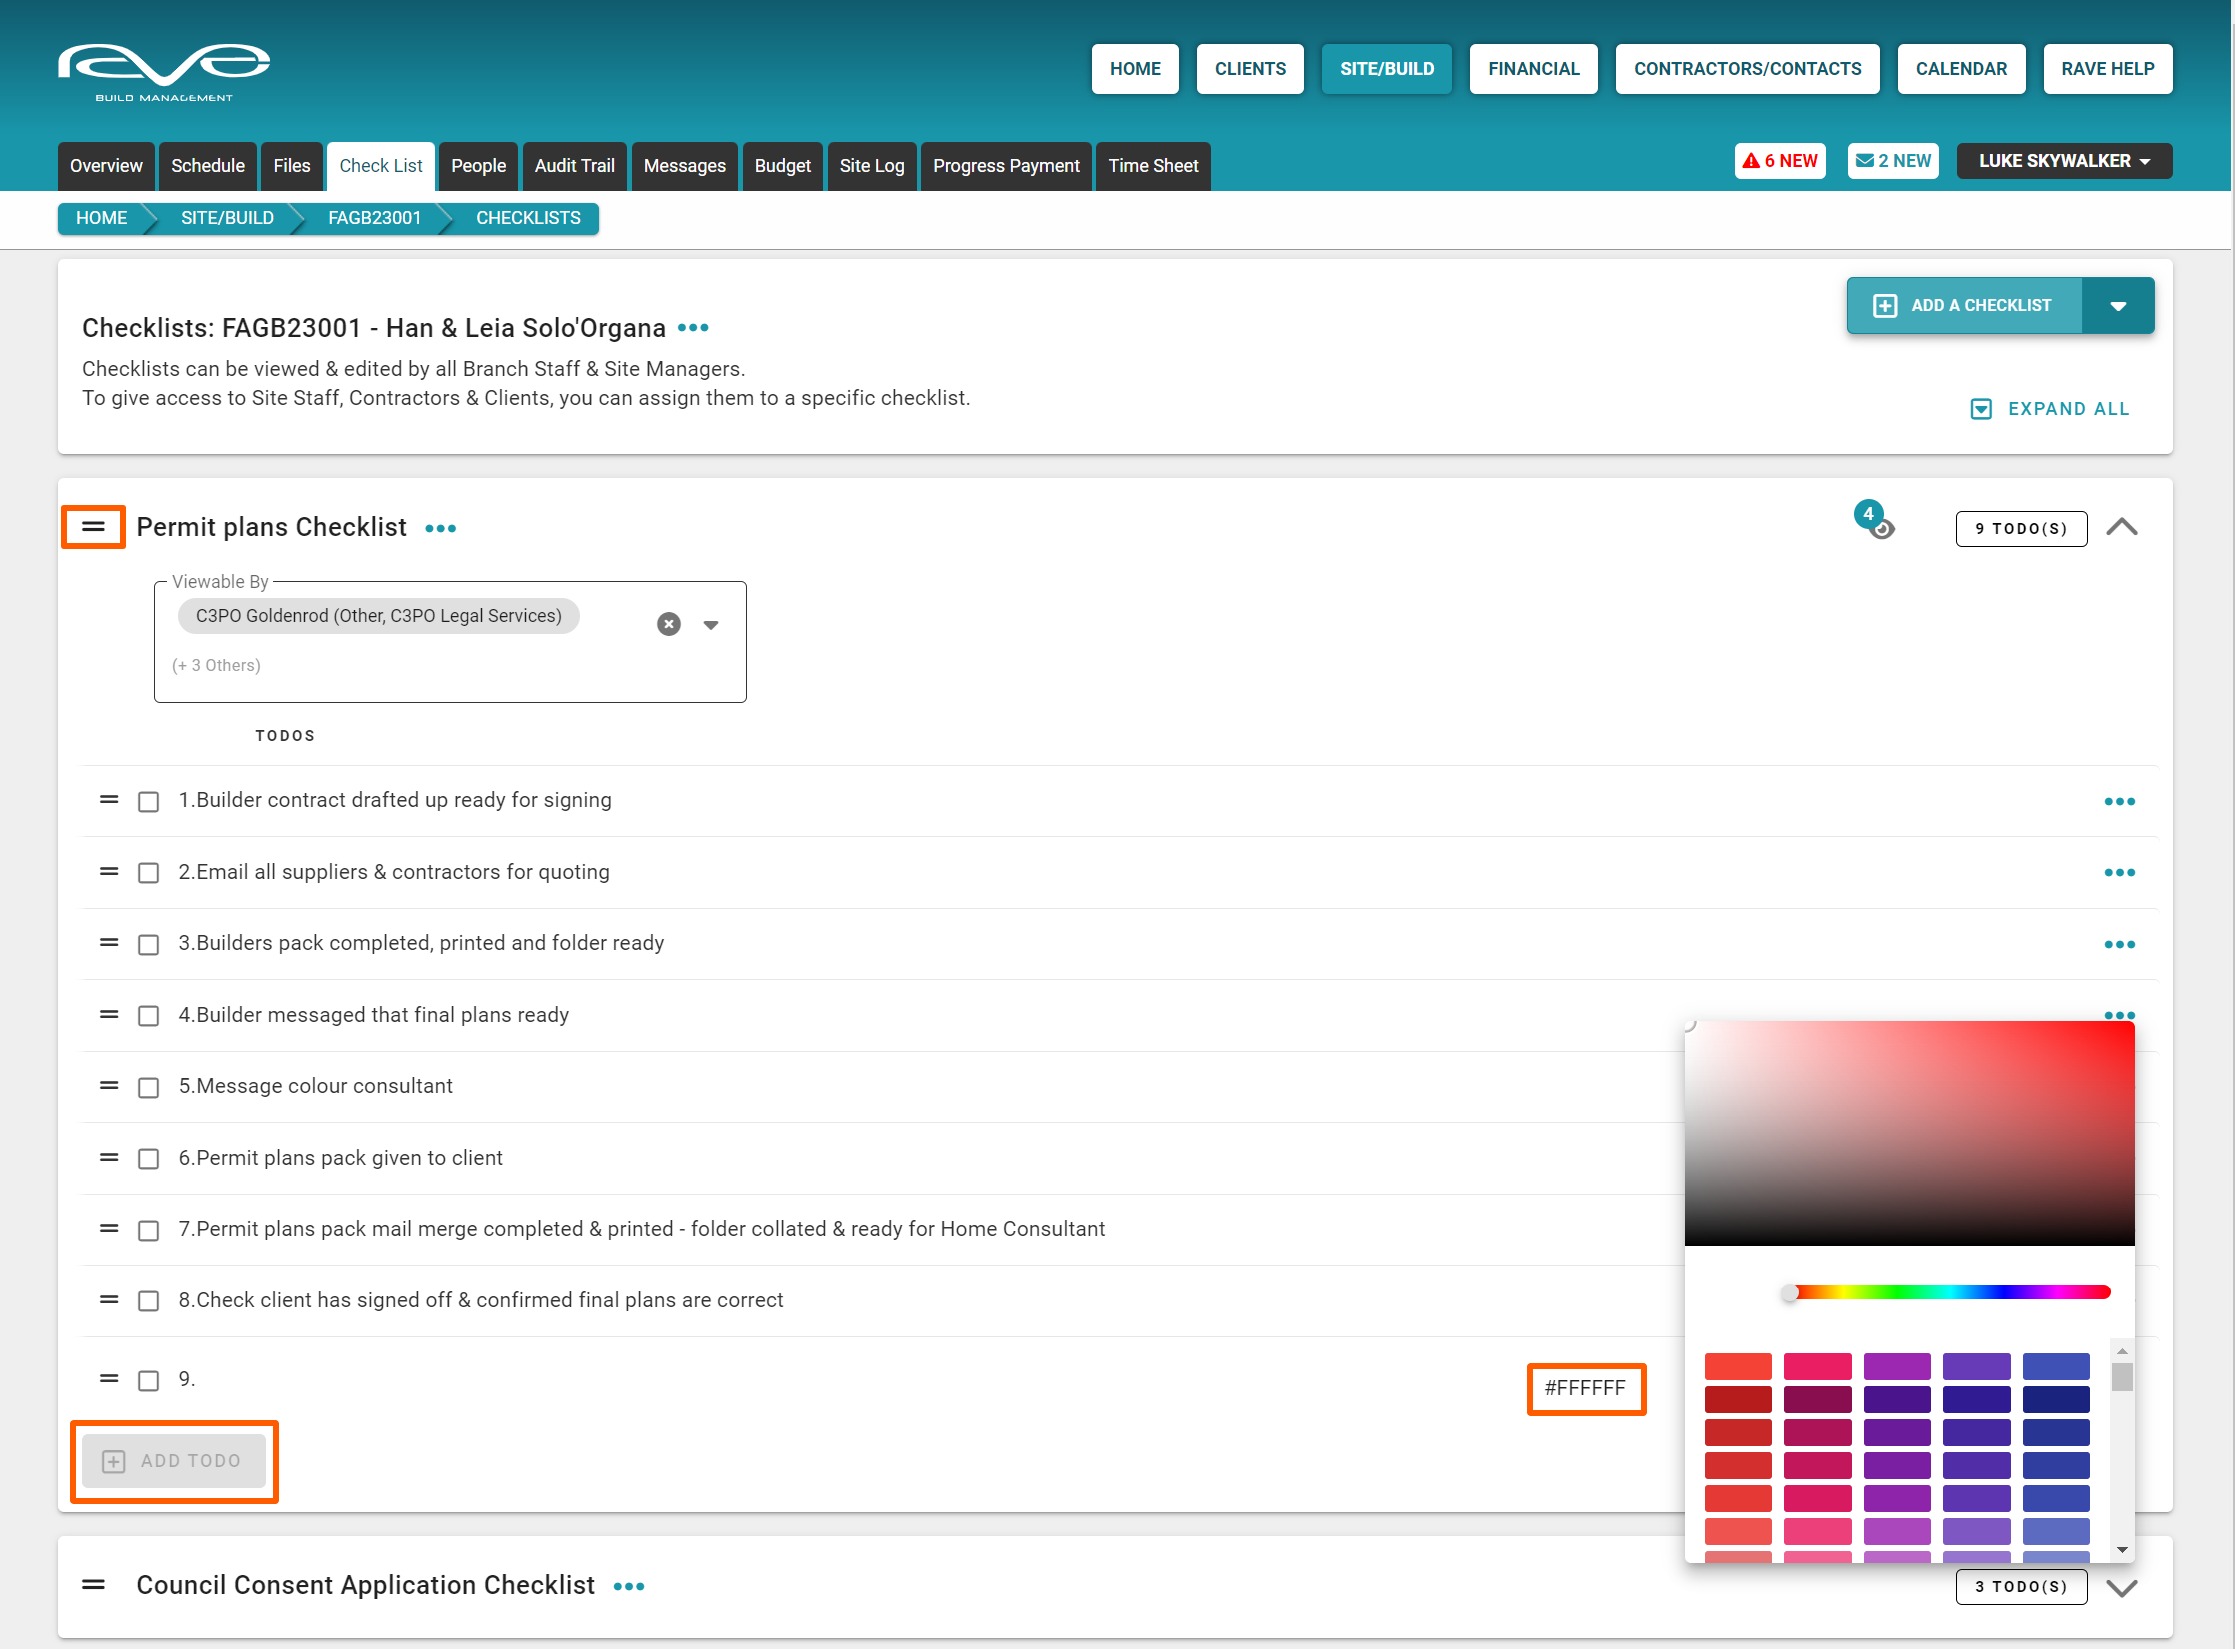
- To rearrange your checklist order, click and drag the two horizontal bars next to the checklist title until it is in the correct order.
- You can add tasks to a checklist by clicking on the ‘Add ToDo’ button and writing in your description.
- You can also select a hex colour code if required.
NOTE: Do not forget to click ‘Save Changes’ after creating a new to do.
Editing a ‘ToDo’
You can edit a ‘ToDo’ description by clicking on the three dots to the far right of each ‘ToDo’. This drop-down gives you the editing options to edit the title or delete the ‘ToDo’.
To rearrange the order of to dos, click and drag on the two horizontal bars on the left side of the title.
How to save checklists and templates
Save a single checklist
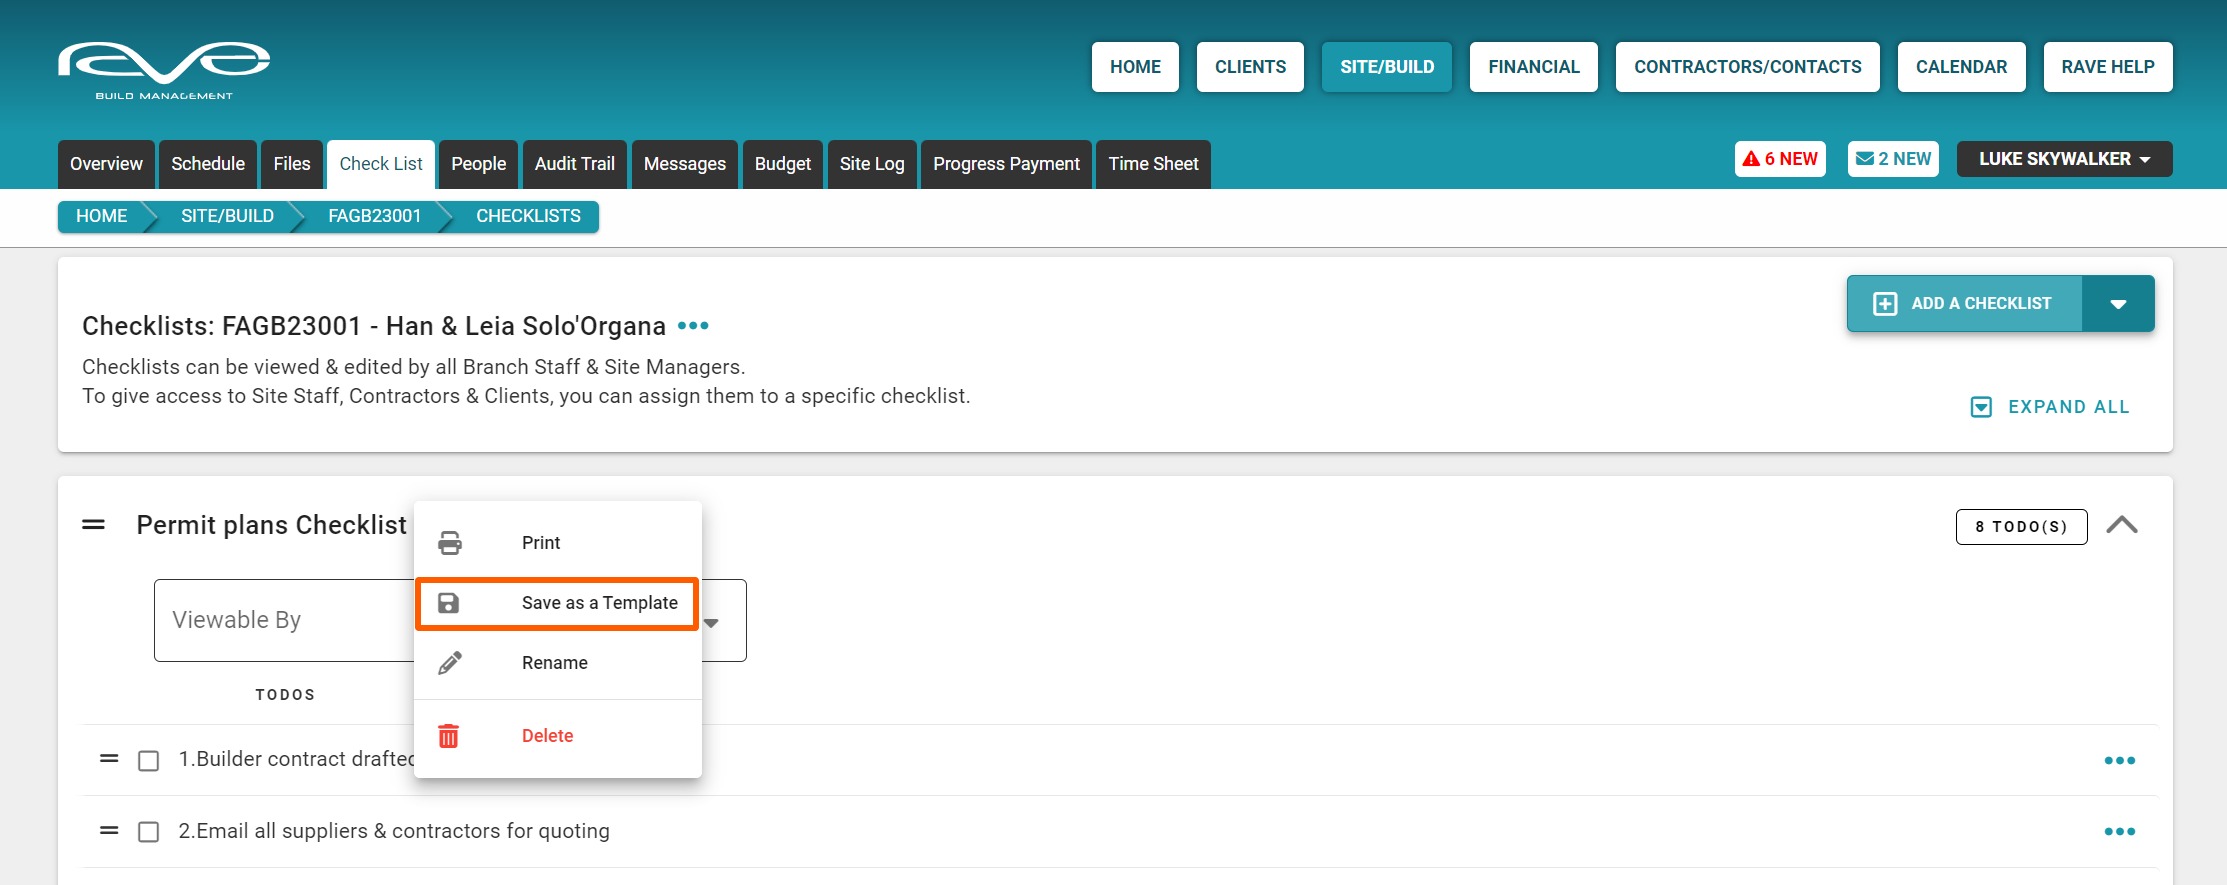
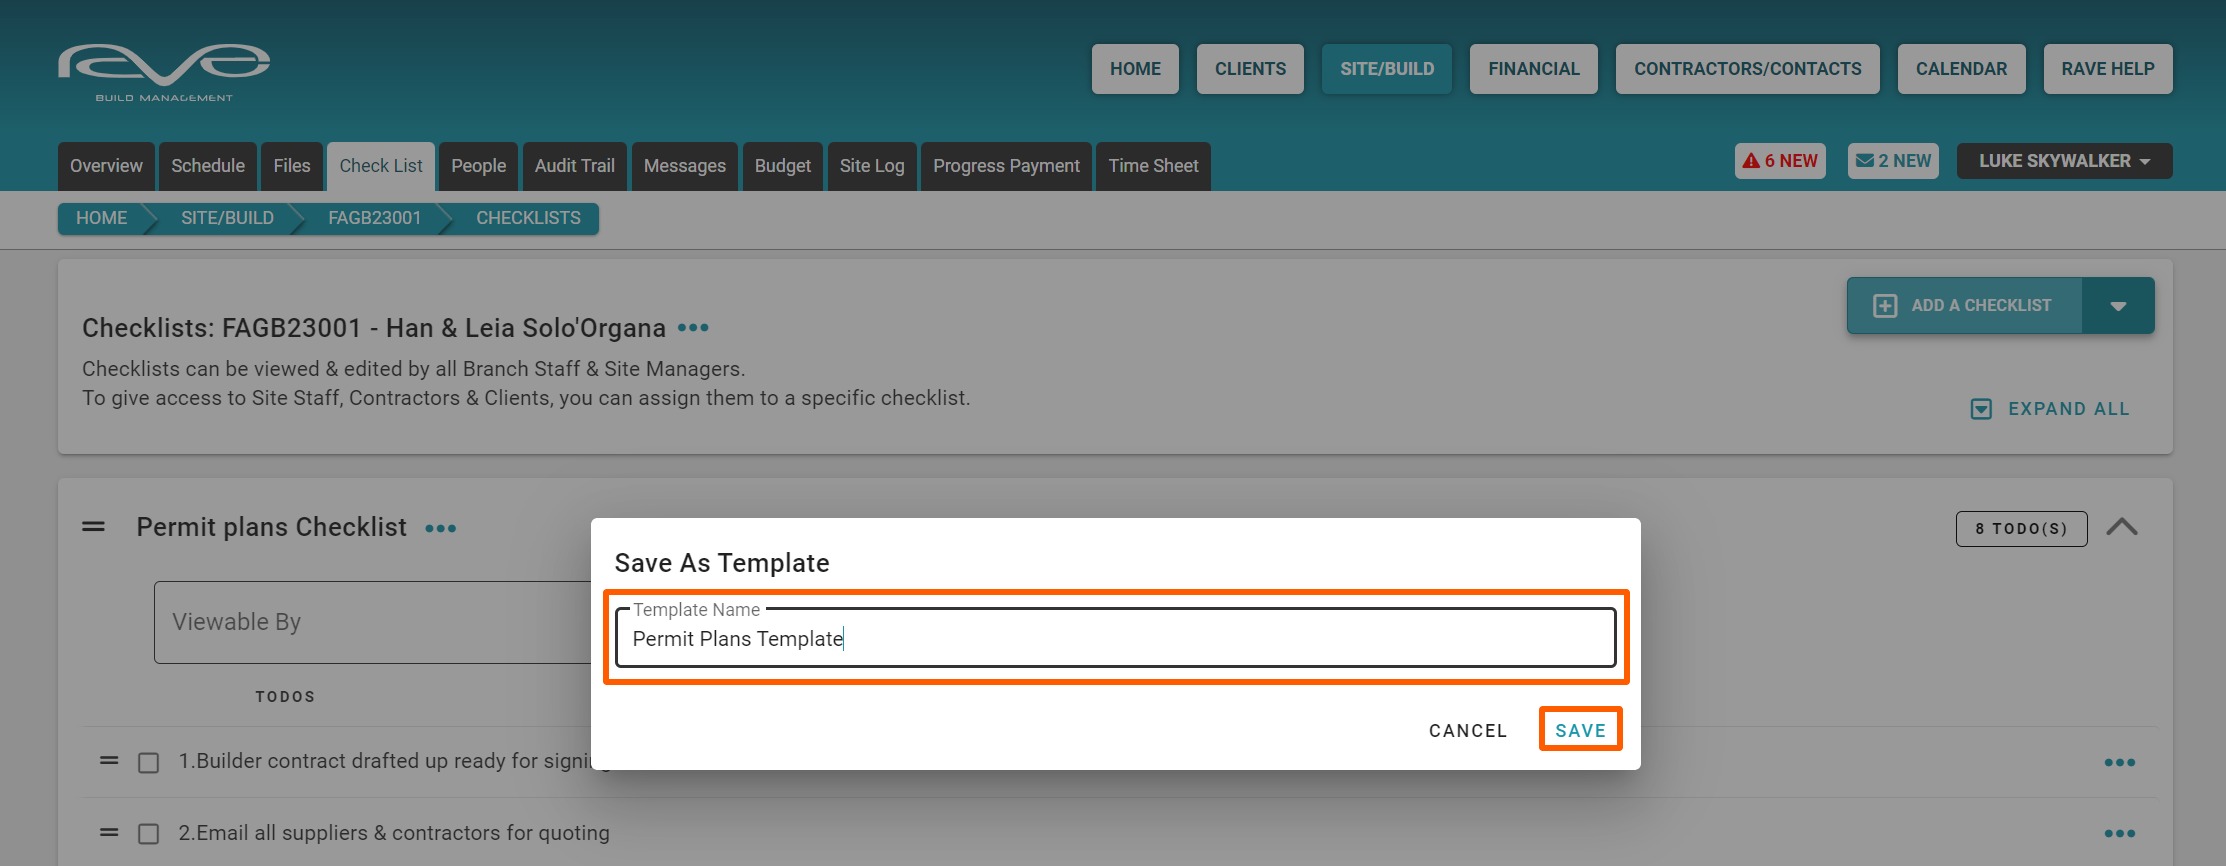
Once you've made all your changes to a checklist, you can save this as a single checklist template allowing you to select and add the specific checklist to future jobs.
Click on the three dots next to the checklist title, click ‘Save As A Template’, give the checklist template a name, and click ‘Save’.
Save a master checklist template
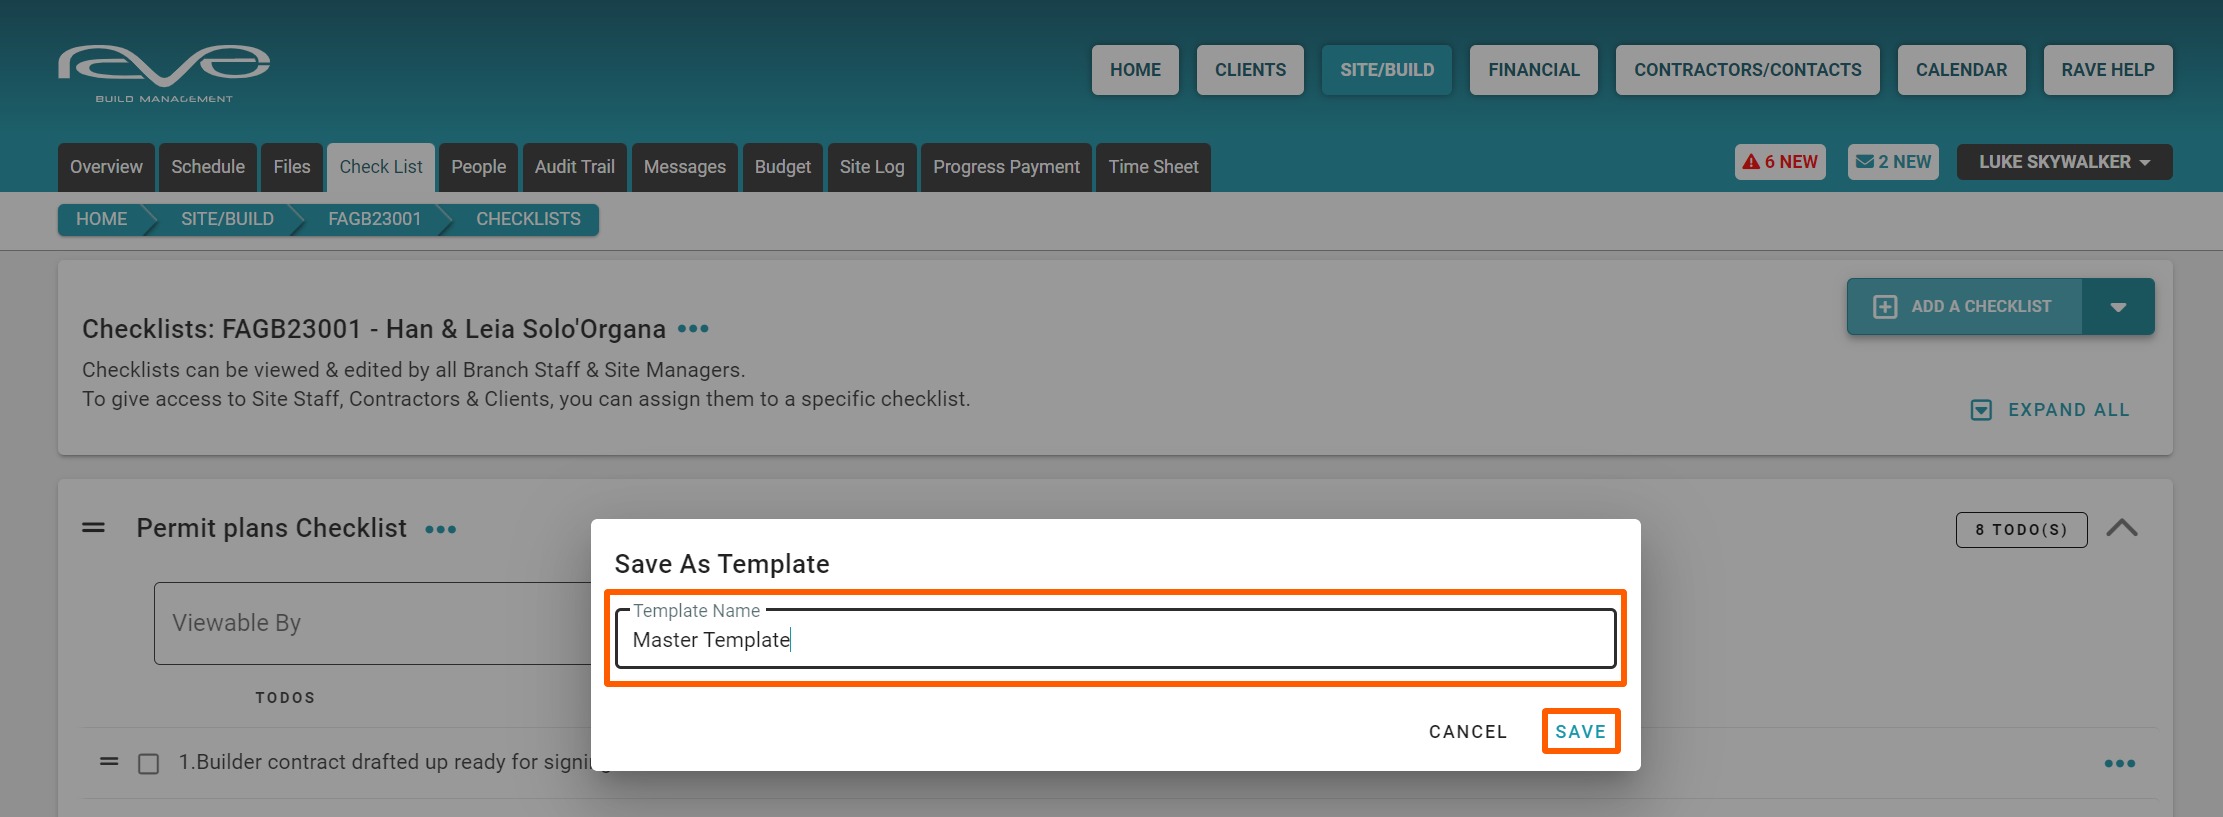
Once you've made all the changes to all of your checklists, including the order of your checklist and any to-do notes, you can save all of your checklists as your own master checklist template allowing you to select and load a group of checklists to a job.
Click the three dots next to the job number and click ‘Save As A Template’, give the checklist template a name and click ‘Save’.
![]()
How to manage and edit checklist templates
You can manage existing checklist templates via the Site|Build / Templates / Checklist Templates section of RAVE.
From here you can:
- Click on the checklist's dropdown arrow to right of the checklist to set the checklist as a default, or delete it
- Click on the view button, to access the edit checklist section, allowing you to then edit the various aspects of your checklist - this was covered earlier in the edit checklsit section.


Add your existing checklist into RAVE via a CSV upload
If your business already has processes in place and you'd like these uploaded to RAVE as a checklist, we have an excel CSV template which you can complete and return to us to upload. If you'd like us to send you our CSV template and instructions, please call us on 07 210 2228 or email your request for our checklist CSV template and instructions to help at help@ravebuild.co.nz.