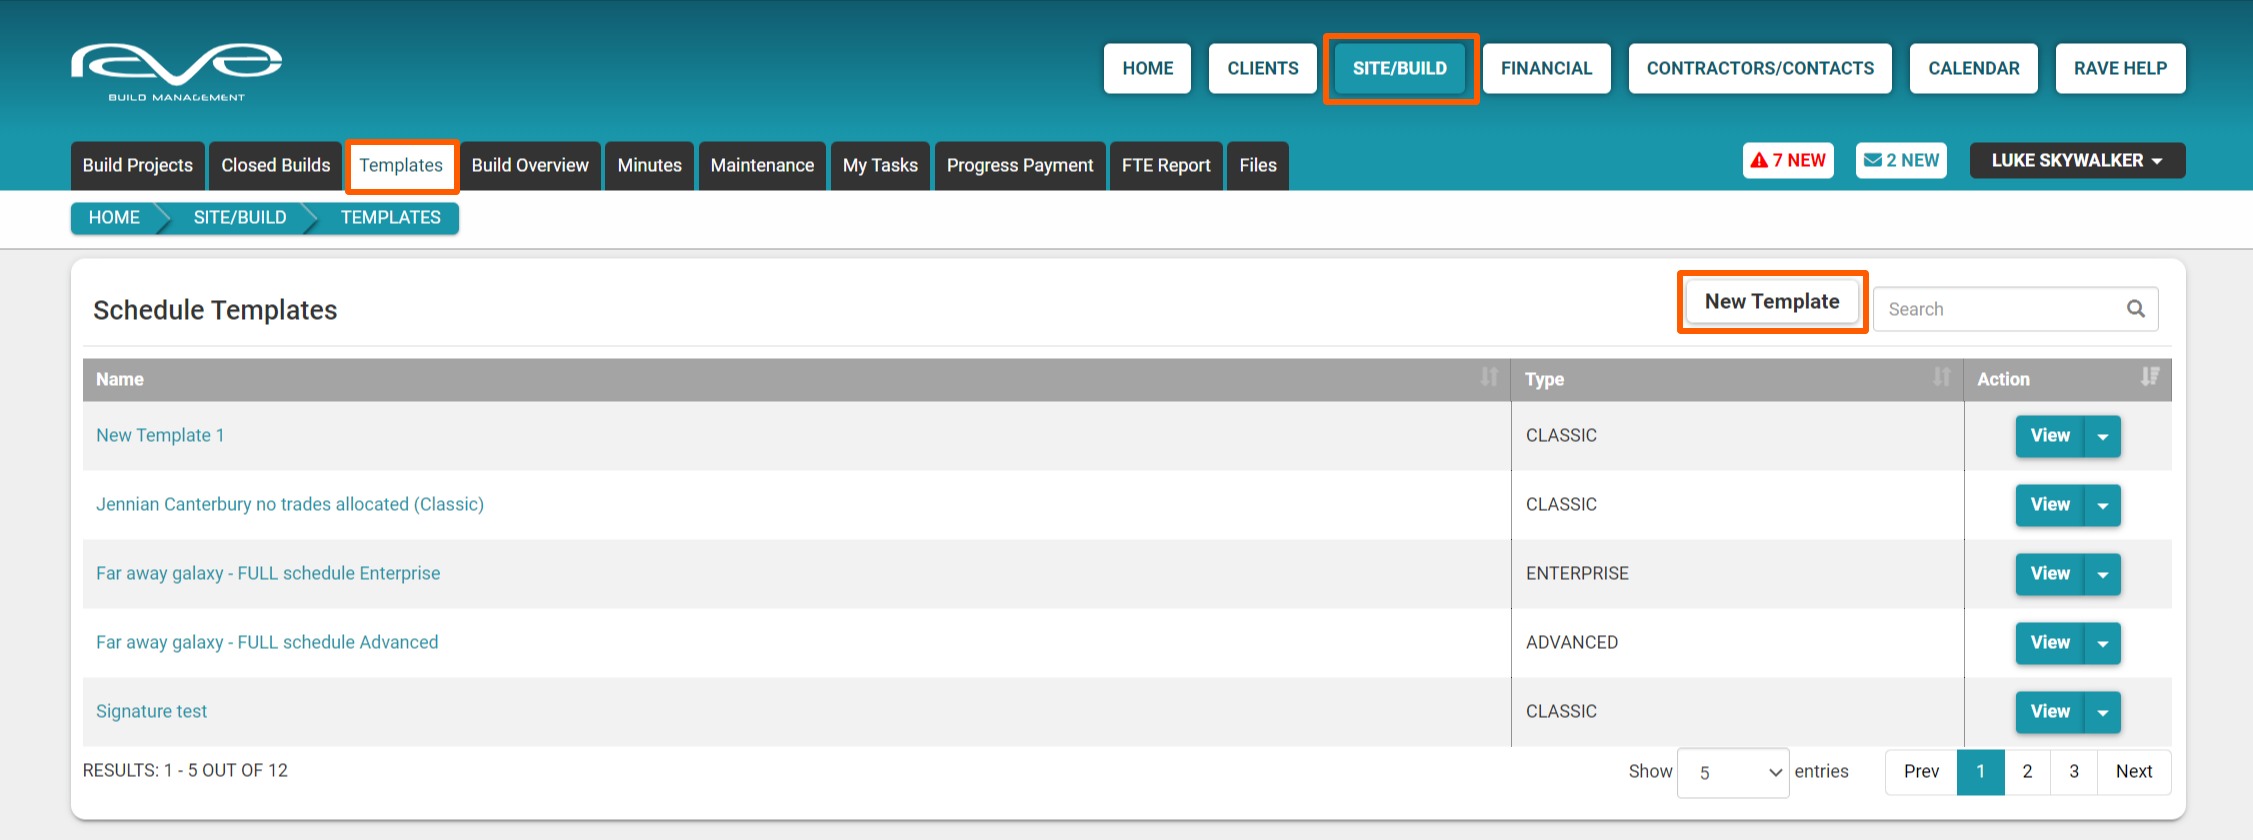
You can create, load from a CSV template, edit, and manage your schedule templates via ‘Site|Build / Templates sub-tab - the ‘Schedule Templates’ are located at the top of this page.
Your previously saved schedule templates are listed here, displaying each template’s name, and the type either 'Classic', 'Advanced', or 'Enterprise'.
You can open the template to look at the schedule by clicking on the schedule name, or by clicking on the 'View' button. While the drop-down allows you to either edit or delete the schedule template.
To the bottom left of this section we have the results letting you know the number of schedule templates currently loaded, and to the bottom right we can see the number of schedule templates that are displayed for this page.


Opening/Viewing a Schedule Template
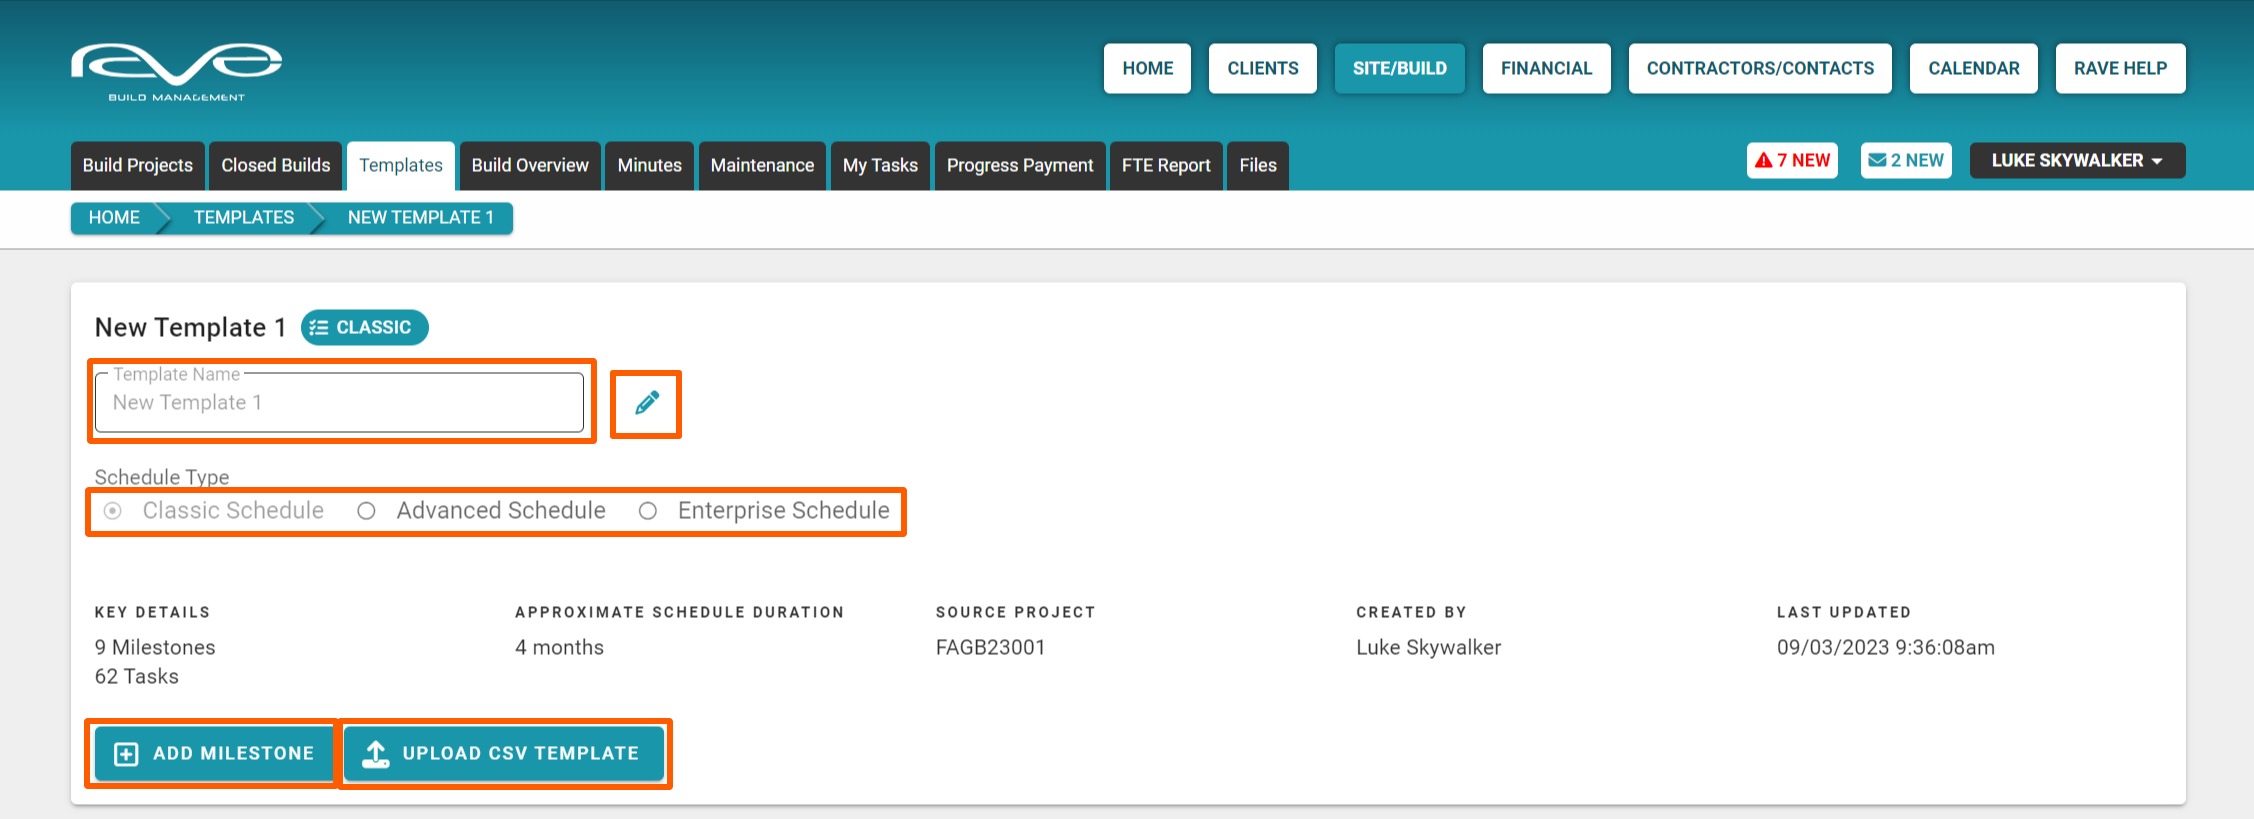
We can open the template to look at the schedule by clicking on the schedule name, or by clicking on the 'View' button - doing so will display:
- The template name and the schedule type/icon to the top left
- The radio buttons allow you to change the schedule type - if you've subscribed to Advanced or Enterprise scheduling
- The key details display the number of milestones and tasks
- The approximate schedule duration
- The source project - the project this schedule was saved from
- Who the schedule template was created by
- When it was last updated
- Then the buttons to Add a Milestone and upload a CSV template
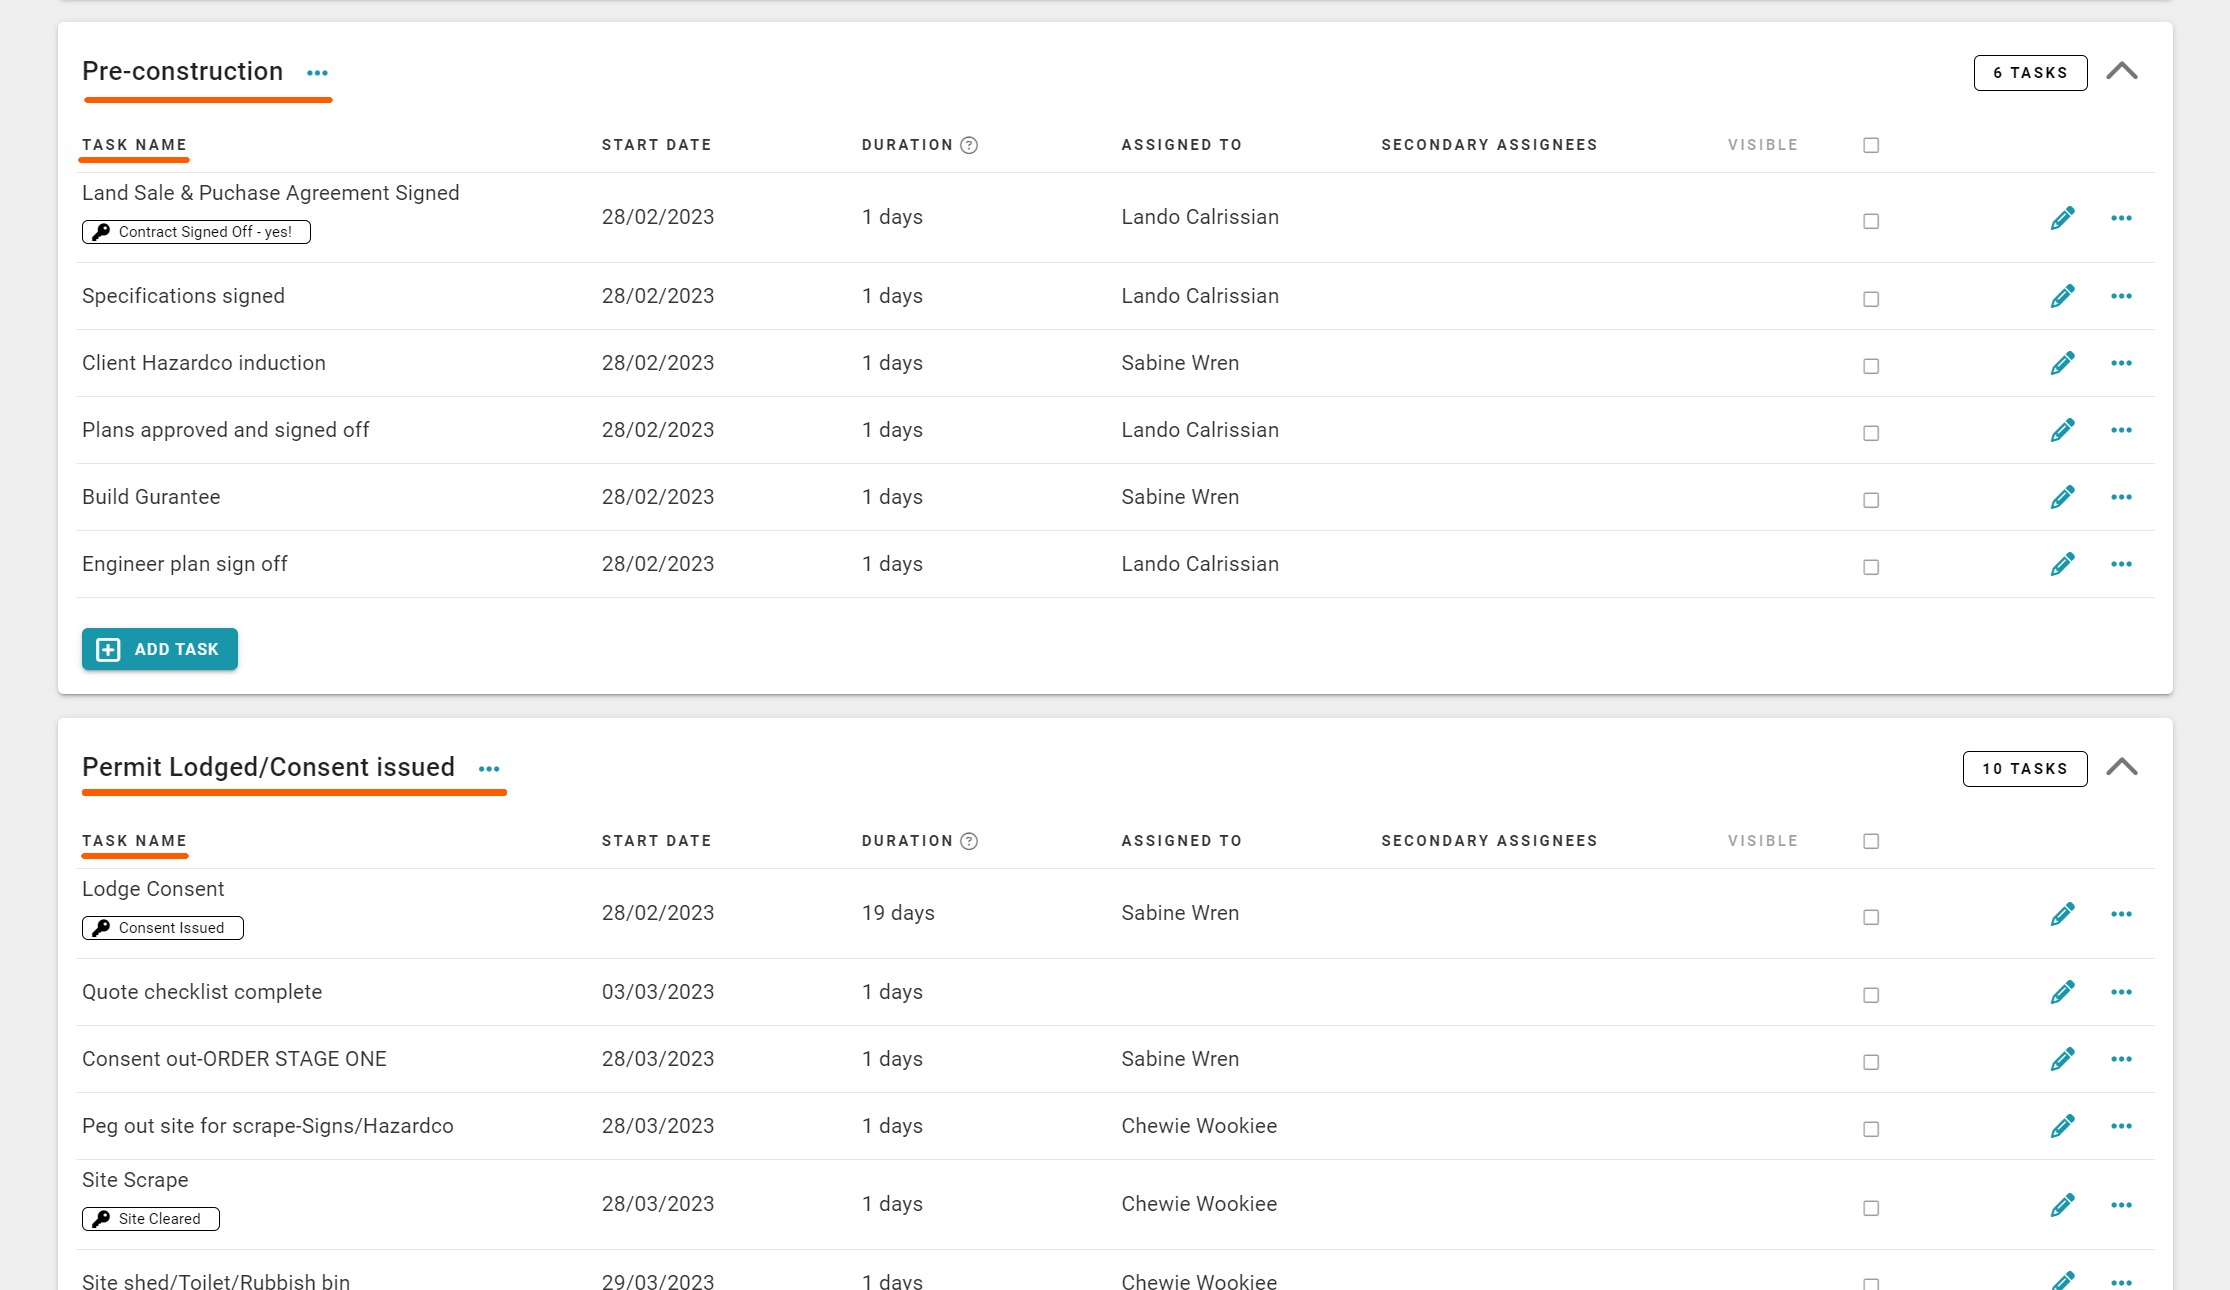
Then we display the schedule by milestones and tasks.


Edit a Schedule Template
NOTE: You have more schedule editing functionality in the project sub-tab rather than the templates section i.e. access to a Task Gantt view, the ability to link progress payments, and more control with linked tasks if you have 'Advanced' and 'Enterprise' scheduling - but, you can do some editing in the schedule templates section.
To edit the schedule via the templates sub-tab, click on the pencil icon to the right of the template name, this enables you to:
- Change the schedule template name
- If you have access to other schedule modes, you can change the template schedule mode here also
- You can add a milestone via the button to the left
- You also have the ability to upload your own schedule via a CSV schedule template
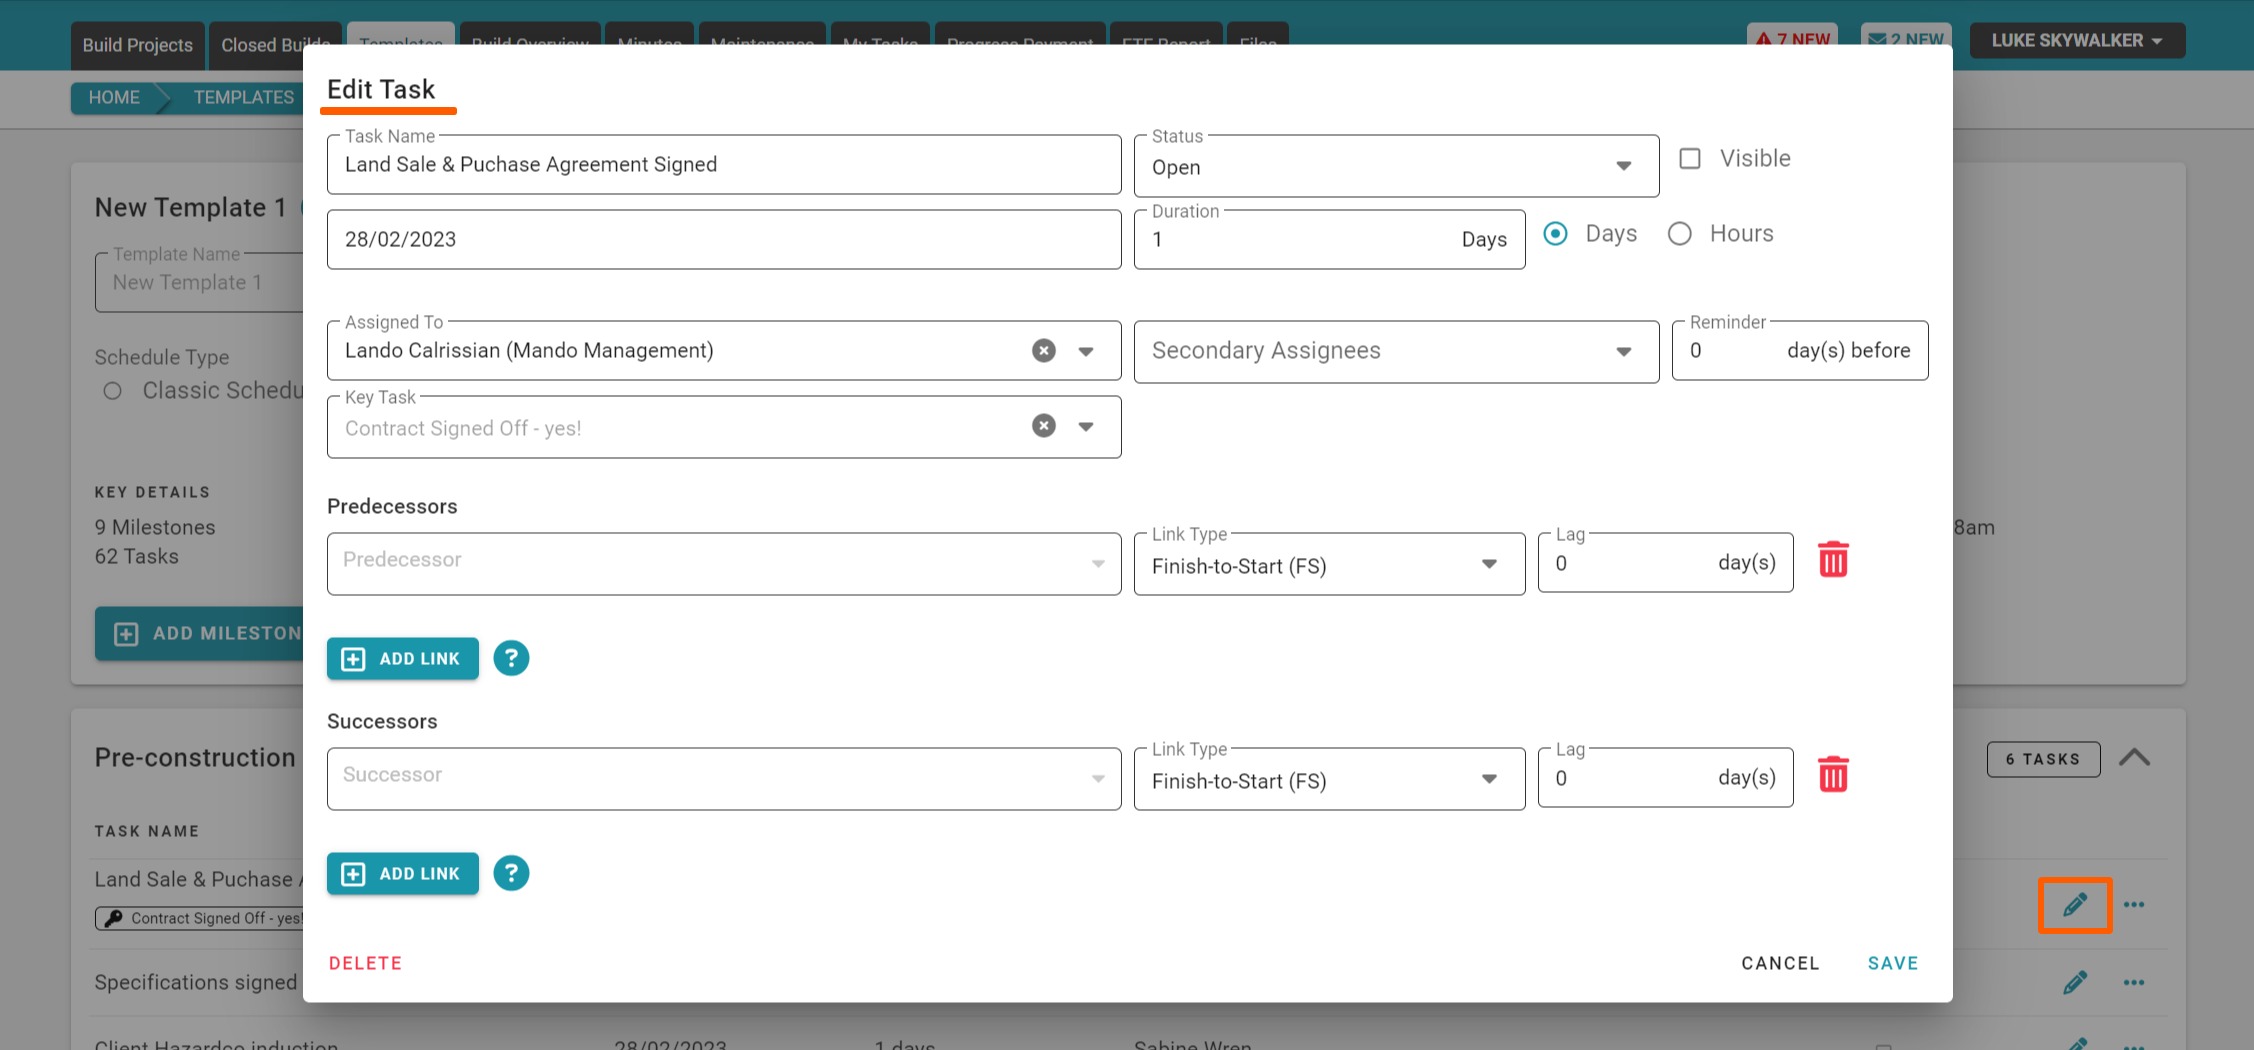
Within a milestone, you can add, edit/manage, and delete tasks - including the management of Key Tasks.
NOTE: You do not have the ability to link progress payments or manage notifications here - they are editable at the project level. This is because schedule templates are not linked to live projects with an active ‘Progress Payment’ sub-tab or live for the notification switches.
Create a Schedule Template via a CSV Upload
Watch the demo here.
You can upload your own schedule to RAVE, though the data needs to be laid out in a very specific way, and you must use our CSV Schedule Template format/layout i.e. any old schedule exported as an excel file won't upload into RAVE without some massaging first! We made it easy by including a 'Sample CSV File' link for you to use - as you'll discover in the below process.
To upload your schedule to RAVE:
- We first click on the 'Site|Build' button, then the 'Templates' sub-tab
- Click on the ‘New Template’ button - to the top right of the page
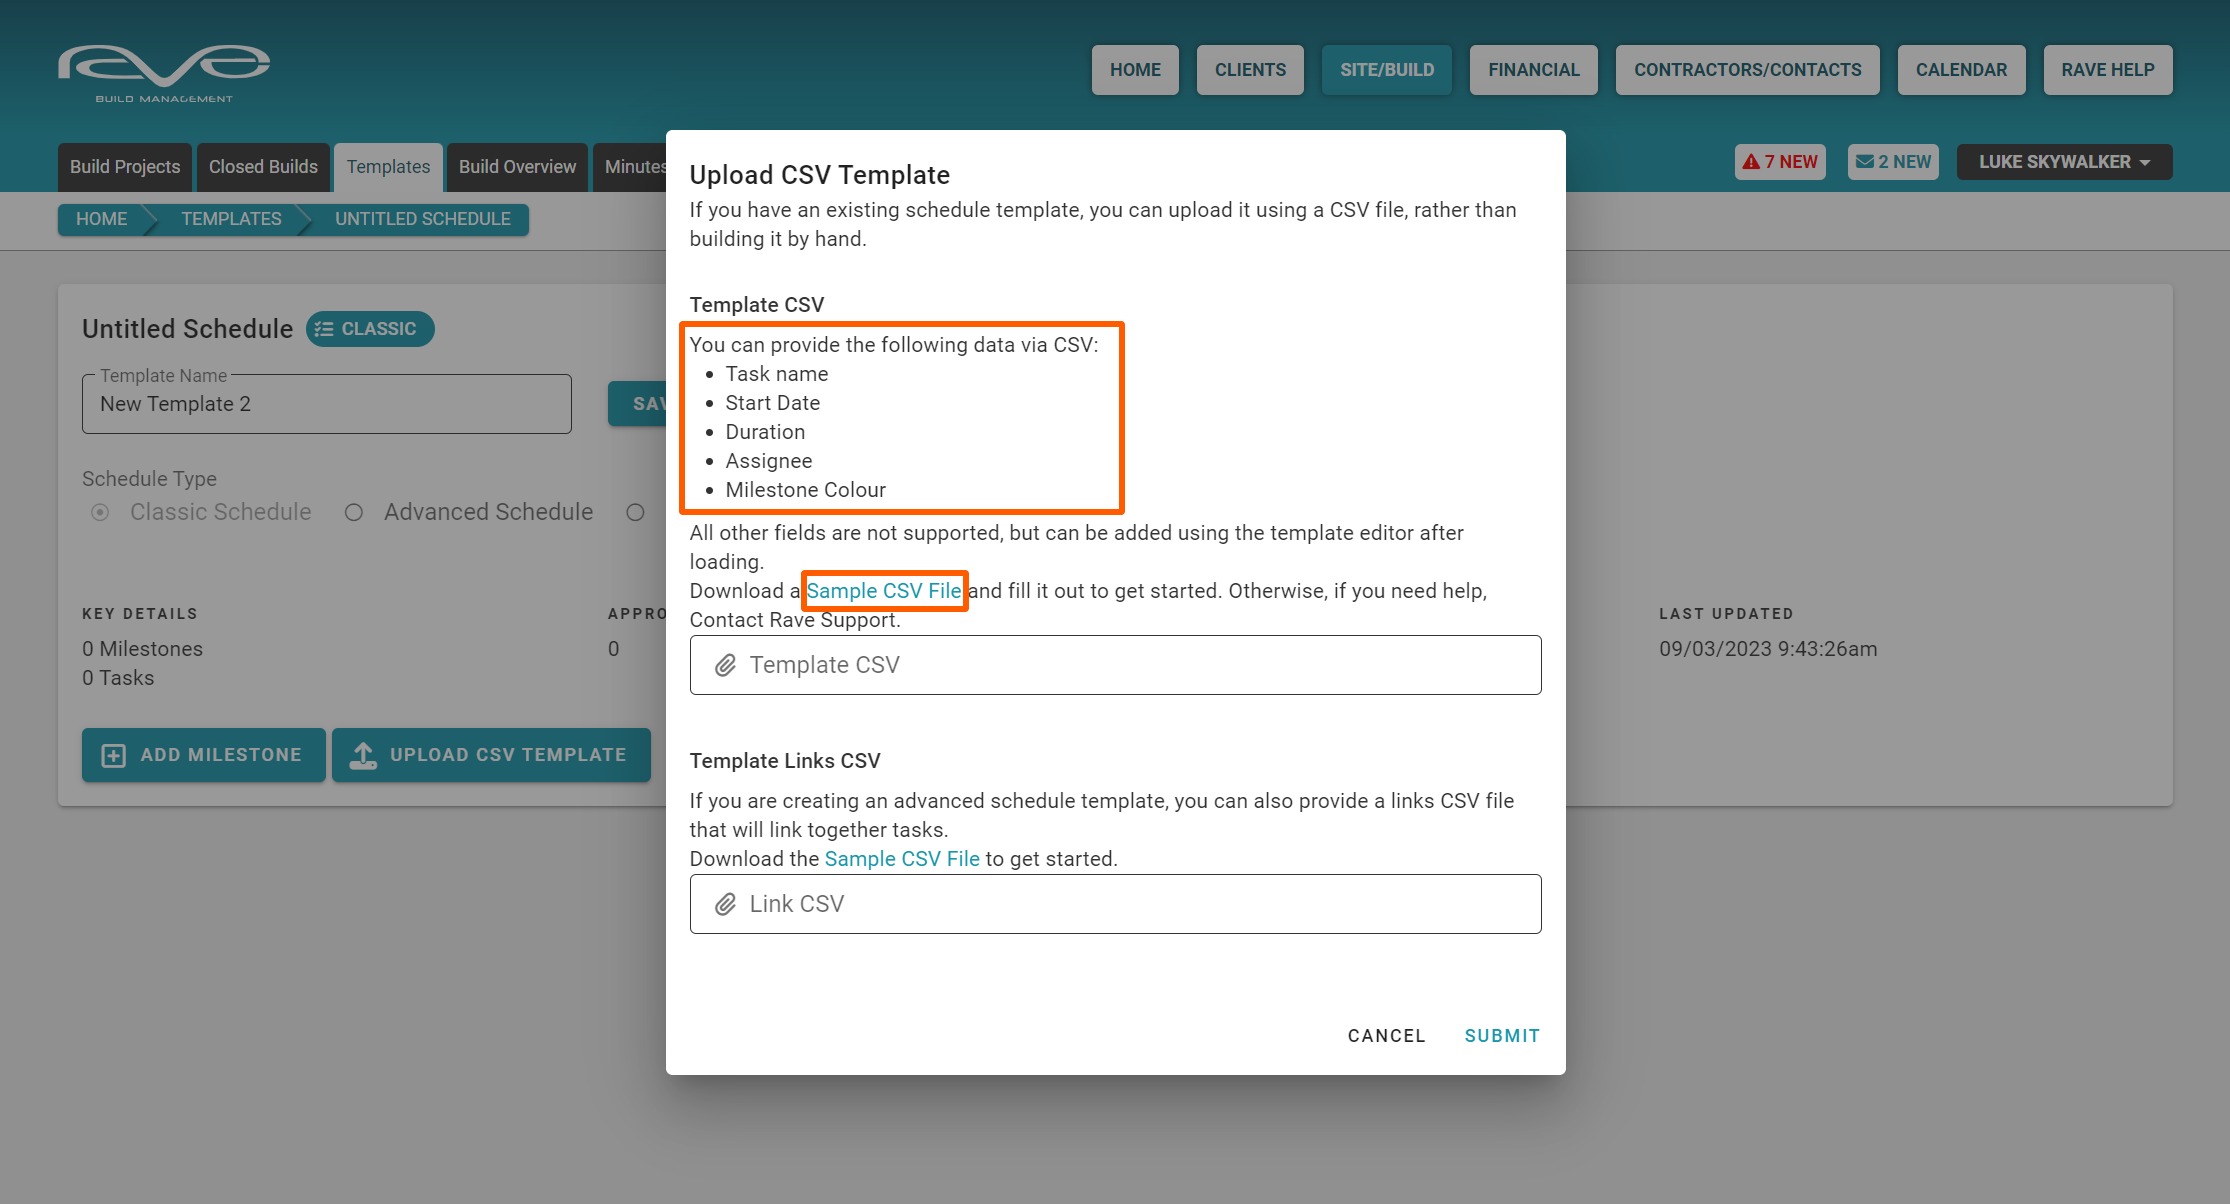
- From the new template screen, we click on the 'Upload CSV Template' button
This will launch the ‘Upload CSV Template’ pop-up, detailing what scheduling data is able to be loaded via CSV, with a link to download the 'Sample_CSV_File'- Click on the link to download the 'Sample_CSV_File'
- Then open that file
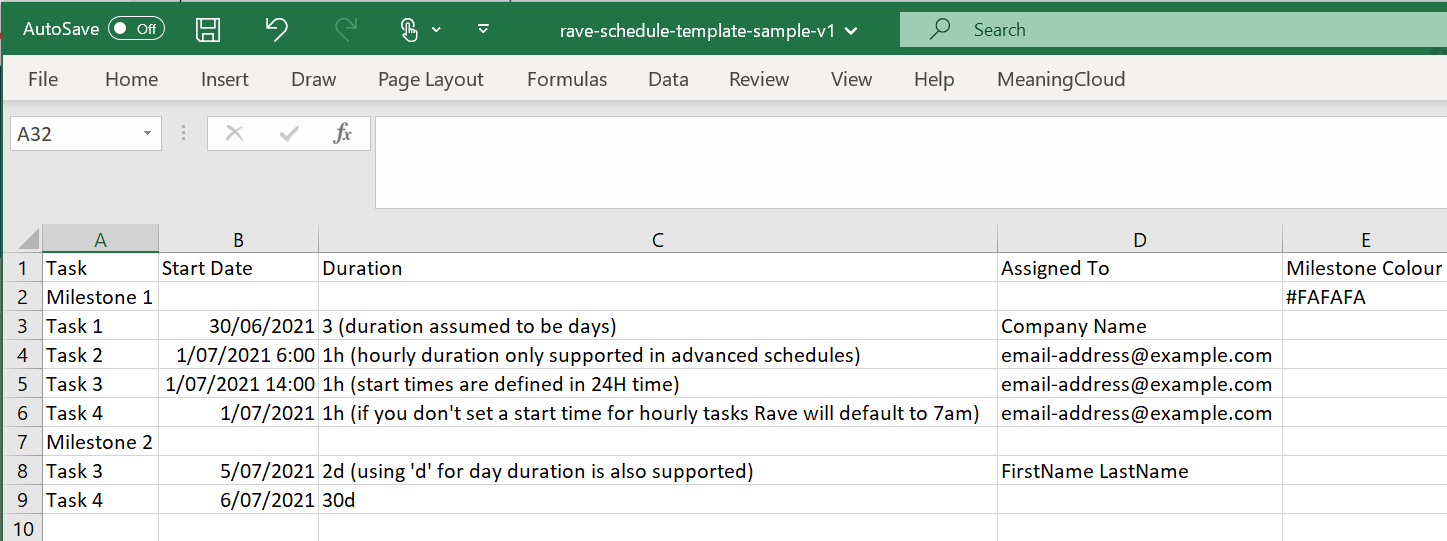
The 'Sample_CSV_File' schedule template, has a very simple and clear layout - displaying- The Task column - where our milestone names and task descriptions go
- The Start Date column - displays a number of acceptable date formatting options
- The Duration column - also displays a number of valid formatting options
Note: The reference to ‘hours’ is only applicable to those with the advanced scheduling module) - The ‘Assigned To’ column - where we can upload the primary assignee for this task
Note: The person or company needs to be in your RAVE system already - The milestone color in 'HEX' format
RAVE Help TIP: Use the 'Sample_CSV_File' as the template to copy and paste your schedule into, and resave for upload.
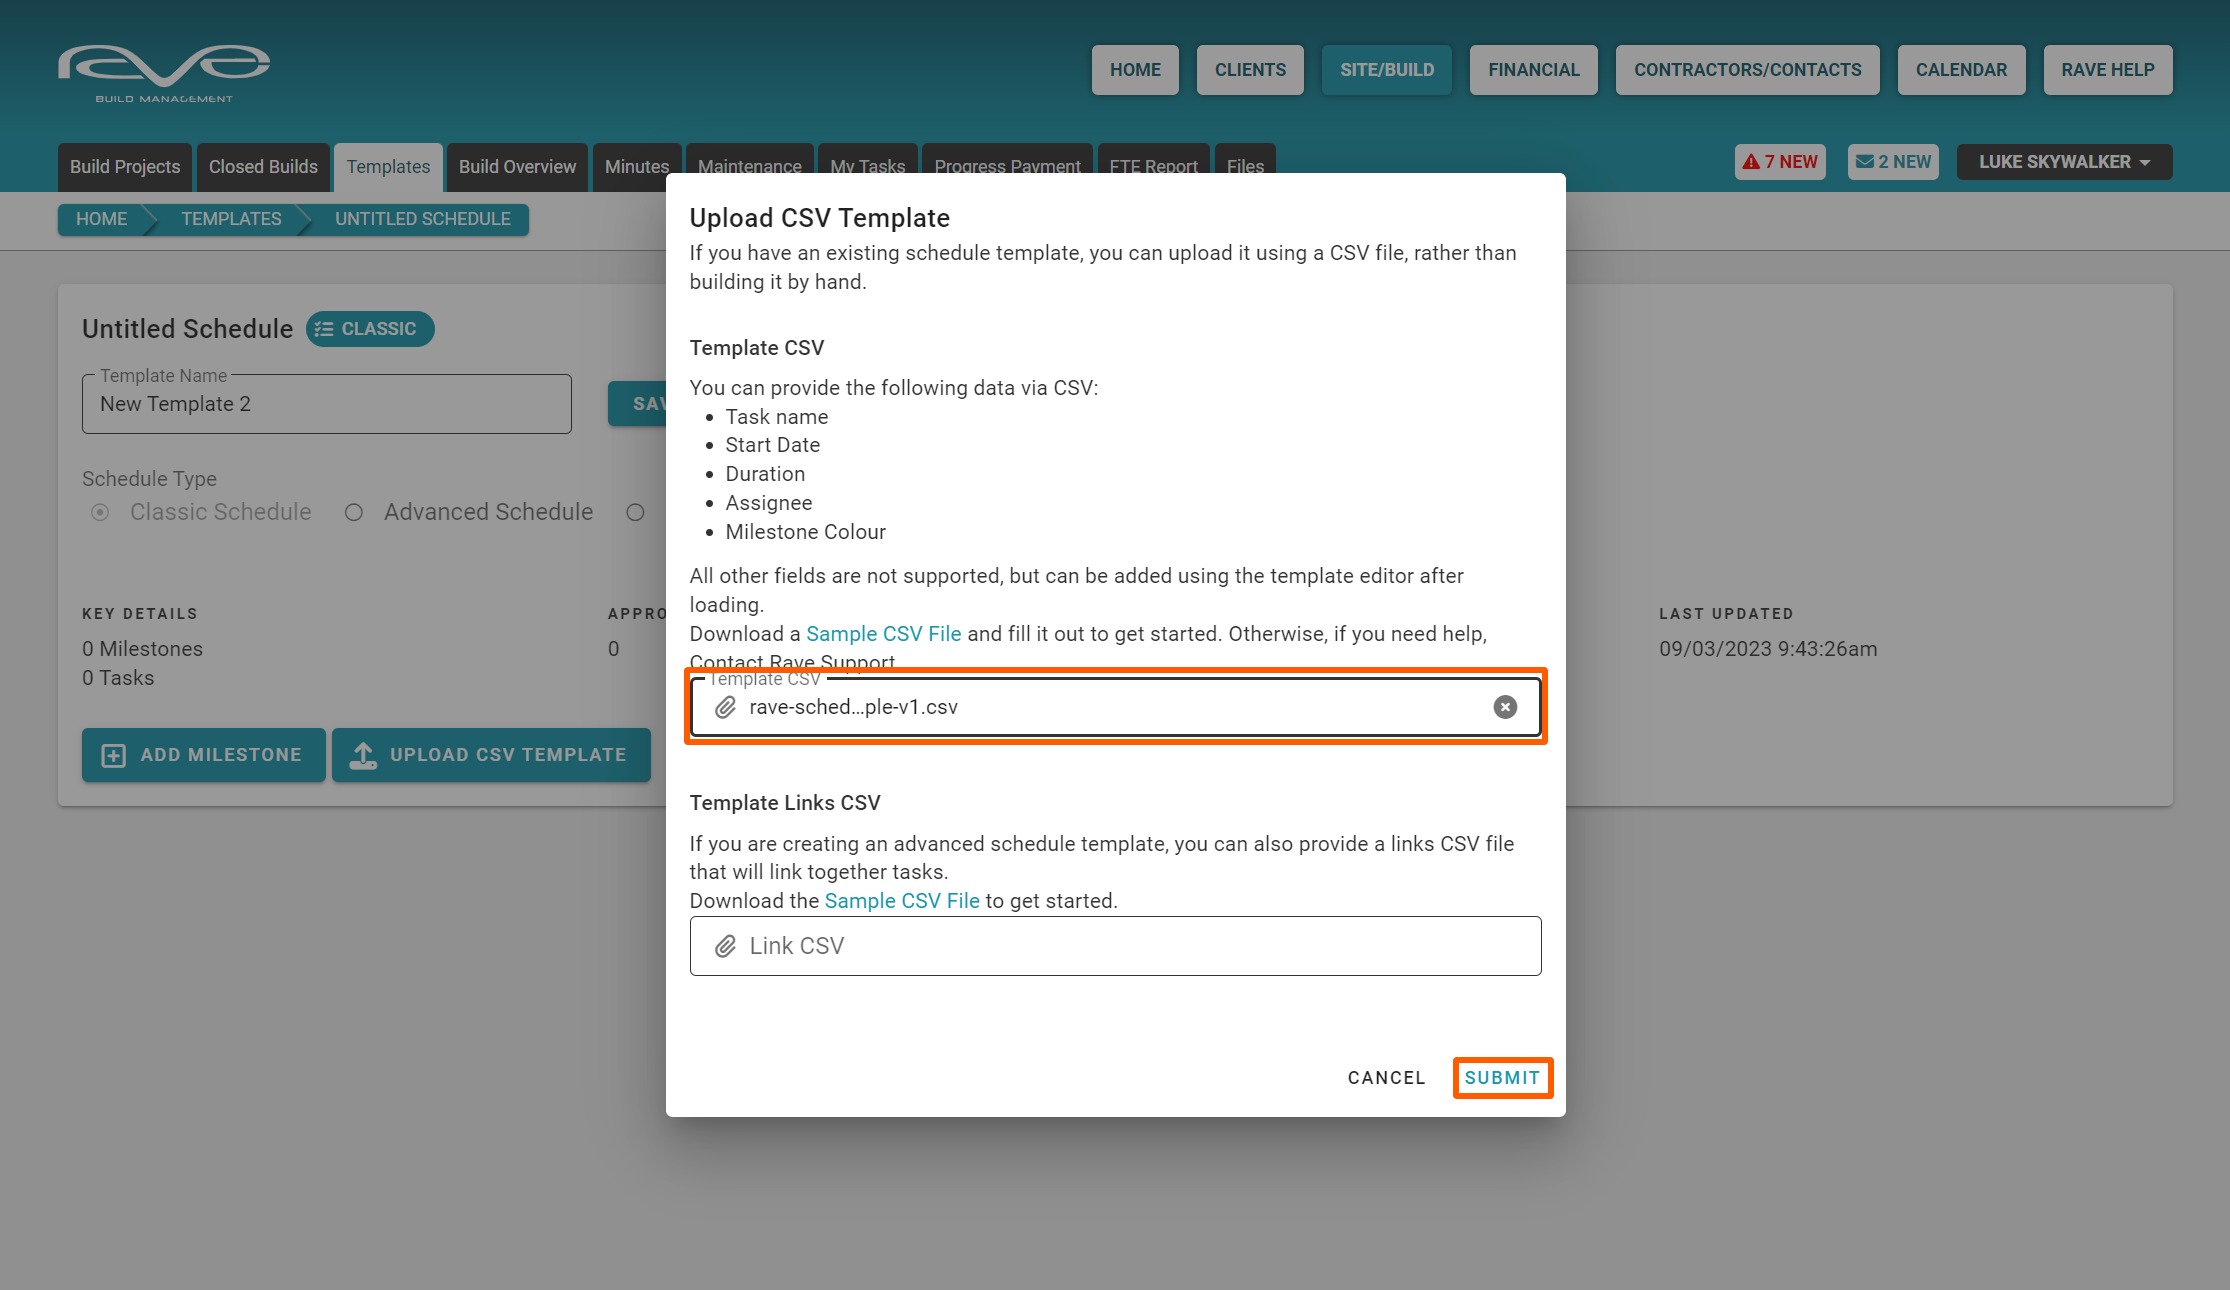
- Click on the ‘Upload CSV Template’ pop-up's 'Template CSV' field to find your file and select it for upload
- Then click the 'Submit' button to confirm.
- After a few moments, your schedule will load, and the process will complete

Reasons Why your 'Sample_CSV_File' Upload May Fail

If your schedule 'Sample_CSV_File' upload fails, check out the list of potential causes and solutions below:
- Firstly the file needs to be saved as a CSV (plain text comma delimited) file - an excel file will not work.
- Milestone headers must only have a milestone name (column A) and the optional milestone color field completed (column E) i.e. If you add a start date plus a duration to a milestone line, Rave will treat it as a task.
- All tasks need to be listed under a milestone header and each task must have a valid start date, and duration.
- All task assignees must already be in your system - as a staff member, a site manager, a site staff member, or as a contractor (by name, email or company name) Furthermore, the assignee's name must match the format as it appears in RAVE.
NOTE: If all these conditions are not met, your schedule upload will fail, and your RAVE session might time out.
If you have a problem with a failed upload:
- Go back to your CSV template and check that all the conditions above are met. Once you have corrected any data issues, have another go at uploading your CSV.
- If you have checked for data issues, and are still experiencing problems uploading your CSV schedule file, email us on help@ravebuild.co.nz with your CSV file attached for us to check that out for you.