The Gantt build overview - available via Site|Build / Build Overview / Gantt. It’s just like your project’s Gantt view display, but allows you to display tasks across multiple projects, again with a number of super handy filter options, plus the ability to print a PDF version of your Gantt chart in addition to exporting it.
Just like your single project Gantt View:
- We list your task details (task name, start date, and duration) plus the job number, project manager and task assignee
- the column headers are clickable, allowing you to sort by these
- the job number is clickable – taking you to the Task List view of that project for quick editing - We have the gantt display to the right, with today’s date line, allowing you to instantly view tasks falling behind – via our gantt colour coding (displayed to the top right) i.e. any tasks in an open (grey) or ordered (purple) state to the left of the date line may be something for the project manager to chase up.
- To the top left, we have the ‘View By’ selector allowing you to zoom in/out by day, week, fortnight, month and year.
- And the ‘Today’ button, which snaps the gantt chart back so the date line is positioned to the centre of the gantt

Running a Gantt report using the Build Overview Filters
At the top of the ‘Gantt’ build overview page, are a number of reporting filter options – these are available for most of the Build Overview reports, and allow you to create your own customised reports – these are:
- Task Name
- Project Manager – project managers can view just their projects, a selection of project manager's projects, or ALL projects
- Site Managers – allows you to view jobs managed by specific Site Manager(s)
- Assigned To – allows you to view tasks assigned to specific task assignee(s)
- Date Range – allows you to view tasks due in a specific date range
- Project – allows you to view the gantt across a selection of specific jobs
- Trade – allows you to view tasks assigned to specific trade(s)
- Task Status – allows you to filter tasks that are in a specific state i.e Open, Ordered, Working, and Completed
Once you have set your filter options, click ‘Apply’ to the bottom right of the filters, to apply your selections to the report.

Printing (and Exporting) your Gantt report
Once you have applied your filters, you have the ability to print, or to export your Gantt build overview report as a CSV file. This is via the 3 dot action dropdown to the right of the job number – to left, above the gantt filters.
To print your Gantt build overview report:
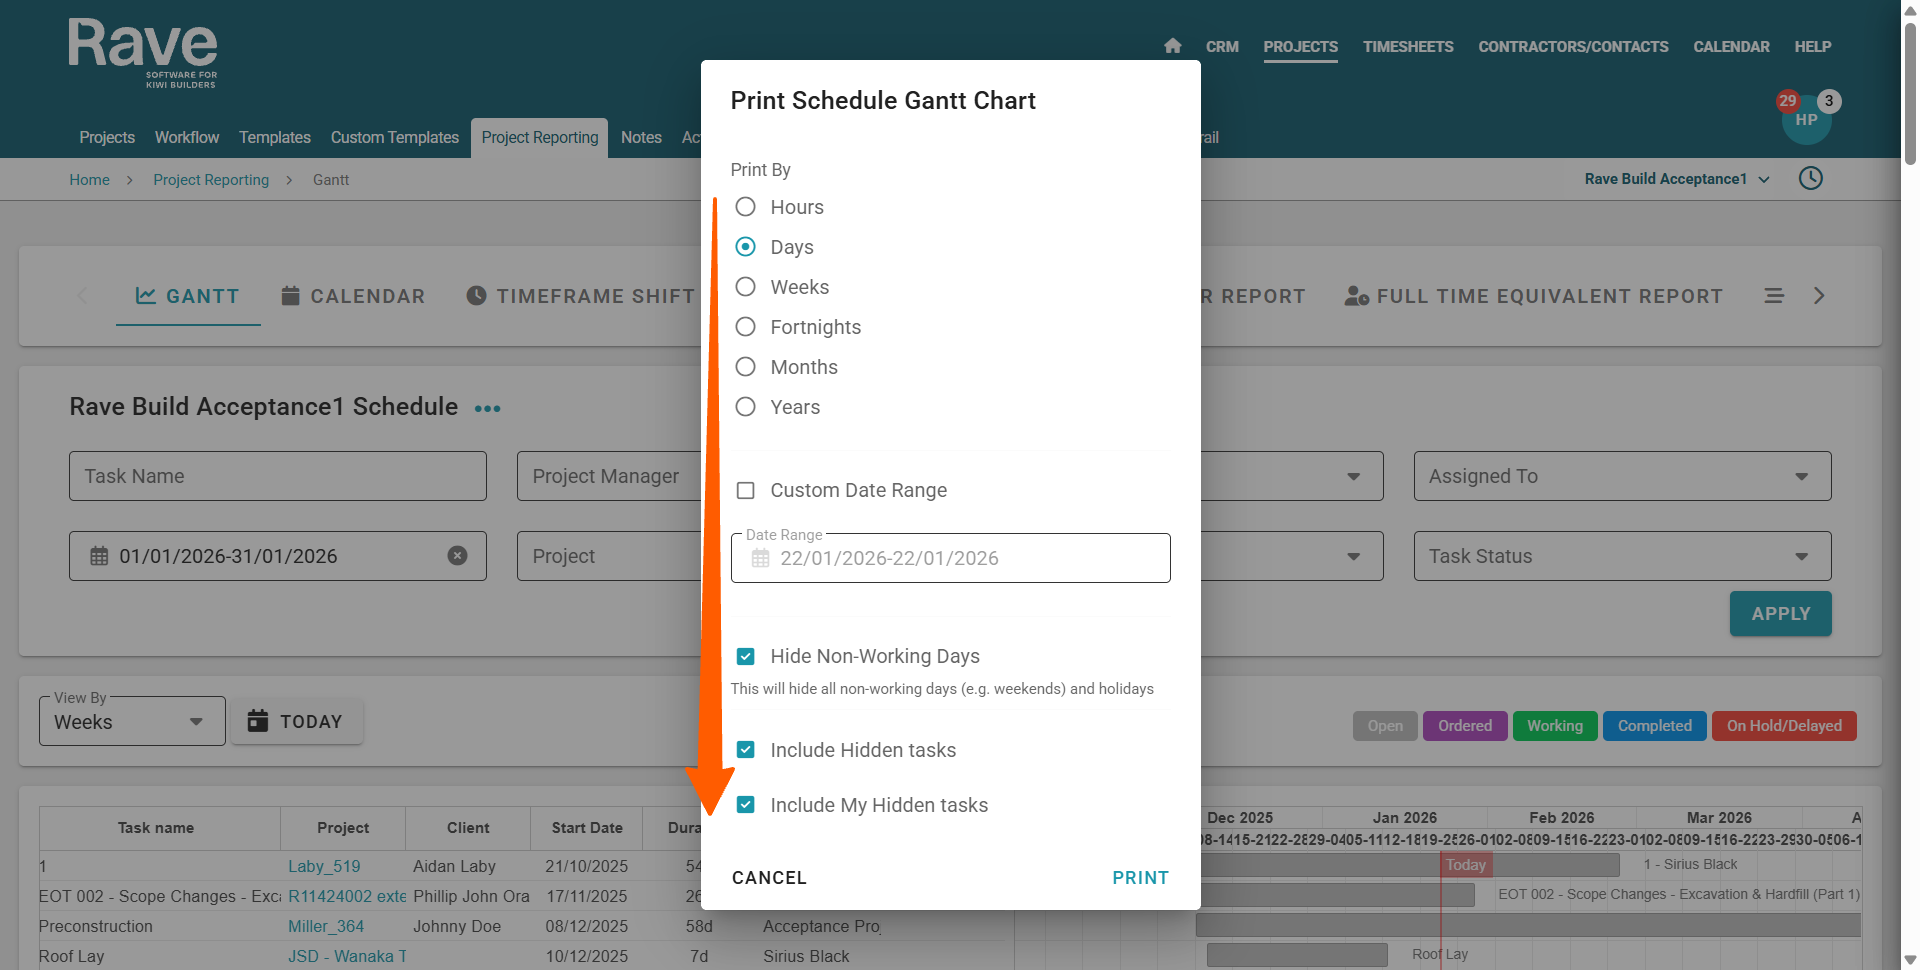
- Select the 'Print Gantt' option – this will open the ‘Print Schedule Gantt Chart’ pop-up
- From here you just select
- The ‘print by’ scale setting you want your printout to display as
- Select the start and finish dates of the range you want to display
- Decide whether to hide (default) or display non-work periods i.e. weekends and holidays
- Choose whether to include hidden tasks, and more specifically my hidden tasks
- And then click ‘Print’ to print
- This will create a webpage preview of the gantt chart for printing. Right click and select ‘Save image as…’, to save as a .jpeg or .png image file, with your file name i.e. 'Solo Gantt Aug Sept.png'
- Then open your saved image file of the Gantt chart to print, and click on your printer icon to print it.
From here you will be able to print to whatever paper size, and scale you want i.e. fit to a page, or your own scale option. If your printer supports 'poster' or 'tile’ printing, you can blow the Gantt chart image file up over 2 or more pages (x pages wide by y pages high), allowing you to print an enlarged version of your gantt charts without the need for a larger printer.
NOTE: If you require a PDF copy of your gantt chart, after step 6 above, select the 'Print to PDF' option instead of an actual printer, this will prompt you to select a file name and saving location for a PDF version of your gantt chart.


To Export your Gantt overview report as a CSV File:
Once you have applied your filters, you have the ability to export your Gantt build overview report as a CSV file. This is via the 3 dot action dropdown to the right of the job number – to left, above the gantt filters.
- Select the 'Export' option
This will generate (and download) a CSV version of your report.
Was this article helpful?
That’s Great!
Thank you for your feedback
Sorry! We couldn't be helpful
Thank you for your feedback
Feedback sent
We appreciate your effort and will try to fix the article