While the project schedule's ‘Replace Assignee’ action allows you to reallocate all of a project's tasks assigned to one task assignee to another - the Bulk Replace Assignee allows those with branch owner access to swap out a staff member or contractor listed in the People sub-tab of all projects and replace them with another staff member or contractor.
NOTE: This action may remove the current task assignee and add the new task assignee to the People sub-tab, and assigned tasks, of all of the projects affected
How to Bulk Replace Assignee across ALL Schedules
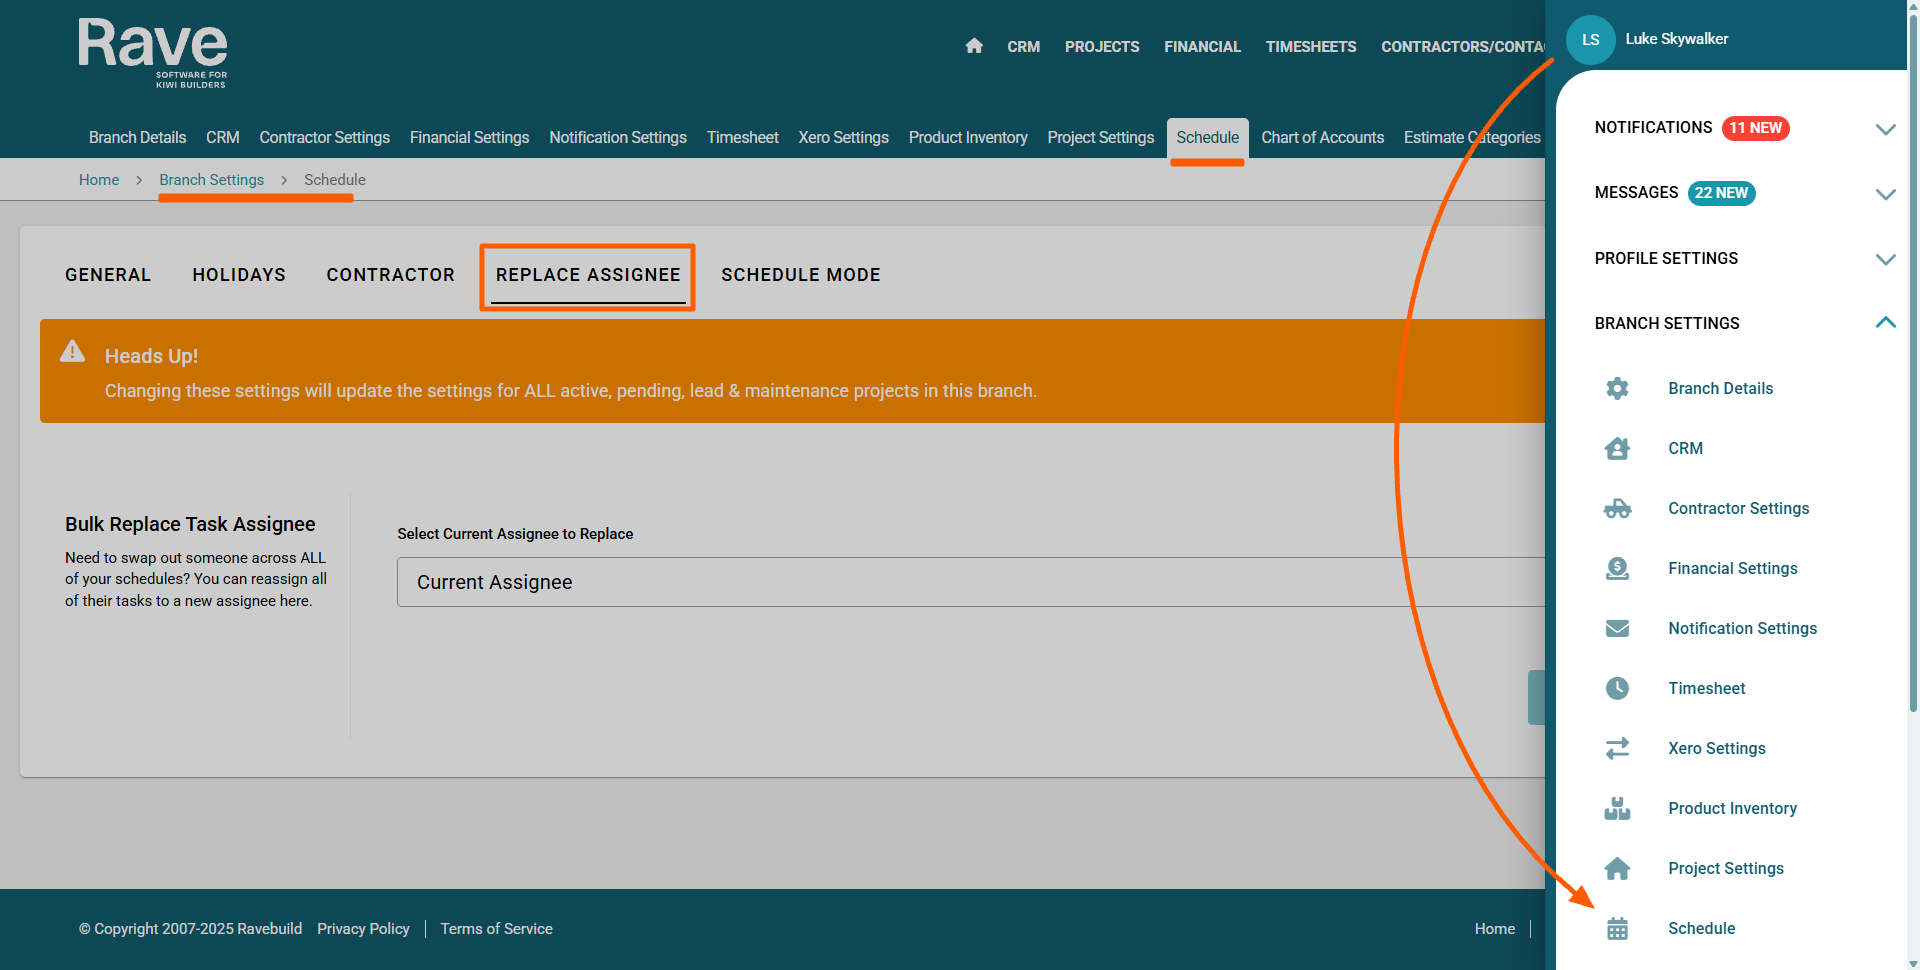
To Bulk Replace a staff member or contractor across ALL projects, you first need to go to your branch owners Profile Drop-down | Branch Settings | Schedule Screen
- Then click on the 'Replace Assignee' sub-tab
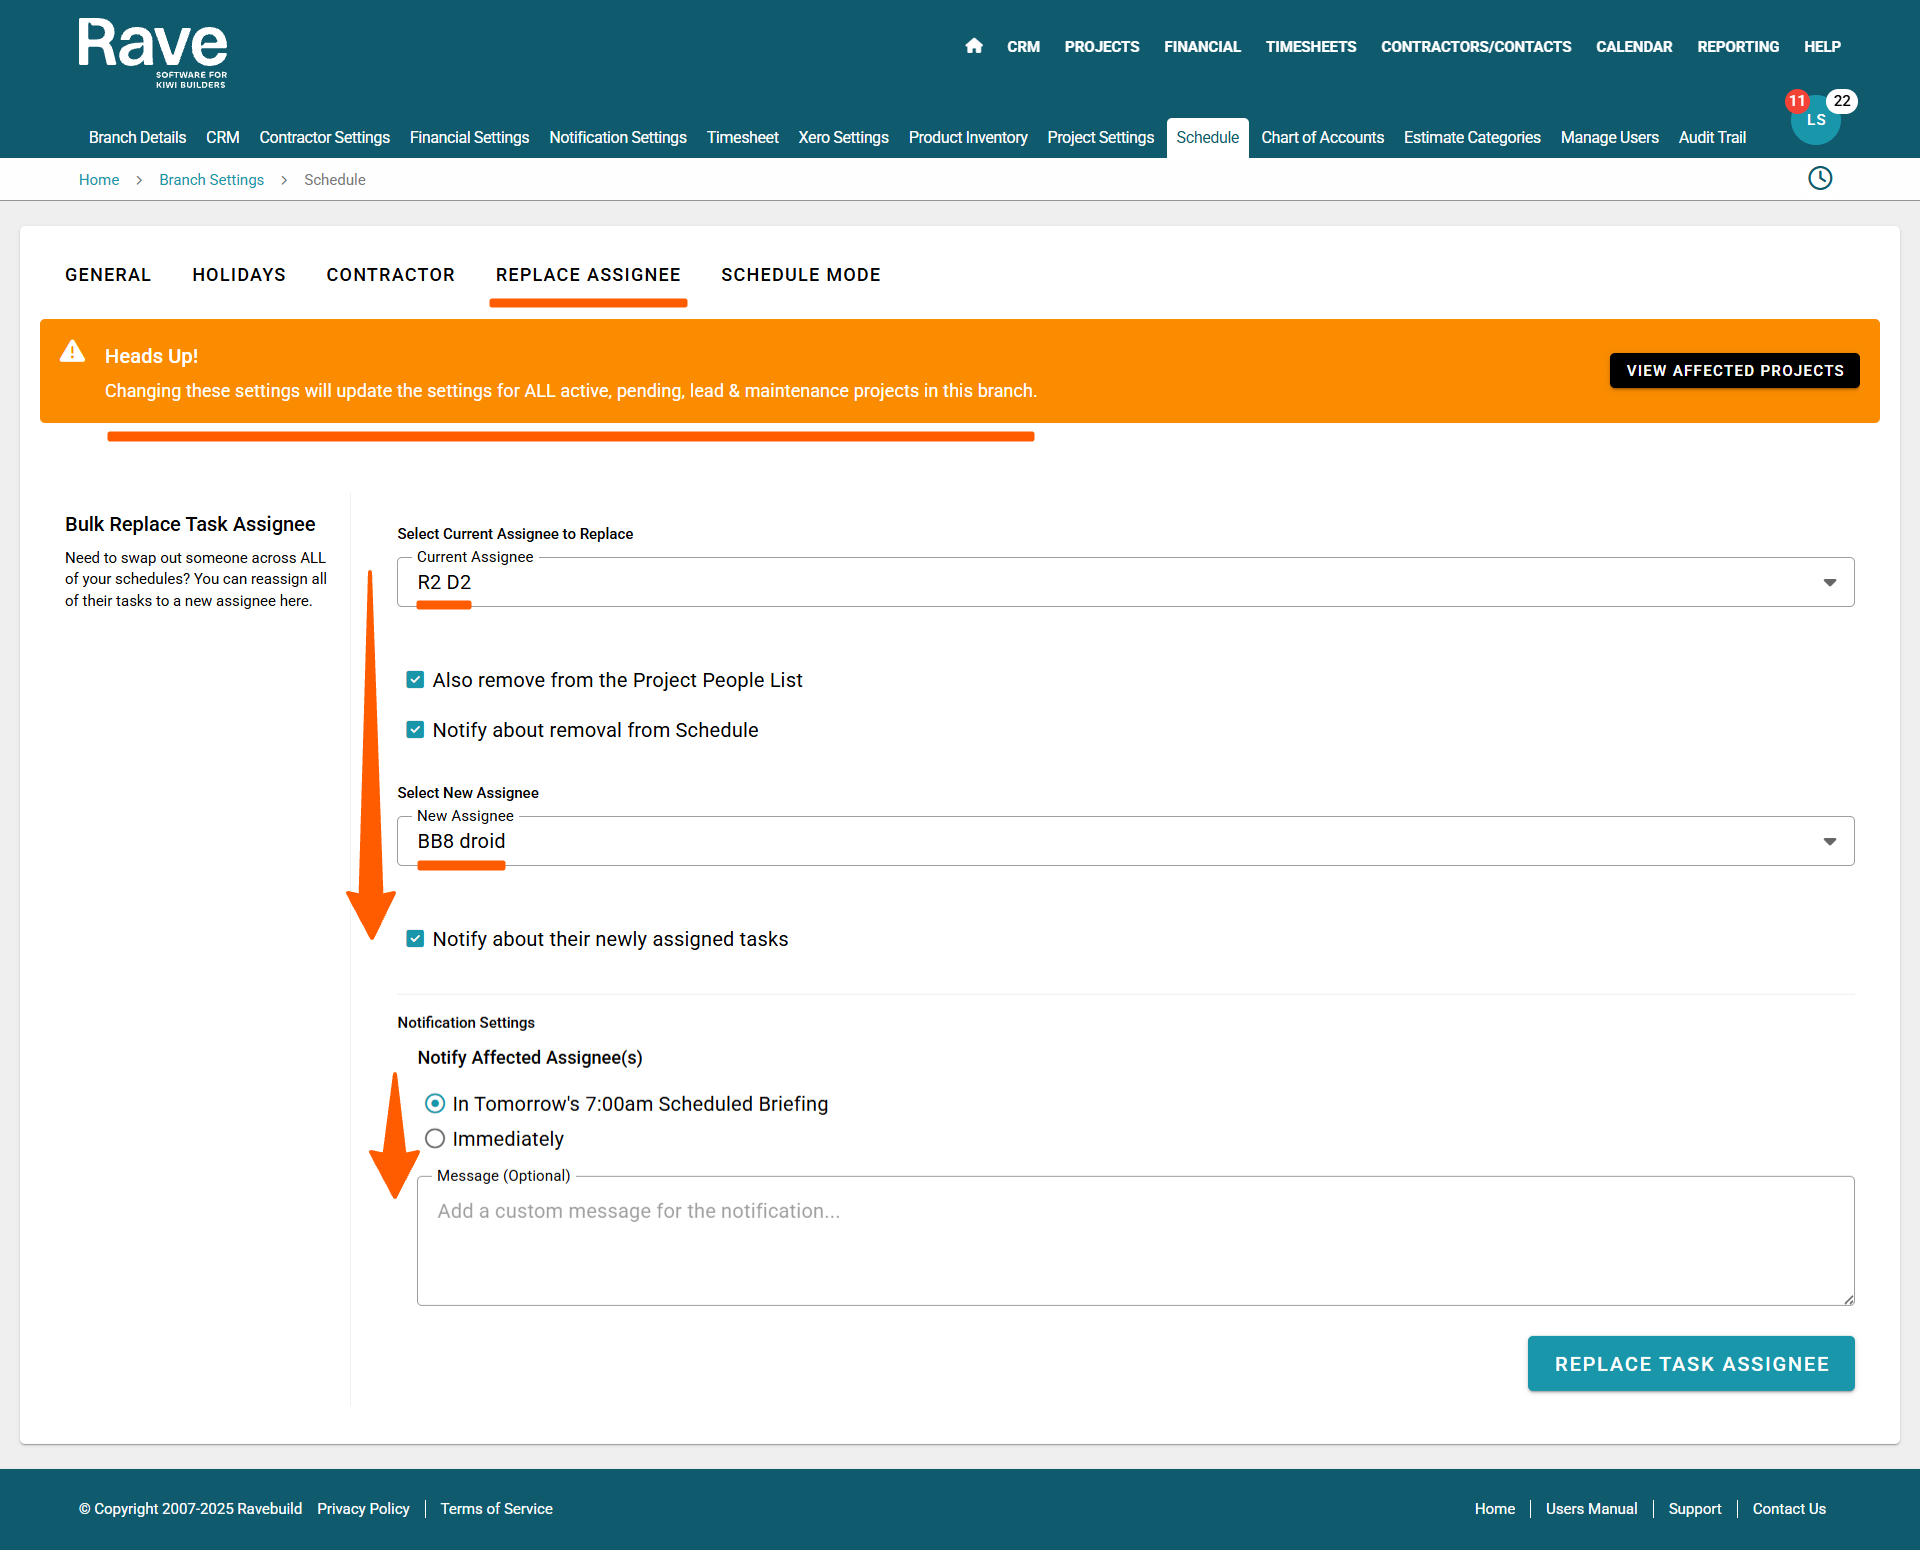
- Click the Current Assignee dropdown, and select the assignee you would like to replace
You can also tick the following checkboxes if appropriate:
- 'Also remove from the Project People List' - to immediately remove their access to any of their assigned task projects
- 'Notify about removal from schedule' - to let them know all of the projects they have been removed from - Then, click the New Assignee dropdown and select the new assignee you would like to replace the old assignee with
- You can also tick the 'Notify about their newly assigned tasks' option here - to let them know all of the projects they have been added to.
NOTE: Clicking the 'Notify about their newly assigned tasks' check box allows you to choose whether this notification should be an overnight or immediate email. You can also add a comment to the new assignees' notification email.
We previously sent the old and new contractors an email for each project they were removed from, but these have been consolidated into one email per contractor with each project separated by a horizontal dividing line —as per the examples at the bottom of this article. - Once you've made your selections, click the 'Replace Assignee' button to confirm
- This will open a 'Replace Assignee in the Schedule' pop-up
- warning you of the change you're about to make
- also listing all of the projects the replacement is being made to
To finalise the process you need to type (in capitals) the word 'CONFIRM' and then click the 'Replace Assignee' button to confirm
This will replace the old task assignee, with the new task assignee - and if selected, remove the old task assignee from the project's people list, and send email notifications also.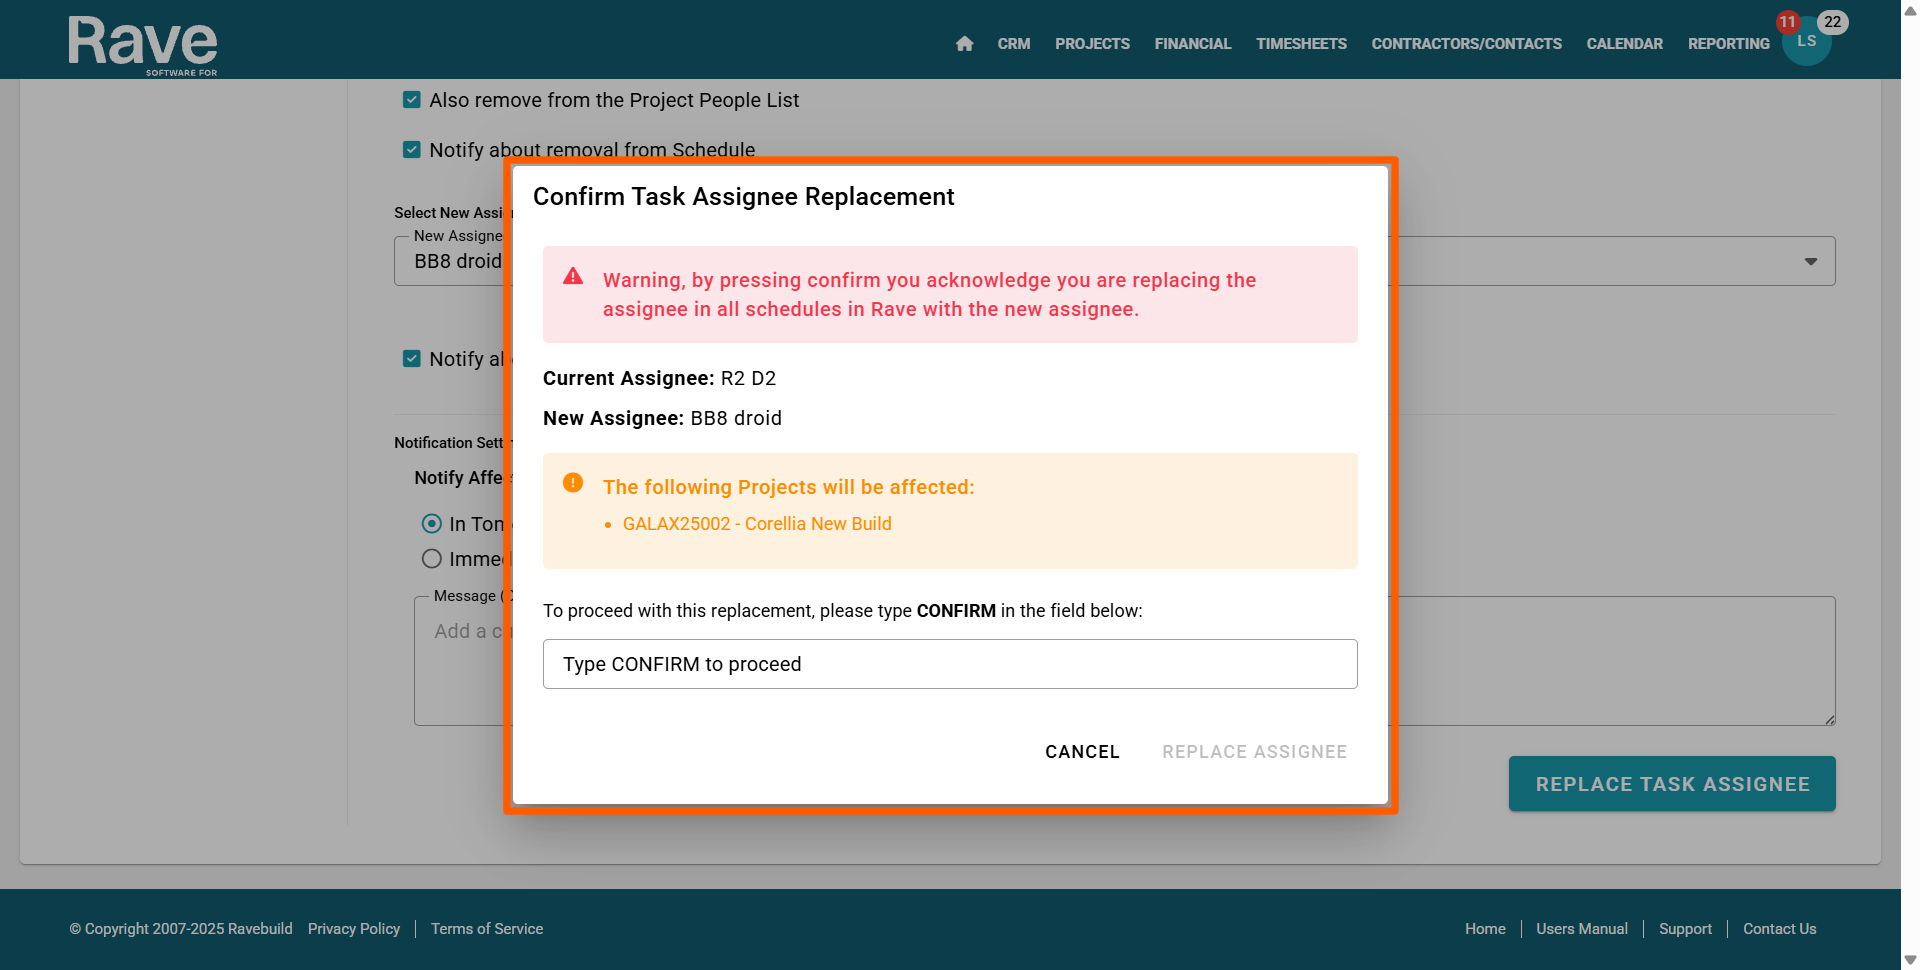
Examples of the notification email sent to the old and new task assignees

Was this article helpful?
That’s Great!
Thank you for your feedback
Sorry! We couldn't be helpful
Thank you for your feedback
Feedback sent
We appreciate your effort and will try to fix the article